Yearly Archives: 2016

Clinique Lash Power Flutter-To-Full Mascara + #TheWink

Clinique Lash Power Flutter-To-Full Mascara + #TheWink

This post is mostly a review, but there’s a wee introduction to Clinique‘s new editorial platform: The Wink at the end!
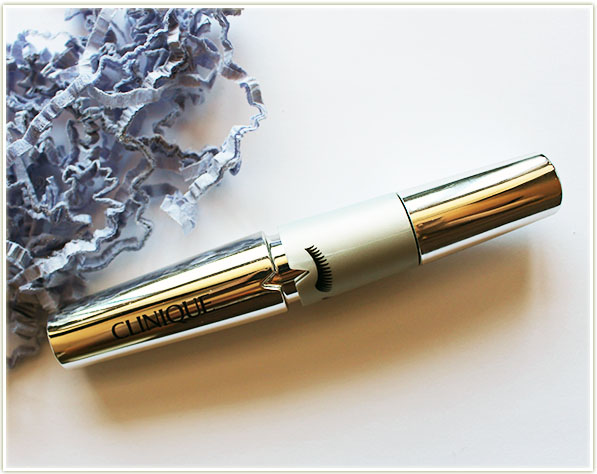
Clinique Lash Power Flutter-To-Full Mascara

The Lash Power Flutter-To Full Mascara is Clinique‘s new(ish) mascara. It promises to customize the amount of volume you deposit n your lashes so that you can go from fluttery to volumized.
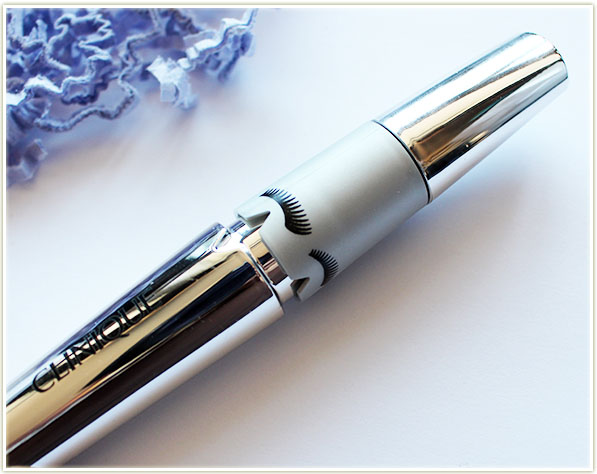
Clinique Lash Power Flutter-To-Full Mascara - has a rotating cap to adjust the amount of product you get on the wand.
Clinique Lash Power Flutter-To-Full Mascara – has a rotating cap to adjust the amount of product you get on the wand.

You’ll notice a dial in the center of the tube that has increasingly bigger lashes drawn on to the cap. You can twist the cap to match the size of the lashes you so desire. Although I can’t find any instructions on what actually causes the difference in volume, my gut inclination is that the twisting mechanism tightens/untightens the barrel that the lash wand comes out through. The tighten the barrel, the less product you get on the wand, and vice versa.
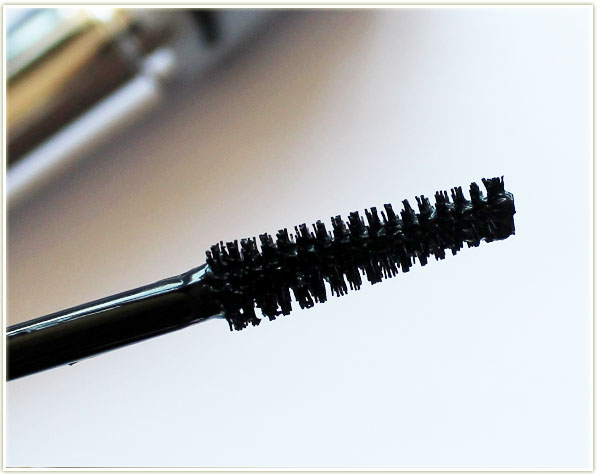
Clinique Lash Power Flutter-To-Full Mascara - natural fiber mascara wand
Clinique Lash Power Flutter-To-Full Mascara – natural fiber mascara wand

The wand itself is made up of “natural” fibers – no rubberized brush here!

So here’s how it plays out:
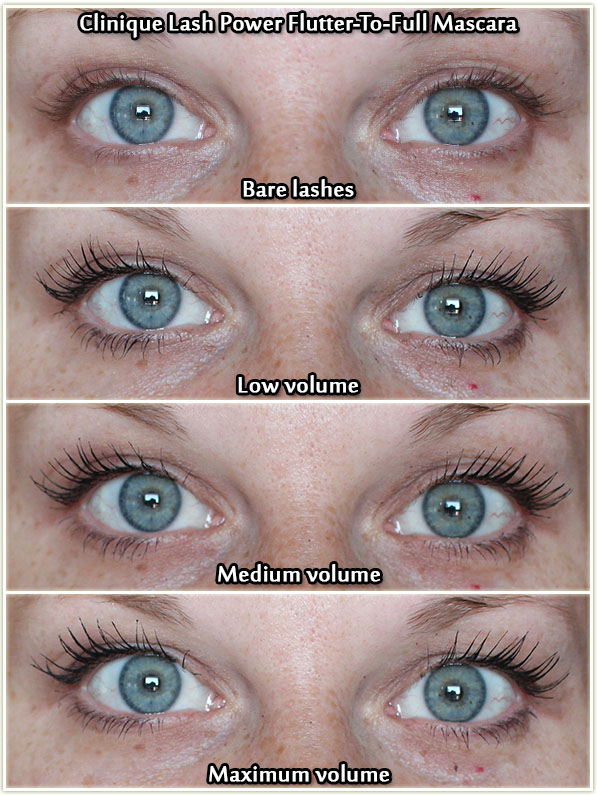
Clinique Lash Power Flutter-To-Full Mascara - comparison
Clinique Lash Power Flutter-To-Full Mascara – comparison – each “level” of volume was done with one coat of mascara.

Honestly, I really don’t notice that much of a difference when I twist the barrel any which way. I think the most volumized look is potentially SLIGHTLY more volumized than the first barrel turn, but not enough that it warrants creating that kind of mechanism for the product itself. (You could achieve that just by adding another coat of mascara really.) In the end, I think I preferred the look of the least voluminous look because it provided more definition to my lashes.

Other pertinent details: This is more a dry formula than a wet one (I prefer wet mascaras overall) and it left my lashes feeling a bit crispy (I tend to prefer a waxier feeling after it’s dried). Although this mascara wasn’t necessarily my bag, maybe the details above will help you decide if it works for you. Mascara is such a personal thing that it’s really hard to account for what other people are looking for.

OH! One *super* important thing to note: This mascara didn’t flake on me at all. I’m exceptionally prone to flaking mascara and this sucker did not budge!

The Clinique Lash Power Flutter-To-Fall mascara can be purchased on sephora.ca for $28 CAD or on sephora.com for $21 USD.

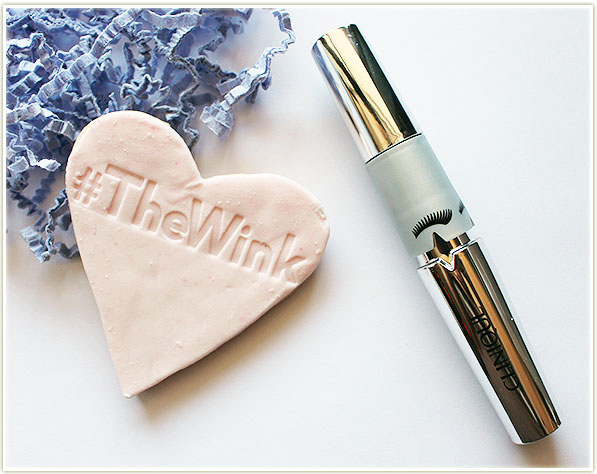
Clinique Lash Power Flutter-To-Full Mascara + #TheWink

On October 6, 2016, Clinique also launched The Wink. It’s an editorial platform by the brand intended to help readers discover the people, places, ideas and stories that Clinique finds simply amazing – from across Canada and around the world. I know I was intrigued as soon as I saw an article on Crushed Macaron Ice Cream. That Red Velvet one is making me swoon!

The product/web site featured in this post was sent to me for consideration.
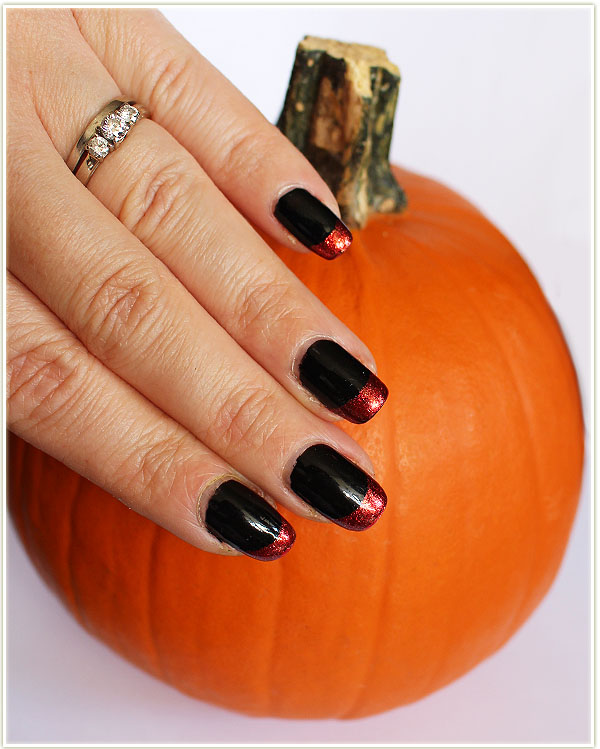
Halloween Nails for the Amateurs (aka me)

Halloween Nails

Alright you guys, I am a gross amateur when it comes to applying nail polish, forget gorgeous nail art! (I’m in constant awe of my friend Kaitlyn who manages to pull out some insanely beautiful nail art on her gorgeous nails!) However, for whatever unknown reason, my nails have gotten long and strong recently, so I find myself wanting to do *something* with them.

And the easiest thing I know is a French tip because it’s basically fool proof since I use the nail stickers (I buy them for like 99 cents on Ebay!).

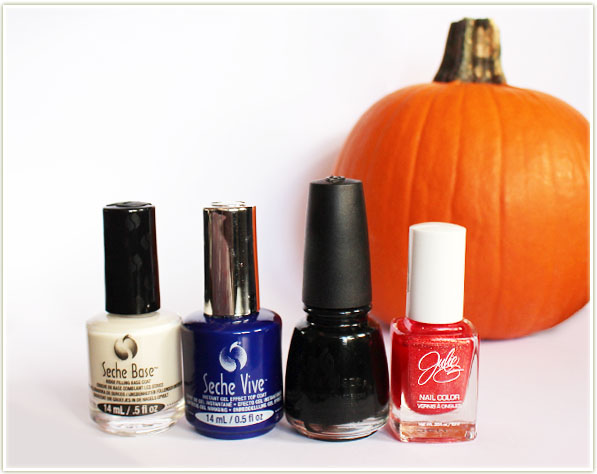
Left to right: Seche Base, Seche Vive, China Glaze Liquid Leather and Julie G Albuquerque

I’m personally not interested in the usual French tip colours of nude and white, so I opt to switch it up and play with colour. Since Halloween is around the corner, I wanted to stick with a seasonal orange and black nail. And since I did this just for me and wasn’t planning on doing a post about it, I really don’t have a step by step guide for you guys, but I can tell you about some of my favourite products for nails!

I don’t know how I did any nail polish whatsoever before I discovered Seche Vive/Seche Vite back in August. Seche Vive is the new gel-like fast drying finish, but I think a lot of people are already aware of Seche Vite (the original). This stuff dries so freaking fast and makes my manicure last at least 7 days (but really it’s usually closer to 10-12 days). I wish I’d gotten on the bandwagon a lot sooner because in the past my nails were always chipped by day 2!

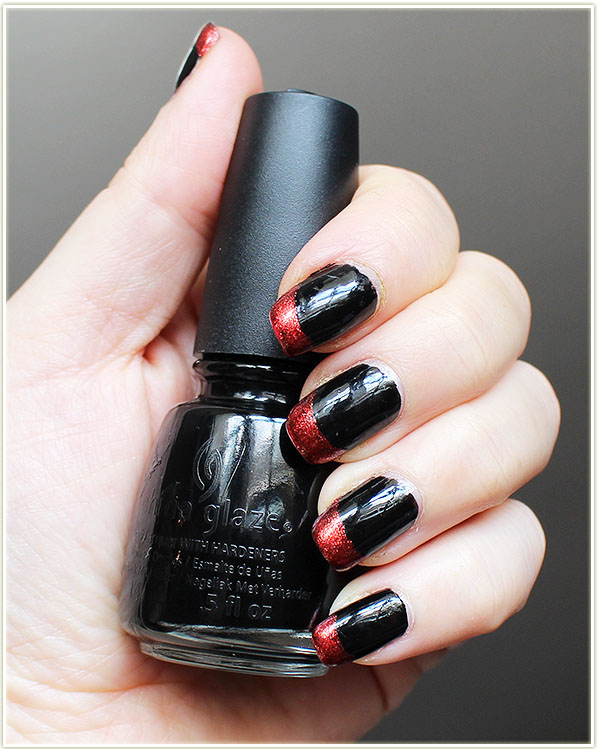
Halloween Nails - polish being held is China Glaze Liquid Leather
Halloween Nails – polish being held is China Glaze Liquid Leather

The black nail polish I’ve been using for years is China Glaze‘s Liquid Leather. It’s not a single coat black, but it’s pretty darn close. (And if you watch Simply Nailogical, you’ll know that this one was one of the better black polishes in her recent roundup. It’s also one of the easiest to get your hands on that’s for sure!) One of the reasons I like this so much is I’ve probably had it for 4-5 years and although I can’t tell how much I’ve finished in the bottle, I can say that the formula remains just as fluid as the day I got it. No gunking up in this bottle!

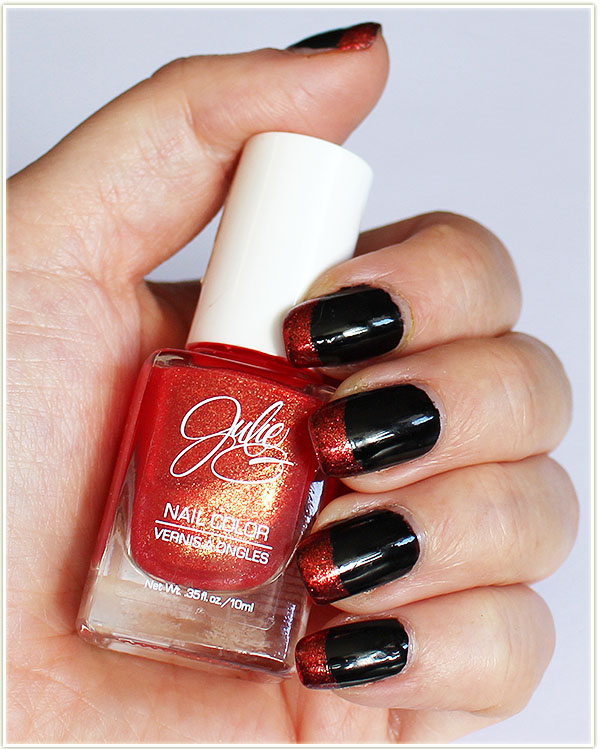
Halloween Nails - polish being held is Julie G's Albuquerque
Halloween Nails – polish being held is Julie G’s Albuquerque

Although not available in Canada, Julie G‘s nail polish line is one I look forward to buying whenever I’m in the US and have access to a Rite Aid. Julie G is one of the original YouTubers I remember watching when I first got into the beauty world. When I first spotted her line while on vacation, I was happy to support her… and then even happier to discover that I really, REALLY liked her shimmery polishes (I’ve only tried one cream polish and I didn’t love it as much). This particular shade is Albuquerque and I’m drawn to it because it’s not only a stunning shimmery metallic orange, but it’s also the city Julie lives in as well as being the city that Breaking Bad took place in. (God I miss that show soooo much!)

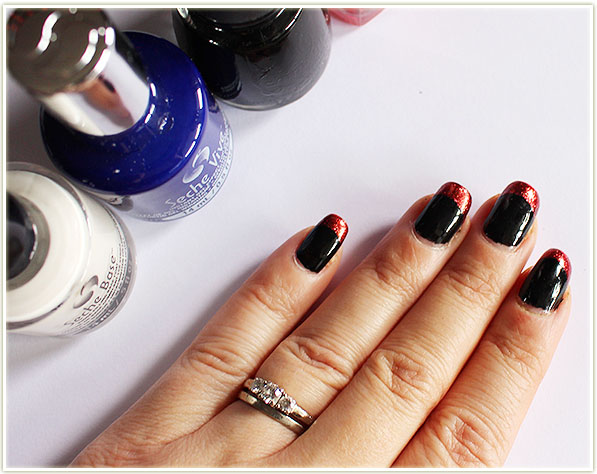
Black nail with an orange tip

In short, how I got this nail look is first by coating my nails with the Seche Base. Waiting five minutes, coating with one layer of black polish. Waiting another two minutes and then applying a second layer of black polish. I then coated my nails with a thick layer of Seche Vive so I could use the nail stickers soon thereafter. Thirty minutes and a load of laundry later, I then applied the French tip nail stickers, did two coats on the tips of my nails with orange polish, peeled off the stickers and re-coated them with Seche Vive.

This is the easiest time I have ever had doing French tips! In the past, I always had problems with the stickers yanking off the base layer polish. This time Seche kept my base layer intact! As you can maybe see from the ridiculous sheen in the photos, Seche Vive adds one hell of a glossy topcoat to my nails. It’s really, really nice to look at in person, but it’s hell on a camera lens!

Although this post was accidental and I hadn't actually done my nails with a post in mind (seriously, I think this is my first ever nail post), please note that the Seche Base and Seche Vive products were sent to me for consideration.
Swatch Sunday: Sonia Kashuk Eye on Neutral 02

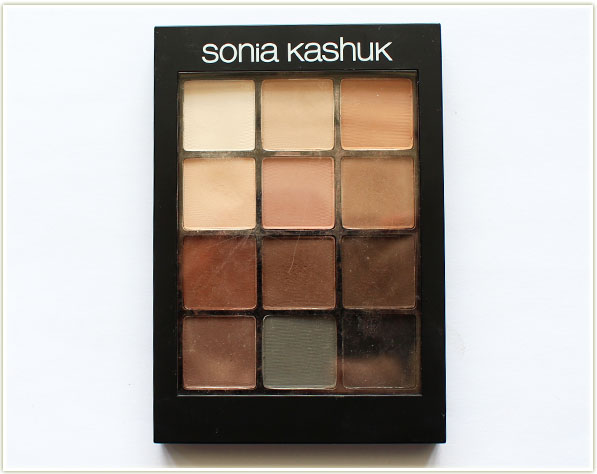
Sonia Kashuk Eye on Neutral 02 palette

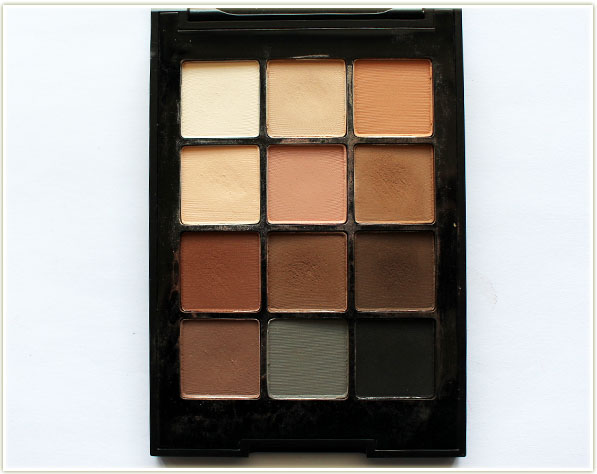
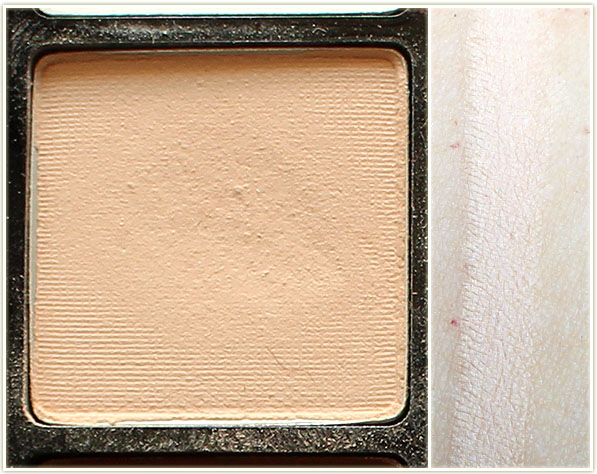
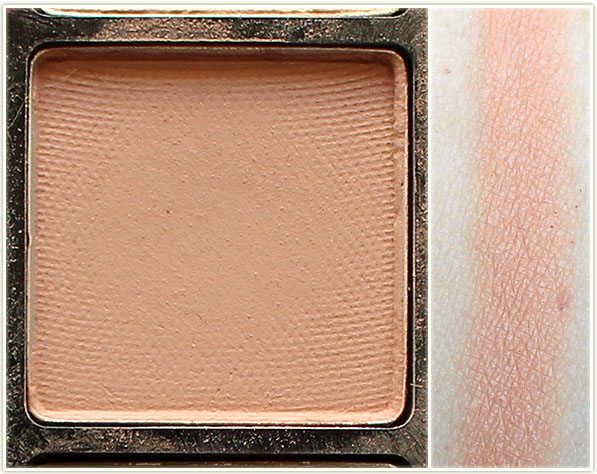
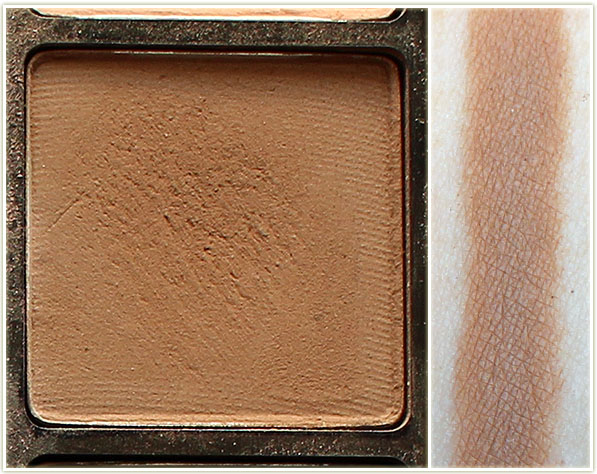
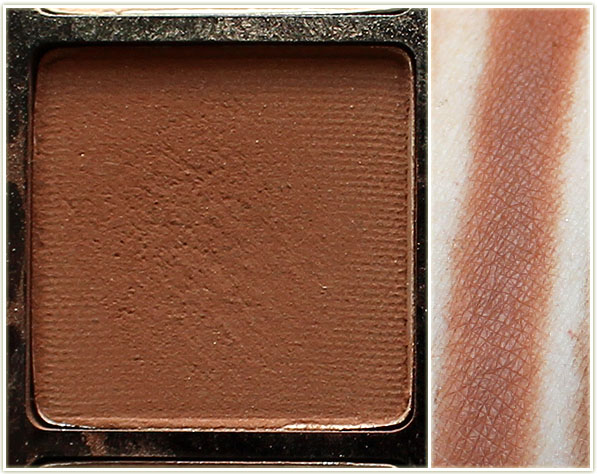
If there’s a basic palette out there that everyone needs, it’s the Sonia Kashuk Eye on Neutral 02 palette. (Sidenote, why the heck is it 02? Was there a 01 at some point?) Some people may balk at the price tag (it’s $20 USD) since it’s a drugstore-bought item at Target, but this palette is full of mattes that help complete EVERY look. Brow bone highlighting shades? Got it. Transition shades? Got it. Outer corner or lid shades? Got it. Need a black or dark tone to deepen up your look? Got it.

Sonia Kashuk Eye on Neutral 02 palette

You cannot go wrong with this palette. It’s not the most exciting thing to look at, but it definitely is one of the most useful ones!

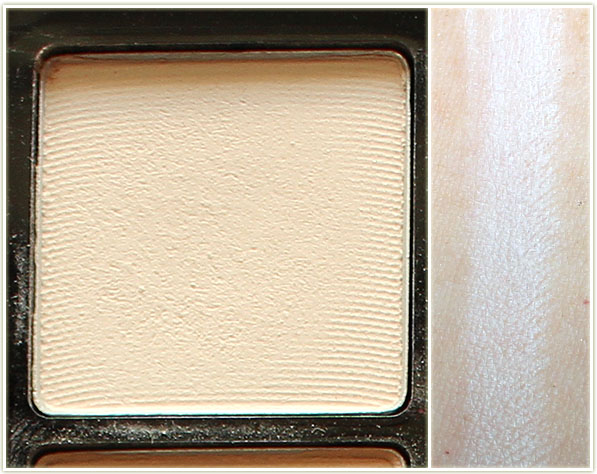
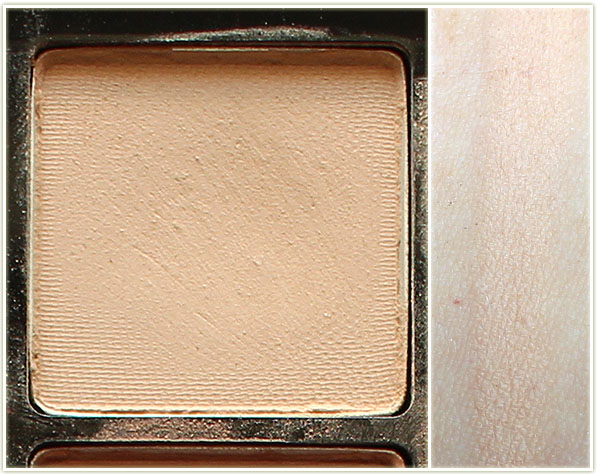
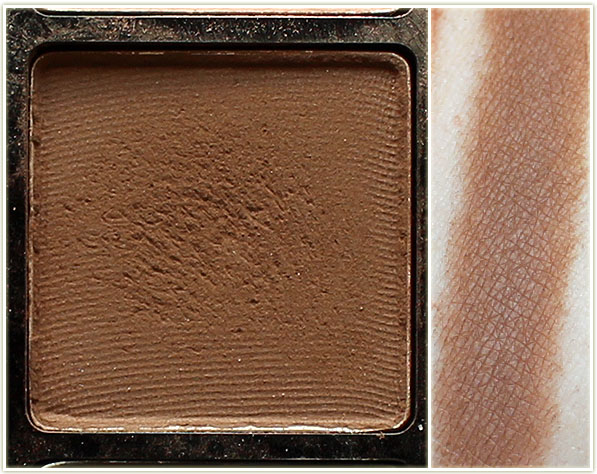
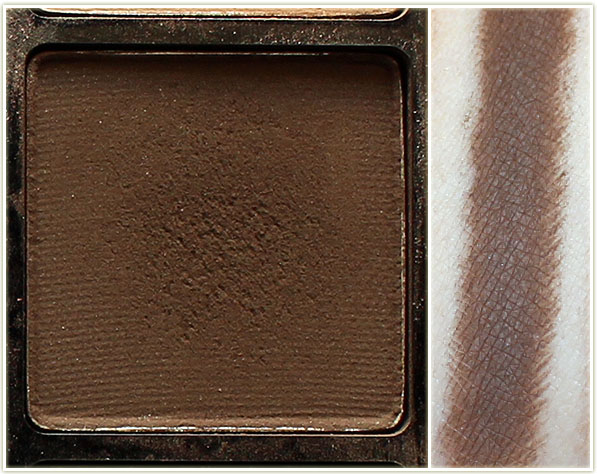
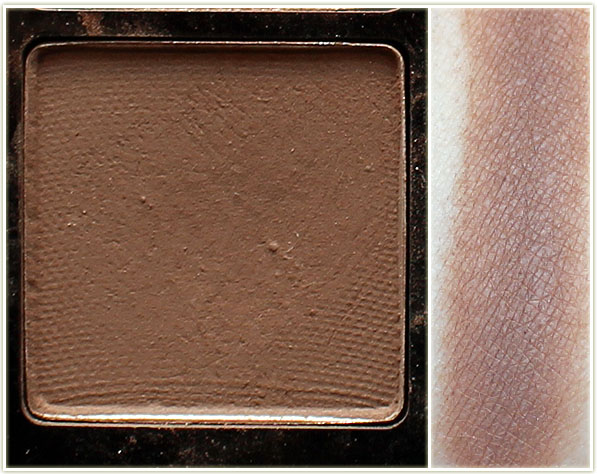
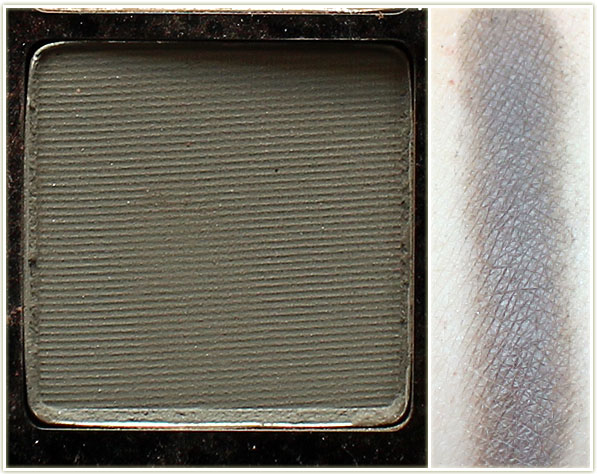
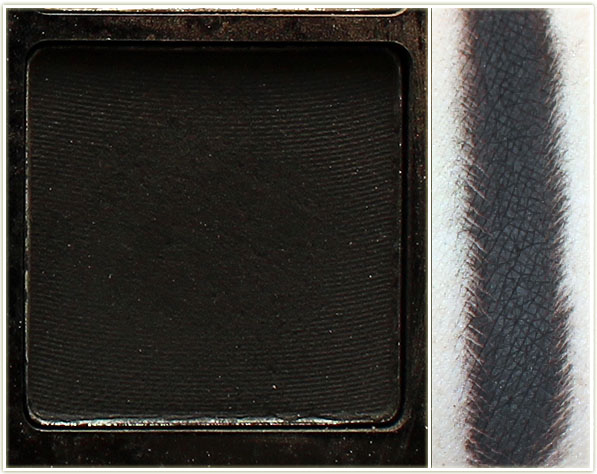
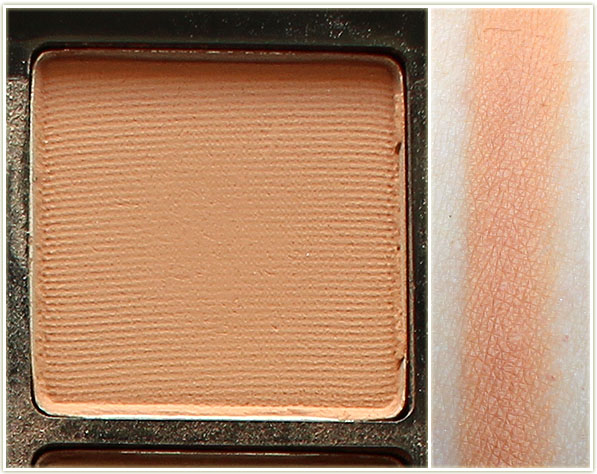
Sonia Kashuk Eye on Neutral 02 Swatches

Eye on Neutral 02 - Swatch 1
Eye on Neutral 02 – Swatch 1
Eye on Neutral 02 - Swatch 2
Eye on Neutral 02 – Swatch 2
Eye on Neutral 02 - Swatch 3
Eye on Neutral 02 – Swatch 3
Eye on Neutral 02 - Swatch 4
Eye on Neutral 02 – Swatch 4
Eye on Neutral 02 - Swatch 5
Eye on Neutral 02 – Swatch 5
Eye on Neutral 02 - Swatch 6
Eye on Neutral 02 – Swatch 6
Eye on Neutral 02 - Swatch 7
Eye on Neutral 02 – Swatch 7
Eye on Neutral 02 - Swatch 8
Eye on Neutral 02 – Swatch 8
Eye on Neutral 02 - Swatch 9
Eye on Neutral 02 – Swatch 9
Eye on Neutral 02 - Swatch 10
Eye on Neutral 02 – Swatch 10
Eye on Neutral 02 - Swatch 11
Eye on Neutral 02 – Swatch 11
Eye on Neutral 02 - Swatch 12
Eye on Neutral 02 – Swatch 12

The Sonia Kashuk Eye on Neutral 02 palette is available at target.com for $19.99 USD.

Skincare Saturday: Bioderma’s Hydrabio Range

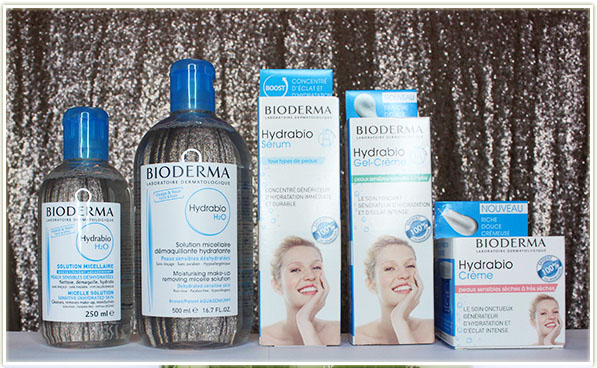
Bioderma Hydrabio products

If you’re unfamiliar with Bioderma‘s Hydrabio products, let me have the pleasure of taking you through a tour of some of their products! The Hydrabio range is intended for dehydrated sensitive skin and contains the Aquagenium patent which stimulates the skin’s cellular capacities and reactivates its natural hydration process to the upper layers of the skin. 

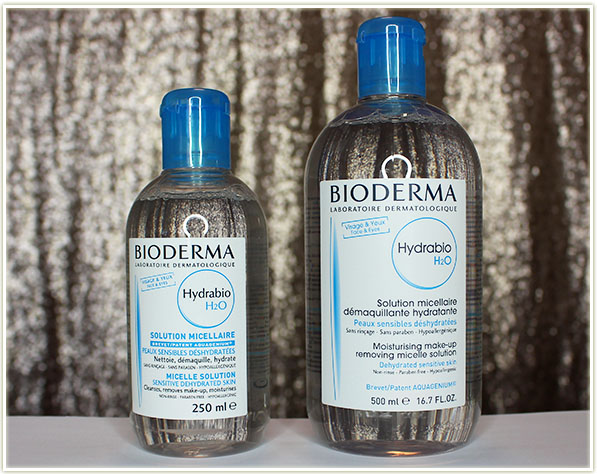
Bioderma Hydrabio H2O micelle solution

The product that first introduced me to the Hydrabio range was their H2O micelle solution. I had been using (and still do) use the Sensibio/Crealine micelle solution (that’s the one you see most often with the pink cap!), but when the weather gets colder in Toronto, I wanted something a little bit more hydrating and the Hydrabio line delivers on that. The other huge upside for me is that the Hydrabio range has a scent that is really clean and fresh.

So, if you’re not familiar with a micelle solution (also often referenced as micellar) is a cleansing and make-up removing water. I don’t personally find it strong enough to remove long wearing foundation and waterproof mascara, but I find this impeccable for removing all other traces of makeup. I’ll usually remove my makeup with an oil based remover, and then I’ll go in with this micelle solution to clean up all the extra bits. It hydrates, cleanses and refreshes my skin all at the same time. Even if you’re not wearing makeup, this is excellent for just re-vivifying the skin when you need a bit of a pick me up. Throw a few squirts on a cotton pad, swipe it all over your skin and you’re good to go!

The Hydrabio H2O used to only be available in the 250 ml version, but I can happily report that you can now get it in a 500 ml bottle as well!

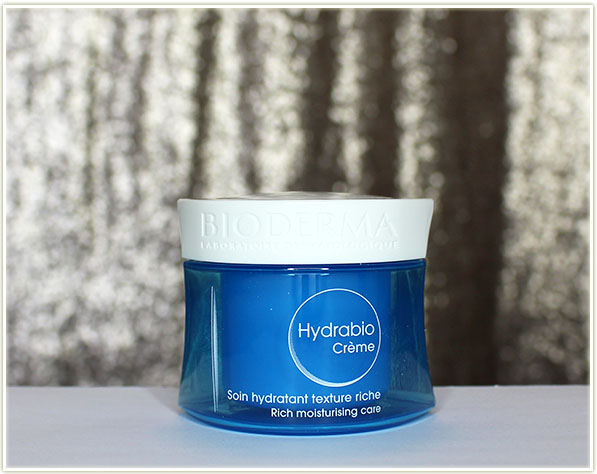
Bioderma Hydrabio Creme

If you’re looking for a heavy duty face cream, look no further than the Hydrabio Creme. The Creme is targeted towards people with dehydrated sensitive to very dry skin with a lack of radiance. I don’t find myself on that extreme end of the dryness spectrum, but I can say that this one feels incredibility luxurious on my face. I use it on my face as an overnight moisturizer when I really need to pack in the moisture (which is something I tend to need if I’ve been wearing foundation too many days in a row). It’s a small jar, but you don’t need a ton!

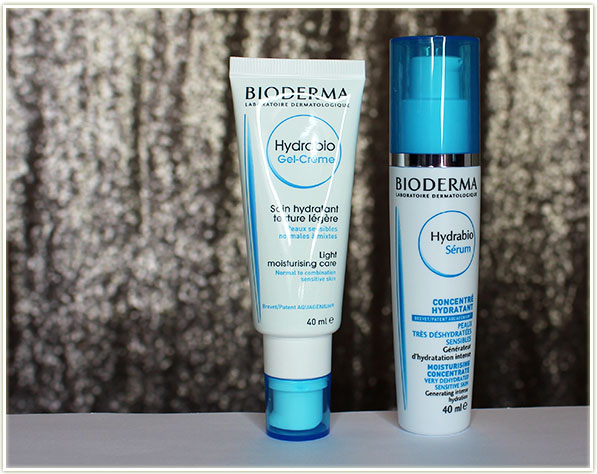
Bioderma Hydrabio Gel-Creme & Serum

To round out my Hydrabio routine, I’ve got the Gel-Creme and the Serum.

As you found expect, the Gel-Creme isn’t as thick of a cream since it does have a gel base. While it’s still great for dry skin, it’s also targeted towards combination skin since it’s not quite as thick. I use this in the morning on days when I don’t feel like something a intensely moisturizing as thick cream, and I’ll interchange it with whatever other moisturizers I’d currently be using it (like Aveeno, etc.).

And lastly, their Hydrabio Serum. Serums are something I’ve only recently started to understand in my beauty routine and I’m not quite sure I notice an immediate difference in my skin with them, so it’s a bit of a take it or leave it step for me. I started using this particular Serum last winter when my skin needed the added boost of moisturizer and I felt it did help me out (it was also before I had more of the Hydrabio range so I needed to amp up my regular moisturizing routine), but it’s not something I reached for during the warmer months. As we’re headed into the colder months up here in the Northern Hemisphere, you may want to look into something simple like a Serum in order to augment your current moisturizers!

If it wasn’t already hyper-obvious, I’m an huge enormous fan of Bioderma and their Hydrabio range is a staple for me in the colder months. A lot of skincare can leave me going “meh, it’s fine, but do I love it?”, but Bioderma is definitely a true love for me in terms of skincare.

Even if you’re not into the dry skin products, you may want to check out their range since they do offer products for varying types of skin. If you’re Canadian, the Bioderma range is easily accessible via Shoppers Drug Mart and Rexall! For those looking to shop online, here’s a direct link to Bioderma‘s product page on beautylish.com!

The products featured in this post were sent to me for review.