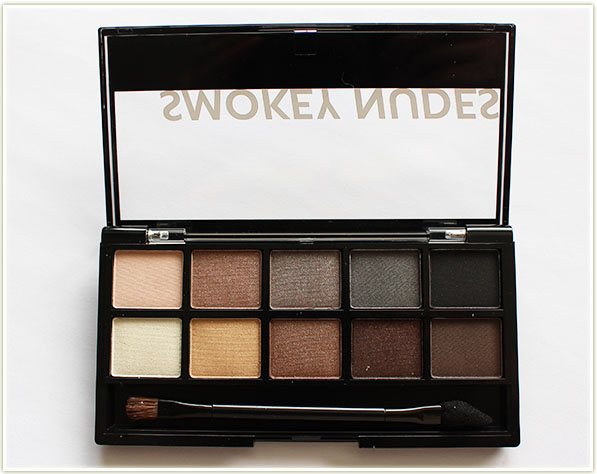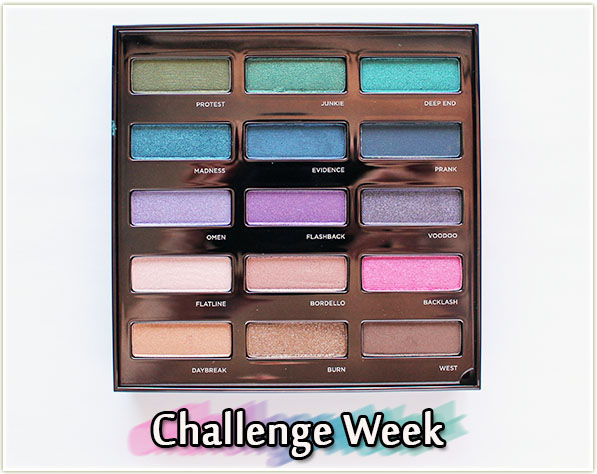
The Urban Decay Urban Spectrum palette surprised the bejesus out of me. I had hemmed and hawed over getting it because, although pretty, it’s not especially unique. Some of these are repeat shades that I thankfully don’t have,however, I know I’ve got similar colours in my collection to all of these (and most definitely all of those browns).
But it was too pretty to pass up so I picked it up when it launched on Sephora’s site for VIB and VIB Rouge members. Over the last week and a bit it has really, really impressed me. Urban Decay always has well pigmented shadows, but this just took me by extra surprise. They’re so pigmented that I was like “omgggg KEEP BLENDING” when I started applying it to my eyes. That’s not a downside by the way, that’s just further proof that this is worth the money you spend on it.
The only thing worth noting that some people may consider a downside is that there are no true mattes in here, so this is not a “complete” palette. I pulled in a matte shade to highlight my brow bone a lot, but for this to work on an every day basis, you’re going to need to work in some matte browns for transition shades, etc. That being said, no one’s looking to this as a starter palette. If you want to try out colourful shades for the first time, it’s a fairly good assumption that you’ve already got plenty of matte neutral shades in your collection that you can use to help balance out all the sheen from these.
Enough rambling, on with the looks! (And if you want swatches of all the shades, see this past Sunday’s Swatch Sunday post here.)
Urban Decay Urban Spectrum Makeup Looks
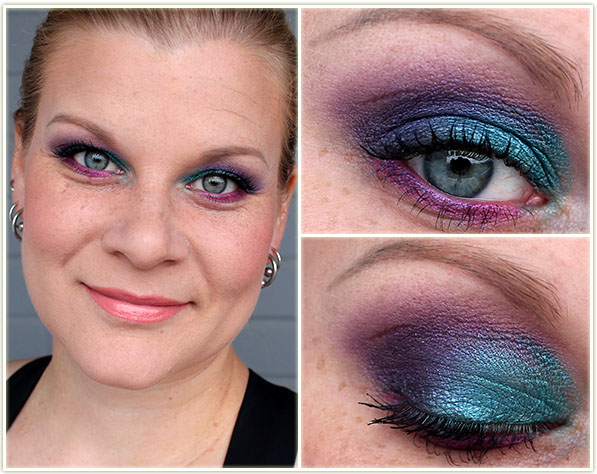
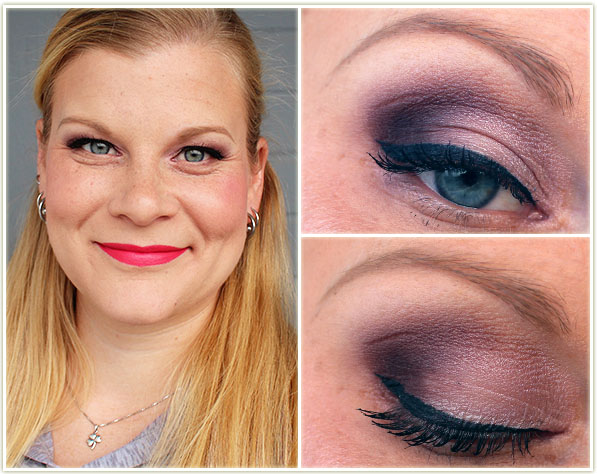
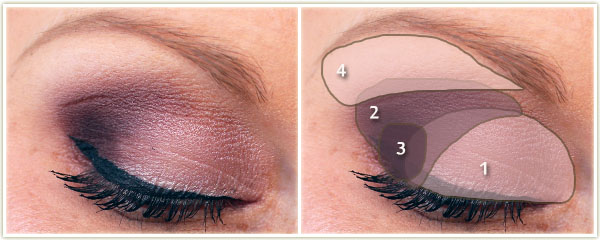
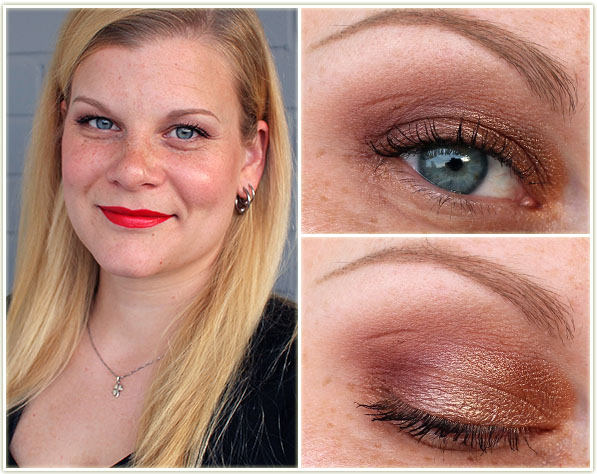
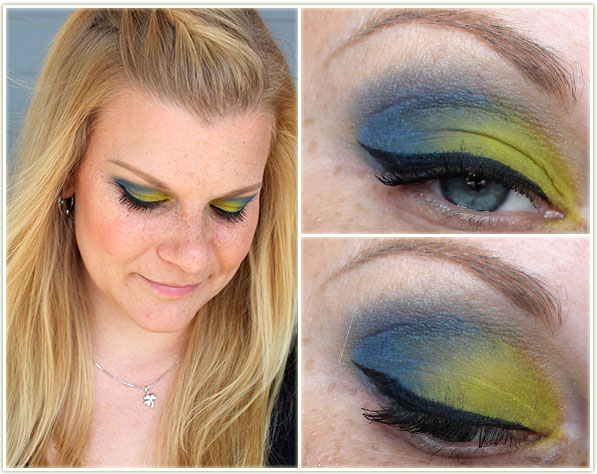
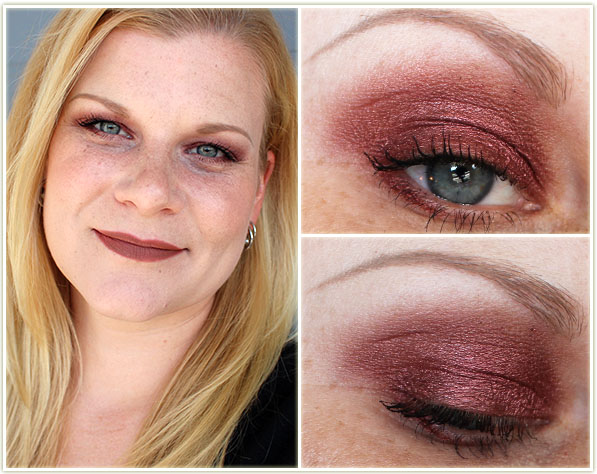
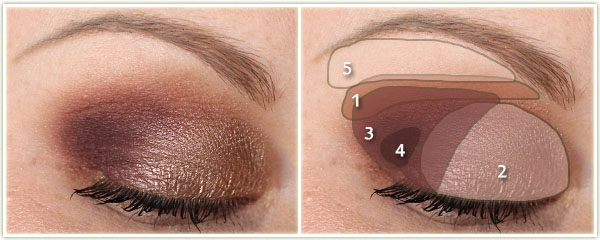
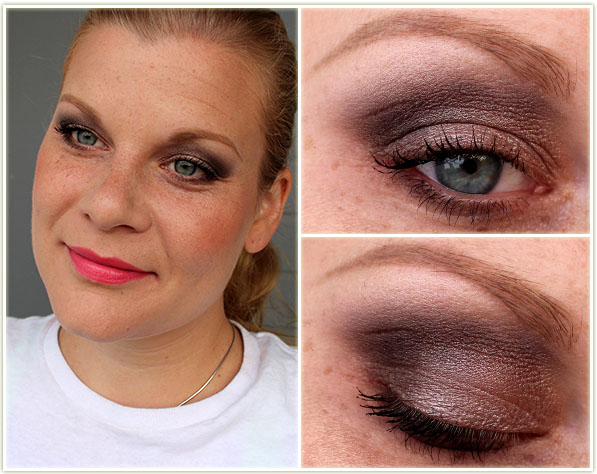
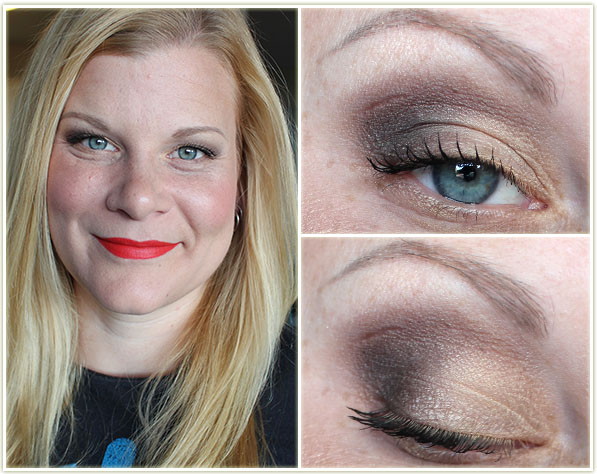
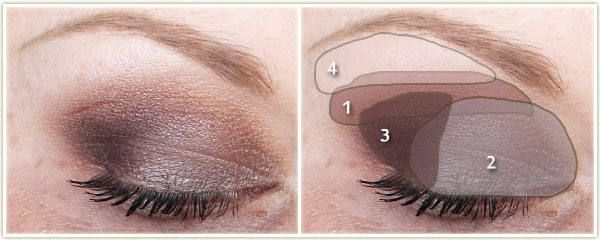
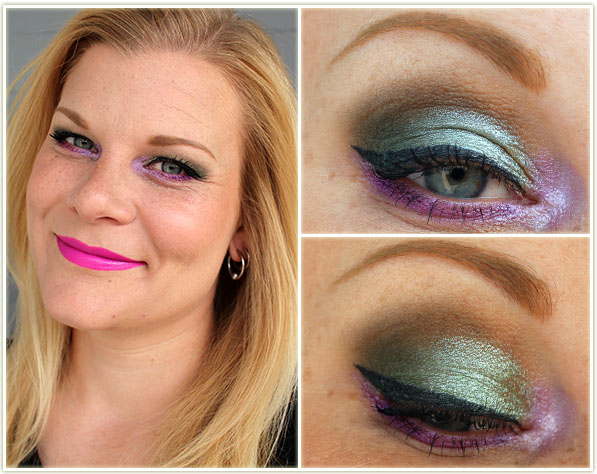
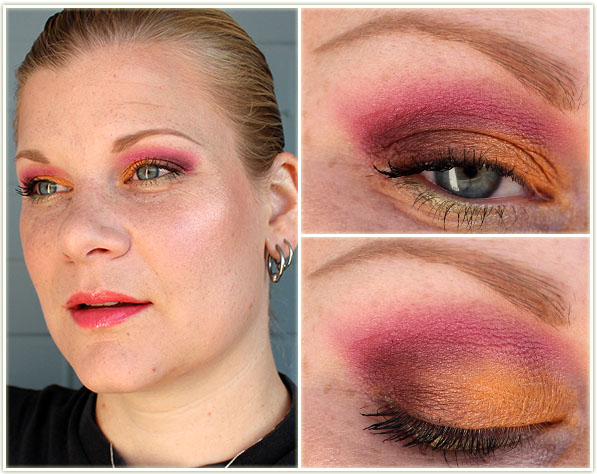
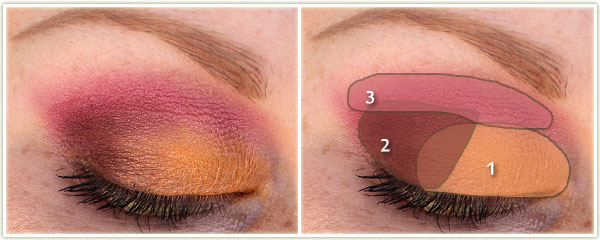
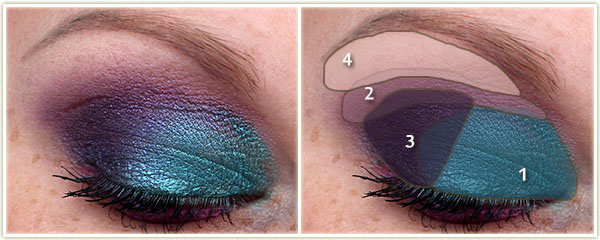
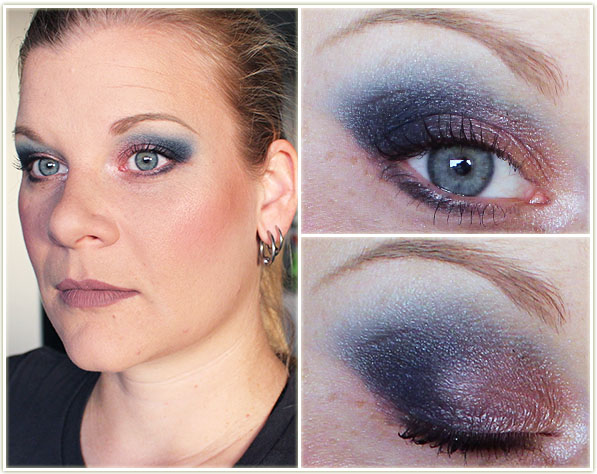
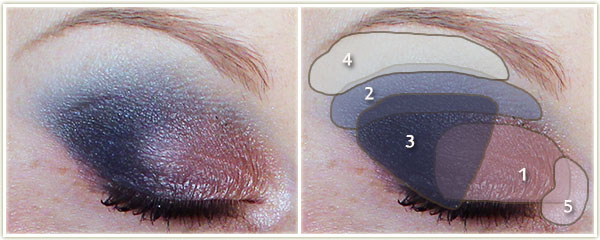
The first one I did, and easily my favourite. I had no idea what the hell to do with that ridiculously hot pink Backlash shade, but it worked soooo well on the lower lash line to complement the other shades. I don’t like my lip colour though – I should’ve gone for something brighter and less peach.
Eyes
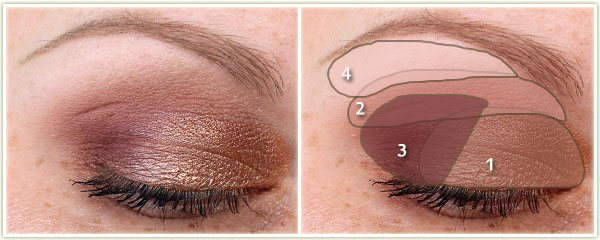
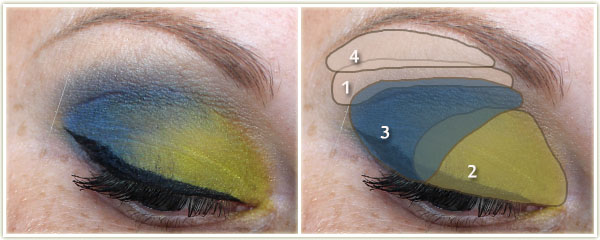
- Deep End on the lid.
- Fashback through the crease.
- Voodoo in the outer corner.
- Wet n Wild Brule on the brow bone.
I lined my lower lash line with Backlash and coated my lashes with Urban Decay‘s Perversion mascara.
Face
- Foundation: Revlon Colorstay in 200 Nude and 220 Natural Beige mixed together
- Bronzer: NYC Fire Island Tan
- Blush: Hourglass Diffused Heat
- Highlighter: Becca Champagne Pop
- Lips: Wet n Wild 903C with NYX Tiramisu on top
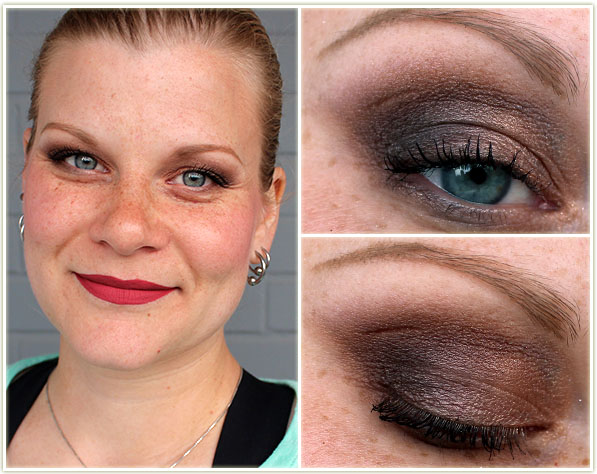
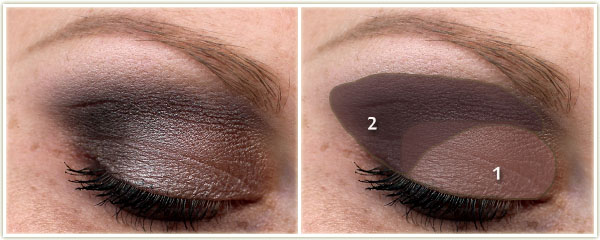
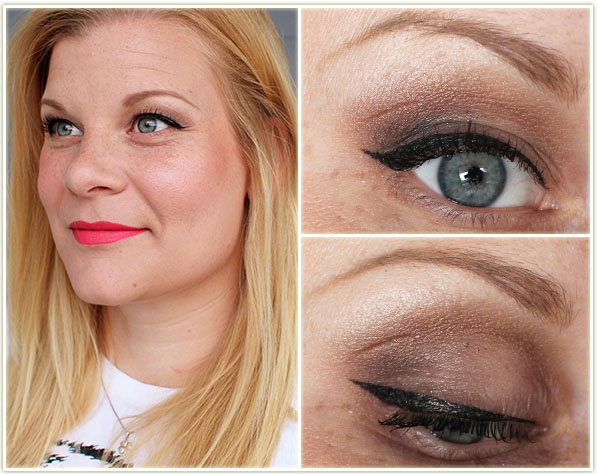
I packed most of the neutrals into one look because they’re the most safest colours this palette had to offer.
Eyes
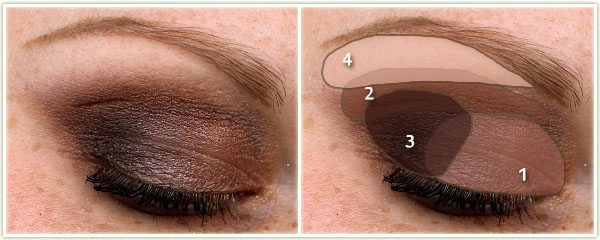
- Daybreak on the lid.
- Burn on the crease.
- West in the outer corner. (This came out WAY deeper than the pan shows.)
- Wet n Wild Brule on the my brow bone.
Urban Decay Perversion mascara is on my lashes.
Face
- Bronzer: Make Up For Ever Pro Bronze Fusion in 30M
- Blush: The Body Shop Honey Bronze Highlighting Dome in 03
- Lips: ColourPop Ultra Matte in Bumble
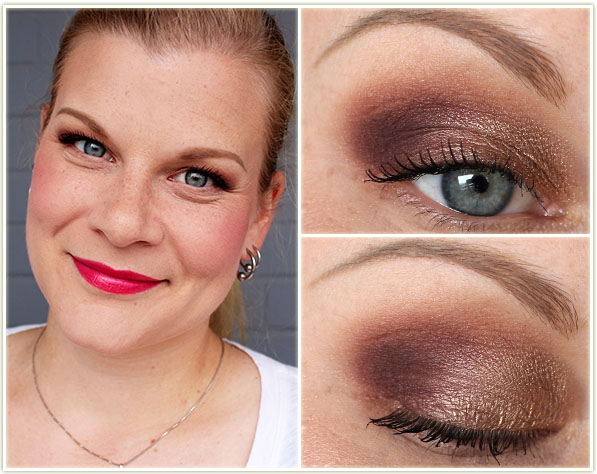
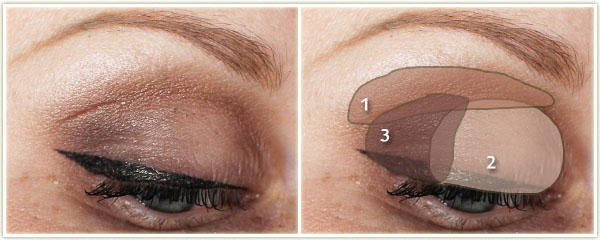
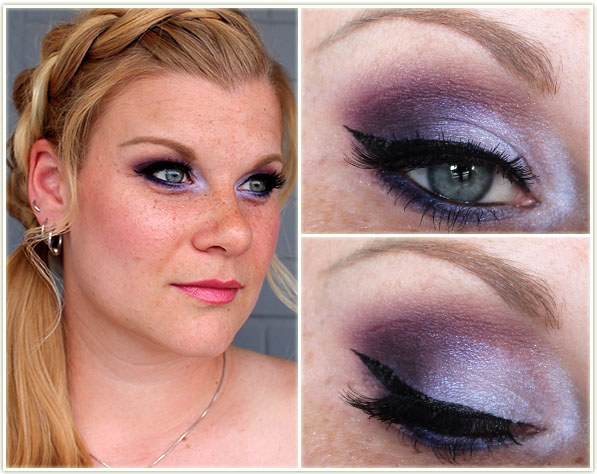
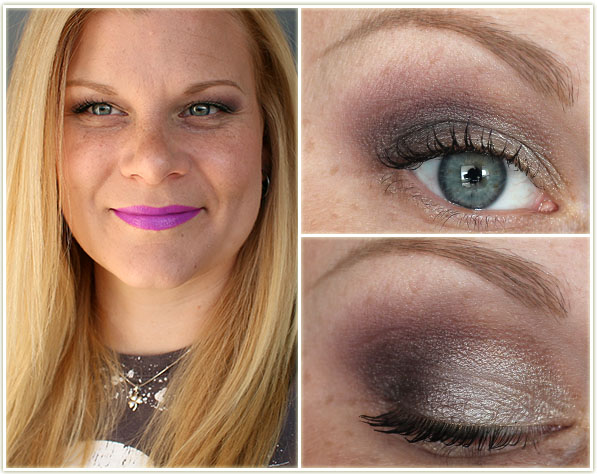
I’m kind of iffy on this one. Maybe it’s because my lighting wasn’t great for it. The colours sure do blend out nicely though!
Eyes
- Bordello all over the lid.
- Madness at the top of the crease.
- Prank on the outer half of the lid and used to line the lower lash line.
- Flatline on the inner corner.
I applied Urban Decay‘s Perversion mascara to my lashes.
Face
- Foundation: Revlon Colorstay in 200 Nude and 220 Natural Beige mixed together
- Bronzer: NYC Fire Island Tan
- Blush: Kroylan Glossy Rosewood
- Highlighter: Becca Champagne Pop
- Lips: ColourPop Ultra Matte in Trap
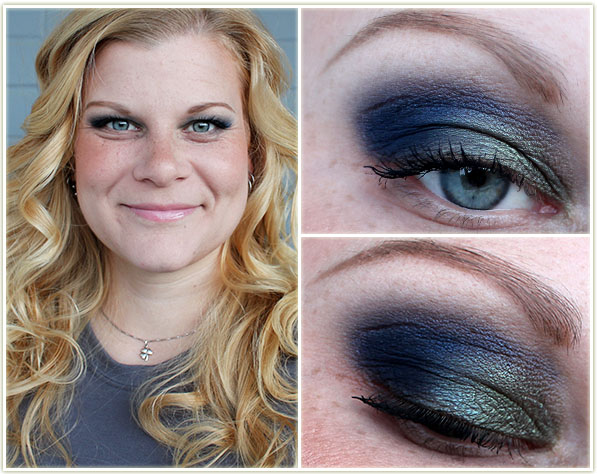
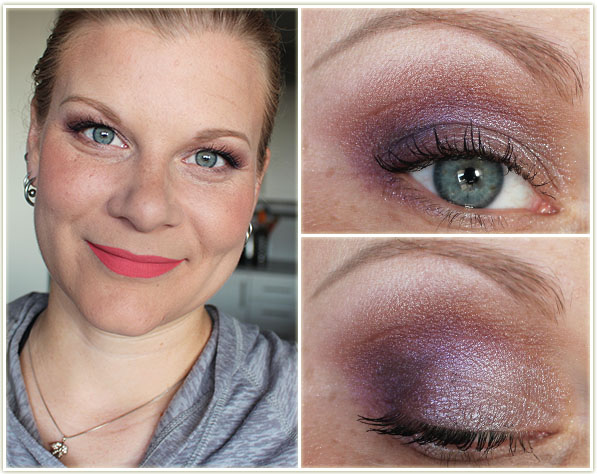
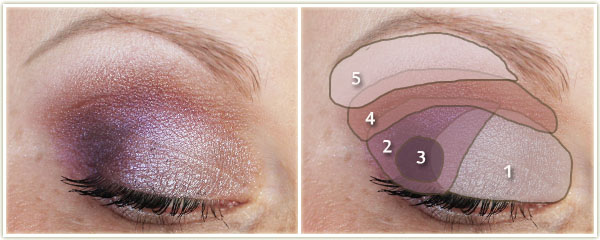
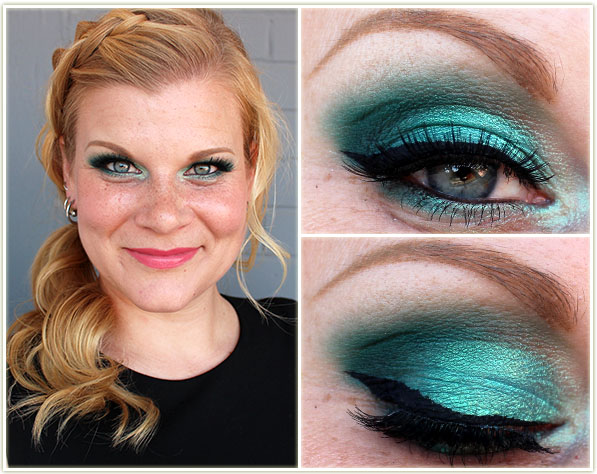
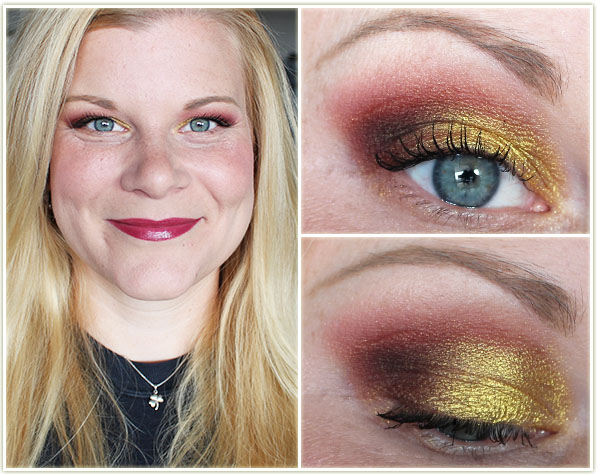
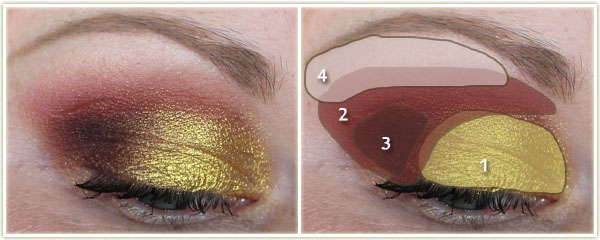
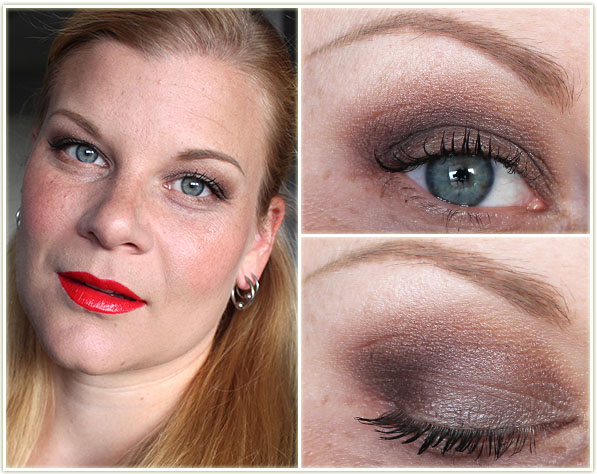
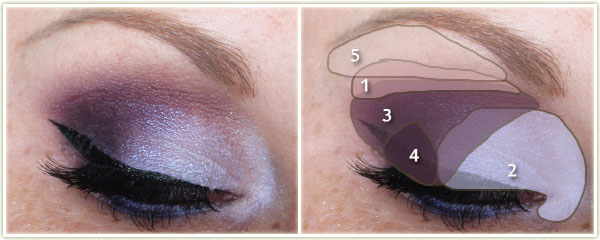
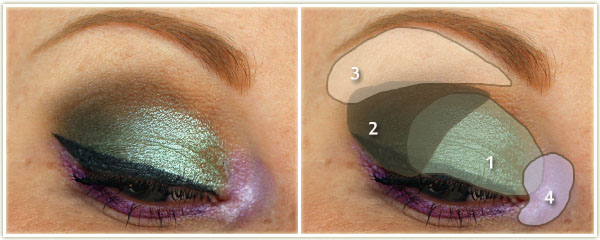
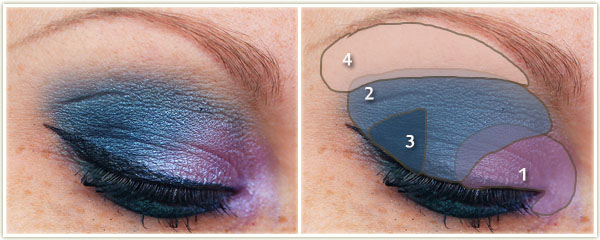
This kind of green to blue colour transition is a long time favourite look of mine. I’ve done it with varying shades and brands over the years and I never tire of it.
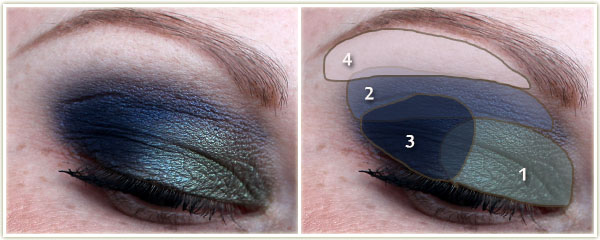
Eyes
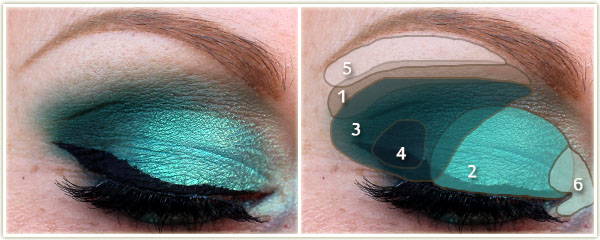
- Protest on the lid.
- Evidence through the top of the crease.
- Prank on the outer third of the lid.
- Wet n Wild Brule on the brow bone.
I coated my lashes with Too Faced‘s Better than Sex mascara.
Face
- Foundation: Yaby in Buff
- Bronzer: NYC Fire Island Tan
- Blush: MAC Gingerly
- Lips: NYX Butter Gloss in Vanilla Cream Pie

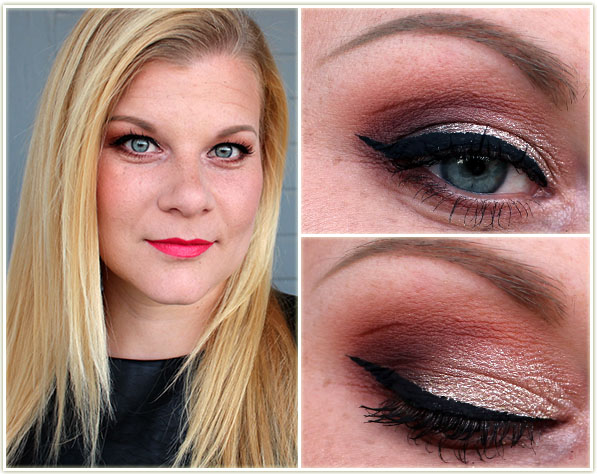
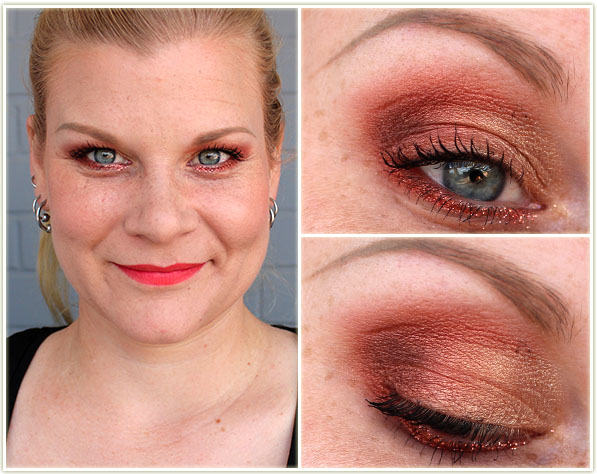
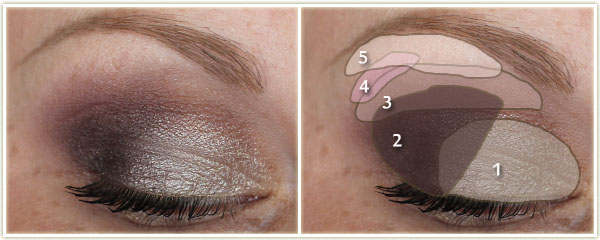
Only an eye look for this one I’m afraid. Because this is zoomed in closer, you can see just how shiny most of the colours come across. They’re beautiful, there’s no doubt of that, but they really can come across as a shine-bomb if you use them all at once.
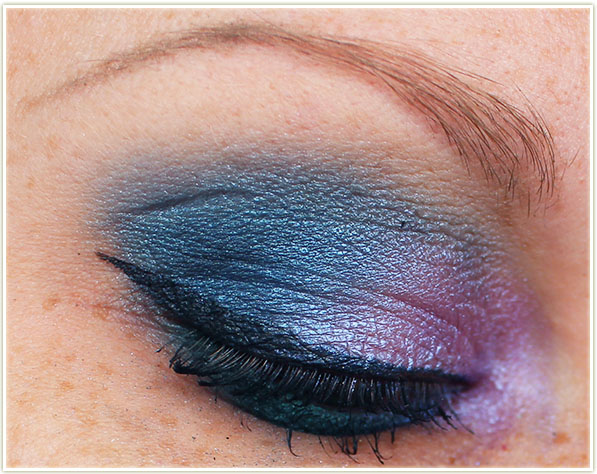
Eyes
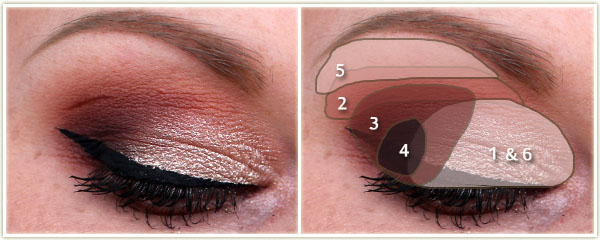
- Omen on inner half of the lid.
- Madness on the outer two-thirds of the lid.
- Prank in the outer corner.
- Wet n Wild Brule on the brow bone.
I created the wing with essence‘s Jumbo Liner Pen and coated my lashes with SST Cosmetics‘ Lash Rebel mascara.
I hope you enjoyed the Urban Spectrum looks! Next up I think I’ll be working through the Kat Von D Mi Vida Loca Remix palette. (I’m really, REALLY excited for that one!