As I was putting together this roundup of looks, I started to realize just how much I’ve been using my Makeup Geek shadows lately. I mean, I use them a lot on a regular basis, but three out of the five looks are solely Makeup Geek in here!
I did this for a YouTube video tutorial but had to repost it here because I know not everyone has the time for videos (I’ll continue to repost my video tutorial looks on the blog as time goes on).
Eyes
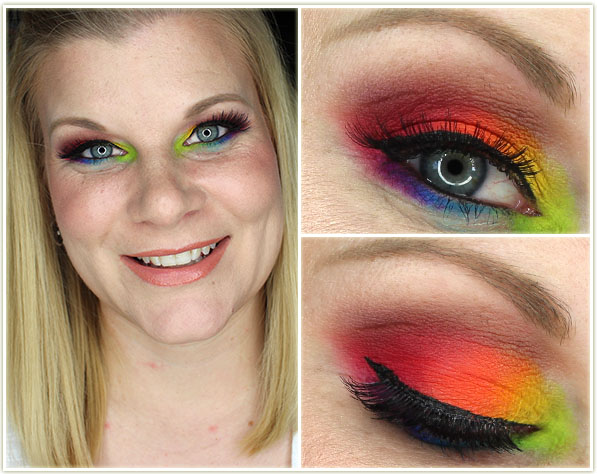
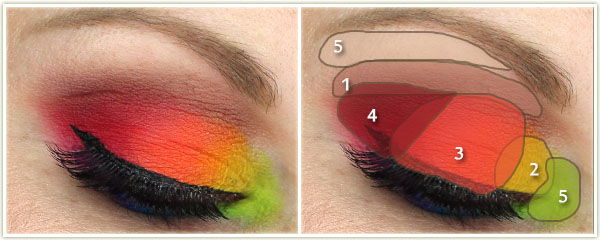
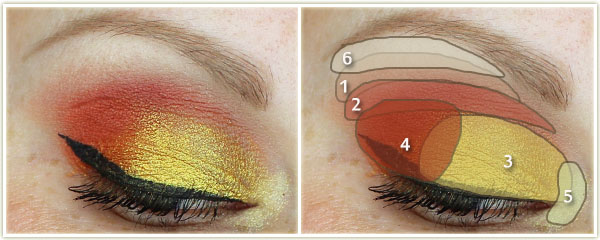
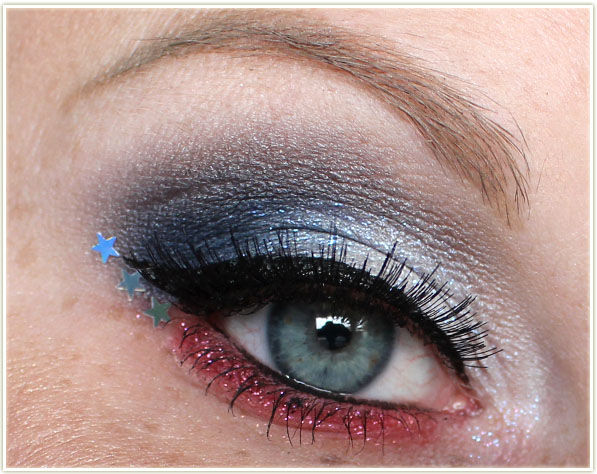
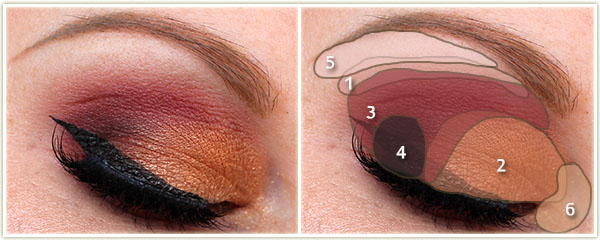
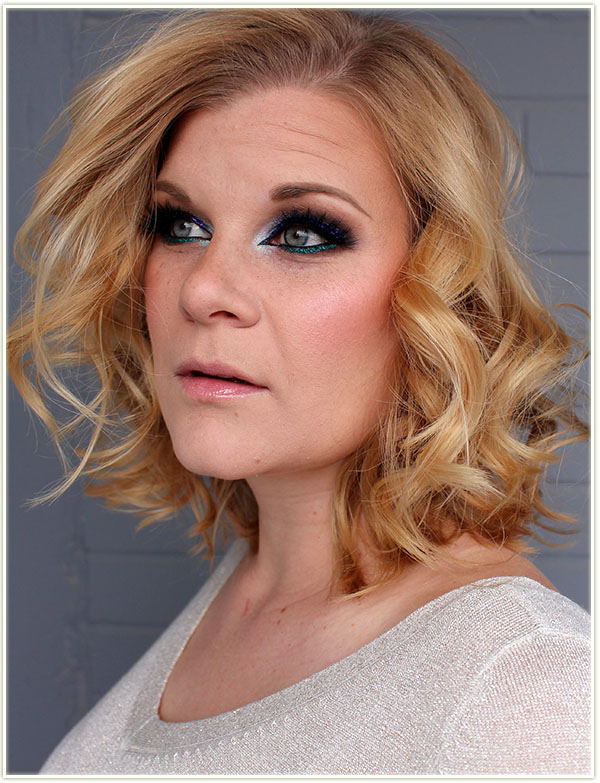
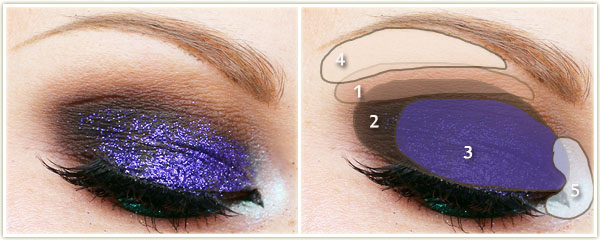
(using the Viseart 08 Editorial Brights palette) I first covered my lid with NYX‘s Jumbo Eyeshadow Pencil in Milk and then:
MAC‘s Cork in the crease.
The yellow shade from the palette on the inner third of the lid.
The orange on the middle of the lid.
The red on the outer half of the lid.
The lime green on the inner corner of the lid.
(also listed as 5) MAC‘s Blanc Type to highlighter the brow bone.
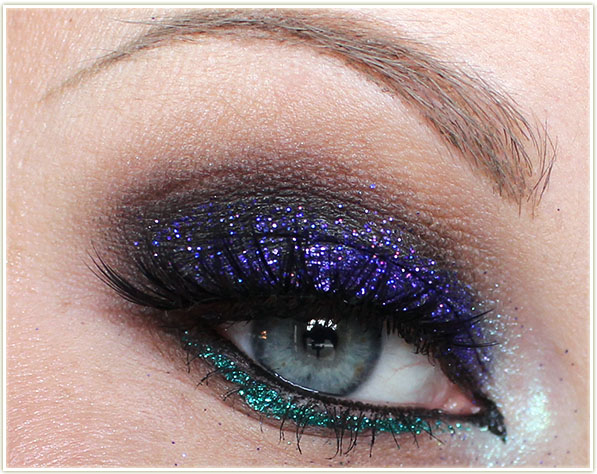
I applied the light blue to the middle of my lower lash line and the purple to the outer section of the lower lash line. I created the wing with Kat Von D‘s Tattoo Liner in Trooper and tightlined my water lines with Marc Jacobs‘ Highliner Gel Crayon in Blacquer. I coated my lashes with Make Up For EverSmoky Stretch mascara and applied House of LashesBombshell falsies.
Face
Primer: Make Up For Ever Step 1 Smoothing Primer
Foundation: Make Up For Ever UltraHD in Y225
Bronzer: Joe FreshSand
Blush: HourglassDiffused Heat
Highlighter: BeccaChampagne Pop
Lips: Too FacedMelted Chocolate Milkshake with Sephora‘s lipgloss in Good Fairy
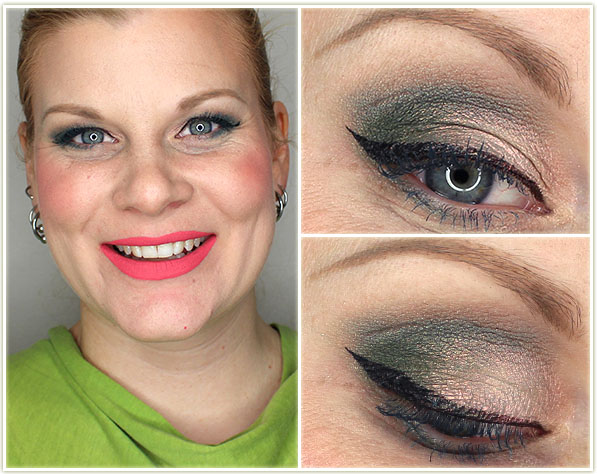
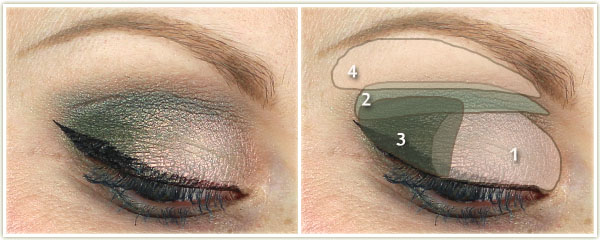
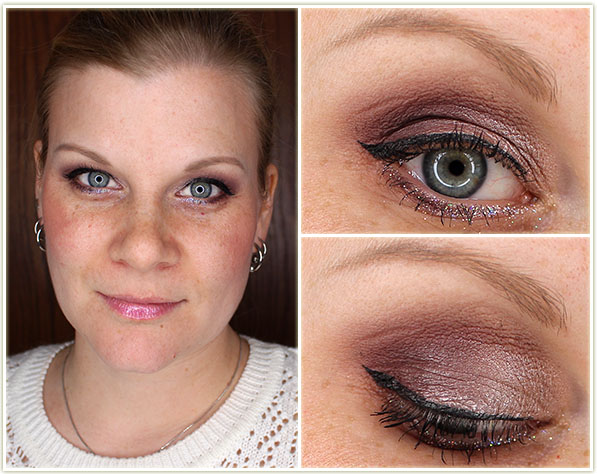
Although I love the Kat Von DMi Vida Loca Remix palette, I’ve not been using it because I was trying to work through a bunch of other palettes. I said enough was enough, and went back to it for it this look!
Eyes
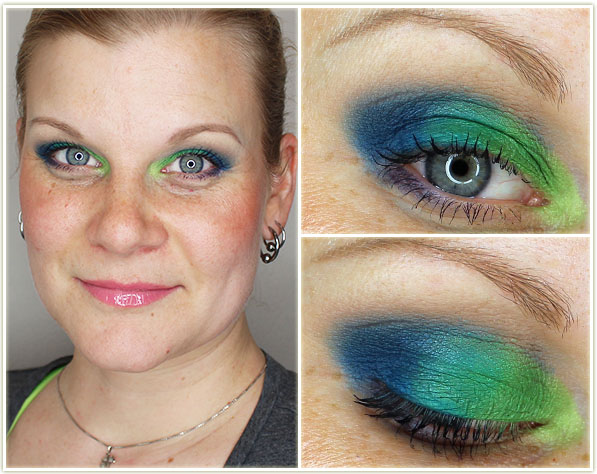
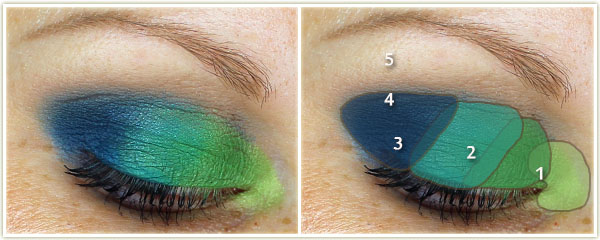
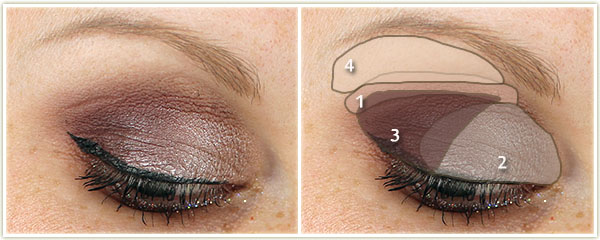
(Using the Kat Von DMi Vida Loca Remix palette) I first applied NYX‘s Jumbo Eyeshadow Pencil in Milk to my lid, then:
Misfit on the inner third of the lid.
Synth on the middle of the lid.
Dark Wave on the outer corner.
(numbers are screwed up, sorry) Vinyl on the inner corner (to the right of 1).
Ignore this one… I haven’t a clue if I put anything on my brow bone.
Echo is lining the outer half of my lower lash line. I coated my lashes with Make Up For Ever‘s Smoky Stretch mascara.
Face
Bronzer: Joe FreshSand
Blush: MACWarm Soul
Lips: MACSweet Tooth
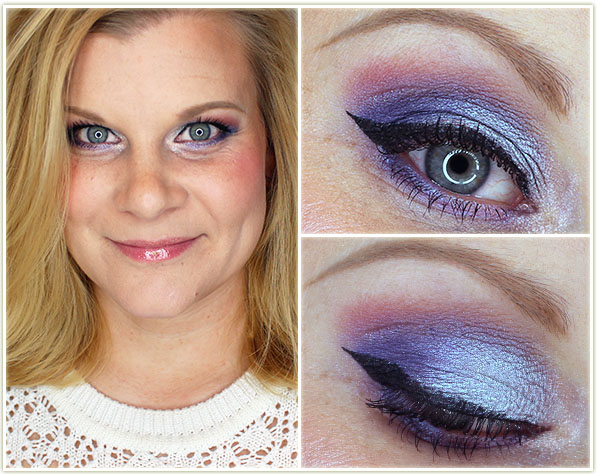
Playing around with my new Makeup Geek duochromes!
Eyes
(all Makeup Geek)
Cupcake through the crease.
Kaleidoscope on the lid.
Pop Culture on the outer third of the lid.
Duchess on the outer corner.
Prism on the inner corner
Vanilla Bean on my brow bone.
I used Blacklight on the lower lash line and created the wing with MAC‘s Blacktrack fluidline. I covered my lashes with Make Up For Ever Smoky Stretch mascara.
Face
Foundation: Revlon Colorstay in 200 Nude
Bronzer: Joe FreshSand
Blush: MACLife’s A Picnic
Lips: SephoraGood Fairy
Before anyone says anything – I know the lips look weird. I was playing around with different shades and I *thought* this went together. It wasn’t till I saw the photos that I was like “ohhh….”. haha
Eyes
(all Makeup Geek)
Prism all over the lid.
Typhoon through the crease.
Dirty Martini on the outer third of the lid.
Vanilla Bean on the brow bone.
I created the wing with Kat Von D‘s Tattoo Liner in Trooper and coated my lashes with Clarins’Aquatic Green mascara.
Face
Foundation: Revlon Colorstay in 200 Nude
Bronzer: Joe FreshSand
Blush: TarteBlissful
Lips: Colour PopDonut
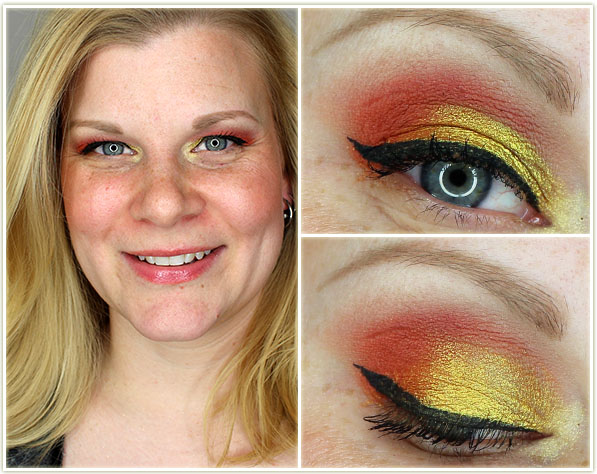
More Makeup Geek goodness!
Eyes
(all Makeup Geek)
Peach Smoothie through the top of the crease.
Poppy through the crease.
Fortune Teller on the lid.
Morocco on the outer third of the lid.
Voltage on the inner corner.
Vanilla Bean on the brow bone.
I created the wing with MAC’s Blacktrack fluidline and coated my lashes with Make Up For Ever‘s Smoky Stretch.
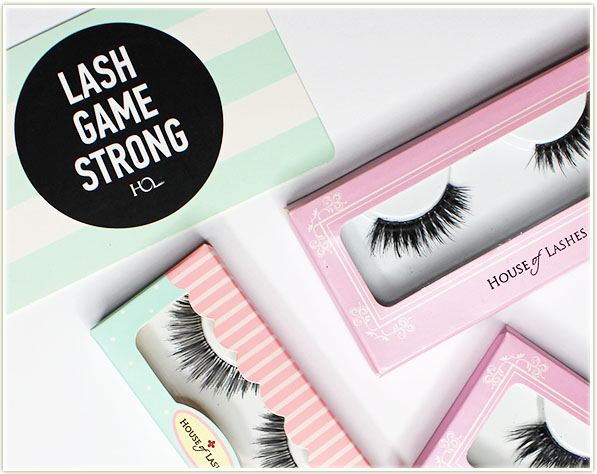
My love for House of Lashes actually started as a result of my frustration with other lash brands. I was doing my makeup several months ago and I was eager to try out some lashes I had sitting in a drawer. I went through FOUR DIFFERENT BRANDS and not a single one of them would stay put (not ping off the edges), not look fake (some had seriously reflective plastic) or even curve to fit my eyelid no matter what I did with them. I ended up throwing out everything I had except for my lonely pair of Bombshell lashes by House of Lashes that I knew worked for me.
House of Lashes false lashes
From that moment on, I vowed to only buy House of Lashes. I don’t know about you, but I don’t wear lashes too frequently – maybe a handful of times a month. So when I wear them, I want to be able to just put them on and not worry about them. I don’t want the application to be difficult or tedious – I just want it to WORK. And for that very reason, I am happy to say that I’ve found my lash brand of choice, and I will not be swaying from House of Lashes any time soon. (Also worth mentioning – their house brand lash glue is the best I’ve ever used – highly recommended.)
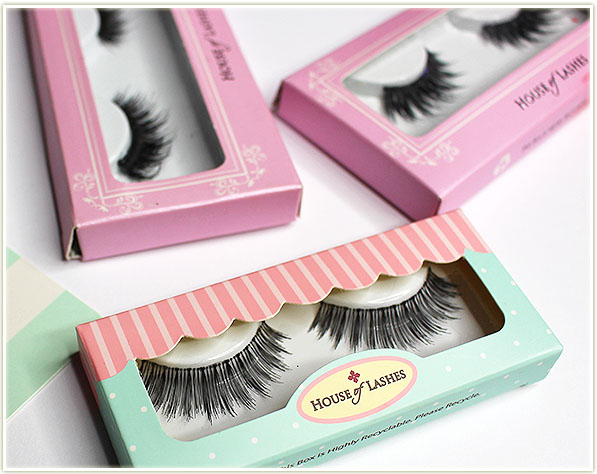
Here are pairs I’ve used so far (two sets have been used, so they’re snipped to fit my eyelid):
House of Lashes – Iconic
Quite a few YouTubers wear the Iconic lashes ($12 USD) so I wanted to try them out as well. They are fat, fluffy caterpillars and they are incredibly flattering. They’re quite a heavy and thick, so the band is on the thicker side to support the weight of the lashes. That being said, the band will still bend nicely to conform to my eyelid.
Houses of Lashes – Iconic
I wear these when I want a lot of impact. They are noticeably fake on me though – although they’re gorgeous, many people were able to easily identify that I was wearing fake lashes just because they’re so fluffy.
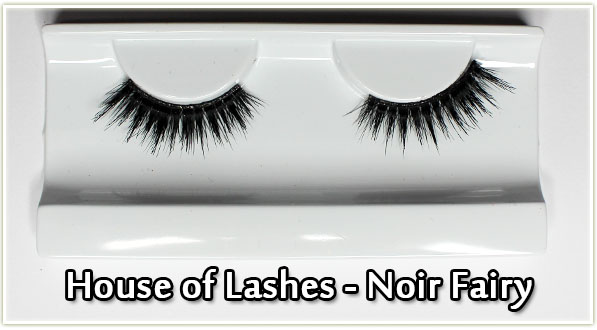
House of Lashes – Noir Fairy
When I first got the Noir Fairy lashes ($12 USD) I stayed away from them for several months because I thought they were just way too thick for my liking. I thought they’d take over my eye shape and swallow up any kind of lid space I had. I was wrong however:
Houses of Lashes – Noir Fairy
These are absolute stunners. I don’t feel they’re as “in your face” as the Iconics are, but they add a lovely swoop and curve to the ends of my lashes. I love how they add a lot of thickness to the base of my lashes and yet taper out to softer points.
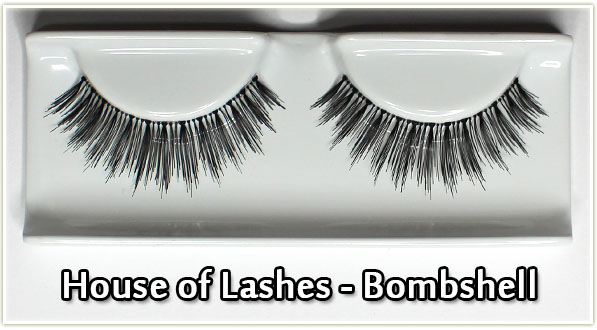
House of Lashes – Bombshell
And finally, my beloved Bombshell ($7 USD)lashes. These are the ones that made me fall in love with the brand. These are very light and soft. They add a lot of depth to my lashes, but are they aren’t overly heavy or obvious. The band is invisible and quite thin, which makes them very flexible and easy to curve to your eyelid. These are also almost indestructible. I have worn my first set of Bombshells over TWENTY TIMES and they are still in excellent condition (the shot above is of a backup pair I have). I haven’t even been able to get mink lashes to last that long and they’re more than double the price of these!
House of Lashes – Bombshell
And here’s me wearing the Bombshell lashes – you can see that they add depth and length to my own lashes, but they don’t overtake my eyelid space.
Final Thoughts
I’m really happy I took the leap and bought House of Lashes. Because they seem to be an online only type of brand, you never know what kind of quality you’re going to get… but the internet did not lie to me! These are excellent lashes and, for me, they are well worth the slight price increase from a drugstore brand. By comparison though, these are quite cheap compared to some higher end lash brands (including mink lashes) and yet the durability of them is unparalleled. They also have bundle deals where if you buy a few pairs of each, you save a couple bucks. Do yourself a favour and try these out!
Alright, it’s been a while since I’ve done a roundup of looks. Unfortunately, there wasn’t a lot of pizzazz in my looks throughout December as I felt like I was eternally rushing around, so this roundup is going to include my actual New Year’s look, some guest posts and a suuuuper old look from June I still hadn’t posted yet. Enjoy!
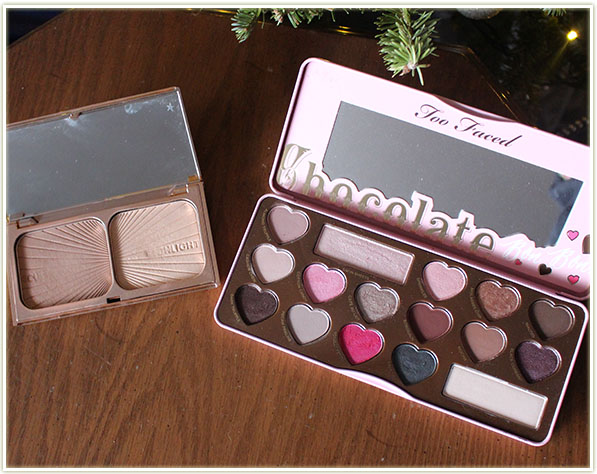
So here’s what I actually wore on New Year’s Eve. We didn’t have extravagant plans (we ended up going to an arcade), but I wanted to at least have a splash of glitter on! I ended up applying false lashes later on, but didn’t get around to reshooting the pictures, so what you’re looking at is sans falsies. This look does use the Too Faced Chocolate Bon Bons palette, but I promise there’s a full Challenge Week coming up focusing on that palette soon!
Eyes
(Too FacedChocolate Bon Bons palette)
Pecan Praline through the crease.
Cafe Au Lait on the lid.
Bordeaux on the outer half of the lid.
Divinity on the brow bone.
I applied Make Up For Ever Glitters in 13 to my lower lash line using some Too FacedGlitter Glue. I created the wing with Kat Von D‘s Tattoo Liner in Trooper and applied Make Up For EverSmoky Stretch mascara to my lashes.
Face
Bronzer: Charlotte TilburyFilmstar Bronze & Glow
Blush: CliniqueCola Pop
Highlighter: Charlotte Tilbury Filmstar Bronze & Glow
Lips: Sephora lipgloss in Queen Bee
This look was completely focused on featuring Too Faced’s Melted Villain lipstick. Although it’s a dark purple, I have to admit that it mostly comes out looking black on me. that’s okay though! I love the colour and it’s NOT patchy! (And yes, I did wear this exact look to work that day!)
Eyes (all Makeup Geek)
Peach Smoothie through the top of the crease.
Grandstand on the lid.
Hipster through my crease.
Burlesque on the outer half ofthe lid.
Vanilla Bean on the brow bone.
I applied Make Up For Ever‘s Smoky Stretch mascara to my lashes.
Face
Foundation: Bourjois Healthy Mix Serum 51 Vanilla
Concealer: Collection Lasting Perfection concealer in 2
Bronzer: The Body Shop Honey Bronzing Powder in 01 Light Matte
Blush: HourglassLuminous Flush
Highlighter: MACSoft & Gentle
Lips: Too FacedMelted Villain
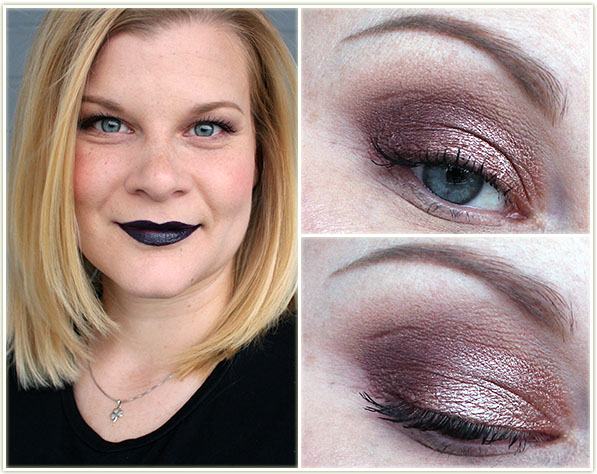
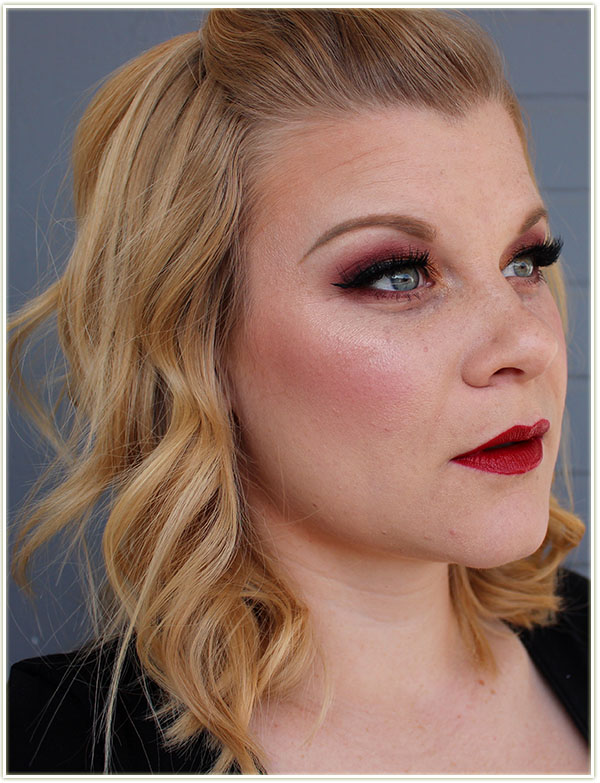
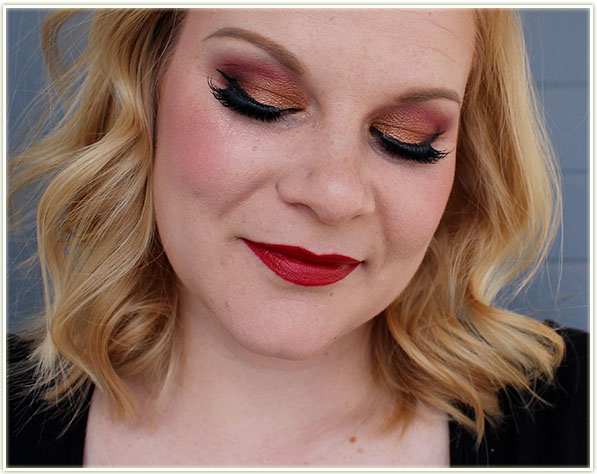
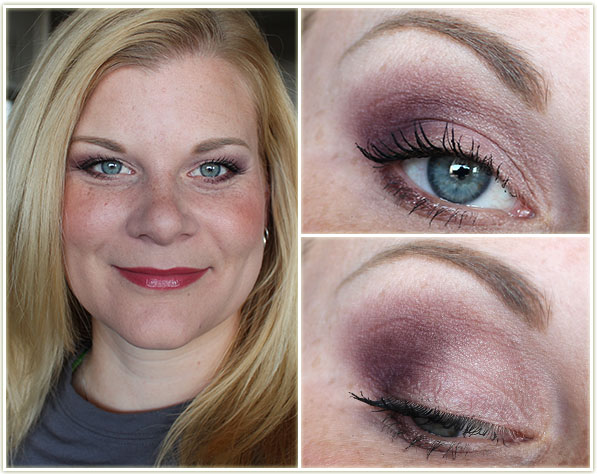
I looooved this look! I did this as a guest post for Up The Rollercoaster last month and just adored how the shots came out. I wasn’t sure how the cranberry tones in the shadows would work with a red lip and if I’m honest, I think it’s a LITTLE bit off, but the overall effect is WA-BAM!
^^ That right there’s a money shot. I’m so pleased with it! 😀
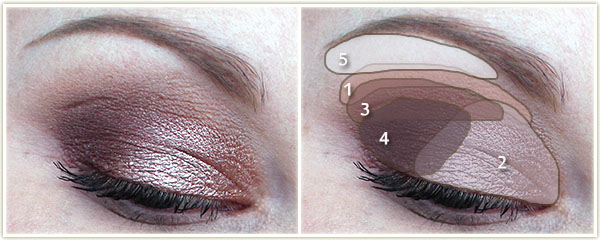
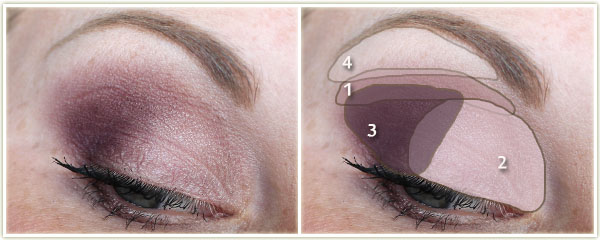
Eyes
Makeup GeekPeach Smoothie through the top of the crease.
Makeup GeekGlamorous all over the lid.
Makeup GeekBitten on the outer half of the lid and through the crease. I also used Bitten to liner my lower lash line.
Makeup GeekCorrupt to deepen up the outer corner.
Makeup Geek Vanilla Bean to highlight the brow bone.
I used some old MAC gold glitter flecks to add some sparkle to the inner corner. Any gold glitter will do!
I created the wing with Kat Von D‘s Tattoo Liner in Trooper and tightlined my upper water line with Marc Jacobs‘ Highliner Gel Crayon in Blacquer. I coated my lashes with essence‘s get BIG! lashes volume boost waterproof mascara and applied a pair of Noir Fairy false lashes by House of Lashes. My brows are filled in with Anastasia’s Dipbrow Pomade in Blonde.
Face
Foundation: Bourjois Healthy Mix Serum in 51 Light Vanilla
Bronzer: Make Up For Ever Pro Bronze Fusion in 30M
Blush: CliniqueCola Pop
Highlighter: Becca Champagne Pop
Lips: MACRussian Red with Brick lipliner to even out the lip lines
Another guest post! (This time for Writing Whimsy.) I really love doing guest posts because it gives me an opportunity to be totally creative. Usually I’ll take a Saturday afternoon and spend a couple hours working on one. This is very different from my usual makeup roundups which are done almost exclusively as my daily work makeup (which doesn’t always afford me the luxury of playing around with glitter since I’m usually in a rush!).
Eyes
After priming my eyelids, I applied NYX‘s Jumbo Eyeshadow Pencil in Black Bean all over the lid and blended out the edges. Then:
I deepened my almost non-existent crease (thanks hooded lids) with MAC‘s Cork.
I covered the entire lid with Urban Decay‘s Blackout, making sure to blend it into Cork.
I then patted on Lit Cosmetics’ glitter in Disco Diva using their glitter adhesive.
MAC‘s Blanc Type is on the brow bone to even everything out.
On the inner corner, I blended together Naked CosmeticsIV-05 and IV-03 and patted it on.
I created the inner corner point with Kat Von D‘s Tattoo Liner in Trooper, thinly lining my upper lash line with it as well. I tightlined my water lines with Marc Jacobs Highliner Gel Crayon in Blacquer and applied essence get big! lashes waterproof mascara to my lashes. I lined my lower lash line Lit CosmeticsPeacock glitter.
Face
Foundation: Revlon Colorstay in 200 Nude
Bronzer: Too FacedMilk Chocolate Soleil
Blush: HourglassDiffused Heat
Highlighter: Make Up For Ever ProSculpting Duo #1 (highlighting shade)
Lips: Sephora Good Fairy lipgloss
Alright this one’s just super old. I had toyed with doing a Challenge Week for Laura Mercier‘s Artist palette, but I never got around to finishing it (likely something new and exciting caught my eye!). I did this look sometime in June of 2015.
Eyes
(all Laura Mercier Artist palette)
Plum Smoke through the crease.
Guava on the lid.
Kir Royale on the outer half of the lid.
Sparkling Dew on the brow bone.
I coated my lashes with essence‘s Lash Princess mascara.
Face
Foundation: Boots No7 Instant Radiance in Cool Vanilla
Bronzer: NYCFire Island Tan
Blush: MACSea Me, Hear Me
Highlighter: Make Up For EverPro Sculpting Duo #1 – Highlighter
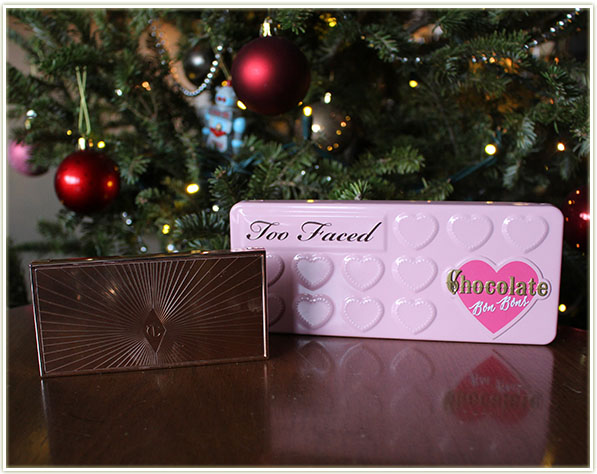
Yesterday, on Christmas Eve, we traveled from Toronto all the way over to Wisconsin for the holidays. We drove (well, I’m writing this in advance and yet I’m referring to myself in the future… so this is weird) the 11 hours or so it took to get to Wisconsin and brought the cats along with us. By the time you’re reading this on Christmas Day, we’ve hopefully made it safe and sound and I don’t want to strangle Kolme (she’s a howler when we travel). We’ll be staying with my husband’s family near Madison for Christmas and New Year’s, and I *pray* they get snow because Toronto sure doesn’t have any!
Charlotte Tilbury Filmstar Bronze & Glow and Too Faced Chocolate Bon Bons
Two of the palettes I’m bringing are the brand new Too FacedChocolate Bon Bons and my Charlotte TilburyFilmstar Bronze & Glow.
Charlotte Tilbury Filmstar Bronze & Glow and Too Faced Chocolate Bon Bons
The Too Faced Bon Bons is a bit of a risk because I’ve barely played with the palette yet so I don’t really know what kind of looks I can come up with. It’s quite neutral which at least makes it fairly easy to play with while on vacation. The Charlotte Tilbury duo is going to be my only highlighter and bronzer on this trip. I like bringing more expensive products to use around Christmas time because it makes me feel kind of fancy. 🙂
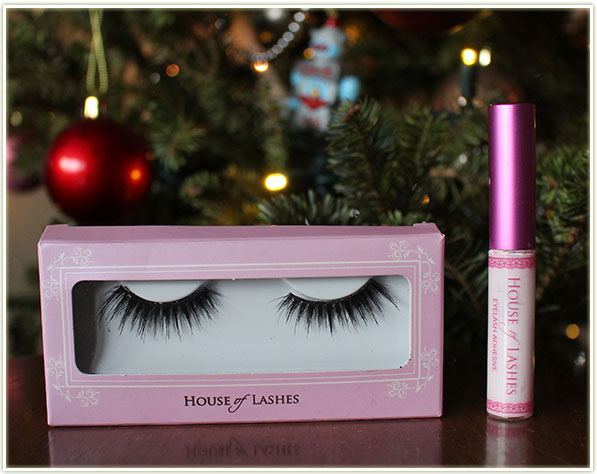
House of Lashes falsies in Noir Fairy and their lash glue
And of course, what’s the holidays without some dramatic lashes? I’m bringing along my Houses of Lashes lash glue and a pair of their lashes in Noir Fairy. They’re already cut down to size since I’ve worn them before so I needn’t worry about trimming them while on vacation.
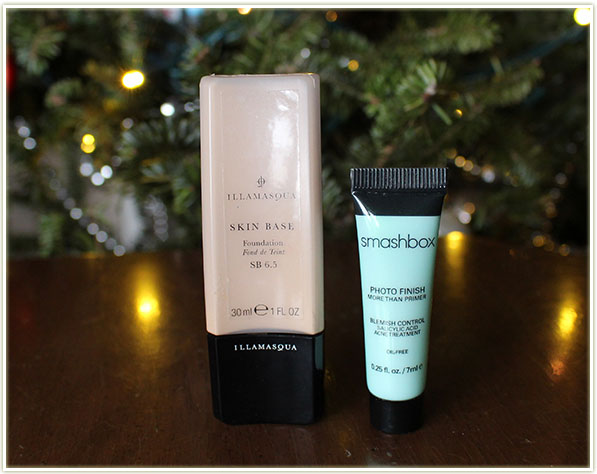
Illamasqua Skin Base in 6.5 and the Smashbox Photo Finish Primer
I say this every time I bring foundation on vacation, but I’ll say it again regardless… I haven’t a clue if I’ll even wear these. I’m not generally in love with foundation as I find I just want to tear it off my face after about 8 hours or so (it has nothing to do with the foundations thesmelves, just the general feeling of having paint on my face). I like the Smashbox primer because it’s tiny and works well, and the IllamasquaSkin Base is lovely to wear but doesn’t get enough use in my collection so I thought I’d bring it along as well.
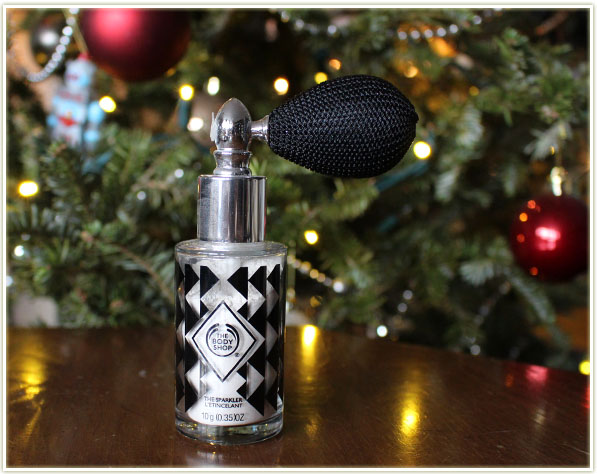
The Body Shop – Shimmer Spray in Silver
And what’s the holidays without a little bit of shimmer spray?? Smells like vanilla and spews out silver shimmer… I loooove it!
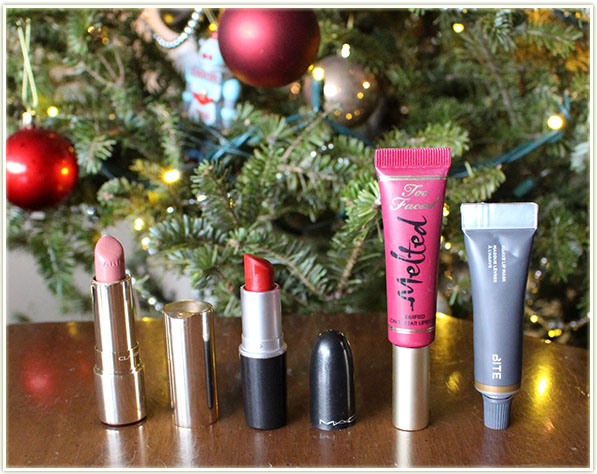
Clarins Rosy Nude, MAC Russian Red, Too Faced Melted Berry and Bite Beauty’s Maple Agave Lip Mask
I never ever feel like I bring enough lip products when I travel because I swear I’ll get there and wish I brought different items! My ClarinsRosy Nude is a perfect neutral shade for every day wear, MACRussian Red is a holiday staple for me, as is my Too FacedMelted Berry. The Bite BeautyAgave Lip Mask in Maple is along for the ride to keep my lips hydrated and because the scent is so stinking delicious!
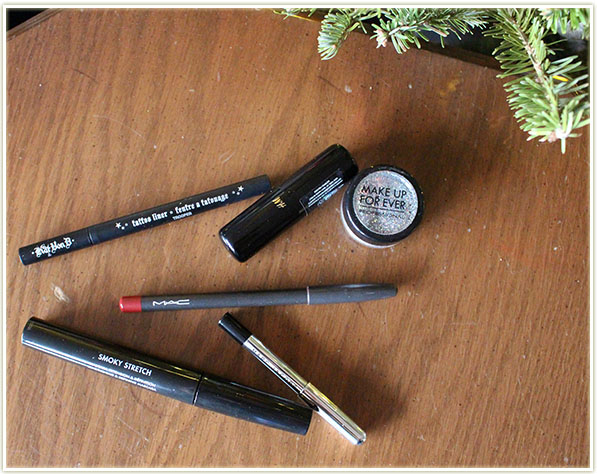
Kat Von D Tattoo Liner in Trooper, H&M Beauty lip primer, Make Up For Ever Glitter (25), MAC Brick lip liner, Marc Jacobs Highliner Gel crayon in Blacquer and Make Up For Ever Smoky Stretch
Random assortment of items here… My Kat Von DTattoo Liner in Trooper is a surefire liquid liner for all my travel purposes. I’ve got an H&M Beauty lip primer in there, a Make Up For Ever glitter (hello New Year’s!), MACBrick lipliner, Marc Jacobs Highliner Gel Crayon in Blacquer and my favourite Make Up for EverSmoky Stretch mascara.
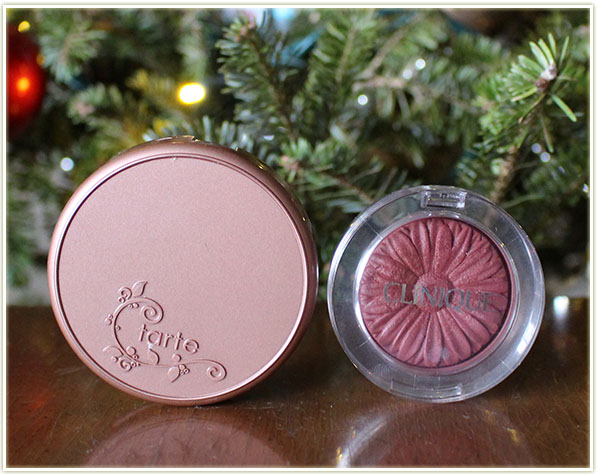
Another bit of a risk here… two medium to deep-toned blushes and no basic pink! TarteExposed has gotten a lot of love from me over the years (I’ve even hit pan on it!) and it a foolproof shade to match with the neutral eyeshadows I’ve packed. And of course, there’s my beloved CliniqueCola Pop. I can’t believe I haven’t worn the flower embossing down a bit more, I wear it constantly!
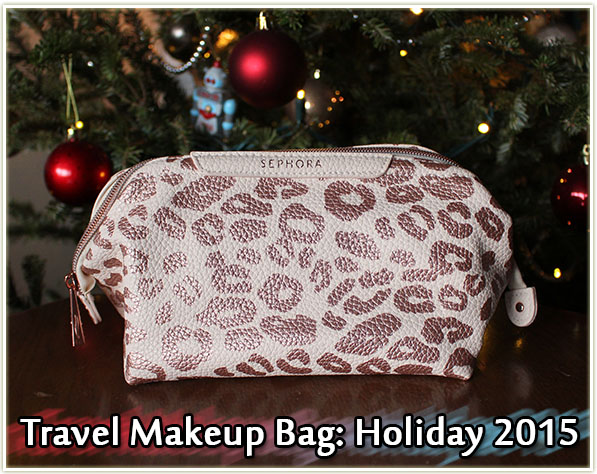
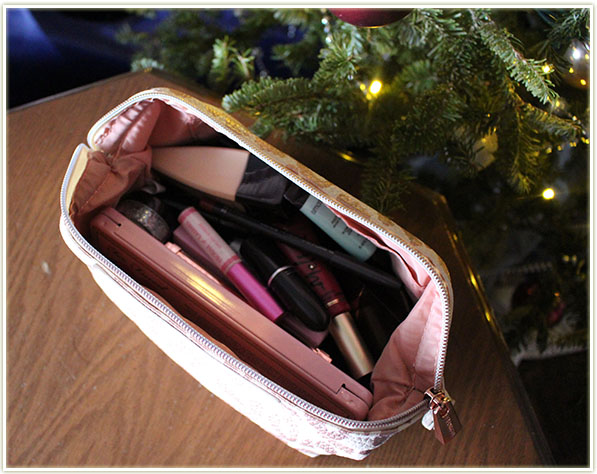
And all of that is crammed into a medium sized Sephora makeup bag. Merry Christmas everyone!
September… you were a painful month for my wallet. Not only did ALL of the makeup brands decide to launch ALL of their freaking holiday palettes (like actually – they totally all did), but it was also a month I traveled to New York City (so obviously I had to take advantage of brands that did free shipping within the USA) AND Toronto IMATS happened. I’m actually physically removing my credit card from my wallet as of today because that poor thing has been rung up so many times I’m worried it’s going to burst into flames shortly. So despite my money flying out the window, this haul is actually a lot of fun because there’s a LOT of fun things in here.
As always, the haul is in chronological order, so there’s a lot more interesting things halfway down the page!
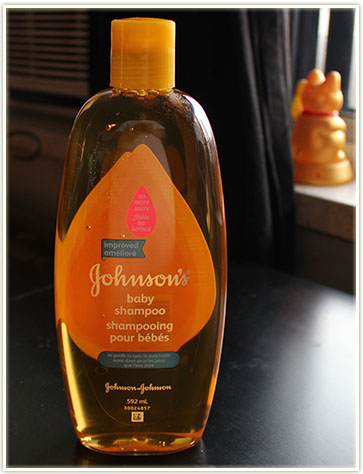
Johnson’s Baby Shampoo ($2.99 CAD)
The least interesting thing I bought this month is Johnson’sBaby Shampoo so that I can finally clean my brushes again. I ran out at some point last month and waited till it was on sale to pick up the large bottle.
Jealous Body Scrub – Grapeseed + Macadamia (free – swap)
The next whack of items are marked as swap, which some of them are, and some are just overflows from other beauty bloggers who want to pass on some of the love (de-stashing, as it were). I really like the Jealous Body scrubs, so I snagged this Grapeseed and Macadamia one. I’ve reviewed their latest scents right over here.
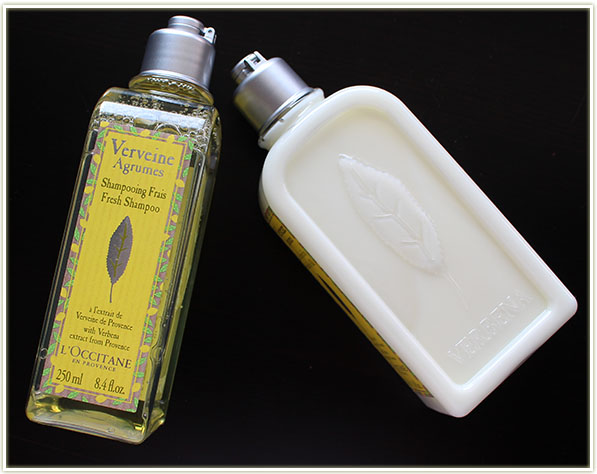
L’Occitane – Verveine body cream and shampoo (free – swap)
I grabbed these two L’Occitane products simply because of the name. Verveine (French) is actually Verbena in English, and I’ve somehow found myself sucked into The Vampire Diaries recently and they use verveine to ward off vampires. It made me giggle, plus I liked the scent… soooo… mine!
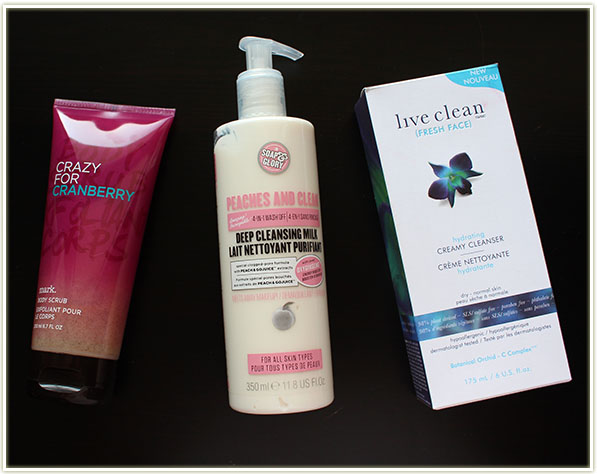
Mark – Crazy for cranberry scrub, Soap & Glory Peaches and Clean, Live Clean Creamy Cleanser (free – swap)
I’ll never ever turn down free body care, so I looted the markCrazy for Cranberry body scrub, the Soap & GloryPeaches and Clean Deep Cleansing Milk and the Live CleanHydrating Creamy Cleanser. Because I don’t have sensitive skin, I am afforded the luxury of trying whatever skincare products happen to cross my path. Lucky me when someone else doesn’t want them!
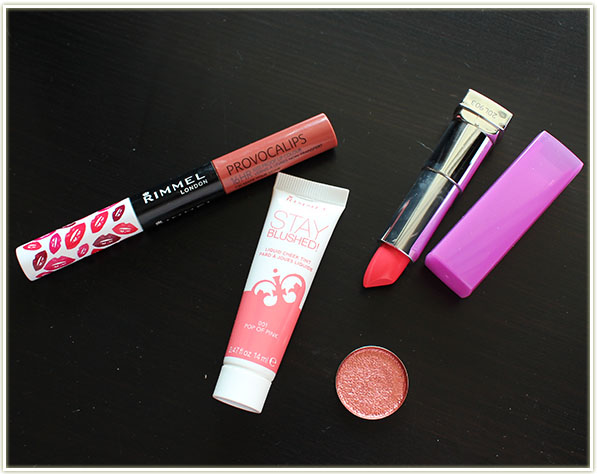
Rimmel Provocalips in Make a Move, Rimmel Stay Blush! in Pop of Pink, Maybelline Rebel Bloom in Coral Burst and a pressed pigment of Rustic Copper by NYX (free – swap)
Random assortment of makeup in here:
Rimmel Provocalips in Make a Move: THIS IS INCREDIBLE! It has unbelievable staying power and it’s not super drying like most liquid lipsticks. The colour is “fall appropriate” and I absolutely MUST have more in my collection. LOVE.
Rimmel Stay Blushed in Pop of Pink: These cream blushes intrigued me but aside from the texture and tube, there’s nothing particularly unique about the shade. Quite pretty on the cheeks though.
Maybelline Rebel Bloom lipstick in Coral Burst: OH MAN. I wanted this shade so badly from the Rebel Bloom collection but told myself I didn’t need it because I’m sure I have a near dupe in my collection somewhere. So I was mighty happy that someone had a duplicate of the shade and was more than happy to toss it my way! (And yes, it’s fairly similar to a lot of other lipsticks I own.)
Shawna pressed me a pigment (using my own tutorial!) from NYX. I think the shade is Rustic Copper… and it’s GORGEOUS.
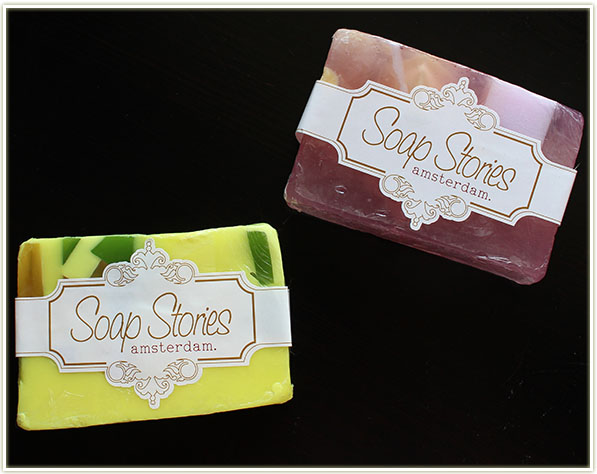
Soap Stories (free – swap)
Soap Stories soap… because who doesn’t want free soap?
Sonia Kashuk – Jewel of an Eye and Lise Watier Expression palette (free – swap)
The Sonia KashukJewel of an Eye palette. I wanted it for SO LONG, but Target Canada never had it as far as I ever saw and I kind of figured it just wasn’t meant to be. Until a blogger destashed it and I was like OH YESSSSSS!
The Lise WatierExpression palette is full of pastel shades that I probably won’t get around to playing with for a while, but they looked super pretty so I thought I’d give them a shot. Plus I don’t tend to have muted versions of my bright shadows, so this’ll help with blending.
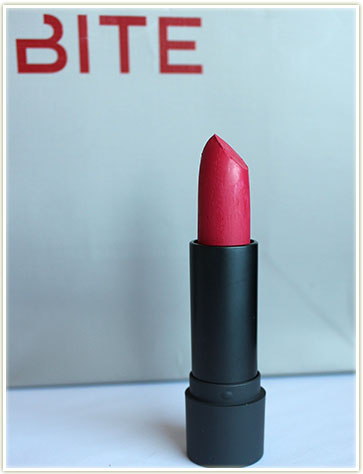
Bite Beauty Lip Lab Colour ($36 USD)
And now we come to the New York City portion of this haul. While visiting some friends out in New York, we went over to the Bite Beauty Lip Lab to get some custom lipsticks made. (You can read about that experience here if you like!) In the week I’ve been back I’ve already worn this shade three times. I’m amazed with just how much I love it!
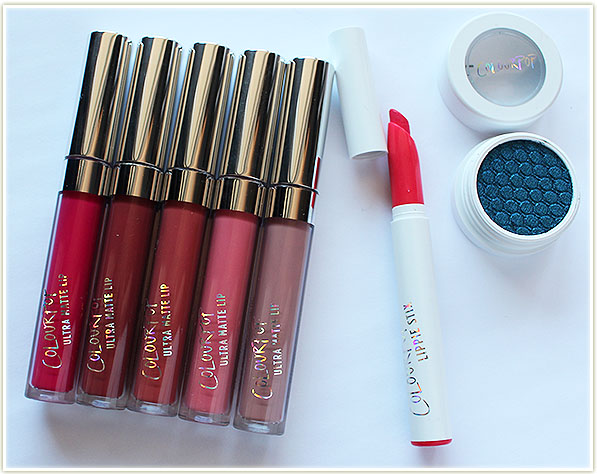
Colour Pop Ultra Mattes in Mars, Tulle, Bumble, Donut, Trap ($6 USD each), Lippie Stix in Toucan ($5 USD), Super Shock Shadow in Coconut ($5 USD)
Of course, what’s a visit to the US without placing a Colour Pop order? I ordered several of the Ultra Matte liquid lipsticks because EVERYONE is raving about them. The colour range I ended up with is a little strange for me, but I did manage to cut it down from 10 shades….
I also grabbed one of the Lippie Stix (Toucan) because the smell of these is intoxicating and I didn’t own any. And, lastly, the Super Shock Shadow in Coconut because I’ve seen it on two bloggers in person now and it’s STUNNING.
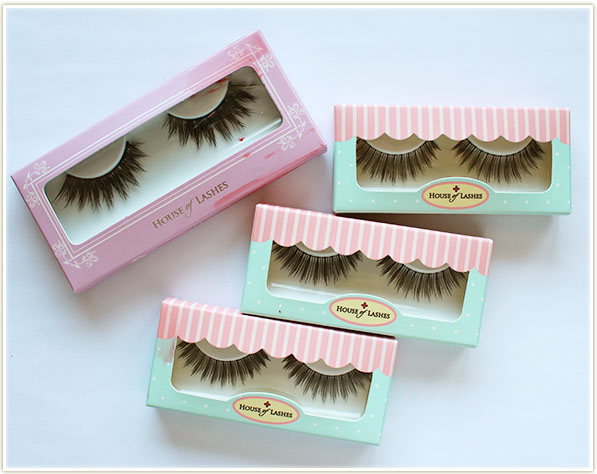
Houses of Lashes Iconic ($12USD), and three sets of Bombshell ($18 USD)
I recently went through a false lash meltdown: I was going out one night and I was trying different lash brands on… and nothing was working. The bands were too inflexible, they looked too plastic, etc. etc. Seriously, I tried on four different brands and I got so annoyed I ended up throwing everything out that wasn’t House of Lashes (which have never failed me). So I had an order placed and shipped to my friend in New York where I picked it up. The Bombshell ones are my favourite so far so I got a three pack. I’m also eager to try out the Iconic lashes because a lot of people seem to like those.
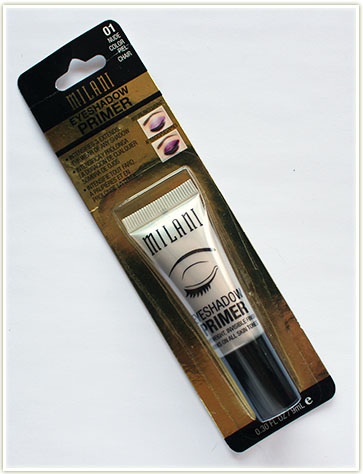
Milani eyeshadow primer ($7.79 USD)
I also picked up a Milani eyeshadow primer at a Duane Reed while on vacation because I just don’t have access to it in Canada and lately it’s the only primer that’s been working for me.
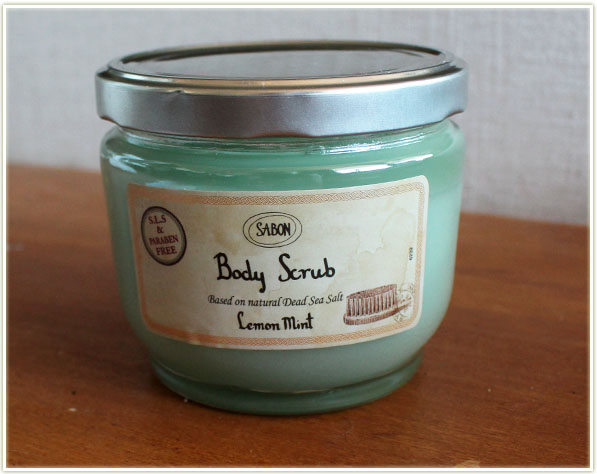
Sabon Body Scrub in Lemon Mint ($33 USD)
Sabon is a bodycare brand that I first fell in love with in New York about a decade or so ago. I was happy to stop in and pick up some stuff but I kept it to a single item because the USD to CAD version is absolute BALLS right now. This is my absolute favourite product by Sabon: their Body Scrub in Lemon Mint. Between the scent and the feel of the product, I’m in absolute heaven!
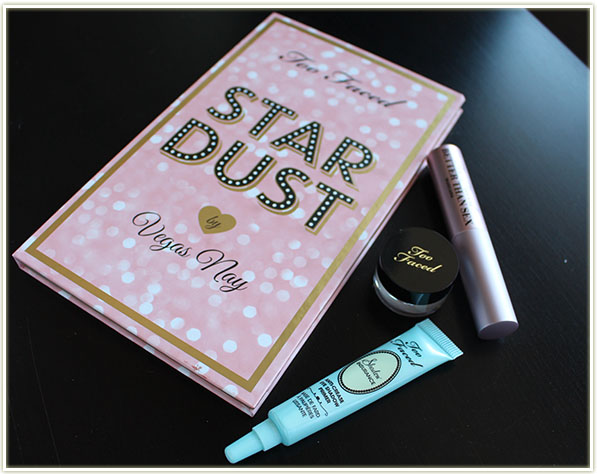
Too Faced Star Dust palette by Vegas Nay ($45 USD)
And the last item I had shipped to a friend was the Too FacedStar Dust palette by Vegas Nay. I wasn’t originally sure I wanted this palette, but the price tag along with the extras (primer, glamour dust and mascara) were enough to win me over based on value.
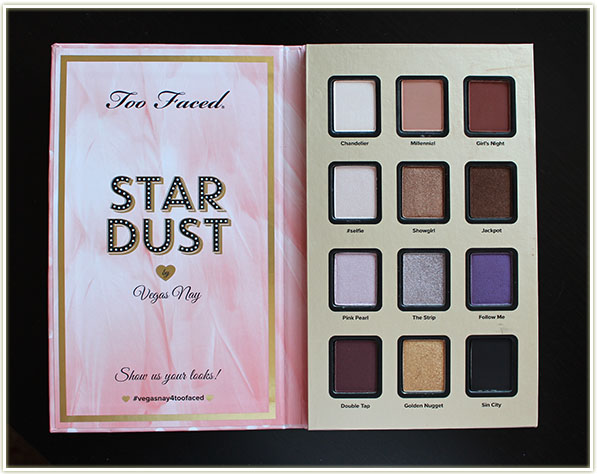
Too Faced Star Dust palette by Vegas Nay ($45 USD)
And I am so very glad I picked it up. The Too Faced holiday palettes aren’t really doing it for me this year so I’m considering this my “Too Faced holiday palette”. It’s phenomenal. The pigmentation is incredible and the shades are wonderful. While it could be considered a neutral palette, there’s still a lot of fun ways to play with the colours. Oddly, the two warm brown shades (Millenial and Girl’s Night) are my absolute favourites – those colours work MAGIC in the crease!
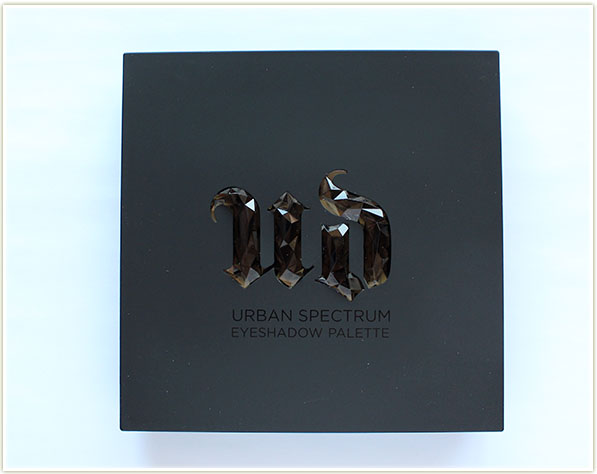
Urban Decay – Urban Spectrum ($65 CAD)
And now we come to the holiday palette debacle. WHY MUST BRANDS RELEASE THEIR HOLIDAY PALETTES IN SEPTEMBER??!?!? This is Urban Decay‘s Urban Spectrum palette. It’s available on the brand’s web site or on Sephora’s site for VIB and VIB Rouge members.
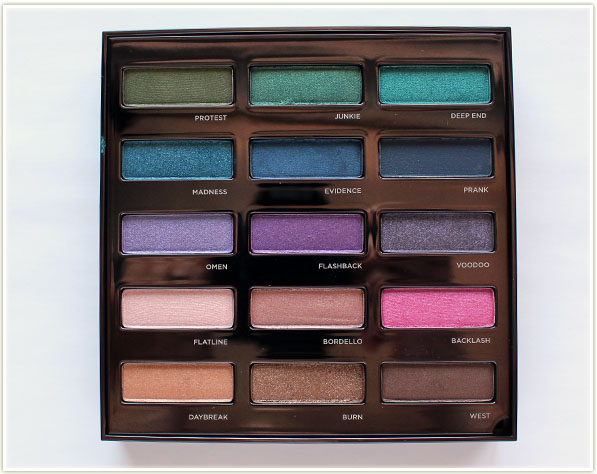
Urban Decay – Urban Spectrum ($65 CAD)
Shade-wise, I prefer this a lot more than the Vice 4 palette (that’s coming below), but it’s definitely not a standalone palette. Every single shade in this palette has shimmer of some sort. They’re gorgeous, there’s no doubt about that, but you’re going to need some mattes if you don’t want to look all shiny all the time. I didn’t pick up the Anniversary palette a few years back, and this has the shades I wanted from that so I’m really glad to own this one now.
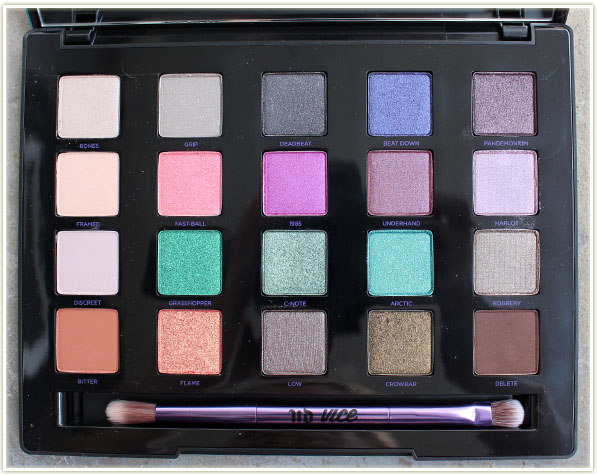
Urban Decay Vice 4 ($70 CAD)
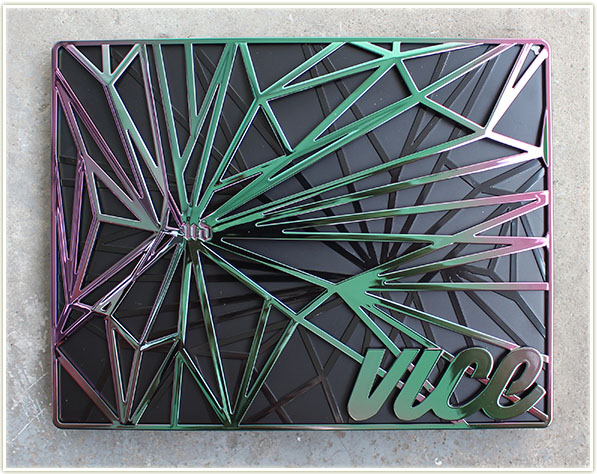
I can admit it, it’s the packaging that sucked me into this one. Urban Decay‘s Vice series always has a wonderfully large mirror, a well layed out palette and gorgeous packaging. I love how all Vice 4s will have a slightly different colour pattern on the top too – feels very unique.
Urban Decay Vice 4 ($70 CAD)
But the shades themselves… are weird. Last year, the Vice 3 felt very cohesive. The shades were layed out nicely, there were colour gradients and complimentary colours… but this year I can’t figure out what the hell I’m looking at. There’s no brow bone shade (not for me anyway – that top left shade is more of a grey-pink pearl colour) so that’s awkward. I love the two oranges in the bottom left hand corner but that’s kind of it… There’s three oddly similar greens/aquas/seafoams in the middle row that kind of make me feel like they could’ve aimed for a bit more variety. I don’t know man… it’s a WEIRD palette. And I really only got it for the outer packaging. What a doofus.
https://instagram.com/p/7qqhzsRayI/
Argh, I forgot to take a picture of the Kat Von DMi Vida Loca Remix palette ($71 CAD). This is the palette I was most excited about for Holiday 2015. The shades in this palette are to die for and I cannot wait to swatch them all and create a bunch of makeup looks. It’s a bit on backlog though as I work through the other palettes first! The only thing I’m not keen on is the packaging. It pulls out like a record, which sounded cool and all… until you tried to use it and then it was just annoying. Ah well, you can’t beat those shades!
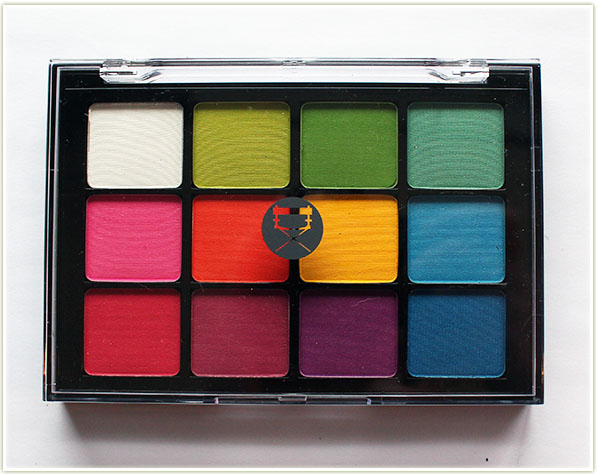
Viseart Editorial Brights ($80 CAD)
The remainder of this haul are items I got from IMATS! When I found out that Viseart was going to be available via Frends, it became my number one place to stop. When I got there, they didn’t even have the palettes available to swatch yet (or even out of their crates), but I knew exactly which one I wanted – the Editorial Brights. It’s a spendy item, but it’s still cheaper than buying it at Sephora! Looking at this one just makes me so, so happy.
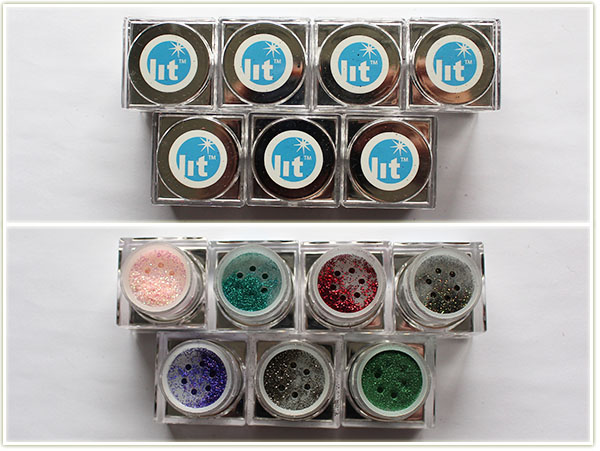
Lit Cosmetics glitter in ABBA, Peacock, Heartbreaker, Soul Sister, Disco Diva, Goth and Mary Jane ($50 USD)
A bit of a random assortment of glitters from Lit Cosmetics. I originally bought three, but ended up going back later in the day for more. I’d like all their colours, frankly, but I’ll have to deal with building up my collection relatively slowly. In hind sight, I wish I’d gone for more of the neons, but hey, I gotta start building up this collection somewhere.
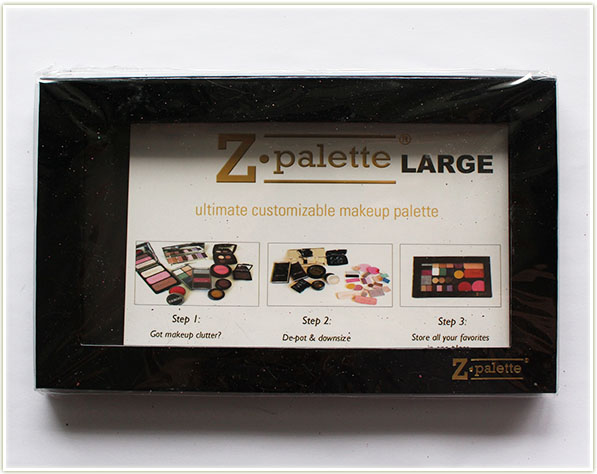
Zpalette – Large ($20 CAD)
Grabbed a Z-palette because I’m running out of space for my Makeup Geek shadows!
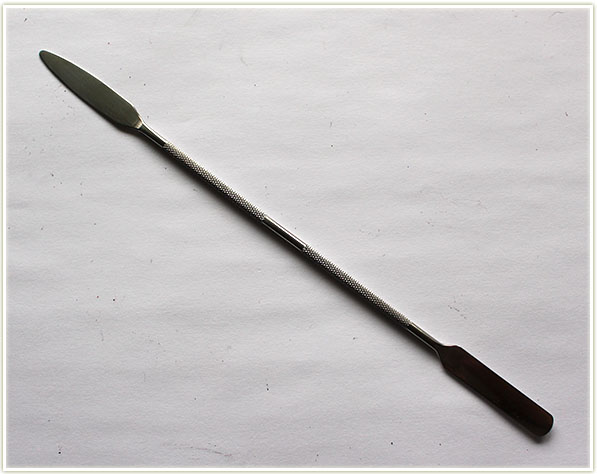
Metal spatula ($4 CAD)
And finally, a tiny metal spatula to help me get products out of containers when I’m getting down to the bottom.
/covers face with hands
That was… a lot. A LOT. I’m happy with what I bought and got, but damn son, I need to chill out cuz this kind of spending is not sustainable! How about you? Are you happy with all of the holiday releases? Or do you feel like they’re being released far too soon like I do? I feel like we kind of got dumped on this year and no one was prepared for it!