Tag Archives: Clinique

Clinique Blend It Yourself (BIY) Pigment Drops Foundation (Review & Swatches)

Clinique Blend It Yourself (BIY) Pigment Drops

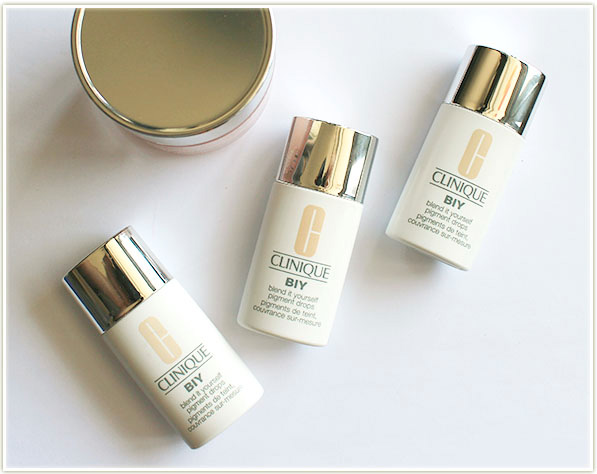
Earlier this year, Clinique launched their Blend It Yourself (BIY) Pigment Drops – a pure pigment product that is intended to be mixed with your moisturizer to create varying levels of coverage.

Clinique Blend It Yourself (BIY) Pigment Drops

Clinique indicates that “one drop of creates sheer cover[age]. Two or three, a flawless finish”. The more drops you use, the thicker your coverage will be! The BIY pigment will take on the finish of the moisturizer you use it with, so you can expect a more radiant coverage with a radiant moisturizer and/or one with a sunscreen base, or a more matte look with a mattifying moisturizer.

Clinique Blend It Yourself (BIY) Pigment Drops

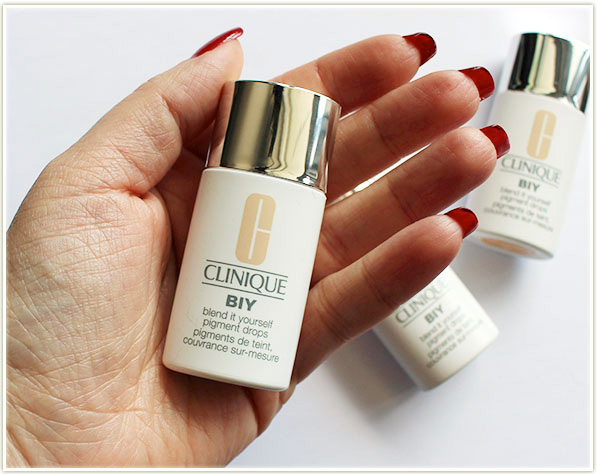
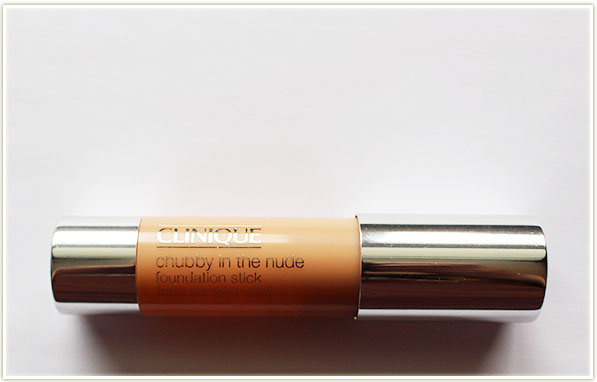
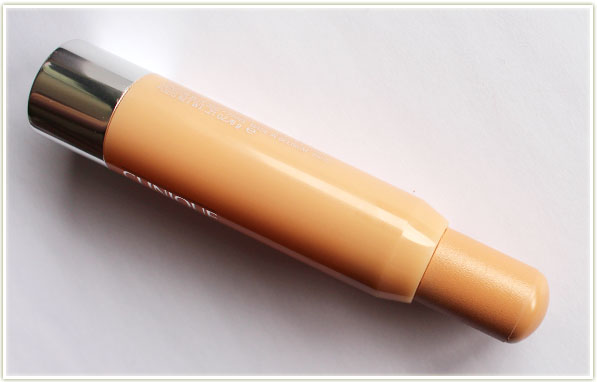
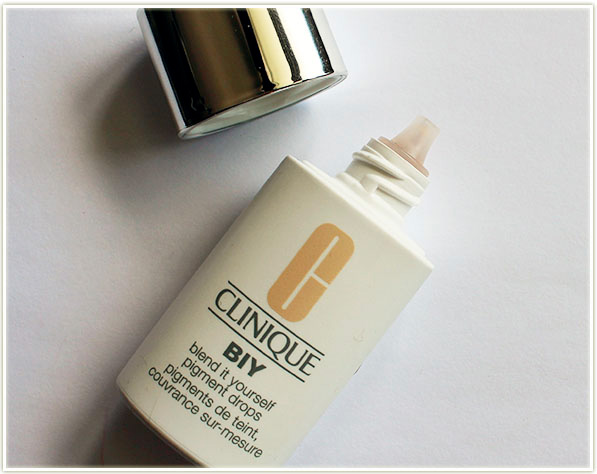
One thing most people don’t realize is just how small the bottle is! Because this product is strictly a pigment, it’s lacking in all of the other “stuff” that would usually fill out a foundation bottle to the normal one ounce/30 ml size. These bottles do contain 0.34 ounces of product, which is the third of a size of a regular size of foundation. So it’s not THAT tiny – it just LOOKS really tiny.

Clinique Blend It Yourself (BIY) Pigment Drops - swatches of BIY 105, BIY 110 and BIY 115
Clinique Blend It Yourself (BIY) Pigment Drops – swatches of BIY 105, BIY 110 and BIY 115

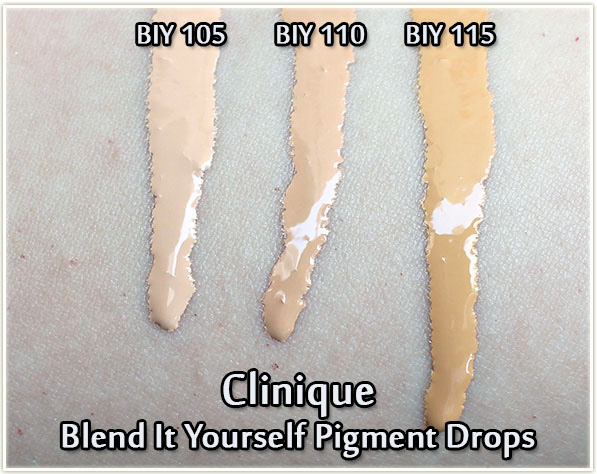
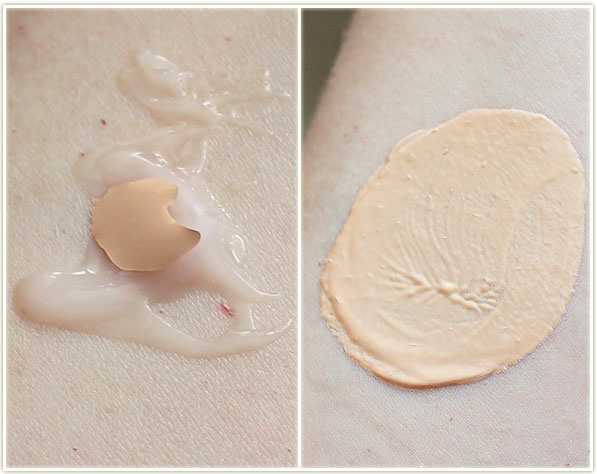
I have three of the shades starting from the lightest BIY 105 through BIY 115. The shot above is the product just after I’d tipped it out onto my arm (after shaking it vigorously to mix the pigment). You can see just how liquid the pigments are because they were dripping down the underside of my arm very quickly!

Clinique Blend It Yourself (BIY) Pigment Drops - swatches of BIY 105, BIY 110 and BIY 115
Clinique Blend It Yourself (BIY) Pigment Drops – swatches of BIY 105, BIY 110 and BIY 115

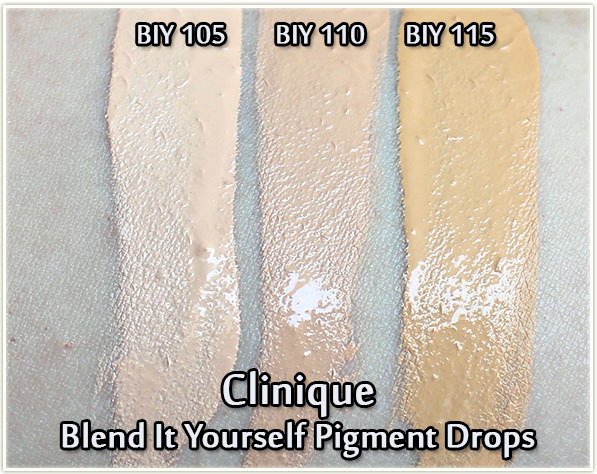
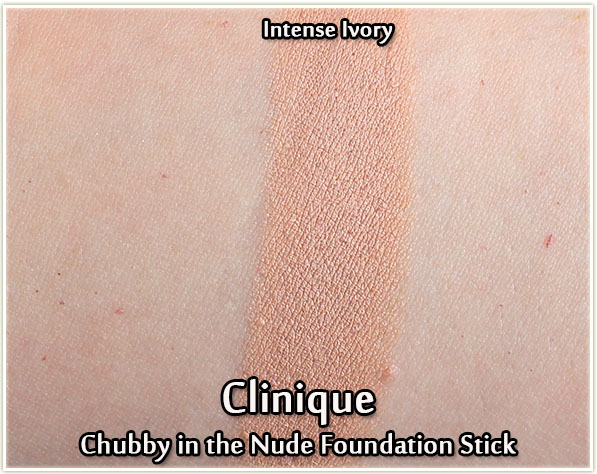
Smoothed out, you can see the colouring a lot better in the pigment.

Clinique Blend It Yourself (BIY) Pigment Drops combined with moisturizer

I ended up mixing the pigment with Clinique‘s Moisture Surge moisturizer. More often than not, you need far less pigment from the bottle than you think you do. Every time I used it I was taken aback by just how much the pigment spreads throughout the moisturizer.

Clean face
Clean face

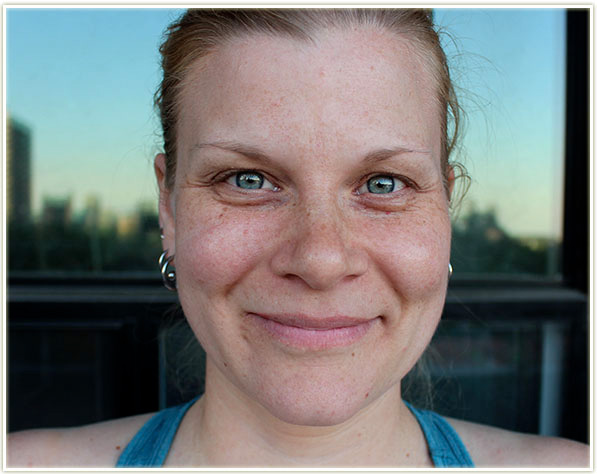
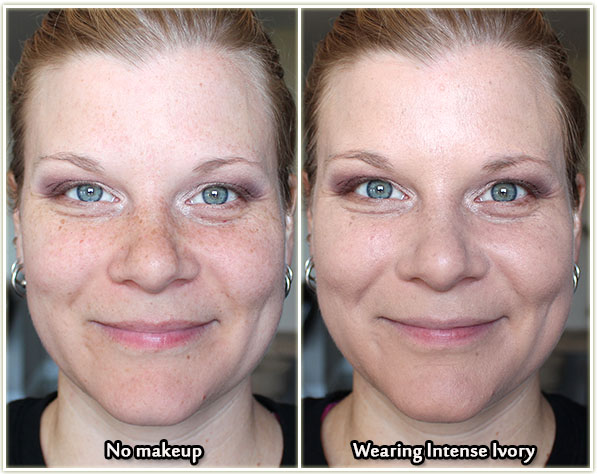
Shot above is with no makeup on for comparison.

Side by side drop comparison

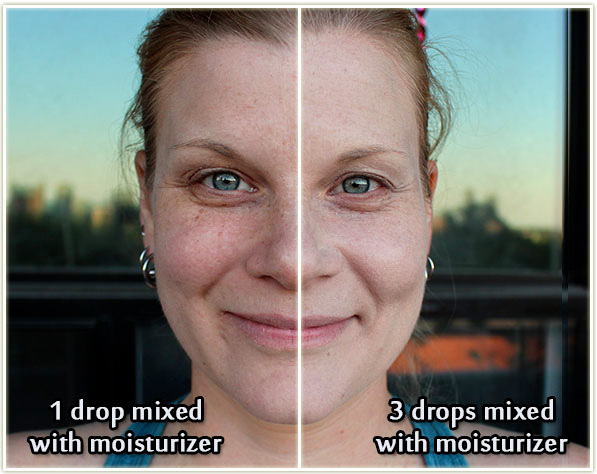
And this shot is a split view using BIY 105 (which is slightly pale for me, I’ve since started using BIY 110) and the Moisture Surge Moisturizer.

  • On the left side (as you’re viewing this) is a single drop mixed with moisturizer. You can see how it keeps the coverage of the BIY product very, very sheer.
  • On the right is three drops mixed in with moisturizer. The coverage becomes a lot denser, and I’d argue to say almost too much since I’m looking a little ghostly.

Final Thoughts

I really like the blend it yourself aspect of this product as I think it’s a fun way to customize how much coverage you have. For me, however, I feel this is best used when you create a lightly tinted moisturizer instead of trying to build up the coverage to get a full coverage foundation. I found one drop mixed with the amount of moisturizer I would need to cover my whole face was the way I preferred to wear it. When I tried for full coverage I felt like it looked like the product sat on my face instead of sinking into it. (And really, if you’re going to be buying a product like this, I truly doubt you’re going for full coverage – you’re more likely to go buy a full coverage foundation!)

Best way to apply it? Use your hands! I plop a dollop of whatever moisturizer I’m using that day on the back of my hand, add a drop of BIY and then mix it together with my fingertips. I’d then smear it on my face as I would any regular morning moisturizer. When done this way, my makeup blends nicely on top and you get a really nice natural finish. It’s not a ton of coverage, granted, but that’s how I prefer to wear product on my face during the summer!

The Clinique Blend It Yourself Pigment Drops can be purchased on ulta.com for $33 USD (us Promo Code: MAGICLINKS350 for $3.50 off $15+ spend!) or on beautyboutique.ca for $44 CAD.

The products featured in this post were sent to me for consideration. Post may contain affiliate links.

Clinique x Crayola Chubby Sticks (Review & Swatches)

Clinique x Crayola Chubby Sticks

When I saw the spoiler images of the Clinique and Crayola Chubby Sticks appearing online a few weeks (maybe a month?) ago, I was more than a little in enamoured. Clinique‘s Chubby Sticks have been around for ages, but there is really no better brand to pair with than Crayola for these products! I mean, they already look like crayons!

Clinique x Crayola Chubby Sticks

Not unexpectedly, but just so you’re aware, this Clinique and Crayola team up is a limited edition collection. The collection features eight shades that  veer very much towards the pink and red side of things. While there are some lesser tinted shades, you won’t find a true nude in the bunch (when I say that, I mean something more brown/caramel in tone).

Clinique x Crayola Chubby Sticks

Although I’ve been aware of Clinique‘s Chubby Stick pencils for years, I’ve never actually tried them before now. These particular Chubby Sticks are branded as a “Moisturizing Lip Colour Balm” and they really do feel that way. They’re loaded with mango and shea butters and the end result is that you get a sheer wash of colour on the lips in a texture that feels akin to any other lip balm on the market. If you’re comfortable wearing lip balm, then these will feel no different to you!

Clinique x Crayola Chubby Stick swatches - Mauvelous, Wild Strawberry and Pink Sherbert
Clinique x Crayola Chubby Stick swatches – Mauvelous, Wild Strawberry and Pink Sherbert

As you can see from the three shades swatched above (Mauvelous, Wild Strawberry and Pink Sherbet), the tones are very much in the pink/red family. The colours are fairly sheer (the swatches were layered quite a bit) but the texture is quite balmy.

Clinique x Crayola Chubby Stick Moisturizing Lip Colour Balm Swatches

Wearing Clinique Crayola Chubby Stick in Mauvelous

I don’t see quite as much mauve in this shade as I would expect for a shade named Mauvelous in the title, but it is absolutely stunning regardless!

Wearing Clinique Crayola Chubby Stick in Wild Strawberry

My favourite of the three shades – Wild Strawberry! Gives that perfect “cherry popsicle” lip look!

Wearing Clinique Crayola Chubby Stick in Pink Sherbert

I’m not a soft pink person, but I know a lot of people are going to love Pink Sherbet because it’s an easy to wear shade that will match a ton of eye looks!

Final Thoughts

Ummm I don’t know where I’ve been, but I’m happy to report that I am sitting comfy on the Clinique Chubby Stick bandwagon now. I love that these feel like lip balm – that’s an ENORMOUS selling point for me because it makes them super easy to apply. The bullets are also quite sturdy which means you’re not going to be slopping the lip colour all over the place while you’re applying it either.

The Clinique x Crayola colours are pretty basic in the grand scheme of things, but that’s not a downer. (And I really do like the added touch of the crayon look!) It means that they’ve got some great shades that are lot of people are going to enjoy wearing on the daily. Longevity is also fairly impressive, especially given the texture of these products. I get about two hours of wear before I feel like I need to refresh my lip colour. It does fade nicely, so you needn’t worry about that either! And, to top it all off, these are scent and taste free!

The Clinique x Crayola Chubby Sticks are limited edition and you can snap them up at sephora.ca for $21 CAD each or on sephora.com for $17 USD each. If you’re interested in trying out all of the shades, they even have a mini set of all eight colours!

The products featured in this post were sent to me for review. Post may contain affiliate links.

Clinique Lash Power Flutter-To-Full Mascara + #TheWink

Clinique Lash Power Flutter-To-Full Mascara + #TheWink

This post is mostly a review, but there’s a wee introduction to Clinique‘s new editorial platform: The Wink at the end!

Clinique Lash Power Flutter-To-Full Mascara

The Lash Power Flutter-To Full Mascara is Clinique‘s new(ish) mascara. It promises to customize the amount of volume you deposit n your lashes so that you can go from fluttery to volumized.

Clinique Lash Power Flutter-To-Full Mascara - has a rotating cap to adjust the amount of product you get on the wand.
Clinique Lash Power Flutter-To-Full Mascara – has a rotating cap to adjust the amount of product you get on the wand.

You’ll notice a dial in the center of the tube that has increasingly bigger lashes drawn on to the cap. You can twist the cap to match the size of the lashes you so desire. Although I can’t find any instructions on what actually causes the difference in volume, my gut inclination is that the twisting mechanism tightens/untightens the barrel that the lash wand comes out through. The tighten the barrel, the less product you get on the wand, and vice versa.

Clinique Lash Power Flutter-To-Full Mascara - natural fiber mascara wand
Clinique Lash Power Flutter-To-Full Mascara – natural fiber mascara wand

The wand itself is made up of “natural” fibers – no rubberized brush here!

So here’s how it plays out:

Clinique Lash Power Flutter-To-Full Mascara - comparison
Clinique Lash Power Flutter-To-Full Mascara – comparison – each “level” of volume was done with one coat of mascara.

Honestly, I really don’t notice that much of a difference when I twist the barrel any which way. I think the most volumized look is potentially SLIGHTLY more volumized than the first barrel turn, but not enough that it warrants creating that kind of mechanism for the product itself. (You could achieve that just by adding another coat of mascara really.) In the end, I think I preferred the look of the least voluminous look because it provided more definition to my lashes.

Other pertinent details: This is more a dry formula than a wet one (I prefer wet mascaras overall) and it left my lashes feeling a bit crispy (I tend to prefer a waxier feeling after it’s dried). Although this mascara wasn’t necessarily my bag, maybe the details above will help you decide if it works for you. Mascara is such a personal thing that it’s really hard to account for what other people are looking for.

OH! One *super* important thing to note: This mascara didn’t flake on me at all. I’m exceptionally prone to flaking mascara and this sucker did not budge!

The Clinique Lash Power Flutter-To-Fall mascara can be purchased on sephora.ca for $28 CAD or on sephora.com for $21 USD.

Clinique Lash Power Flutter-To-Full Mascara + #TheWink

On October 6, 2016, Clinique also launched The Wink. It’s an editorial platform by the brand intended to help readers discover the people, places, ideas and stories that Clinique finds simply amazing – from across Canada and around the world. I know I was intrigued as soon as I saw an article on Crushed Macaron Ice Cream. That Red Velvet one is making me swoon!

The product/web site featured in this post was sent to me for consideration.

What’s On My Face – Volume 47

I’ve only just realized that this is going to be a very heavy “makeup posting” week! I’ve got a What’s On My Face post for you today, a makeup tutorial up on YouTube tomorrow and then a “Totally Cute Challenge Week” on Friday. So if you’re looking for inspiration, hopefully you’ll find something you like on here this week. 🙂


201607_womfvol47_look1.1

Even though I had picked it up aaaages ago at IMATS New York, I hadn’t yet had the opportunity to play with my Mehron Fire palette. The look came out pretty nicely, but they were HUGELY benefited by a white, sticky base.

201607_womfvol47_look1.2

Eyes
I first applied NYX’s Jumbo Eyeshadow Pencil in Milk as a base, then:

  1. MAC Cork
  2. Mehron Inferno
  3. Mehron Hot Pink
  4. Mehron Purple Heat
  5. MAC Blanc Type

I created the wing with MAC‘s Blacktrack fluidline and applied Too Faced Better Than Sex waterproof mascara to my lashes.

Face

  • Foundation: Revlon Colorstay liquid  in 200 Nude
  • Blush: Hourglass Diffused Heat
  • Highlighter: MAC Soft & Gentle
  • Lips: Tarte Lip Quench in Rose

201607_womfvol47_look2.1

More playing around with my IMATS goodies!

201607_womfvol47_look2.2

Eyes
(all from the Violet Voss Holy Grail palette)

  1. Transition
  2. Toffee
  3. How U Doin
  4. Wine N Dine
  5. Teddy Bear
  6. Crystal
  7. Thanks A Latte

I created the wing with Kat Von D‘s Tattoo Liner in Trooper and tightlined both water lines with Marc Jacobs’ Highliner Gel Crayon in Blacquer. I coacted my lashes with Maybelline Lash Sensational Luscious Full Fan Effect mascara and applied a pair of House of Lashes Au Naturale falsies.

Face

  • Foundation: BECCA Aqua Luminous Perfecting Foundation in Fair
  • Blush: Hourglass Ambient Lighting Blush in Luminous Flush
  • Bronzer: Joe Fresh Sand Bronzer
  • Highlighter: MAC Whisper of Gilt
  • Lips: Wet n Wild Cherry Picking

201606_forzoe_purple_face3

I did this one as a guest post for Zoe over on Writing Whimsy in June! She asked for “purple” and I just went hogwild with it.

201606_forzoe_purple_openeye 201606_forzoe_purple_eyemap

Eyes

  1. Makeup Geek Peach Smoothie through the top of the crease.
  2. Makeup Geek Blacklight all over the lid.
  3. Makeup Geek Masquerade on the outer half of the lid.
  4. Makeup Geek Drama Queen on the outer corner to deepen it up.
  5. Makeup Geek Vanilla Bean and White lies mixed together on the brow bone.
  6. Makeup Geek Phantom on the inner corner.

I lined the outer half of my lash line with Makeup Geek Masquerade and then applied Lit CosmeticsDisco Diva glitter to the inner half and painted it into a thin point (I used Lit’s glitter adhesive to get it to stick). I created the wing with Kat Von D’s Tattoo Liner in Trooper and tightlined my waterlines with Marc Jacobs’ Highliner Gel Crayon in Blacquer. I applied Too Faced Better Than Sex Waterproof mascara to my lashes and popped on a pair of Bombshell lashes by Houses of Lashes.

Face

  • Foundation: Make Up For Ever Ultra HD liquid in Y225
  • Bronzer: Physicians Formula Butter Bronzer in Bronze
  • Blush: Urban Decay Bittersweet
  • Highlighter: BECCA Pearl
  • Lips: Too Faced Unicorn Tears

201607_womfvol47_look3.1

I did this look for a YouTube tutorial back in March. At the time I thought I was going to be able to cross post every makeup tutorial I did on there to on here… and it looks like that won’t be possible, but here’s that looks regardless!

201607_womfvol47_look3.2

Eyes

  1. BECCA Ombre Rouge shade #3
  2. BECCA Ombre Rouge shade #4
  3. BECCA Ombre Rouge shade #2
  4. BECCA Ombre Rouge shade #1
  5. BECCA Ombre Rouge shade #5

I created the wing with Make Up For Ever‘s Ink Liner and applied Too Faced Better Than Sex mascara to my lashes. I’m also wearing a pair of Bombshell lashes by House of Lashes.

Face

  • Primer: Make Up For Ever Step 1 Radiant Pink Primer
  • Foundation: BECCA Aqua Luminous Perfecting foundation in Fair
  • Bronzer: Bourjois Delice de Poudre
  • Blush: BECCA Flowerchild
  • Highlighter: BECCA Champagne Pop
  • Lips: I lined my lips with MAC‘s Boldly Bare lip pencil first, then filled them in with MAC Brave with MAC Shy Girl on top

201607_womfvol47_look4.1

Annnnd more products I got from IMATS New York. Eesh, I had no idea how IMATS heavy this post was going to be!

201607_womfvol47_look4.2

Eyes
I first applied NYX‘s Jumbo Eyeshadow Pencil in Milk as a base, then:

  1. Sugarpill Flamepoint
  2. Sugarpill Mochi
  3. Sugarpill Velocity
  4. Sugarpill 2AM
  5. MAC Blanc Type

I created the wing with MAC‘s Blacktrack fluidline and applied Too Faced Better Than Sex Waterproof mascara to my lashes.

Face

  • Primer: Joe Fresh Illuminating Primer in Pure Glow
  • Foundation: Clinique Chubby in the Nude in Intense Ivory
  • Blush: Stila Convertible Color in Peach Blossom
  • Bronzer: MAC Refined Golden
  • Highlighter: Too Faced Candelight Warm Glow
  • Lips: Clinique Pop Glaze in Licorice Pop

Clinique Chubby in the Nude Foundation Stick (Review & Swatch)

Clinique - Chubby in the Nude Foundation Stick

Before I get started on this post, I have to address the elephant in the room that is the name of this product. I cannot, for the life of me, believe that Clinique decided to name their foundation STICK “Chubby in the Nude”. Call me immature, call me whatever you want, but I cannot stop giggling at the name and shape of this product. Was it an intentional penis joke? Cuz if so, well played. But if it wasn’t, then it’s even funnier.

MOVING ON!

Clinique - Chubby in the Nude Foundation Stick
Clinique – Chubby in the Nude Foundation Stick (this is rolled all the way up by the way)

Much, much earlier this year, Clinique launched their Chubby in the Nude foundation stick. I received this item in Intense Ivory and held off testing it out for several months because it was not the right shade for me (I’m somewhere around a MAC NC/NW 20).

201607_clinique_chubbyinthenuClinique - Chubby in the Nude Foundation Stick in Intense Ivory - swatchdefoundationstick_intenseivoryswatch
Clinique – Chubby in the Nude Foundation Stick in Intense Ivory – swatch

As you can see from the swatch above, Intense Ivory looks a heck of a lot darker than the inside of my forearm and yet this shade is labelled as a “neutral pink beige shade for very fair skin tones with neutral undertones”. Very fair skin tones?? I’m fair, but I’m nowhere near alabaster. This shade looks far more suited towards someone with a light-medium skin tone.

Face comparison
Face comparison

Since it’s now July and my face has a bit more colour to it, I decided to leap back into testing Clinique‘s foundation stick. Despite the arm swatch, you’ll notice that it didn’t darken my face too much. Maybe a touch, but not much more. You’ll also notice that it didn’t really do much in the way of covering anything on my skin. My freckles are shaded down a touch, but that’s really about it. Any darker moles are still showing through loud and proud.

When I apply it to my face it is definitely not a colour match, however, the product itself provides sheer coverage so it blends in enough with my skin. The product did not layer well – when I added a second layer to build up the consistency, I ended up with patchy bits and “clumping” in areas where my face has curves (like my nose).

Wearing Clinique Chubby in the Nude in Intense Ivory

This product retails for $29 CAD/$24 USD and contains 0.21 ounces of product. Since I’ve only ever used one other stick foundation before, the Make Up For Ever Ultra HD, I decided to pull that out for comparison. The MUFE Ultra HD stick retails for $52 CAD/$43 USD and contains 0.44 ounces of product.

If we break that down, per ounce, the Clinique is $138 CAD/114 USD, whereas the Make  Up For Ever is $118 CAD/98 USD. That’s really pricey for a brand that isn’t billed as high end as MUFE.

My Thoughts

I don’t like giving bad reviews (who does??), but I really do not like the Clinique Chubby in the Nude foundation stick. The texture was dry and bizarre to work with – blending it on was fine during the first layer, but as soon as I tried to add another layer it kind of balled up/got patchy. Although you may be someone that likes a sheer coverage (I sure do!), this one was uncomfortable since the stick was so dry and it really didn’t seem to do enough to warrant even wearing it.

I also found that it lifted off my skin so easily that I was left wondering what on earth would actually get it to stick to my skin. I tried multiple different primers and none of them worked. Just to give you an example of how easy this was to accidentally remove: I touched a tissue to face (not heavily pressing) while at work and I managed to coat the tissue with my foundation colour. I wouldn’t trust this thing near any pale shirts whatsoever since I’d be sure to end up with foundation transfer. Sadly, this item is a total pass for me. 🙁

The Clinique Chubby in the Nude foundation sticks can be purchased on sephora.ca for $29 CAD or on sephora.com for $24 USD.

The product featured in this review was sent to me for consideration.