Skincare Saturday: Smooth Wax Bar – Toronto

Smooth Wax Bar- Toronto

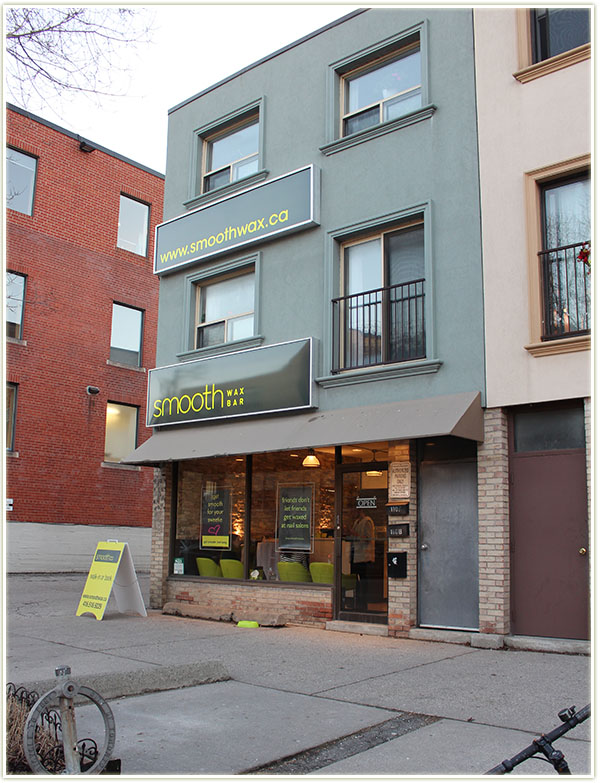
There’s something to be said for a place that prides itself on doing one thing, and doing it well. Smooth Wax Bar Toronto in Liberty Village (located at 110 Atlantic Avenue, 416.516.9229) got their roots started in London, Ontario, two years ago and have just now opened their Toronto location. They don’t do anything else except remove hair from your body. No manicures. No pedicures. No facials. Only wax. Do one thing, and do it well, right?

Smooth Wax Bar- Toronto - having my full legs done
Smooth Wax Bar- Toronto – having my full legs done

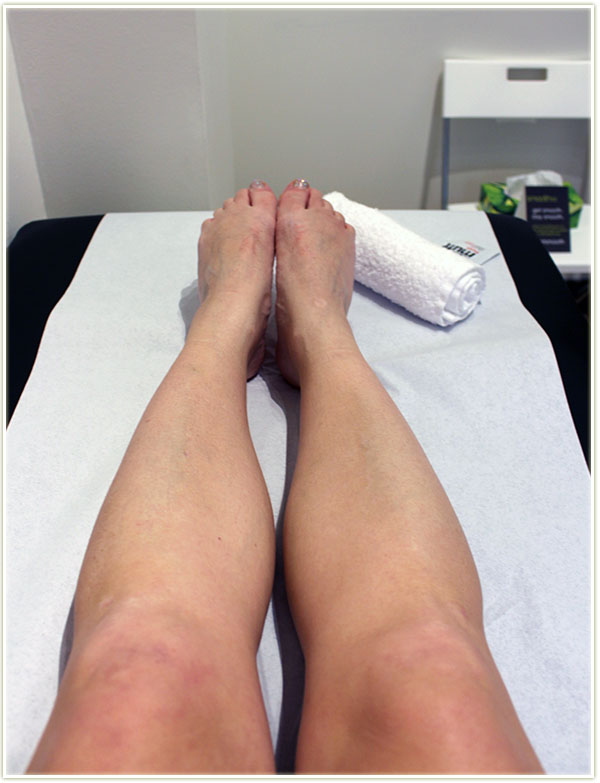
I was kindly invited out to have a waxing of my choice done. After perusing their site for a while, I opted for full legs. A bit of background on my body hair (cuz I’m sure you were just dying to know): I have very fine, nearly translucent body hair. I can often get away with shaving once every one to one and a half weeks even during the summer. In the shot above, I’ve actually got about two weeks of hair growth on my legs (as this shot was taken before I got waxed) but you really can’t see anything cuz there isn’t much to see.

Thighs done first!
Thighs done first!

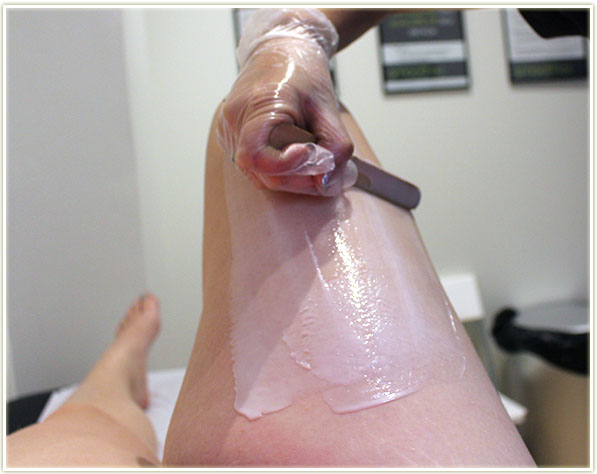
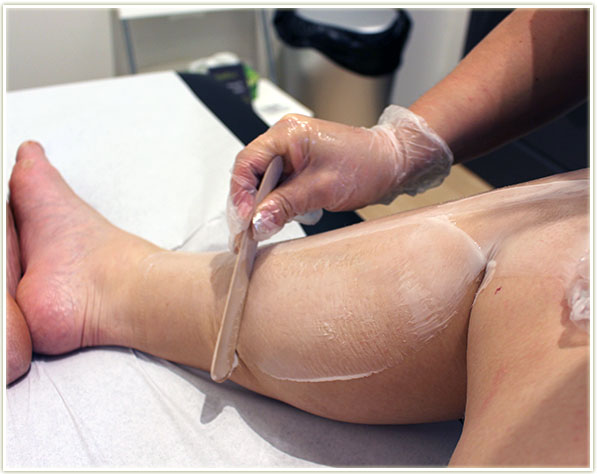
So here’s how it went down. My waxologist, Liette, was probably the nicest person I’ve ever met (and I’m someone who struggles to talk to hair dressers, so I wasn’t sure how this was going to go). She had this air about her that just made me immediately comfortable. As I’d never actually had a wax before, she walked me through every detail. She started with my thighs, which I was pleasantly surprised to find out didn’t hurt nearly as much as I was expecting. I asked her about this and she confirmed that areas that have more fat deposits on them are places that tend to hurt less. As she moved down my legs, the pain levels definitely went up, but at no point was it even remotely unmanageable. My lower legs, particularly around the ankle, was the most uncomfortable area to wax. Liette pinpointed how it was an “angry” pain that a person feels when that area gets ripped off. And she’s totally right – in that split second when the wax strip comes off, you’re absolutely freaking livid. It was kind of hysterical actually. Overall, I was pleasantly impressed with how LITTLE pain I actually did feel throughout the entire process. She was quick, efficient, friendly and easy to talk to. What more could you ask for from someone who’s ripping your hair out by the follicle?

Lower legs done last

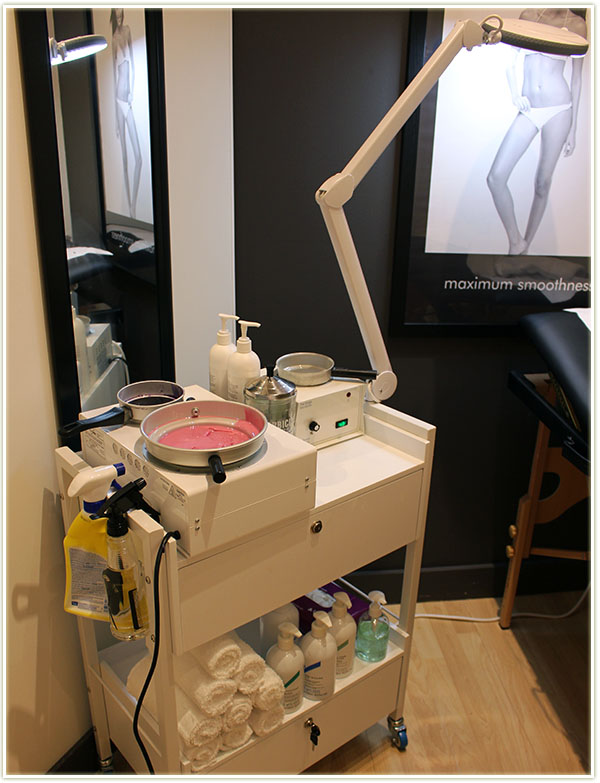
I was also super impressed that my legs never turned red, my hair follicles never rebelled, and I was essentially left with quite content skin. And it may have something to do with their imported waxes from Australia that are “specially made to reduce the ouch. The hard wax is made of all natural bees wax and is infused with the highest quality polymers. It also contains titanium dioxide and Micro Mia for superior skin protection. They carry a second hard wax that we refer to as their Superhero wax because it can remove even the most stubborn hairs as short as 1mm.”

I will say though that since my hair is so fine, the wax that was used on me was not strong enough to pick up some of the tiniest baby hairs, so I was left with a little bit of stubble even the next day. Make sure you let them know what kind of hair you have so they can use the right kind of wax on you! (I didn’t know any better frankly, but I will for next time! I probably could’ve done with growing out my leg hair for longer than two weeks too.)

Wax Bar
Wax Bar

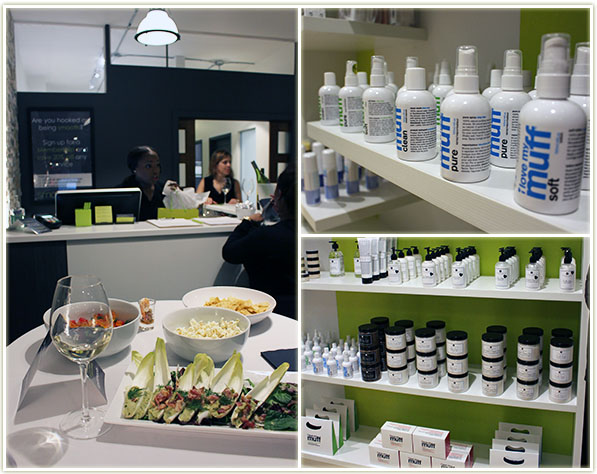
Smooth‘s pricing also didn’t make me gasp with shock, so that’s always a pleasant surprise (check out their price list on their site). Additionally, their Smoothaholic Membership gives you 20% off any service and is perfect for those who are hooked on staying smooth all year round. They also have something called a “Bar Tab” that are for people who want savings but need flexibility (if you prepay for six services, you get the seventh for free).

Smooth Wax Bar - Toronto
Smooth Wax Bar – Toronto

So here’s the kicker, Smooth Wax Bar has given me a promo code for my readers. If you use the promo code “makeupyourmind” you’ll receive 25% off any service until March 31, 2016. If you were considering getting waxed for the first time, or want to try out a new location, why not take advantage of 25% off? (I receive no compensation for this, this is strictly a freebie for you guys!)

Let me know if you go and give it a shot! And feel free to ask me any questions in the comments. I was a waxing newbie myself, but I feel like I’ve got a much better grasp on the process now!

The Body Shop Honey Bronze Bronzing Powder (Review & Swatch)

The Body Shop Honey Bronze Bronzing Powder in 01 Light Matte

I’ve waited a loooong time to pick up The Body Shop‘s Honey Bronze Bronzing Powder (eesh what a redundant name). It’s been in more blogs and vlogs than I can even recall and it’s been haunting me for not owning it. But really, when you already own 15+ bronzers, why do you need another one??? So I held off buying it for months, maybe even years, until just this past holiday season when The Body Shop was having an unbelievable sale and I caved. (I was also shopping with some beauty blogger friends, and we’d had some wine… so you know how THAT goes!)

The Body Shop Honey Bronze Bronzing Powder in 01 Light Matte

I picked up the lightest shade in 01 Light Matte. Notice it says matte right in the name of the product? Love that aspect, and that’s one of the reasons I wanted this so badly. Although I love shimmery bronzers for certain occasions, I had found I was a bit overrun with them and needed ones that were actually matte. (On me, shimmery bronzers look a bit odd during the winter months – I far prefer them for the summer.)

The Body Shop Honey Bronze Bronzing Powder in 01 Light Matte

The Honey Bronzer Bronzing Powder has a honeycomb pattern on the powder (and we all know how much we love our embossed products, don’t we?), the case is sleek, compact and even has a honeycomb pattern embedded on the lid. The whole compact just feels really well put together which is something I can really appreciate. One thing to note though: while this product is enriched with Community Trade Honey from Ethiopia, it does not actually smell like honey. (Boo!)

The Body Shop Honey Bronze Bronzing Powder in 01 Light Matte - swatch
The Body Shop Honey Bronze Bronzing Powder in 01 Light Matte – swatch

So while this may be their lightest shade, if you look on their web site, their range of colours is actually pretty impressive and there are intensely dark shades that look like they’ll be really fantastic for darker skin. 01 Light Matte is slightly warm, but I never feel like it looks too warm on my skin. It’s easy to blend and can be built up for extra intensity if desired.

Wearing 01 Light Matte

If you’d like to see the bronzer in action (applied on top of foundation), you can see that in one of my tutorials from last week – the Too Faced Chocolate Bon Bons/Valentine’s Day look over on YouTube (scroll to the 1:33 mark if you’re only interested in the bronzer).

Final Thoughts

Although I’m currently trying to finish up another one of my bronzers (I’m soooo close), this will absolutely become my go-to winter bronzer. The Body Shop‘s Honey Bronze Bronzing Powder feels dummy-proof to me, and I *need* that on winter days when I can barely see my face in the mirror because the sun hasn’t risen yet. I’ve yet to actually go truly overboard with this powder (unlike blush… holy smokes sometimes I show up at work, take a look in the mirror and I’m like “Hey there clown cheeks, how come I didn’t notice this at home???”) and I think that’s partially a factor on how well this blends out and how pale the colour is. For the snow queens out there who are scared of bronzer, you may want to check this one out – it might just be pale enough for you!

The Body Shop‘s Honey Bronze Bronzing Powder can be purchased on thebodyshop.ca for $20 CAD (or for wait for a sale and grab it at a cheaper price!).

Too Faced Spring 2016 La Creme Lipstick Additions (Review, Swatches + Video)

Too Faced Spring 2016 La Creme Lip Swatches

If there’s something you know I like, it’s a good Too Faced collection!

Too Faced Spring 2016 La Creme Lipsticks: Topless, Double Bubble, Mean Girls, WHAM!, Berry Naughty, Ursula and Unicorn Tears

I’ve got seven out of the 10 new shades in the La Creme lipstick range and wanted to try them all on. Let’s go!

Too Faced Spring 2016 La Creme Lip Swatches

Too Faced La Creme in Topless

Topless is a beautiful peachy nude – this is a nude that I love seeing on myself.

Too Faced La Creme in Double Bubble

Double Bubble is the Barbie pink of the collection.

Too Faced La Creme in Mean Girls

Mean Girls is a slightly deeper pink chockful with glitter.

Too Faced La Creme in WHAM!

WHAM! surprised the hell out of me. The tube looks like a total glitter bomb, but I LOVE how this looks on me. The glitter doesn’t really transfer as much as I expected – instead I’m left with a gorgeous glossy berry shade.

Too Faced La Creme in Berry Naughty

Another stunner! Berry Naughty is quite plum/purple and unlike anything I own. I tend to steer towards the red-berry shades, but this is sooo nice.

Too Faced La Creme in Ursula

Another killer one. Ursula is a deep plum with a lot of glitter in it but it doesn’t look like a glitter bomb on the lips which I highly appreciate.

EDIT: I wore Ursula to work the next day and encountered problems with the glitter in the product moving around on my lips. The colour is still gorgeous, but I’d recommend wearing a similar coloured lip liner all over your lips and then applying this shade on top.

Too Faced La Creme in Unicorn Tears

Unicorn Tears is the most unique shade out of the whole launch. It’s blue in the tube but turns silvery purple on my lips. It definitely has a lot of duochrome in the shade, which can make it look a bit chunky on the lips. This would be best for layering on top of other lipsticks to give them more dimension. (Although I kind of want to wear it to work as is and see who comments on it!)

Too Faced La Creme Spring 2016 Additions
Too Faced La Creme Spring 2016 Additions – Swatches

If you want to see me apply them and talk a little bit more about the shades, I’ve also done a lip swatch video as well:

Final Thoughts

I was a little apprehensive about some of the shades because I had seen that Too Faced was starting to add glitter into the some of their La Cremes which kiiind of didn’t make any sense to me (I mean… La Creme does not mean “with glitter”!). I’m so happy to be proven totally wrong. The only shade that had noticeable glitter was Mean Girls, the other two (Ursula and WHAM!) are beautiful with the addition of the glitter particles (and they also don’t feel super chunky which I appreciate).

These new shades are just as amazing as the original shades I have from the line and it was really nice to see Unicorn Tears being added into the mix. It’s a “strange” colour, sure, but part of what makes Too Faced such a fun brand is that they add whimsical touches onto their products. It may not always be conventional, but it definitely keeps it intriguing!

Out of this launch, WHAM!, Berry Naughty, Topless, and Ursula are my favourites. And I’m currently eyeballing 9021Oh (not pictured above) which I may “need”. Let me know what shades were your favourite!

Too Faced La Creme Color Drenched lipsticks can be purchased on Sephora.ca for $26 CAD and on Sephora.com for $22 USD.

The products featured in this post were sent to me for consideration.

Mary Kay Into The Garden Color Compact (Review, Swatches & Look)

Mary Kay Into The Garden Color Compact

I’m fairly new to Mary Kay makeup. My only lasting impressions of the brand was that it was always an Avon-type brand. You know the kind… where older women in your neighbourhood would have makeup parties and they’d all go through the catalogue together and pick out items they wanted to wear. They’d then place their order via their representative and wait for their products to get delivered. Since my recollections of this were from an eight year old perspective as I watched my mom take part in these things, the brand kind of became branded with a “that’s for old ladies” perspective. And while I think some of those memories still linger for me, I’m quite happy to try out a brand for the first time and see what *I* think about it, and not what my 8 year old self’s impressions are of it.

Mary Kay Into The Garden Color Compact

Well that was an intro and a half. Let’s get into this. As part of their spring collection, Mary Kay has released their Into The Garden collection (available now) and this Color Compact is part of that release. Florals for spring is hardly a new theme, but I know there’s a lot of women out there who appreciate the softness of pastels and gentle colours when it’s finally time for us to exit winter.

Mary Kay Into The Garden Color Compact

The Into The Garden Color Compact comes with four eyeshadows that all have a shimmery finish. The three lip colours are more of a gloss, but they do have some colour in them so they’ll help augment the colour of your lips.

Mary Kay Into The Garden Color Compact - Swatches
Mary Kay Into The Garden Color Compact – Swatches

The eyeshadows impressed me: they may all have the same finish, but they’re soft, easy to blend and the pigmentation is definitely there. There’s no chalky-ness to them and all four colours are highly complementary.

The coloured glosses stood out a bit more to me in this palette as they’re not shades I would expect to see paired with these eyeshadows. They also have a bit of glitter in them.

Wearing Mary Kay Into The Garden

Here’s the look I put together using the Into The Garden Color Compact.

Wearing Mary Kay Into The Garden

I used all four eyeshadows and the more coral-red lip shade.

Wearing Mary Kay Into The Garden - close up
Wearing Mary Kay Into The Garden – close up
Wearing Mary Kay Into The Garden - close up
Wearing Mary Kay Into The Garden – close up

I applied the taupe shade all over the lid, the deep, dark purple on the outer corner and through the crease. I lined my lower lash line with the vibrant purple and applied the soft pink shade to the inner corner. The look came out quite pretty, and yet dramatic enough for my tastes.

Let me know what YOU think of Mary Kay products! I was pretty impressed with the eyeshadows in this palette and would love to hear more about what you recommend from the brand.

The product featured in this post was provided to me for consideration.

VIDEO: The 100’s Wanheda/Clarke

The 100 - Season 3 Episode 3 - Ye Who Enter Here Makeup Tutorial
The 100 – Season 3 Episode 3 – Ye Who Enter Here Makeup Tutorial

I love, love, LOVE the TV series “The 100” and I got a liiiiittle excited during the  Season 3 episode “Ye Who Enter Here” and Clarke’s incredible Grounder makeup during that council scene. So I sat down to recreate it. Enjoy!

A few housekeeping notes…

  1. I’m going to try doing two videos a week going forward (on Tuesdays and Thursdays) because I’m really enjoying the format.
  2. Blog posts will continue on the Monday/Wednesday/Friday schedule with Saturday posts when I have skincare to talk about, and Sundays while I continue to have makeup palettes to swatch (annnnd there’s still about twenty of them left in the queue!).

That’s it! I hope you’re enjoying my videos as much as I’m loving making them!