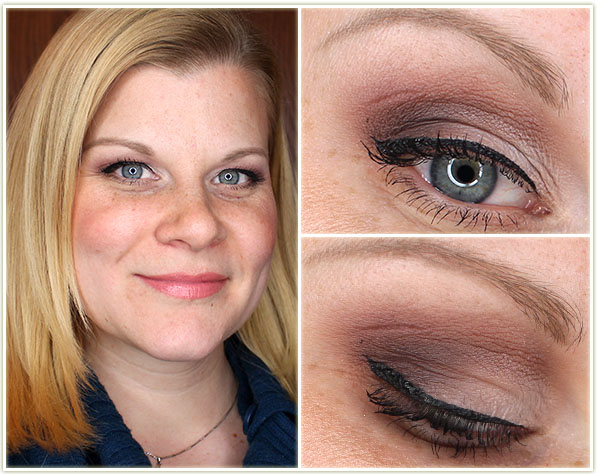
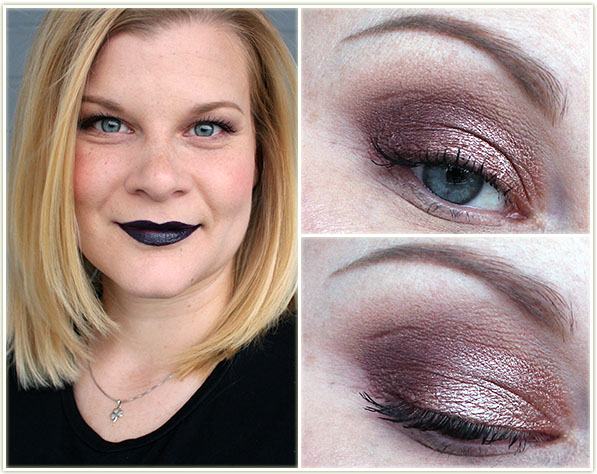
This is the third year in a row I’m wearing the exact same makeup on my birthday, so I thought it was time to share a tutorial on it!
And for reference, here’s how it looked last year (from this post):
This is the third year in a row I’m wearing the exact same makeup on my birthday, so I thought it was time to share a tutorial on it!
And for reference, here’s how it looked last year (from this post):
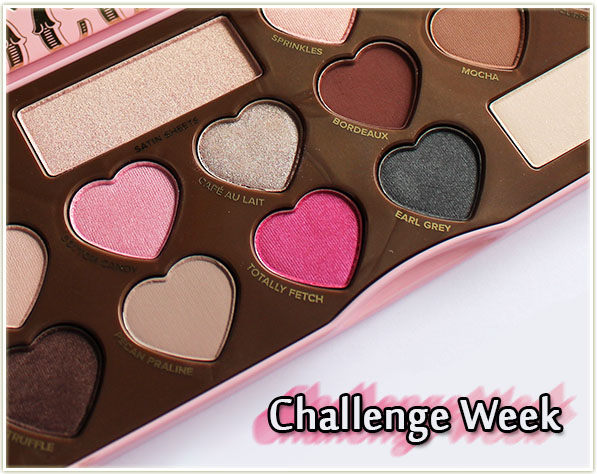
This palette needs little to no introduction as far as I’m concerned!
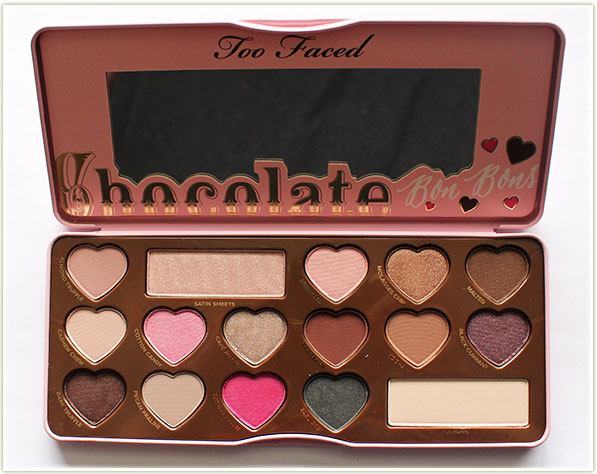
For the uninitiated, however, this is the Too Faced Chocolate Bon Bons palette and it’s the third iteration in Too Faced‘s chocolate-smelling Chocolate Bar lineup of palettes. This one features more of a pink theme (in the shadows and in the packaging), but overall it’s still a very neutral themed palette (which will make a lot of people happy!). Want swatches? Check out this post.
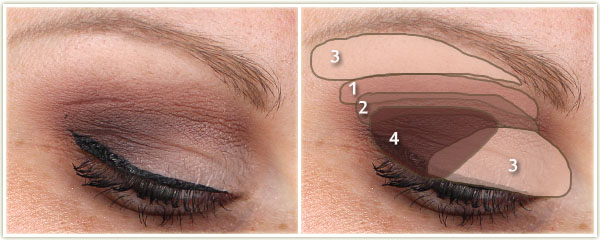
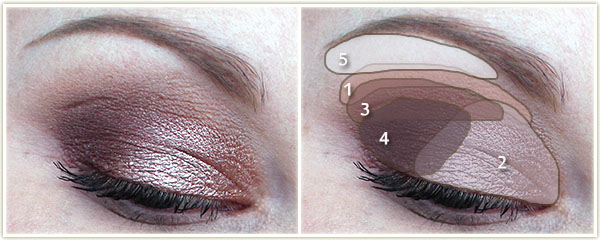
I don’t normally opt for these kinds of shades on my lids, so I made sure it was the first thing I reached for in this palette.

Eyes
On my lashes is Make Up For Ever Smoky Stretch mascara.
Face
I wore this one to a family memorial, so I made sure to keep it matte and neutral.
Eyes
I created the wing with Kat Von D‘s Tattoo Liner in Trooper and applied Make Up For Ever Smoky Stretch mascara to my lashes.
Face
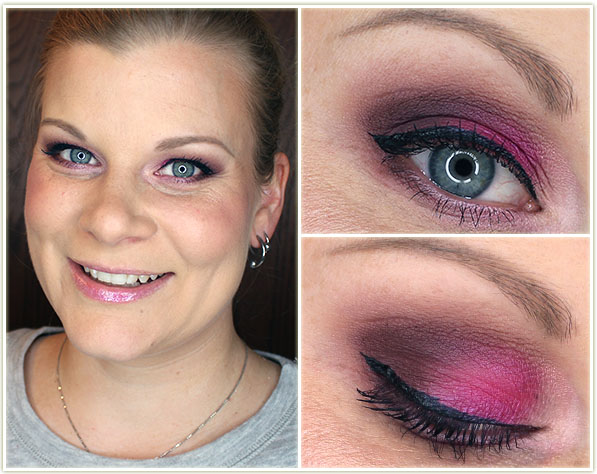
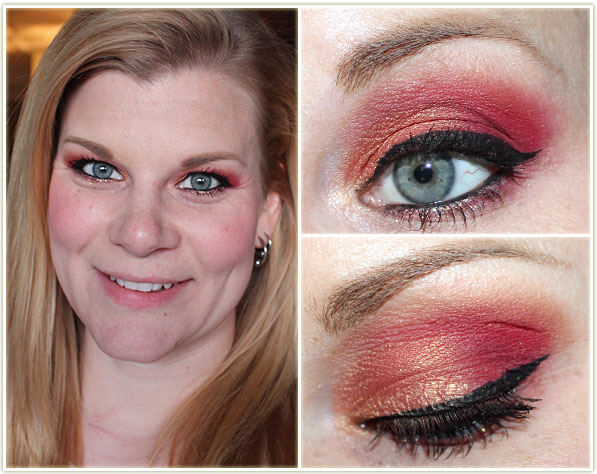
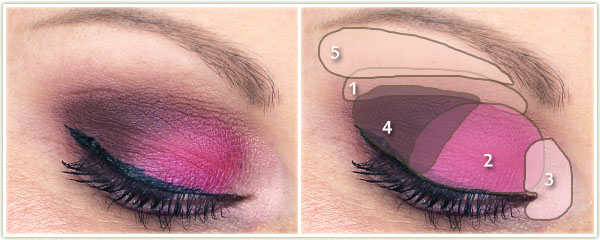
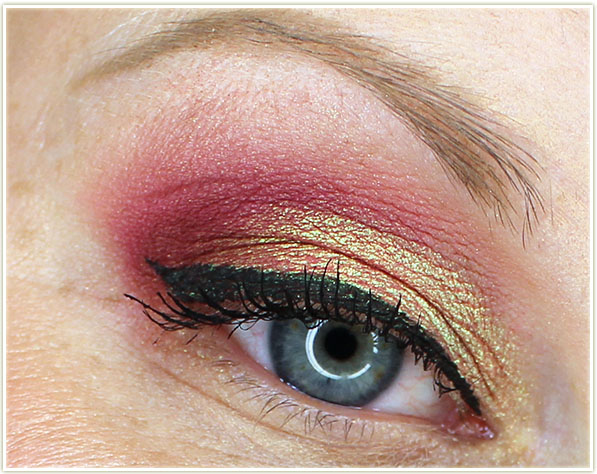
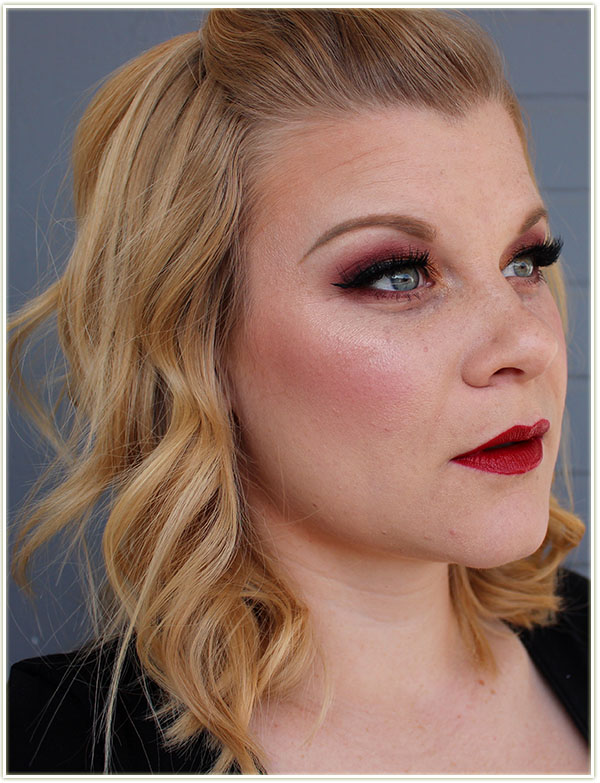
I was excited to use the pink shade in the palette and wanted to create a very dramatic look with it. I made sure to use all three pink shades included in the palette because I wanted to see if it would be overkill (I don’t feel it is).
Eyes
I lined my lower lash line with Cotton Candy (inner half) and Bordeaux (outer half). I created the wing with Kat Von D‘s Tattoo Liner in Trooper and applied Make Up For Ever Smoky Stretch to my lashes.
Face
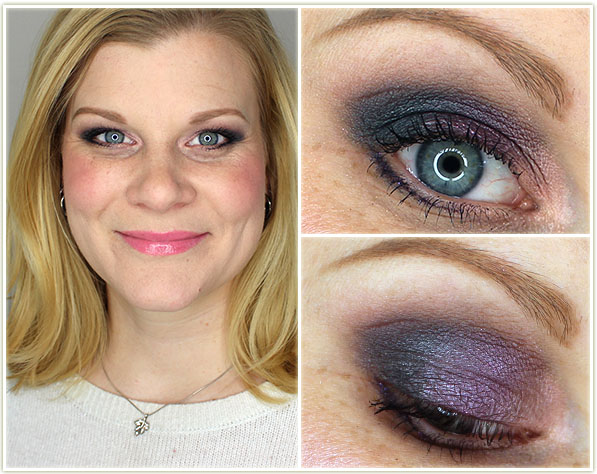
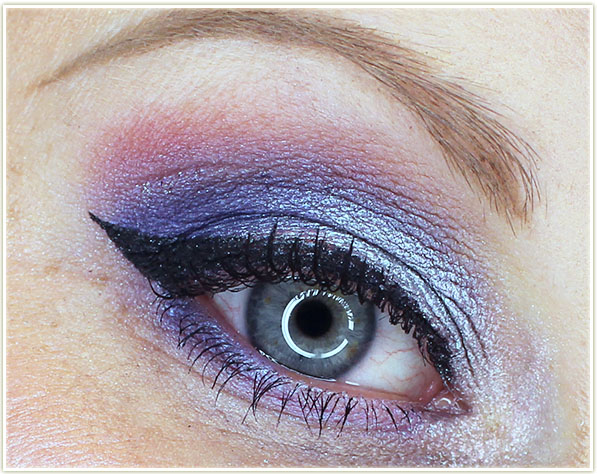
Despite all the pinks, this palette actually has a purple and a darker navy in the mix which helps flesh out the diversity of this palette.
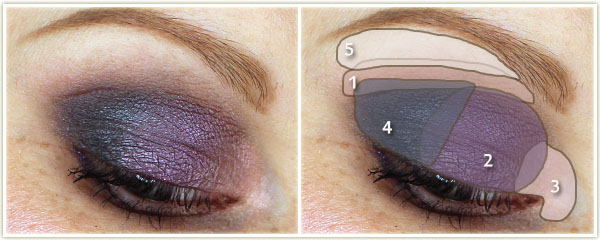
Eyes
I lined the outer half of my lower lash line with Sephora‘s Diamond eyeliner in Phat Rock and applied Make Up For Ever Smoky Stretch to my lashes.
Face
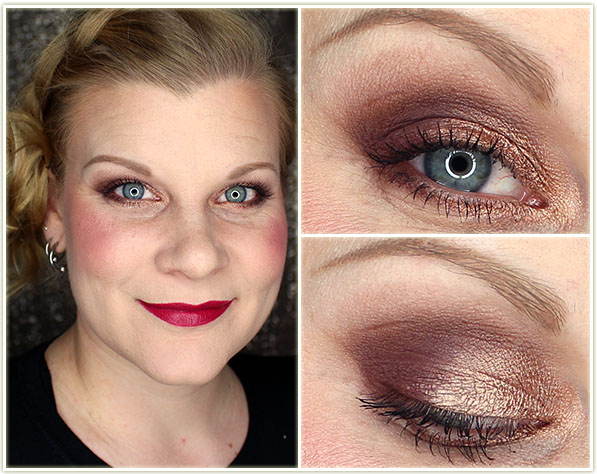
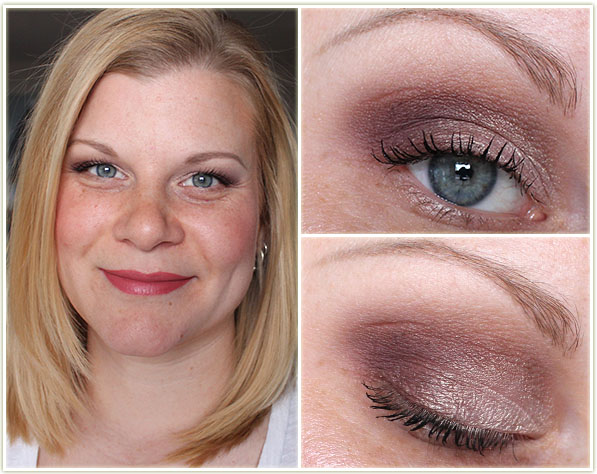
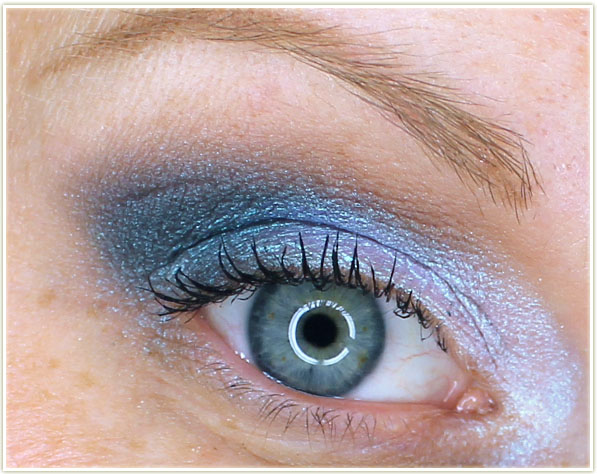
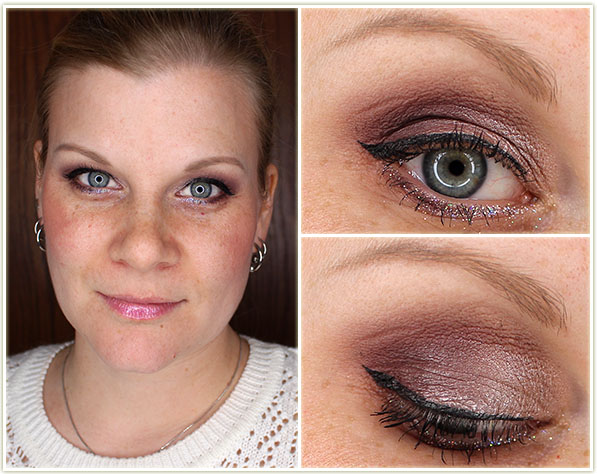
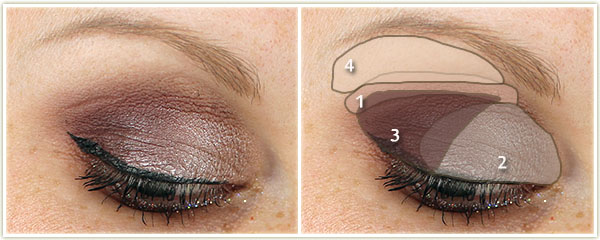
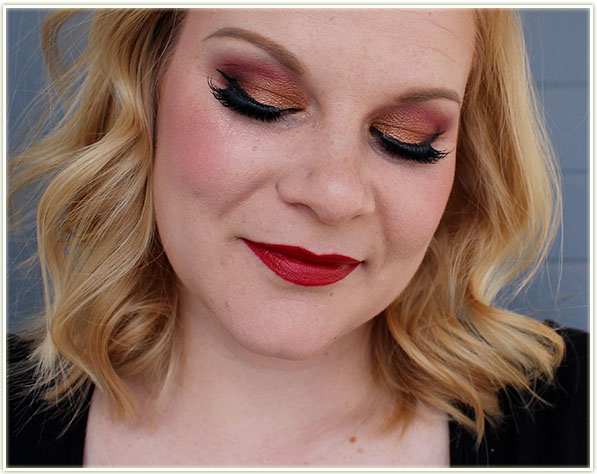
Although I did this look last, this look features my absolute favourite shade in the entire palette: Molasses Chip. It’s the kind of reflective pale bronze that’s creamy and easy to use and so, so beautiful on the lid.
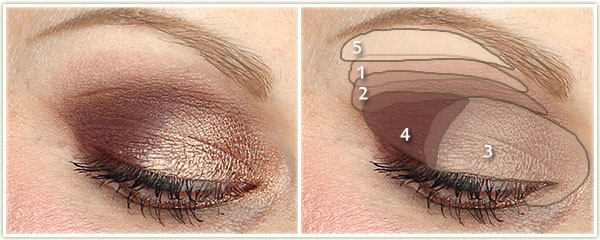
Eyes
I applied Make Up For Ever Smoky Stretch mascara to my lashes.
Face
I hope you enjoyed the looks! The Too Faced Chocolate Bon Bons palette can be purchased from Sephora.ca for $59 CAD, or from TooFaced.com for $49 USD.
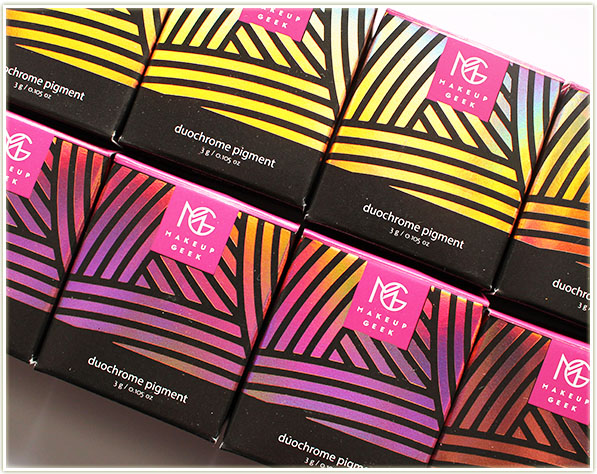
Oh man. I have been lusting and lusting over the Makeup Geek duochromes since they first launched back in September. At the time, I couldn’t justify the cost of the whole collection, but come December I was back in a position to purchase ALL OF THEM. I picked up the entire duochrome set in a packaged bundle for $150 USD. That set comes with all twelve duochrome shadows and all eight duochrome pigments. As I’m typing this, the set is currently out of stock, but it’s expected to be back in stock in early February.
Sidenote: If you’re ever wondering WHEN something will be back in stock at Makeup Geek, always be sure to check their spreadsheet here. They’ve had it for years and it’s continuously updated.
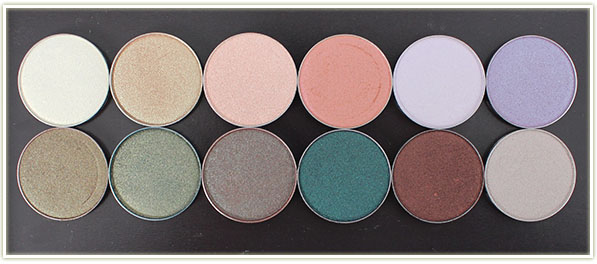
The duochrome eyeshadow singles are packaged in the usual single pan packaging (no case for these guys yet, so you’ll need a Z-palette).
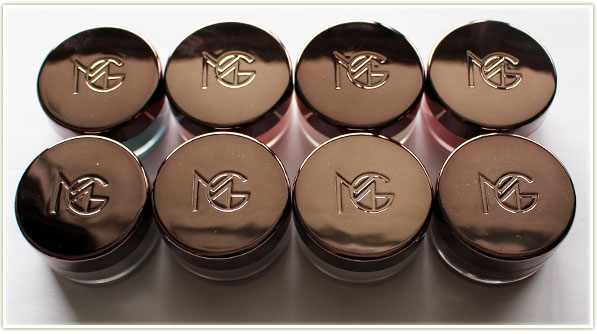
The pigments come in the same original containers as the MUG pigments, but they’ve had an updated lid and logo design that is much more appealing than its earlier incarntion.
As we get into the shades, please keep in mind that since these shadows reflect multiple colours, sometimes a camera cannot capture each shade. At the bottom of all of the swatches are out of focus shots that I’ve taken in an attempt to show you the dimension of each shade.
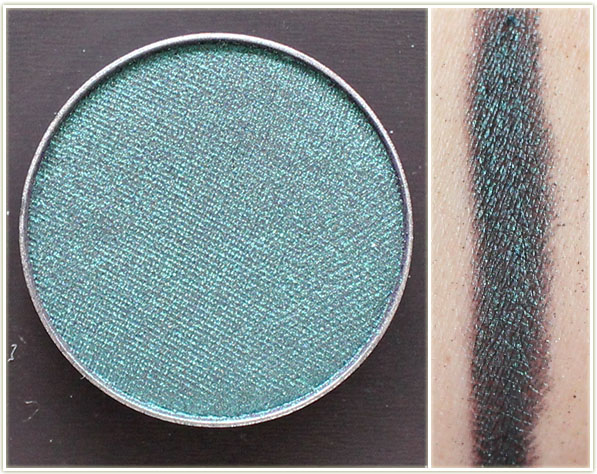
Blacklight is a purple with teal reflect. This is an incredible shade to use with a black base since it will do a lot to change the colour of the shadow.
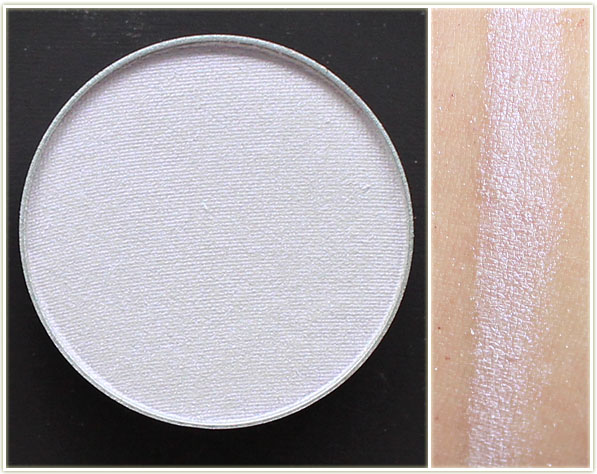
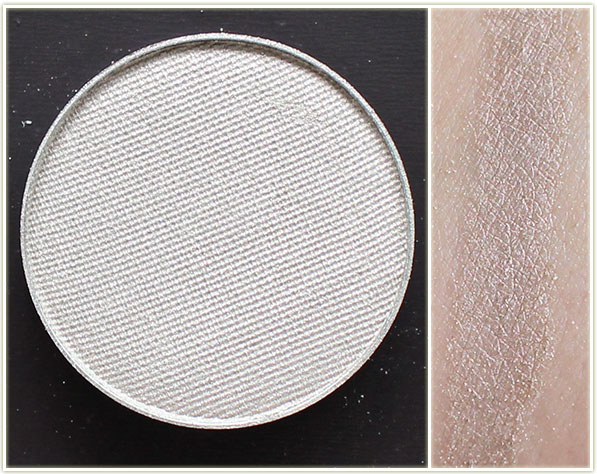
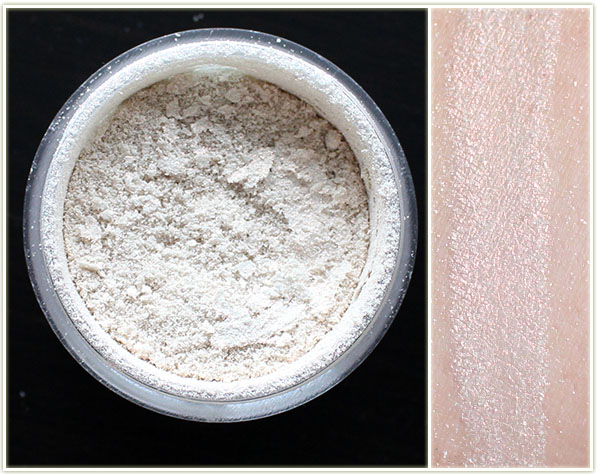
Phantom is a white shadow with a purple reflect. I find this very similar to MAC’s Vellum, although the texture on the Makeup Geek shadow is a million times better. I’ve had several pans of Vellum over the years and it ALWAYS develops crusty hardpan. (Very annoying!) I’m so pleased Phantom doesn’t do that!
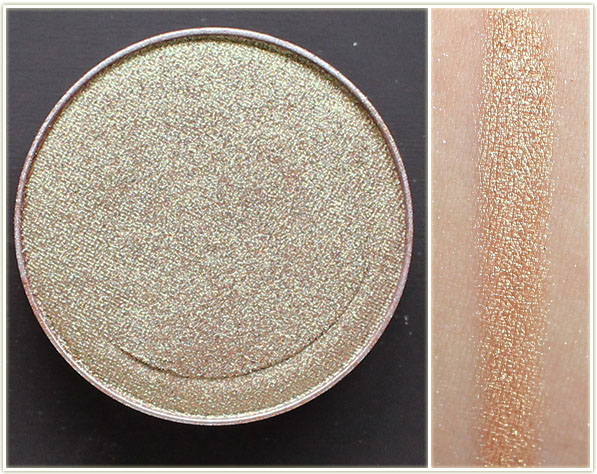
Karma is an orangey-gold with green reflects.
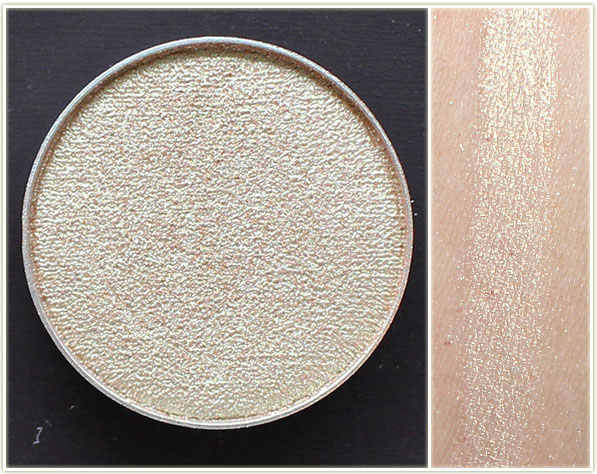
Voltage is a colour I am so, SO FREAKING HAPPY TO HAVE. I had an old MAC duo that was very similar to this shade and I’ve never ever found a dupe for it (was the light white/gold shade from the Illusionary/Burning Ambition duo).
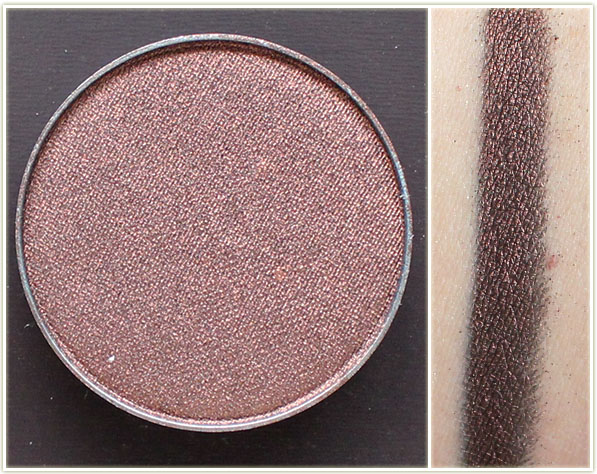
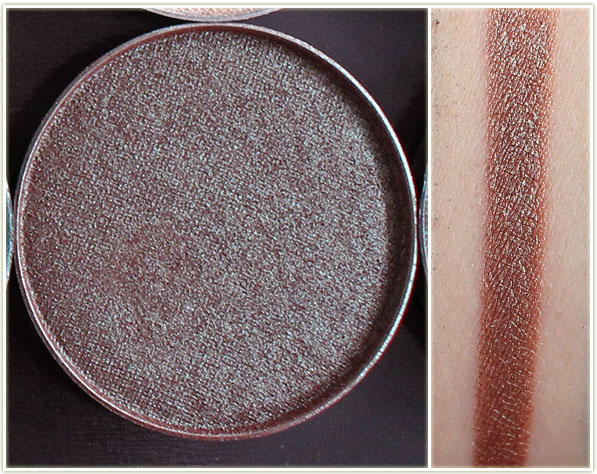
Steampunk is another unique shade I wasn’t expecting to see and it’s jawdropping. It’s a black base with a bronze reflect. And it’s EXACTLY what I would expect a shadow called “Steampunk” to look like.
Havoc, to me, is your basic MAC Club. It’s an orangey-brown base with some teal reflect.

Typhoon is another one that took me by surprise. It looks pretty, you know.. green in the pan. Even perhaps a pale green. However, once you swatch it, the colour actually DEEPENS (sayyyyy what?) and it develops this gorgeous teal with gold and green reflect. Insanity.
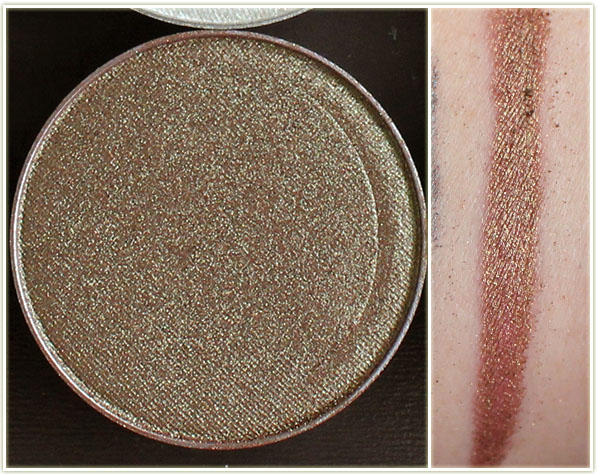
Another stunner! Secret Garden also deepends up once you apply it. It’s a dark brown base with sharp green reflect. This is the perfect shade if you only want to wear one colour on your eye – it’ll be dark green on the lid and smudge out to a brown in the crease.
Ritzy has a reddish brown base with gold reflects.
Mai Tai is a peach shade with a subtle lilac reflect.
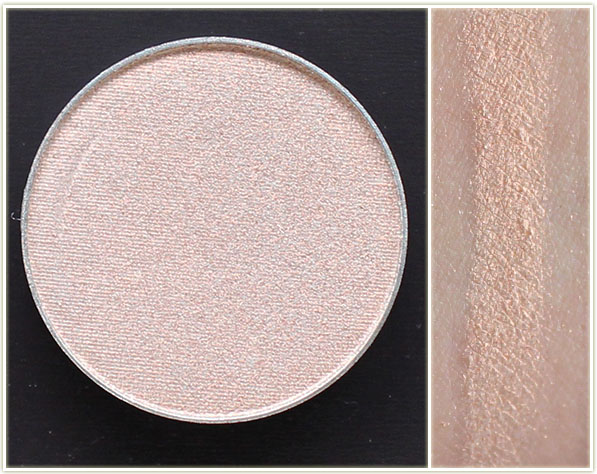
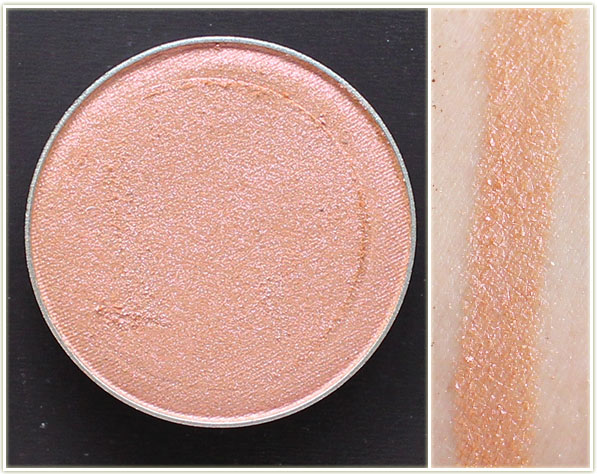
I’m Peachless is a champagne with peach-pink reflects. Stunning on the lid and on the inner corner.
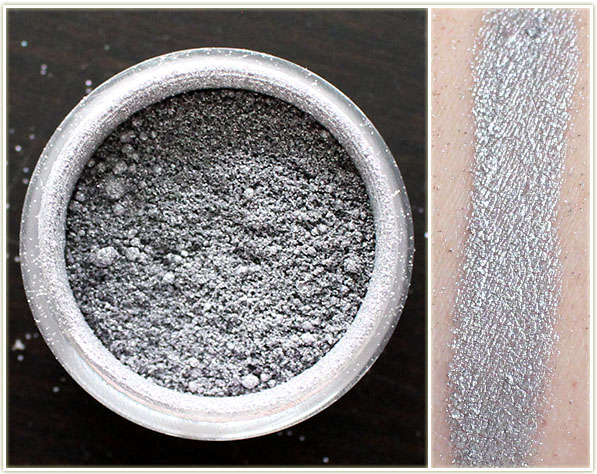
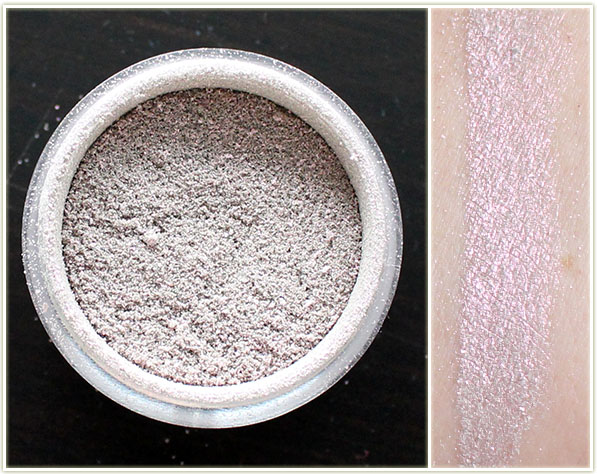
The already existing shade (although now added to the duochrome lineup) is Rockstar, a dull silver with purple and pink reflects. I find this very, very similar to MAC’s Vex.
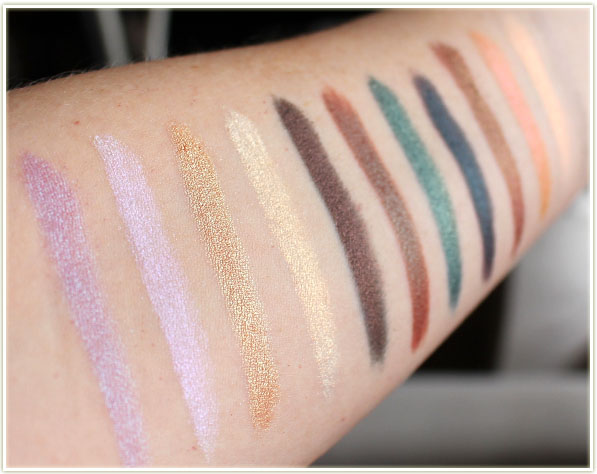
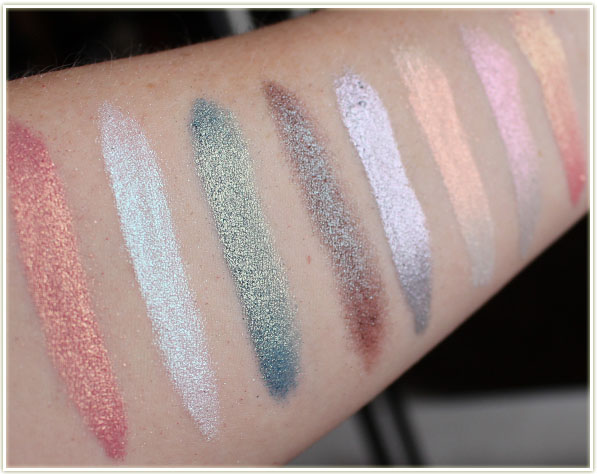
The shot above is every shade in the eyeshadow collection taken out of focus so you can see some of the reflect to the shades.
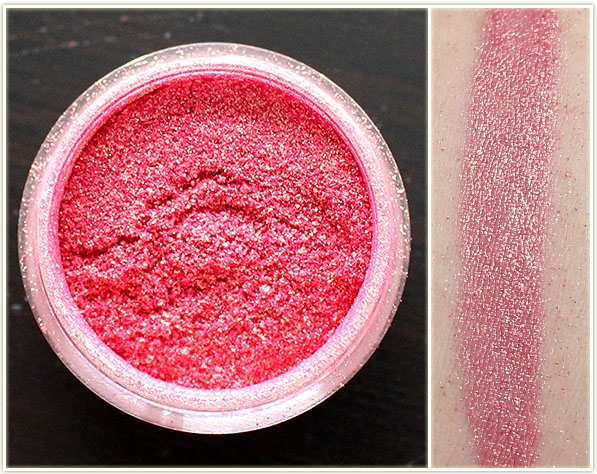
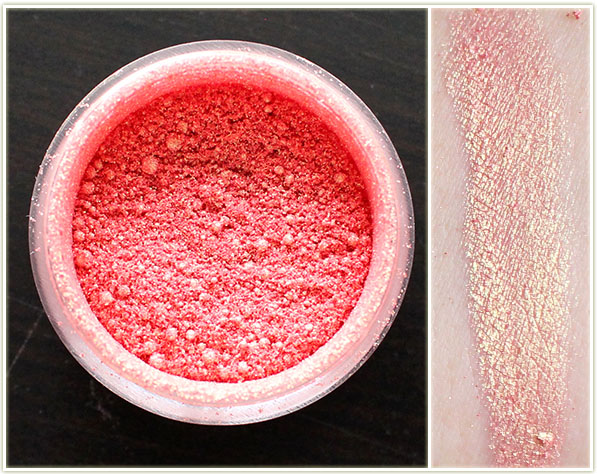
Wildfire is a red-coral with gold reflects. STUNNING.
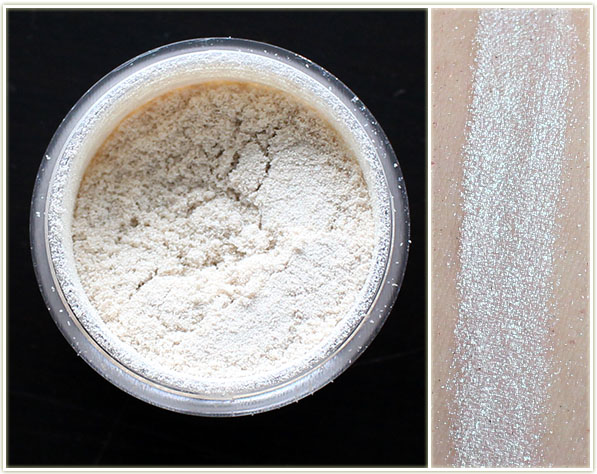
Sugar Rush is a white with a teal reflect. The shot above does nothing to do it justice. Scroll down to see the out of focus shot and you’ll see more of the teal coming out.
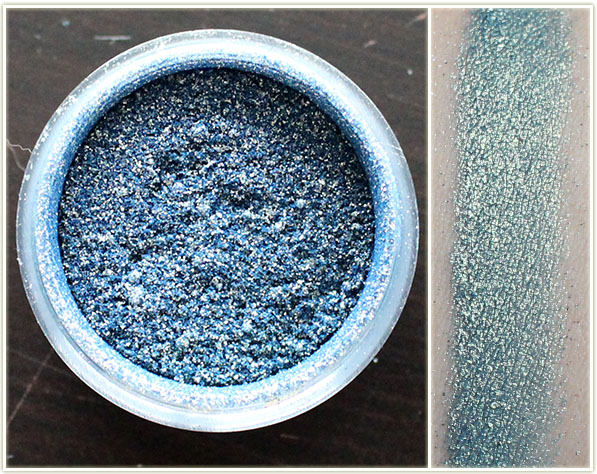
Chameleon is kind of cool in the pot – it looks blue and silver, but as soon as you swatch it it goes teal with gold reflects.
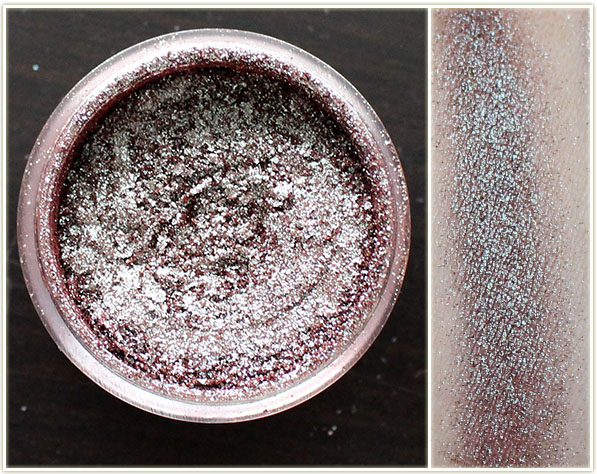
Insomnia is an existing shade for MUG, but I didn’t own it before (so I was happy to have it in this set). It’s a red-brown with blue reflects (also similar to MAC’s Club).
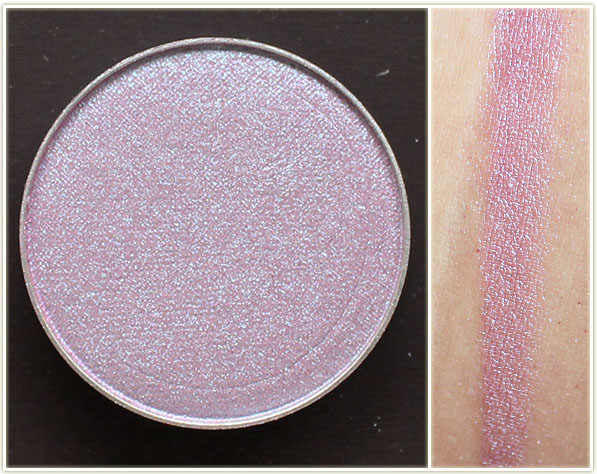
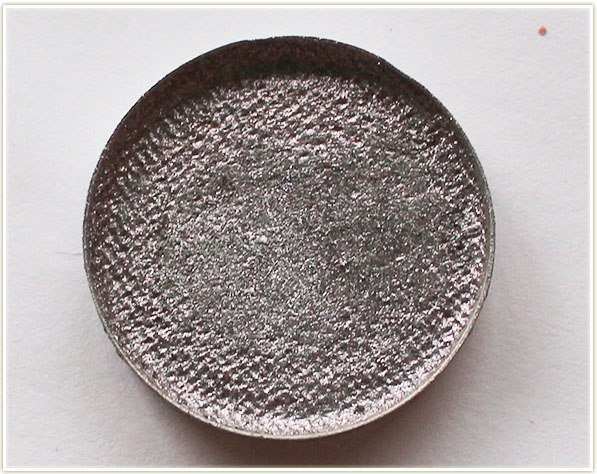
I cannot photograph Kaleidoscope to save my life. It’s a medium silver with pink, purple and teal reflects that are very visible in person.
Prism is another one of those icy white shades with a peachy-pink reflect.
Mood Ring is a pale grey with lavender reflects.
Hologram is a favourite of mine – while the base is quite orange, you get a LOT of gold punch to it on the lid.
See how the colours on the right side of the swatch stand out more when they’re out of focus? So, SO pretty.
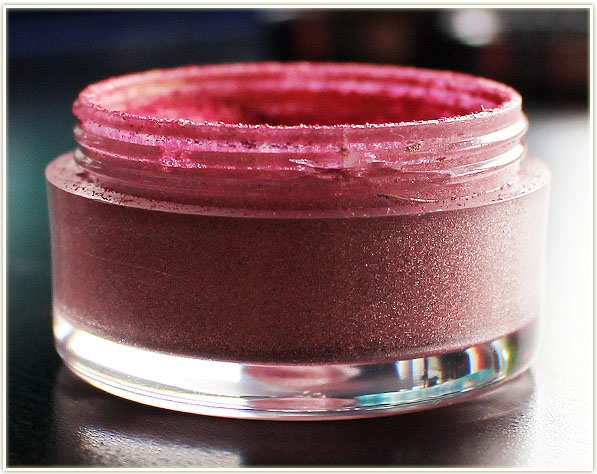
A note on the packaging: My pigments did not come with the sifters inside the jar and instead were in a separate baggie inside my order. Since I knew about the problem of the sifters breaking the jars, I decided to only try it on one of my pigments. As soon as I applied the sifter, it cracked the side of the lid around the screwtop. My husband pulled the top off for me, and I just decided to leave all the pigments as is without slotting in the sifters. Sure, they’re a bit messy, but pigments usually are. Applying the sifter isn’t worth it to me if it’ll crack the jars. Additionally, having the sifter on actually made it difficult to screw the tops closed (without the sifter on, it it glides through the grooves seamlessly.).

As you can see from the shot above, the lid of the pigments are suited to having the sifters on (the circle sticks out and slots into the hole in the sifter). I’m hoping they fix the packaging in the future so that that sifters don’t crack the jars, but until then it’s definitely not a deal breaker for me: I love the pigments and will continue to use them without the sifters.
Here’s a few looks I cooked up using some of the pigments:
I know some people don’t like the mess of pigments, so I decided to press Kaleidoscope to see how it would turn out (plus I wanted to send it to a friend). For a tutorial on how to press pigments, check out this post.
It definitely works, and the swatch ends up looking rather similar:
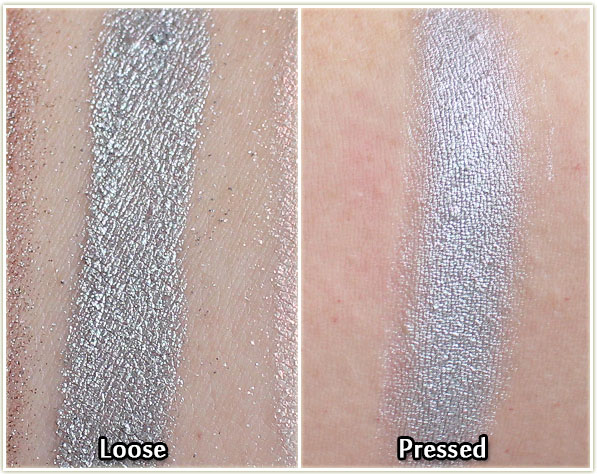
If anything, it’s a bit softer of a colour when it’s been pressed and then swatched, but the different colours are present when you tilt the shadow towards the light. (I know you can’t see it in the swatch, which is a shame, because Kaleidoscope is so utterly unique!)
These are PHENOMENAL. They are so much fun to use and play with. Since the duochromes have multi-coloured shifts, you can mix and match with other eyeshadows you have to pull out more colour as you wish. For example, to pull out the red tones in Hologram in my eye shot above, I used some darker red/orange shades. You can also use different bases to augment different shades in the pigment (try playing around with it!).
My personal favourites eyeshadow shades are Blacklight, I’m Peachless, Phantom and Secret Garden. For the pigments, I love Hologram, Wildfire, Sugar Rush and Prism. They’re all good though, and the pigmentation as amazing as every other Makeup Geek shadow I’ve tried! If you REALLY want to see the multi-faceted shades in one of these, next time you place a MUG order, pick up the Kaleidoscope pigment. I actually gasped when I swatched that one!
So if you couldn’t tell, as per usual, these are total winners from the Makeup Geek brand. The duochrome eyeshadows are the same $6 USD price tag you’re used to from MUG, although the pigments will set you back $12 USD each. If you get some, tell me about your experiences with the shades!
Alright! I’m figuring out this editing thing! I’ve got music, smoother transitions… and plenty of background noise for you to enjoy! (You can thank downtown Toronto for the constant sirens!) I’ve got a microphone I’ll be plugging in next time, in the meantime, please enjoy this neon rainbow look I came up with using the Viseart Editorial 08 Matte Brights palette!
Alright, it’s been a while since I’ve done a roundup of looks. Unfortunately, there wasn’t a lot of pizzazz in my looks throughout December as I felt like I was eternally rushing around, so this roundup is going to include my actual New Year’s look, some guest posts and a suuuuper old look from June I still hadn’t posted yet. Enjoy!
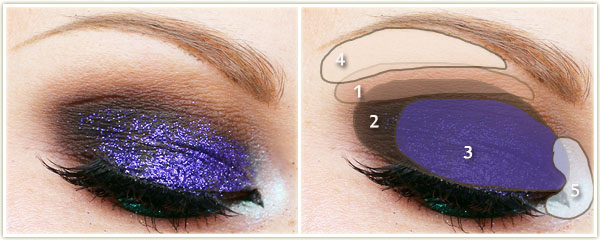
So here’s what I actually wore on New Year’s Eve. We didn’t have extravagant plans (we ended up going to an arcade), but I wanted to at least have a splash of glitter on! I ended up applying false lashes later on, but didn’t get around to reshooting the pictures, so what you’re looking at is sans falsies. This look does use the Too Faced Chocolate Bon Bons palette, but I promise there’s a full Challenge Week coming up focusing on that palette soon!
Eyes
(Too Faced Chocolate Bon Bons palette)
I applied Make Up For Ever Glitters in 13 to my lower lash line using some Too Faced Glitter Glue. I created the wing with Kat Von D‘s Tattoo Liner in Trooper and applied Make Up For Ever Smoky Stretch mascara to my lashes.
Face
This look was completely focused on featuring Too Faced’s Melted Villain lipstick. Although it’s a dark purple, I have to admit that it mostly comes out looking black on me. that’s okay though! I love the colour and it’s NOT patchy! (And yes, I did wear this exact look to work that day!)
Eyes
(all Makeup Geek)
I applied Make Up For Ever‘s Smoky Stretch mascara to my lashes.
Face
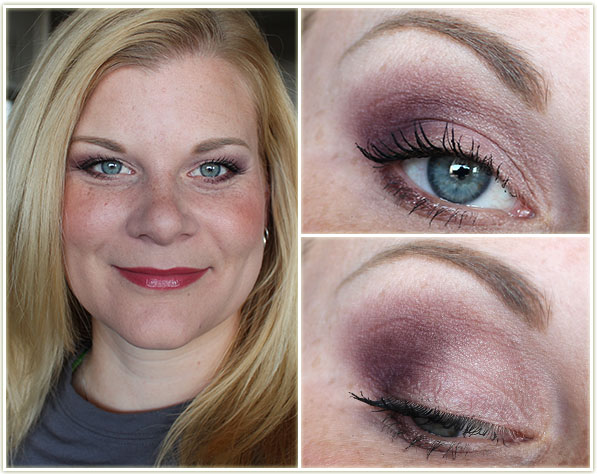
I looooved this look! I did this as a guest post for Up The Rollercoaster last month and just adored how the shots came out. I wasn’t sure how the cranberry tones in the shadows would work with a red lip and if I’m honest, I think it’s a LITTLE bit off, but the overall effect is WA-BAM!

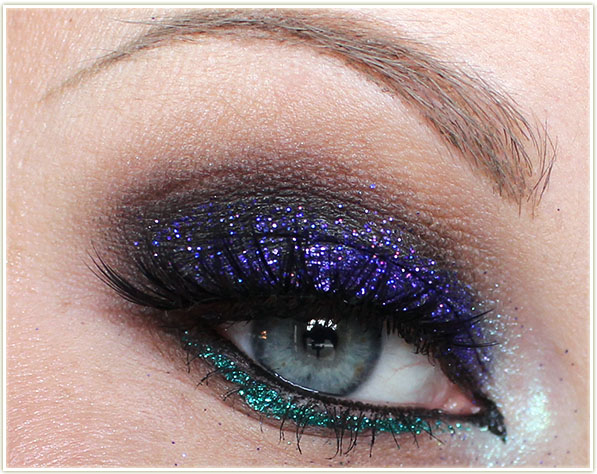
^^ That right there’s a money shot. I’m so pleased with it! 😀
Eyes
I created the wing with Kat Von D‘s Tattoo Liner in Trooper and tightlined my upper water line with Marc Jacobs‘ Highliner Gel Crayon in Blacquer. I coated my lashes with essence‘s get BIG! lashes volume boost waterproof mascara and applied a pair of Noir Fairy false lashes by House of Lashes. My brows are filled in with Anastasia’s Dipbrow Pomade in Blonde.
Face
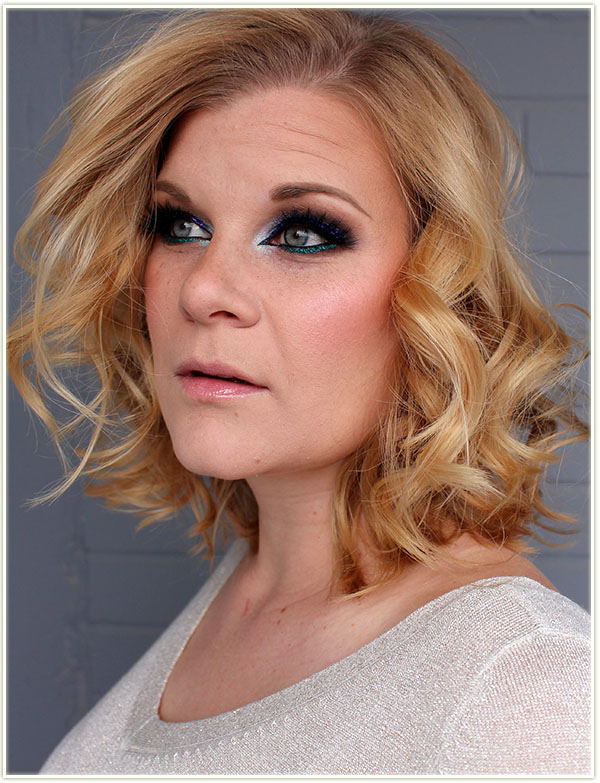
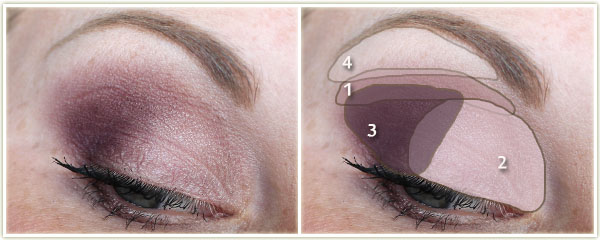
Another guest post! (This time for Writing Whimsy.) I really love doing guest posts because it gives me an opportunity to be totally creative. Usually I’ll take a Saturday afternoon and spend a couple hours working on one. This is very different from my usual makeup roundups which are done almost exclusively as my daily work makeup (which doesn’t always afford me the luxury of playing around with glitter since I’m usually in a rush!).
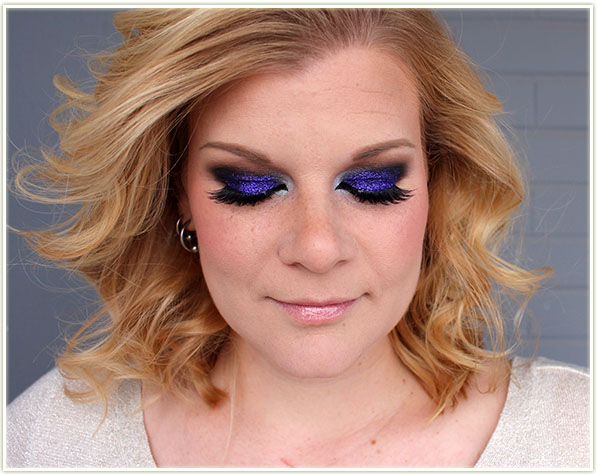
Eyes
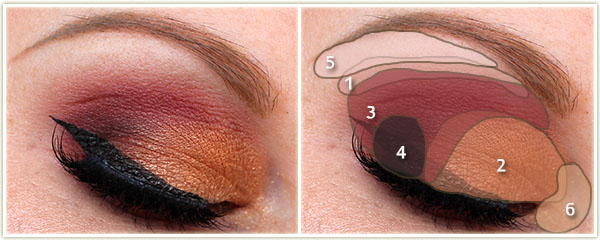
After priming my eyelids, I applied NYX‘s Jumbo Eyeshadow Pencil in Black Bean all over the lid and blended out the edges. Then:
I created the inner corner point with Kat Von D‘s Tattoo Liner in Trooper, thinly lining my upper lash line with it as well. I tightlined my water lines with Marc Jacobs Highliner Gel Crayon in Blacquer and applied essence get big! lashes waterproof mascara to my lashes. I lined my lower lash line Lit Cosmetics Peacock glitter.
Face
Alright this one’s just super old. I had toyed with doing a Challenge Week for Laura Mercier‘s Artist palette, but I never got around to finishing it (likely something new and exciting caught my eye!). I did this look sometime in June of 2015.
Eyes
(all Laura Mercier Artist palette)
I coated my lashes with essence‘s Lash Princess mascara.
Face