Come find me on Jodi’s blog, Up The Rollercoaster, today!
Come find me on Jodi’s blog, Up The Rollercoaster, today!
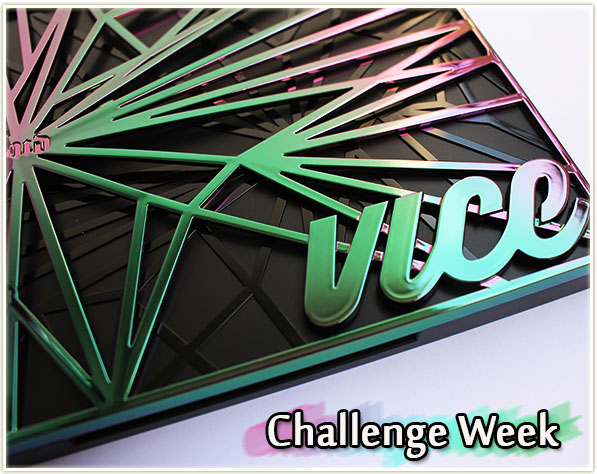
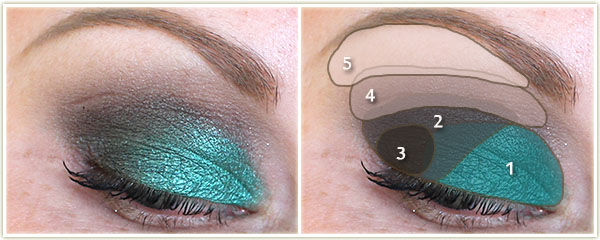
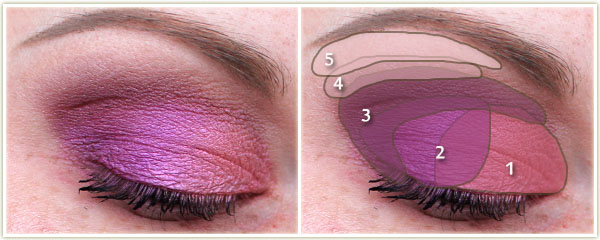
Without a doubt, the absolute best holiday packaging goes to Urban Decay‘s Vice 4 palette. Who DIDN’T get suckered in by that gorgeous oil-slick cover? Even more intriguing is the fact that everyone who bought this ended up with a different coloured lid. So unique!
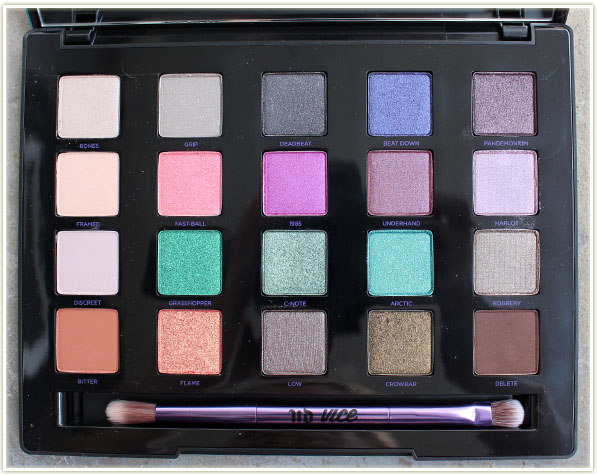
I bought this because I HAD to have it, but unfortunately not a lot of the colours really spoke to me (swatches here). The warm shades, for sure, but those three greenish/aquaish colours in the middle? They’re so similar that I feel that two of them could’ve been omitted for other colours. You’ll see two looks in this collection of five that look absolutely identical to each other, and yet *completely* different colours were used!
Regardless, the usual Urban Decay eyeshadow quality is there in this palette! Buttery, pigmented as all hell and a pleasure to work with.
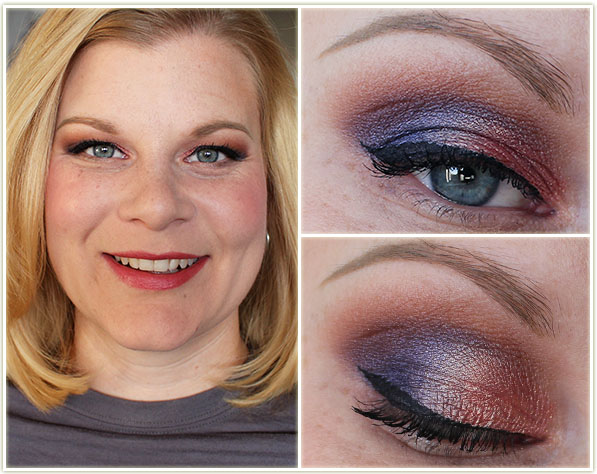
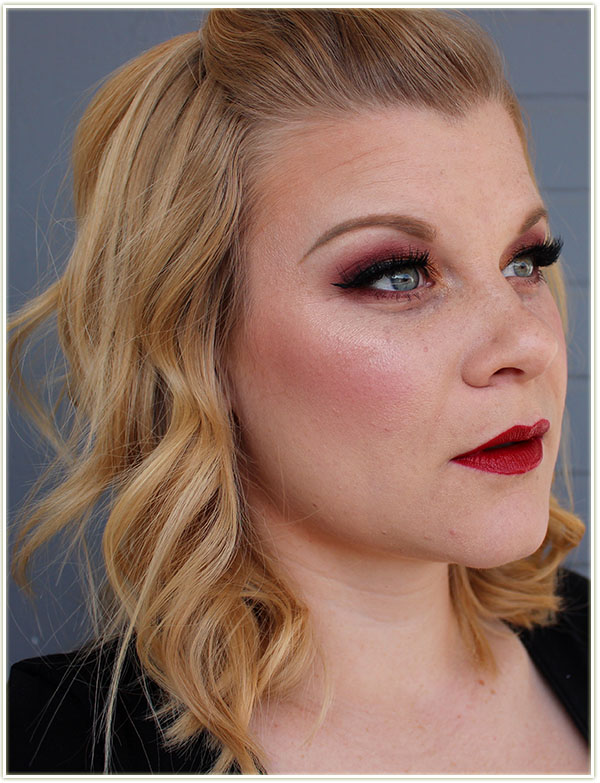
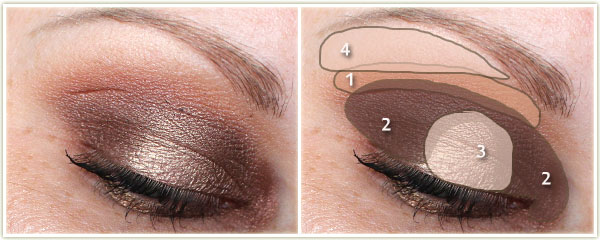
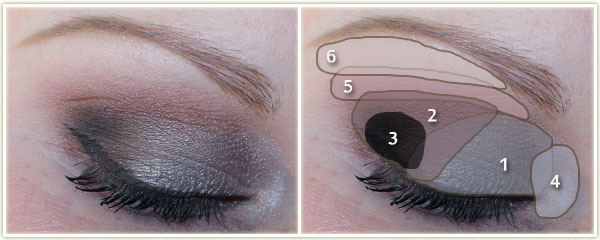
Normally I’d take both orange shades (bottom left of the palette) and call it a day, but I wanted to add something a bit different in this one so I added in the purple. It actually made the orange on the lid look a LOT more pink instead!
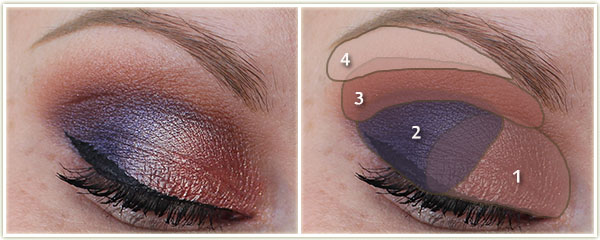
Eyes
I created the wing with MAC‘s Blacktrack fluidline and applied Too Faced Better Than Sex mascara to my lashes.
Face
Using a shadow along the lash line has become a staple when I don’t know what to do with a particular colour (hence the pink!).
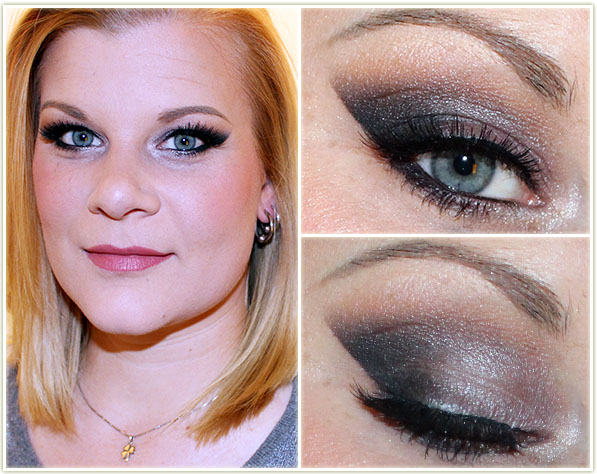
Eyes
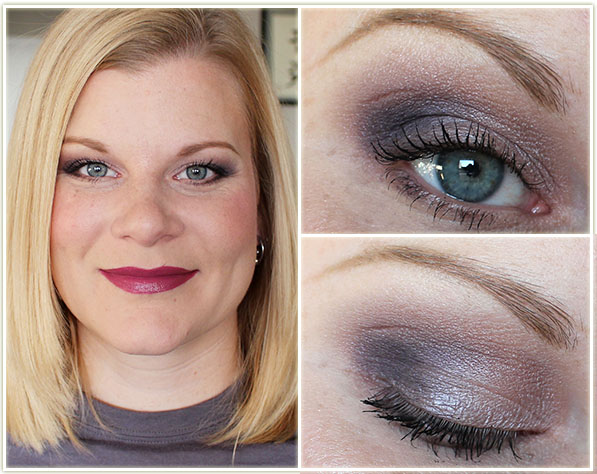
1985 was used on the lower lash line and Too Faced Better Than Sex mascara was applied to my lashes.
Face
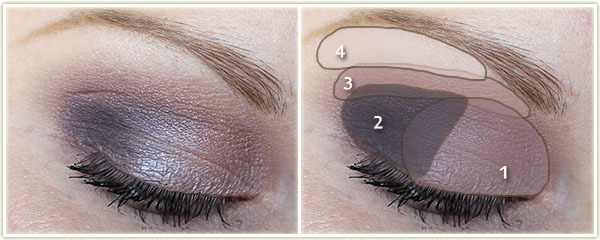
And this looks is dead similar to the one before it. The only real difference in the eyes is that there’s no pink on the lower lash line. And yet, I used totally different colours!
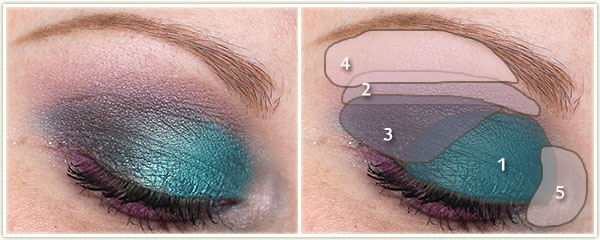
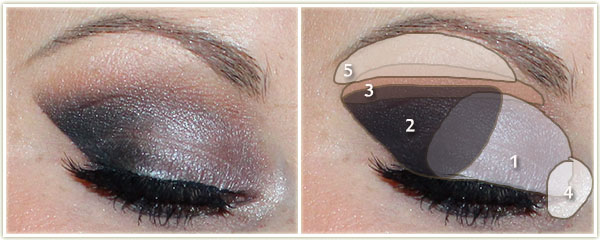
Eyes
On my lashes is Make Up For Ever‘s Smoky Stretch mascara.
Face
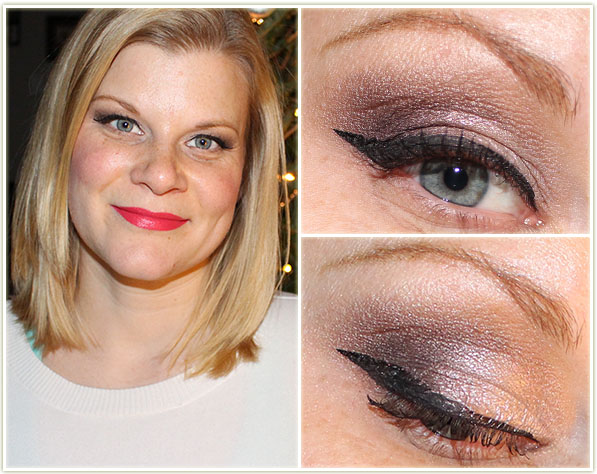
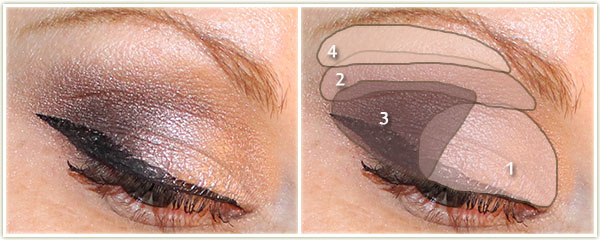
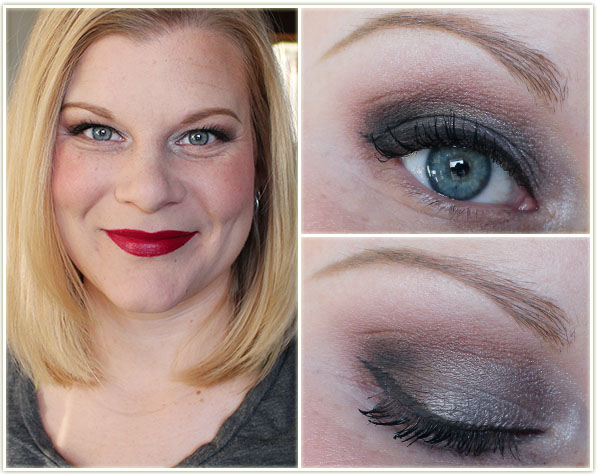
Flash shots – sorry! Thankfully, I’ll have a ring light by the end of the month and won’t be relying on the power of the sun for my photos any longer! I wanted something a bit more neutral for this look.
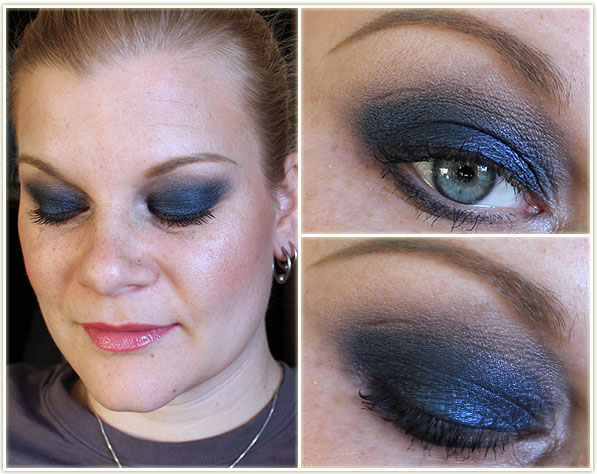
Eyes
I created the wing with MAC‘s Blacktrack fluidline and applied Make Up For Ever Smoky Stretch mascara to my lashes.
Face
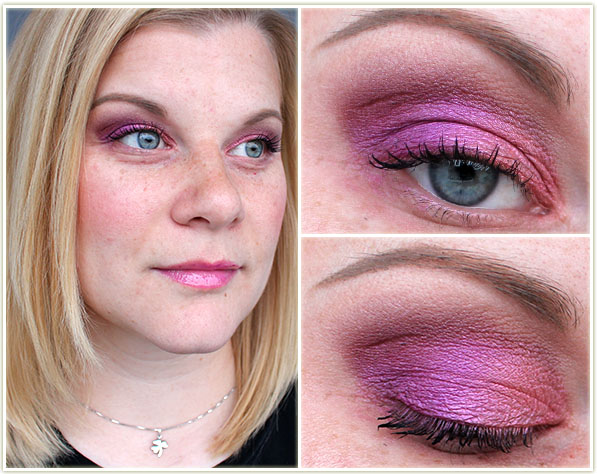
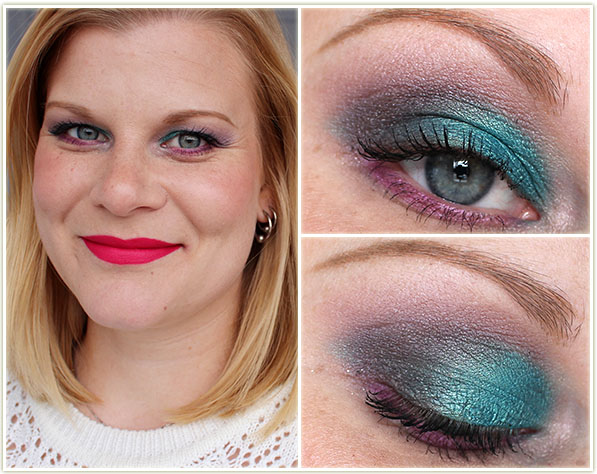
This was my FAVOURITE look I came up with out of this palette. I was looking at my previous pictures being like “aww man, nothing is THAT impactful”. So I started throwing some of the pink shades together and bam! IMPACT!
Eyes
Make Up For Ever Smoky Stretch mascara is on my lashes.
Face
As far as I can tell, “duochrome” is a word that the makeup industry made up. Ask anyone outside the makeup world what duochrome is, and it’s highly likely they won’t have a clue what you’re talking about. (The only term that comes remotely close, and should probably be used instead, is “pearlescent“, but usually people are talking about car colours when they’re using that word.)
So what is a duochrome then? In makeup, it refers to a shadow that can display two different colours. Some duochromes are subtle enough that you can only see it on the edges of the product, or when the product is viewed from a certain angle, often out of focus. Some duochrome shadows are stronger and can be manipulated by changing your base colour.
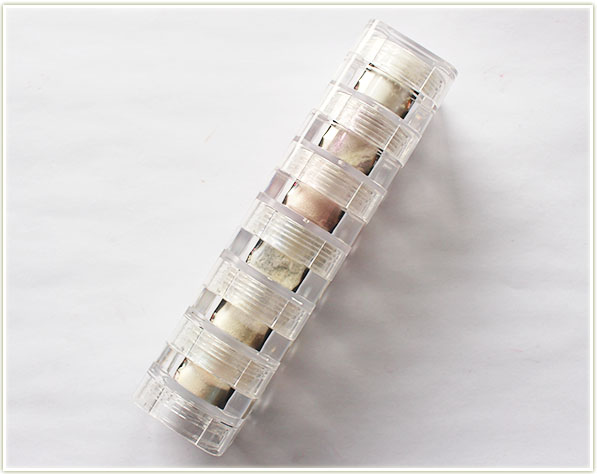
My Naked Cosmetics Ivory stack is a great example for showing off duochromes. In the stack they look mostly white with a hint of colour. However, once you swatch them over different bases….
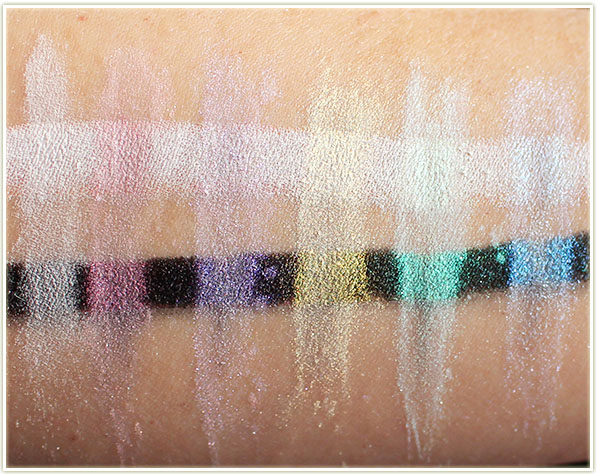
…they come ALIVE! Used without any base, there’s a faint whisper of colour, but nothing with much substance. But when you put it over a black base, the colour that’s hidden in the powder starts screaming at you.
That right there is the duochrome effect: on one hand the pigment looks like a faint pastel colour, but once used with a base, you can intensify the colour and give it far more dimension.
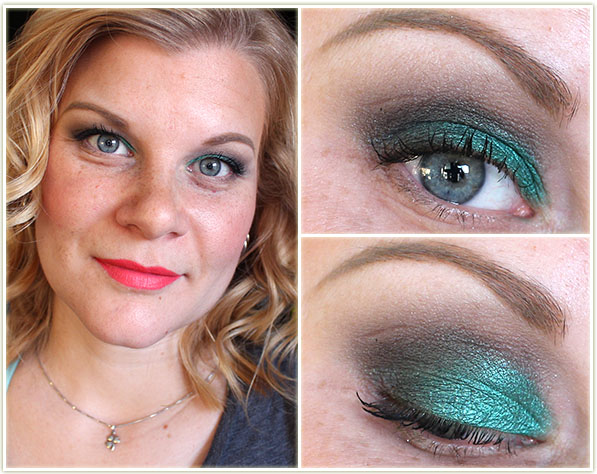
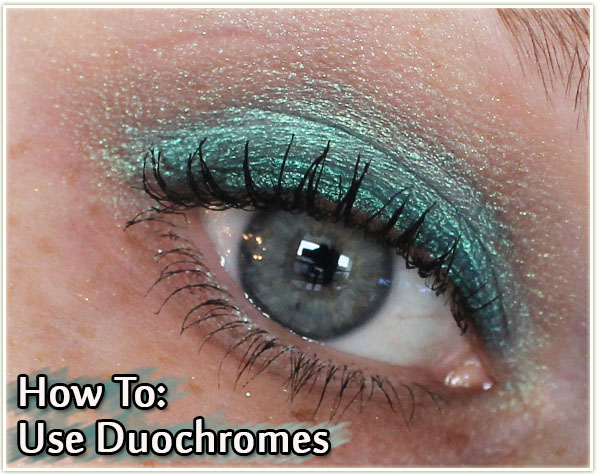
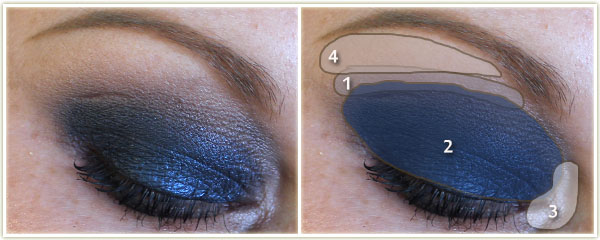
Here’s how I manipulate duochromes to create an eye look with impact:
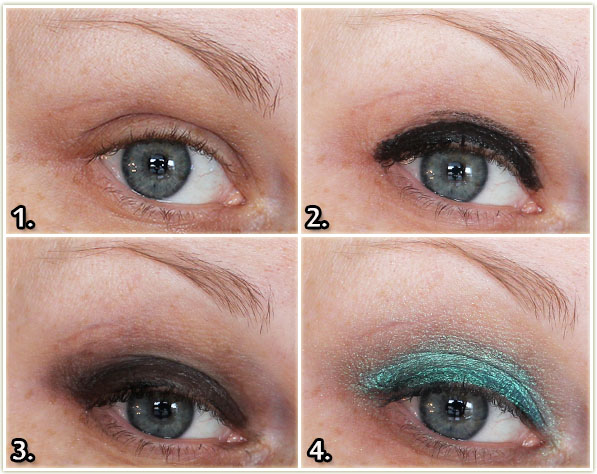
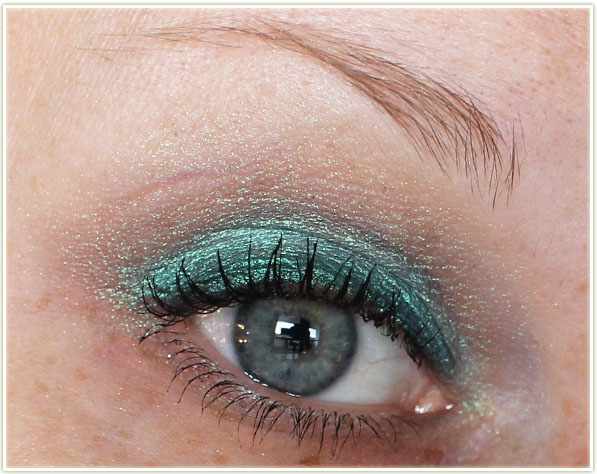
The close up shot shows you that I really did apply the pigment ALL over my eye lid. It goes from my lash liner to just slightly below my brow bone. The green colour stays intense where the black pigment was darkest, and then fades out where there isn’t any black at all.
There are so many options on how to bring out different colours in duochromes. Try changing your base colour and see how the colour reacts to it. If you’re not sure what colours to try, start with a black and then go from there!
Fun fact: I learned all of this from a makeup artist at The Body Shop about 15 years ago!
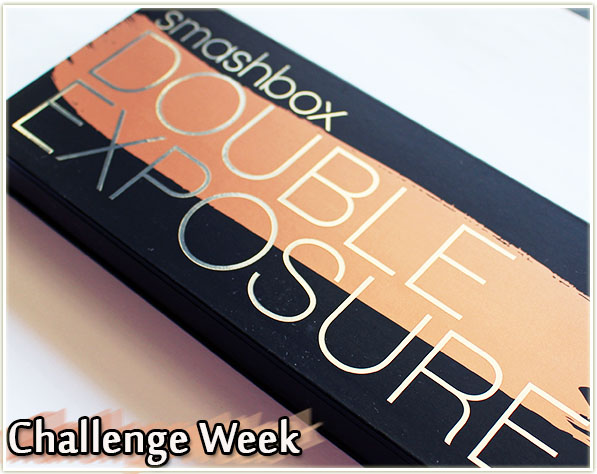
The Smashbox Double Exposure palette features 14 shadows that can be used wet or dry. The idea is that you can create different looks with each shade depending on whether or not you add water. Typically, when you add water, it intensifies a shadow (be it a darker matte, more metallic, etc.), however, as a general rule, I find you don’t really need to add water to these shadows. They just work on their own! The pigment is incredible and really wowed me with how well they went on the lids and blended out. I did use a few shadows wet just to try it out, and I’ll point those out as we go. (Wet and dry swatches can be found here.)
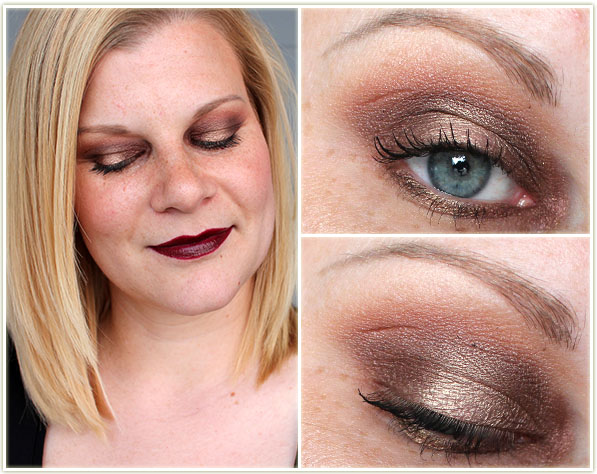
I gravitated towards the warm tones first (mostly on the right side of the palette) and I love how this one turned out – especially with the dark lips!
Eyes
I coated my lashes with Smashbox Full Exposure mascara.
Face
No real inspiration with this one – I just wanted to play around with some of the shadows I wouldn’t necessarily gravitate towards the most in a palette.
Eyes
I applied Too Faced Better Than Sex mascara to my lashes.
Face
Now this is something I really love doing on my eyes. Adding in that warmer shade through the crease really adds some depth to an otherwise cool-toned look.
Eyes
I created the wing with MAC‘s Dipdown fluidline and coated my lashes with Too Faced Better Than Sex mascara.
Face
I wanted something more dramatic for this look to show off that you can really go to town with this palette because it has an awesome black shadow in it. I created that sharp outer corner with a shadow shield – works wayyyy better than tape AND it has a bit of a curve to it that you can’t really see, but it looks a lot more natural that normal tape does (thanks for the tip Julie!). Sidenote: If you think my face is lit up weirdly – it is! I had to use a flash. /shudder
Eyes
I lined my lash line really thinly with Catrice‘s Dating Joe Black liquid liner, applied essence‘s get big! lashes waterproof mascara and then popped on a pair of Noir Fairy false lashes by House of Lashes. I tightlined both water lines with Marc Jacob‘s Highliner Gel Crayon in Blacquer.
Face
For my lash look, I *had* to use the incredibly dark blue shadow (Midnight) in the palette. This shadow may not look like much in the pan, but swatch it wet and you’ll be completely blown away.
Eyes
I applied Make Up For Ever‘s Smoky Stretch mascara to my lashes.
Face
Have you used the Smashbox Double Exposure palette? Let me know what you think of it!
The product featured in this post was provided by PR for consideration.
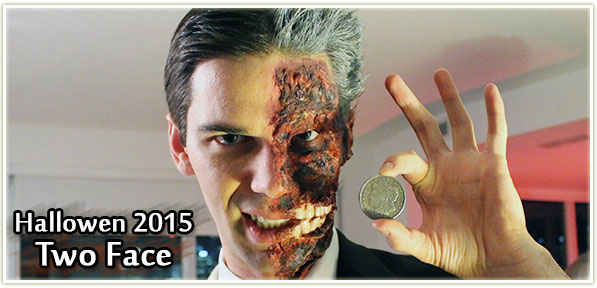
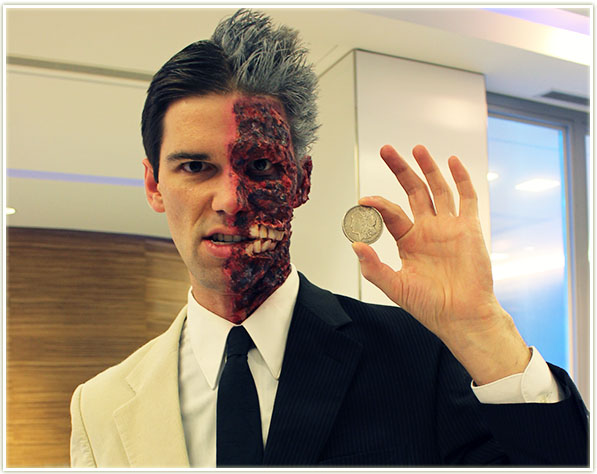
We’ve reached the end folks! The last Halloween 2015 roundup is for Harvey Dent/Two Face!
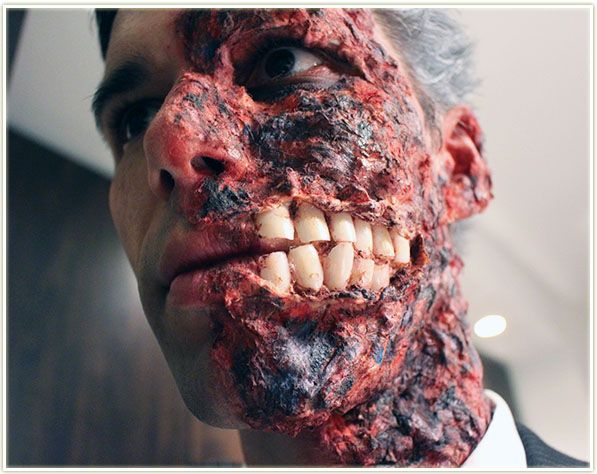
The most striking thing about Shawn’s get up was definitely his face. While I didn’t do the makeup (our friend Steve did – he was Batman in our group costume), I can link you to the video where an amazing YouTuber came up with some great techniques for it!
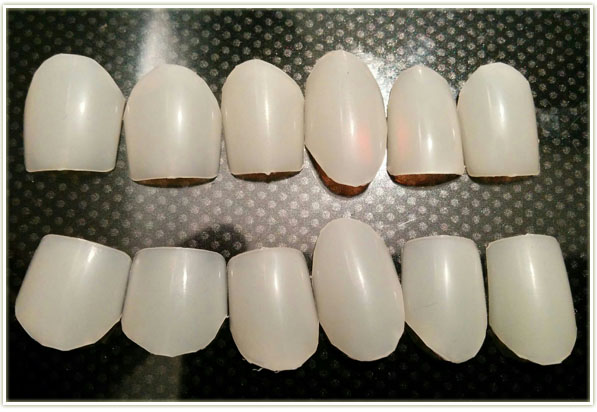
One of the key pieces for the makeup was incorporating clear fake fingernails by cutting them down to the shape of teeth! For this, KISS clear fake nails were used. I couldn’t believe just how realistic they looked when applied to the face.
Here’s a brief time lapse video of the application process:
https://www.youtube.com/watch?v=iOLNld7LkHQ
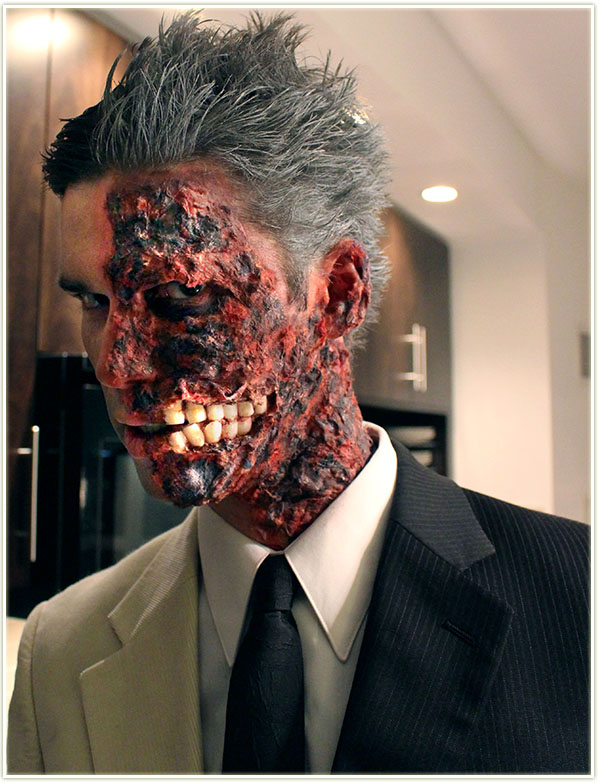
In Shawn’s own words: “The process of applying the make-up was actually less time consuming than I thought it would be – Steve worked remarkably quickly given the significant layering required to achieve the final look.
The significant amount of liquid latex applied to my face and neck was surprisingly comfortable; to be honest, it felt like a second skin and I barely noticed it throughout the evening. The edges of the prosthetic started to peel up a few hours after the initial application, especially around the mouth, but we were able to re-secure it with some eyelash glue.
At the end of the evening, the latex peeled off very easily and there was only a small amount of make-up left on my face to remove with make-up remover. All in all it was a very smooth and painless process from start to finish.”

The one piece I did have a hand in was creating the actual Two Face outfit. Shawn bought two suits that somehow miraculously lined up pretty well, including the button holes! Unfortunately, I’m not much of a seamstress and I haven’t a clue how to operate a sewing machine. We ripped the two sides of the pants apart, as well as the jacket, and I sewed them back up together by hand. We salvaged the zipper from one of the pants and were able to use that to help keep the pants up (with a touch of Velcro to lock it in place). All in all, I think the outfit turned out surprisingly good!


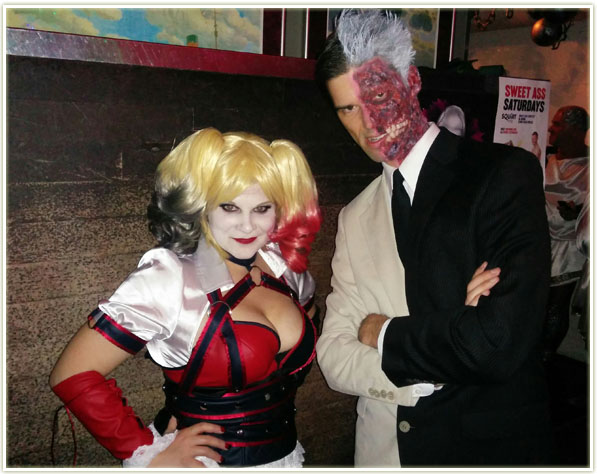
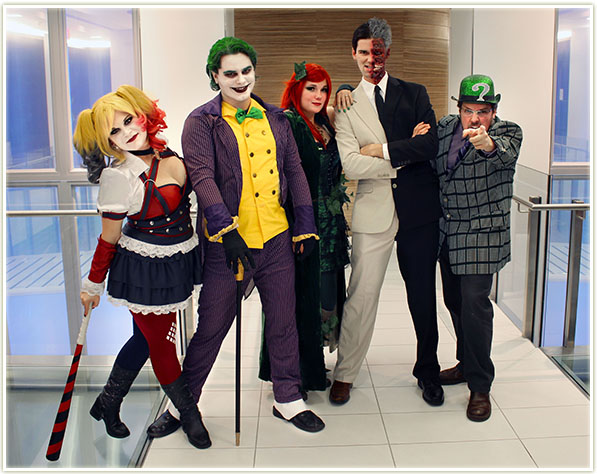
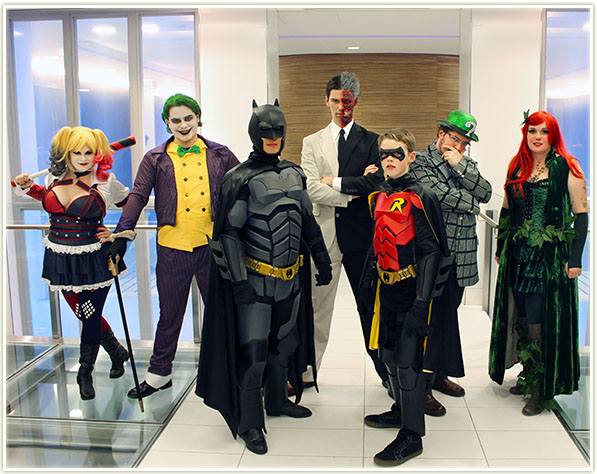
And with that, we’re done for Halloween 2015! If you’re interested in the other costumes I posted about, you can find them here: | Harley Quinn | The Joker | Poison Ivy |