Tons of vibrant looks this week with one neutral one thrown in the mix. I’m really pleased with how a lot of these turned out.
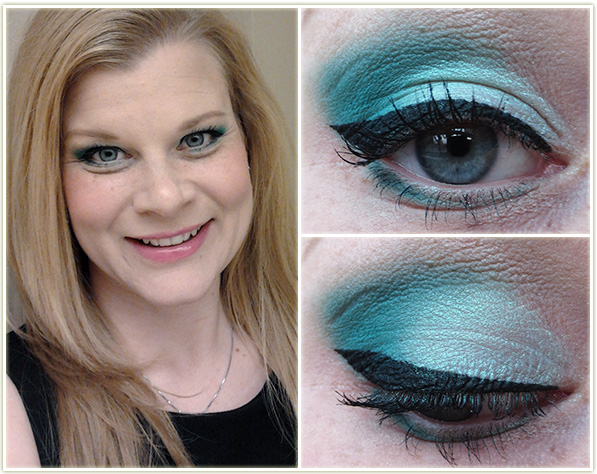
Ummm yeahhhhh. Love it – Love this one so much! The lid colour (InglotAMC Shine 24) is so freaking stunning – it seems to go with anything.
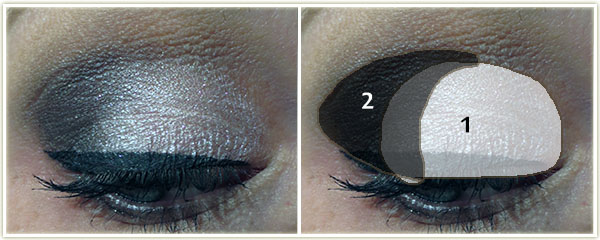
Eyes
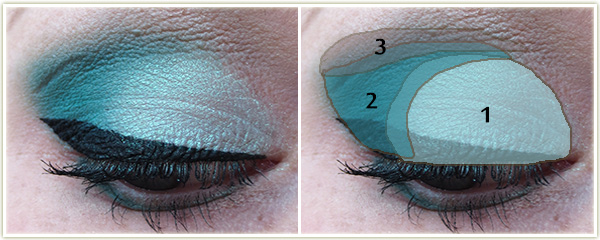
InglotAMC Shine 24 all over the lid.
InglotMatte 317 in the outer corner and through the crease, also used to line the lower lash line.
Makeup GeekCreme Brulee through the top of the crease.
MACShroom to highlight the brow, Tarte Amazonian Clay Waterproof Gel Liner in Black to create the winged liner and L’OrealVoluminous Carbon Black mascara on my lashes.
Rest of the Face
Foundation: Revlon Colorstay in 200 Nude (Combination/Oily)
Bronzer: Joe FreshSand Bronzer
Blush: HourglassDiffused Heat
Lips: NYXVanilla Cream Pie
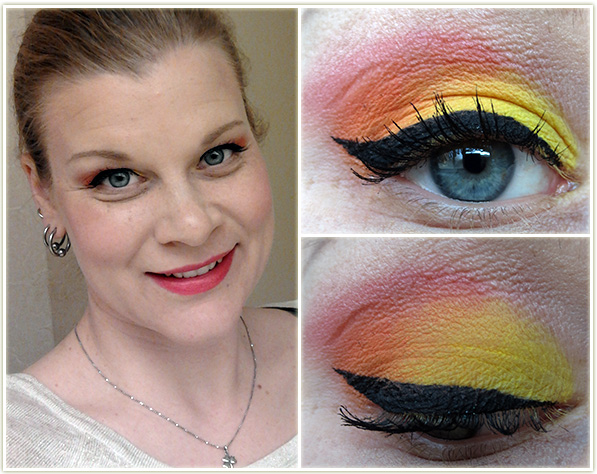
Another really fun vibrant one. Would’ve been kind of neat to draw palm trees coming up from the winged liner, but I’d probably get some weird looks at work for that!
Eyes
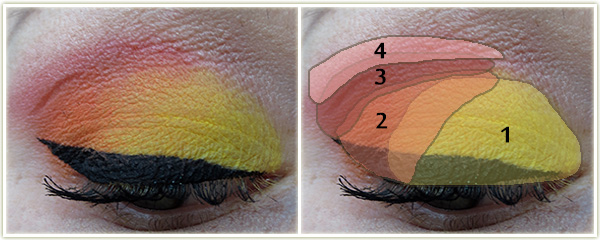
InglotMatte 317 all over the lid.
Inglot Matte 383 on the outer third.
I goofed – there is no third colour here, it’s just more of InglotMatte 383, just blend it up higher!
MACSushi Flower through the upper crease.
MACShroom under the brow bone, Tarte black gel liner for the wing and L’OrealVoluminous Carbon Black mascara on my lashes.
Rest of the Face
Foundation: Covergirl CC Cream in 110 Classic Ivory and Bourjois Healthy Mix Serum in Shade 51 Light Vanilla mixed together
Bronzer: Physicians Formula Bronze Booster in Light/Medium
Blush: Bobbi BrownApricot
Highlighter: Hard CandyTiki
Lips: NYX Butter lipstick in Fizzies
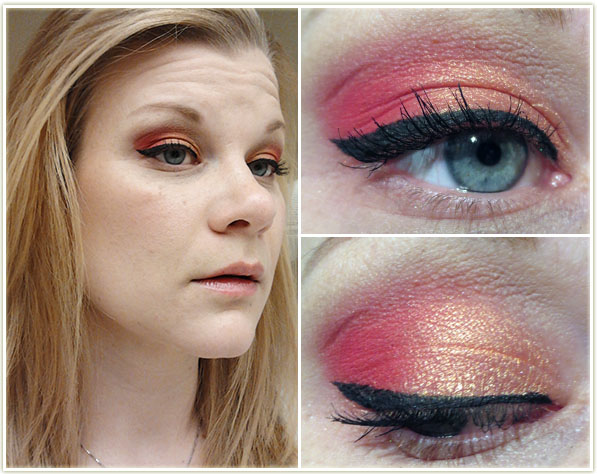
Another favourite look! I really like how this lip combo turned out.
Eyes
InglotAMC Shine 24 on the inner two-thirds of the lid and on the inner half of the bottom lash line.
InglotMatte 334 in the outer corner and through the crease.
InglotMatte 325 in the outer corner to darken it up and on the outer half of the lower lash line.
MACShroom to highlight the browbone and on the inner tear duct, Tarte black gel liner for the wing and L’OrealVoluminous Carbon Black mascara on my lashes. I also put on a pair of Sephora lashes in Tempting.
Face of the Day
Foundation: MUA Matte foundation Shade 1 Soft Sand
Bronzer: Joe FreshSand Bronzer
Blush: HourglassDiffused Heat
Highlighter: MACSilver Dusk
Lips: Wet n WildJust Peachy (903C) with NYX Butter Gloss in Tiramisu on top
That skip in the liner is driving me crazy (even though you can’t see it when my eyes are open)! For this look, I wanted to wear a bright lip, but I’ve not yet mastered (if it’s possible) wearing bright eyeshadows and bright lipstick at the same time, so for now – toned down eyes and bright lips.
Eyes (all Makeup Geek)
Shimma Shimma on the inner two-thirds of the lid.
Goddess on the outer third and to line the lower lash line.
Frappe through the crease.
Vanilla Bean on the browbone, Tarte black gel liner for the wing and L’OrealVoluminous Carbon Black mascara on my lashes.
Rest of the Face
Foundation: MUA Matte foundation in Shade 1 Soft Sand
Bronzer: Joe FreshSand Bronzer
Blush: SleekCrochet
Highlighter: MACSoft and Gentle
Lips: RevlonFire and Ice
Photographing glitter is near impossible! I wasn’t a huge fan of how this look came out, but it was good enough for a 80s night at a nearby club and to be honest, I ran out of time to take it off and try again.
Eyes
Too FacedPure Glam all over the lid and on the outer corner of the bottom lash line.
InglotAMC Shine 33 to blend out Pure Glam and through the crease. Also used to line the inner half of the lower lash line.
InglotAMC Shine 28 on the inner tear duct.
Make Up For Ever Glitter in 13
MACShroom to highlight the browbone and BenefitThey’re Real mascara on my lashes with Ardell102 Demi false lashes on top.
Rest of the Face
Foundation: Revlon Colorstay in 200 Nude (Combination/Oily)
Bronzer/Attempted Contouring: Revlon Photoready Bronzer in Bronzed & Chic
Highlighter: MACSilver Dusk
Blush: HourglassDiffused Heat
Lips: MilaniFlamingo Pose with MaybellineStormy Sahara on top
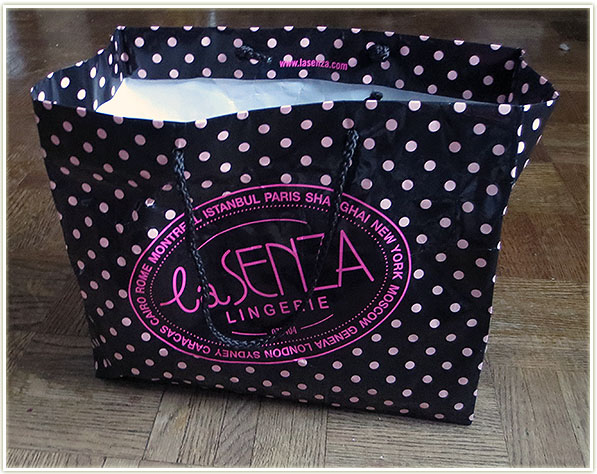
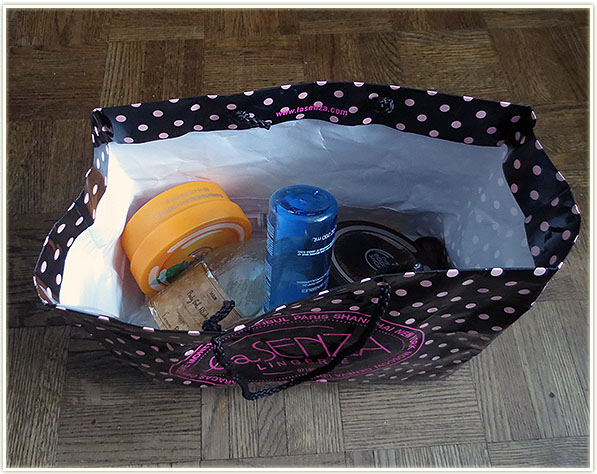
Nope, not a La Senza haul, instead this is a product empties post and that big ole La Senza bag just happens to house all of them.
Product Empties
Having never really saved my empty products until I created this blog, I was a bit surprised that I had enough empties for another blog post only three months after my last one. I’m only posting products I’d actually haul – so you’re not going to be seeing shampoos and toothpaste in here.
First up are the actual makeup products, because I know that’s what interests me most when I read these kinds of posts.
CoverGirl Clump Crusher (water resistant) and L’Oreal Voluminous Carbon Black (waterproof)
These are my two staple mascaras. The CoverGirlClump Crusher mascara is probably my favourite out of the two of them, but even though this is the water resistant formula (a true waterproof one doesn’t actually exist in this formula) is really isn’t water resistant at all. I’ve said this before, but it’s worth repeating, if you get water near your lashes while wearing this, it will definitely run or smear. That being said, the formula really is fantastic and it’s worth wearing – although I stick to the summer months when my eyes are less likely to tear up.
During the winter, or when I need a truly waterproof mascara, I’ll use L’Oreal‘s Voluminous Carbon Black mascara. I always come back to this formula, but I definitely prefer it when it’s in the “wet-er” stages, which is within the first month of opening a new tube. I’m currently using another tube of the L’Oreal one right now.
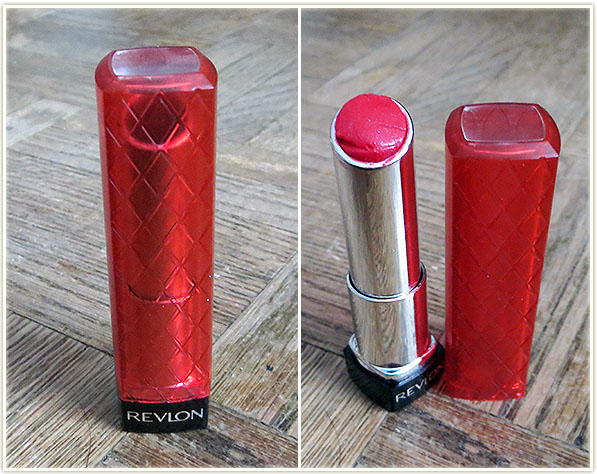
The Revlon Lip Butter in Cherry Tart is a beautiful shade on the lips, it goes on smooth and looks rather glossy. The wear time is about average for a balm (~1.5 hours before you need to re-apply) so don’t expect this to be a particularly long lasting product. I’ve used up as much as I can get out of the tube without actually digging into the bottom of the bullet (can’t be bothered really). While it’s lovely on the lips, I’ve also grown rather tired of the maintenance required with non-long-lasting lip colours so while I like the colour, I just don’t have the patience to keep touching up my lip colour every hour or so.
Verdict: Unlikely re-buy
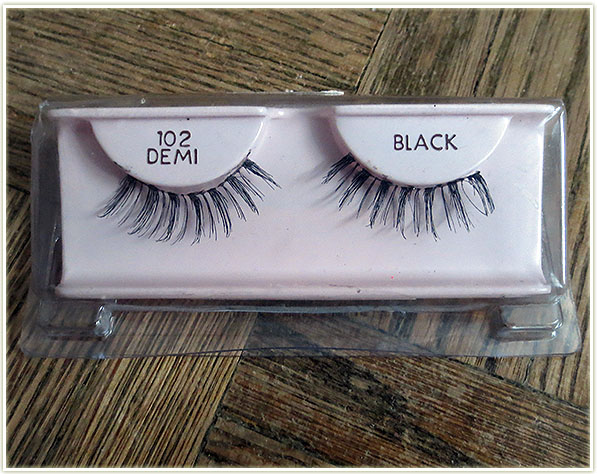
Ardell Lashes – 102 Demi
These Ardell102 Demis are my favourite false lashes to wear and I have certainly worn these to death. I don’t wear false lashes often (once or twice a month, if even) and I believe I got about 8-10 uses out of these. They’re starting to look rather gungy (not to mention they’re also quite old) so it was time to just throw these out and start in on a fresh pair.
Verdict: Definite re-buy – I’ve already got another set waiting in the wings!
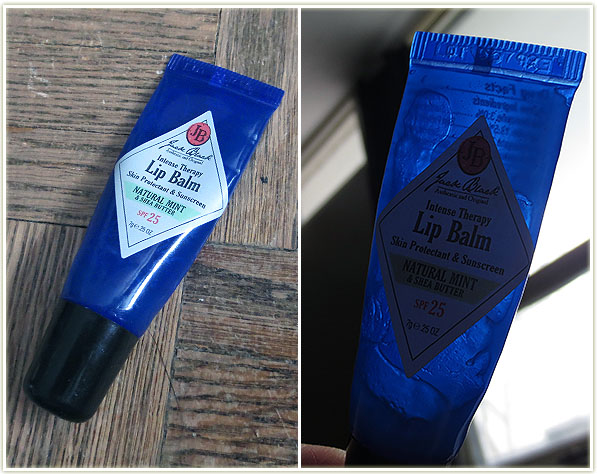
Jack Black Lip Balm in Natural Mint
This Jack Black balm was included in my Products I Want To Use Up In 2014 post, and I’m happy to have finished it. You can see remnants in the tube, but I really can’t squeeze anymore of it out. This product was… adequate. I don’t feel it did much for my lips, neither helpful nor destructive, it was just kind of there. It was great for protecting against windburn throughout the winter since its main ingredient is petrolatum. The thing I liked most about this product is that it comes in a squeezy tube, which makes it easy to apply. I’m not a germaphobe at all, and double dipping in my potted lip products really doesn’t bother me from a hygienic point of view, but I reaIly wish more lip products came like this if only because it’s so much easier to apply on the go.
Verdict: Unlikely to purchase again
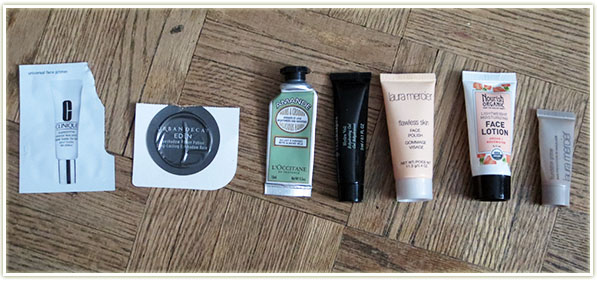
l-r: Clinique Superprimer Universal Face Primer, Urban Decay Primer Potion in Eden, L’Occitane Delicious Hands Almond, Illamasqua Hydra Veil, Laura Mercier Face Polish, Nourish Organic Face Lotion, Laura Mercier Foundation Primer
I know sample size empties are hardly exciting, but sometimes they’re worth mentioning for that first impression.
Clinique Superprimer Universal Face Primer – Won’t buy full size
I used this just for the sake of using it. I didn’t notice it affecting how long my foundation lasted on my skin, but then again I’m not prone to foundation just sliding right off my face in the first place.
Urban Decay Primer Potion in Eden – not sure what to think…
I’m not sure what to think about this. I started using this primer right around the time where even my OriginalUDPP started creasing on me (which shocked and frightened me, to be perfectly honest), so my only exposure to Eden is to say that it creased on me. But so did my usual primer at the time. So maybe it was a weird hormonal fluctuation in my skin, but this didn’t work out for me at the time that I used it.
L’Occitane Delicious Hands Almond – won’t buy full size
Smelled like almonds and worked well but it’s pricey and not a scent I’d usually pay a lot of money.
Illamasqua Hydra Veil – possible purchase
My first exposure to a gel moisturizer – this felt SO COOL. When I think of gels (of any kind), I think of alcohol, so I didn’t really understand how the heck this was going to moisturize my skin. This felt really neat on the skin and I *loved* the smell of it. However, at the $48 CAD price point, I’d have to be gifted this because I’m perfectly happy with my Aveeno facial moisturizer and that is way too steep of a price in my books.
Laura Mercier Face Polish – won’t buy full size
This felt cool to use, but it’s not something I really need or want. The granules in the polish are so small that they actually feel kind of soothing as you rub it into your wet skin.
Nourish Organic Face Lotion – will avoid for life
The smell became rather sickening after a while and after this dried down on my face it felt like I had a thin mask over my face that I had to crack just by moving my features around. Unpleasant all around.
Laura Mercier Foundation Primer – won’t buy full size
Just like the Clinique one, I don’t find this foundation primer actually did anything for my makeup. /shrugs
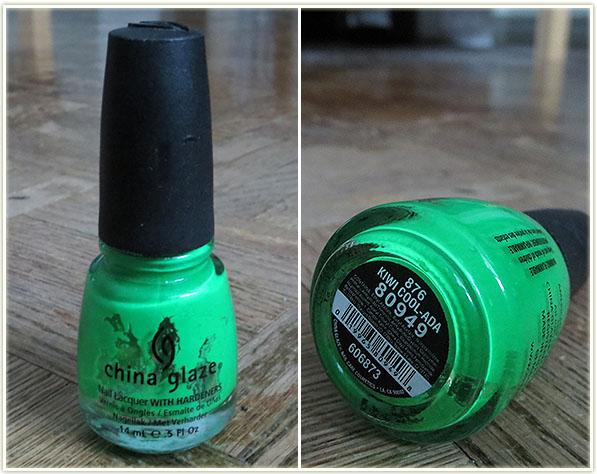
China Glaze – Kiwi Cool-Ada
I used the pants out of this China Glaze shade. Kiwi Cool-Ada was a matte neon polish (use a top coat to get some shine) that just glowed in the daylight. Since the polish went on rather streaky, you usually needed about three coats before it looked perfect.
Verdict: Possible re-buy, but I’d rather use up some of my other polishes first.
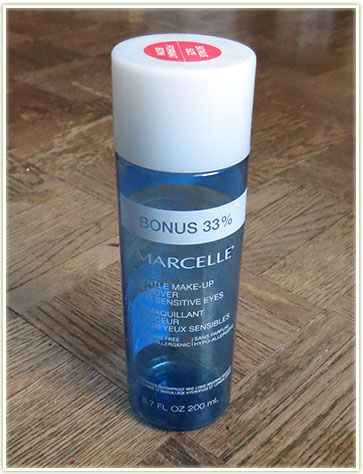
Marcelle Gentle Makeup Remover for Sensitive Eyes
MarcelleGentle Makeup Remover for Sensitive Eyes has been my go-to makeup remover for years and years. It’s an oil-based remover (shake before using) which, of course, ensures that it’ll take off any and all waterproof makeup. I find this works just as well as MAC‘s makeup remover (the one in the red/pink tube), if not better, and at almost half the price. Since the Marcelle normally runs around $15, I usually wait for a sale at Shoppers and/or buy it when it’s in the larger bonus size bottle (like the one above – 33% more product). I can’t recommend this enough, I’ve been using this remover for well over six years now and haven’t found anything better.
It’s hard to vocalize just how disgusting these Make-Up Cleansing Tissues from Absolute! are. I saw on the Ipsy forums that someone referred to these as smelling like beer… and they nailed it. In my original Ipsy review, I said that they smelled like some kind of alcoholic fruity drink, and I was kind of close, but also off the mark. These smell like beer that has gone rancid. They don’t smell like pomegranate, that’s for sure. And they don’t even work that well either – removing waterproof mascara was a nightmare and I’m fairly certain I pulled out more lashes than I actually cleaned. (Let it be known that it also said on the packaging that it would remove waterproof mascara.)
Verdict: You couldn’t PAY me to use these again – avoid like the plague
The Body Shop Body Butters – Satsuma & Coconut
The Body Shop Body Butters are legendary – I don’t think I’ve ever actually heard of someone disliking them. They’re thick, moisturizing and these two in particular, Satsuma andCoconut, smell especially fantastic. Satsuma was my favourite one out of these two and I’ve got a backup sitting on a bookshelf behind me.
Verdict: Love these and will definitely repurchase at some point.
Embryolisse – Lait-Creme Concentre
I picked up Embryolisse‘s Lait-Creme Concentre while vacationing in France in 2012 (picked up a few tubes actually, this was my last one) because I’d heard so many people rave about it. And it’s… okay. It’s not especially expensive (under 10 euros I think), which is rather nice, and cheaper, than my usual facial moisturizer. It feels kind of fancy to say you use French skincare that you bought in France… but the reality is that I didn’t notice anything different about my skin after using this cream. It smelled like generic “unfragranced” skincare and goes on smoothly.
Verdict: Will repurchase if I’m in Europe again.
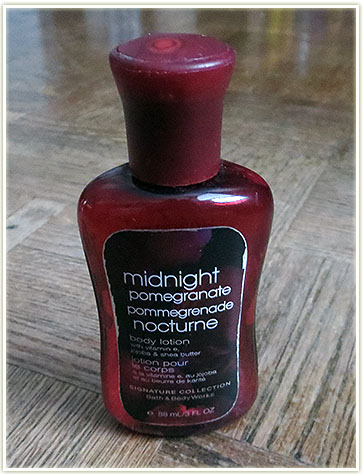
Bath & Body Works – Midnight Pomegranate Body Lotion
This Bath & Body Works lotion in Midnight Pomegranate took me forever to use up. It’s one of the mini bottles, but the scent was so strong that it was actually incredibly overpowering when I used this a few times at the office (just ask my coworkers from several offices over). I was happy to finish this up (and I’m still struggling with the 3-wick candle I have in the same scent, although I have to say the candle is far less powerful than the lotion) but it’s not something I can say I really enjoyed. The lotion is on the thin side and really didn’t seem to do anything other than fragrance my skin.
Verdict: Won’t repurchase
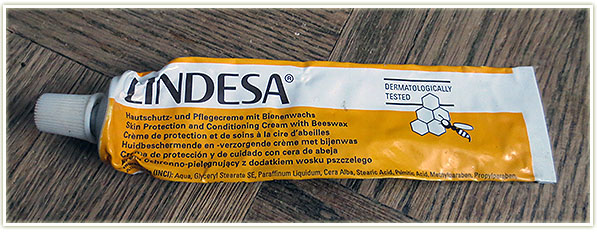
Lindesa – Skin Conditioning Cream
I was given this Lindesa hand cream as a gift and I believe it came from a German Christmas market. The cream seems to contain a substantial amount of beeswax, so it could feel pretty heavy on the hands. The smell was really nice, although mild, and it was a great moisturizer for when my hands were on the drier side.
Verdict: Unlikely re-buy since I have no idea where to even get it!
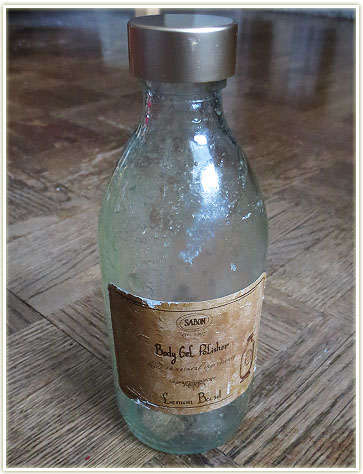
Sabon – Body Gel Polisher in Lemon Mint
I never see any Sabon products mentioned in the beauty world but I love their products so much. I first discovered them in New York City about seven years ago by accident. They also have a location in Toronto, but it’s nowhere especially close to where I live. Anyway, this Body Gel Polisher is fantastic, it’s a full body exfoliant, but you don’t need a ton of product to get the desired effect. I quite like the Lemon Mint smell, although I’ve been told my others who got a whiff of it that they can’t stand the smell of it – to each their own!
Verdict: Will repurchase when convenient.
Not an especially exciting empties roundup, but I was happy to empty out my bag of garbage!
More makeup looks I’ve done over the past few weeks ranging from stuff I wore to work, out to a bar or was just headed over to a friend’s place! I was really happy with this set of looks and I hope you enjoy them.
As a note, I’ve switched to NARS‘ Pro Prime eyeshadow primer, so that’s what I use in all of my looks now unless otherwise stated.
I loooove this one! It took me a lot more time to put this one together because I don’t normally get this creative and use so many shadows. (Seriously, if you haven’t noticed, I tend to stick to about two lid colours!) I don’t typically wear this much shadow/liner under my eyes on a regular basis because holy hell is that area ever sensitive on me and I usually end up with very watery eyes. This frustrates me because I realize just how much a makeup look comes together when you shade under your eyes!
Anyway, moving on.
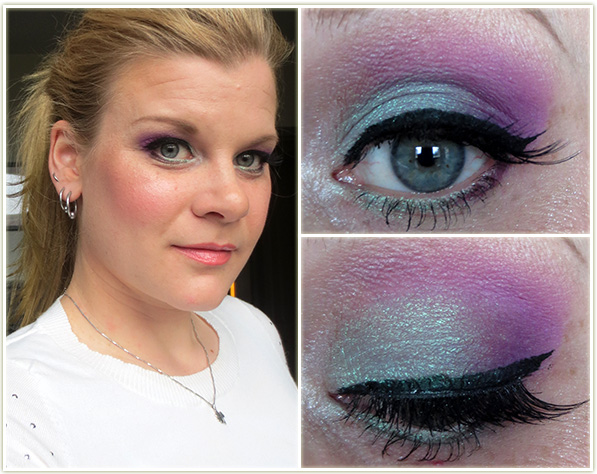
With this, I had one goal: I wanted to use the MUFE rainbow glitter that I had picked up last month. I also hadn’t done purple look in quite a while so I figured this was as good a time as any.
Eyes: I first applied NYX‘s Jumbo Eye Shadow Pencil in Milk all over the lid as a base.
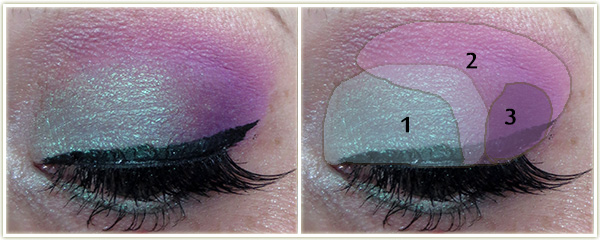
The first colour from a ginormous Sephora eyeshadow palette I have that unfortunately does not have shade names, however, the colour is very similar to MAC‘s Crystal. Essentially, the colour is a very pale lilac shade with a bit of a sheen to it. This shade was placed on the inner half of the lid.
I then used MACDame’s Desire right beside the previous shadow, but not all the way out to the corner.
SleekSugarlite was blended heavily into the upper crease.
SleekHighness filled in the outer corner, with;
SleekNoir at the very edge of the outer lashline to darken up that area.
I then used MACVellum to highlight the inner corner of the eye and blended it into the pale purple.
MACBlanc Type to highlight the browbone with MACOmega on my brows. On the lower lashline, I used Sugarlite to line the outer half of the lid, then applied some Too FacedGlitter Glue to the inner half of the lid and tapped on Make Up For Ever‘s Glitters 13 (silver rainbow glitter) on top of the glue. I lined the upper lashline with MUFE‘s Aqua Liner in 13 Blackand used MAC‘s Feline Kohl Power pencil on the lower waterline. And finally, I finished up the eyes with some Ardell‘s 102 Demis and applied L’OrealVoluminous Carbon Black on my lashes.
Rest of the Face
Foundation: Bourjois Healthy Mix Serum in 51 Light Vanilla
Bronzer: Revlon Photoready Bronzer in Bronzed & Chic
Blush: TarteExposed with IllamasquaHussy layered on top
Highlighter: MACSilver Dusk
Lips: I’m not wearing it in the picture, but I wore Rimmel Apocalips in Celestial out that night.
Extra: I used MAC‘s Select Coverup in NW20 under my eyes and set it with Laura Mercier
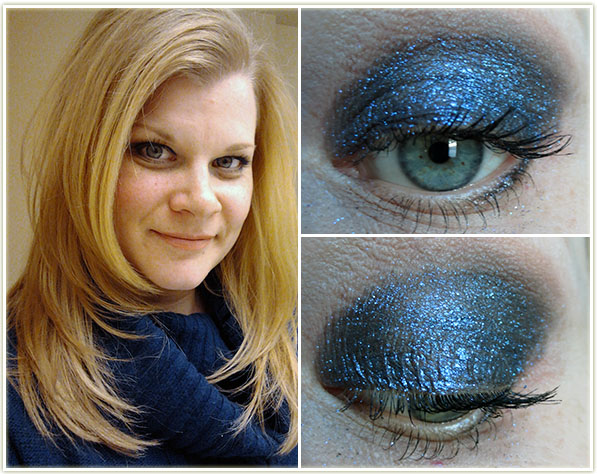
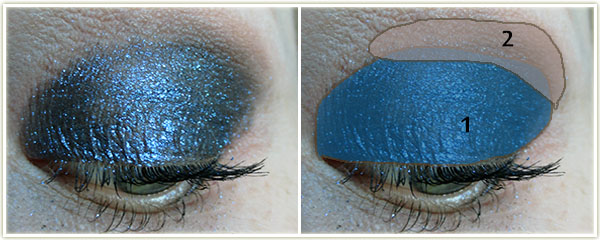
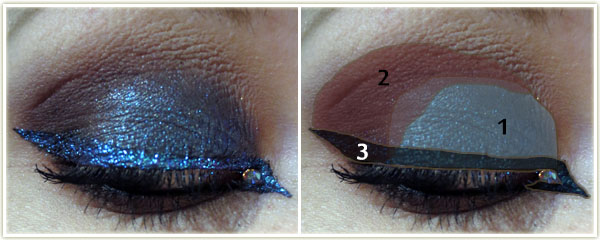
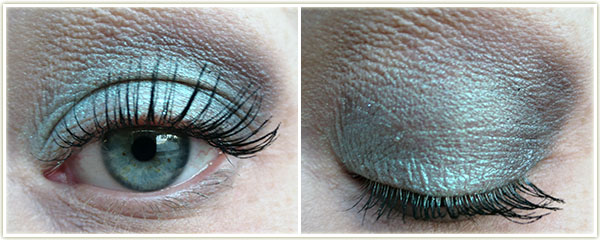
It was just one of those mornings when I had no idea what to wear and just happened to look into the tub that contains all of my mineralize eyeshadows. Although it’s beautiful, I rarely use this shadow. A word to the wise though, this can apply really patchy and can flake off at a moment’s notice. Beautiful end result, however.
Eyes:
With a dampened, flat, stiff makeup brush, I packed (and I do mean packed) on MACBlue Flame all over my entire lid. You may will likely need to layer this.
I then blended Makeup GeekCreme Brulee into the crease.
I also lined the outer third of my bottom lashline with the Blue Flame as well. Too Faced‘s Cream Colored Ponies on my browbone and L’OrealVoluminous Carbon Black on my lashes.
Rest of the Face
No foundation, bronzer or highlighter.
Blush: Illamasqua –Hussy
Lips: MAC – Shy Girl
Obligatory neutral eye look, using the Too Faced A Few of my Favorite Things palette.
Eyes: (Urban DecayPrimer Potion as a primer for this one!)
Too FacedSnowflakes all over the lid.
Too FacedBuche de Noel slightly into the outer corner.
Too FacedWoolen Mittens on the outer corner and blended into the crease.
I did the winged liner with MAC‘s Dipdown fluidline. Too FacedCream Colored Ponies to highlight the brow with L’OrealVoluminous Carbon Black on the lashes.
Rest of the Face
Foundation: MUA Matte foundation in Shade 1 Soft Sand
Bronzer: Physicians Formula Bronze Booster in Light/Medium
Blush: Errr no idea. Maybe nothing?
Lips: MACBoldly Bare lipliner with MACViva Glam Cyndi on top
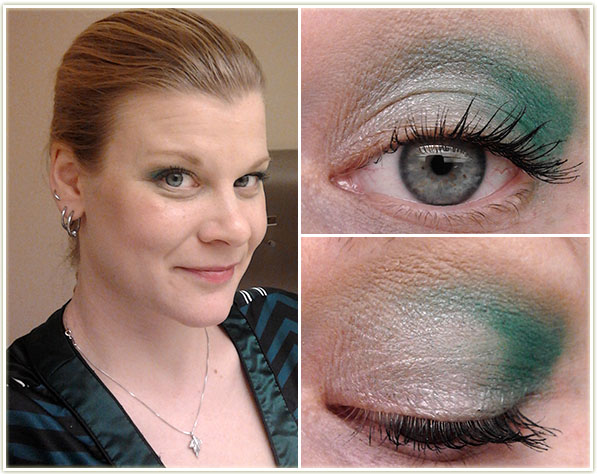
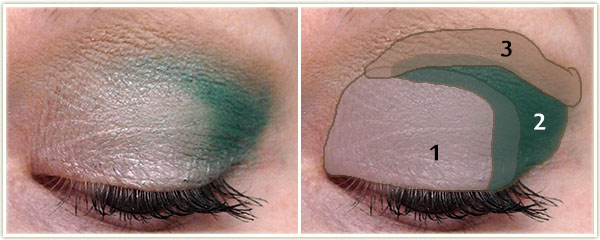
This look features Jealousy Wakes, the eyeshadow created by Christine (Temptalia) for MAC. Unfortunately it was limited edition (boy, was it EVER) and it sold out almost instantly back when it was released. It’s a beautiful shade and this is my default look when I want to wear that shadow.
Eyes: (Again with UDPP)
MACVex, inner two thirds.
MACJealousy Wakes, outer corner and into the crease.
Makeup GeekCreme Brulee throughout the crease.
MACBrule to highlight the brow and L’OrealVoluminous Carbon Black on my lashes.
Rest of the Face
Foundation: MUA Matte foundation in Shade 1 Soft Sand
Bronzer: Physicians Formula Bronze Booster in Light/Medium
Blush: Physicians Formula – Natural
Highlighter: DiorAmber Diamond
Lips: MACPetting Pink Lip Conditioner
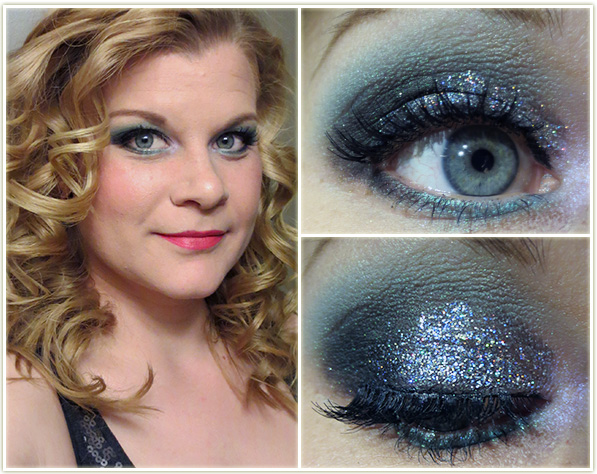
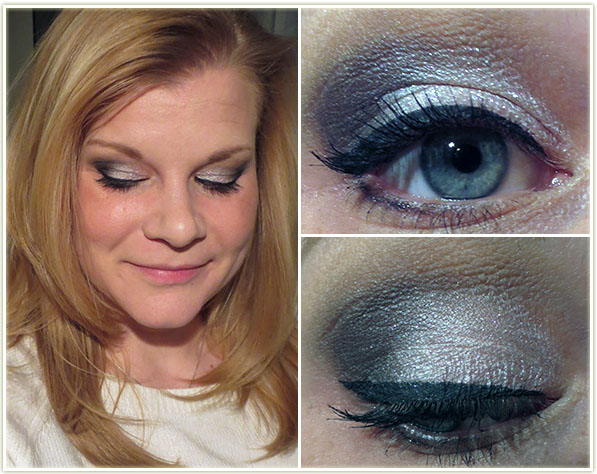
A shame the sparkles don’t show up more – I was going for a wintry snowfall at night look.
Eyes:
MACCrystal Avalanche on the inner two-thirds of the lid.
MACPrint on the outer third.
Although it is incredibly difficult to see in the photograph (which is very frustrating to me), I did layer Illamasqua‘s Beguilepigment on top of Crystal Avalanche. Rest assured that it showed up much better in person.
I used KIKO‘s Twinkle Eye Pencil in 06 (I really need to use this more, it’s fantastic) on the lower lashline. The upper winged lined was created with MACBlacktrack fluidline. I appliedToo FacedBetter Than Sex mascara to both sets of lashes and ran some MACOmega through my brows. (The brows really never change, I’ll probably stop repeating this…)
Rest of the Face
Foundation: MUA BB Cream in Light mixed with some moisturizer
Bronzer: Physicians Formula Bronze Booster in Light/Medium
Blush: MACWarm Soul
Highlighter: MACSilver Dusk
Lips: Nothing – was heading out to eat so I didn’t see the point!
I’m pretty pleased in the makeup department lately… most of my looks have been suitable enough to post on here and I had about 15 or so looks to choose from for this post! Pretty happy with that because sometimes I can get a nasty streak where I don’t like anything I applied at all for several days. (That’ll make for an interesting post some day.
Lately I found I had been wearing far too many neutral looks and I was boring myself with my makeup in the morning. Neutral colours are so easy and safe to play with… but they just don’t get me excited. When I wear something more vibrant on my eyes, I actually feel better. I can’t explain it any better than that really. Colour makes me happy!
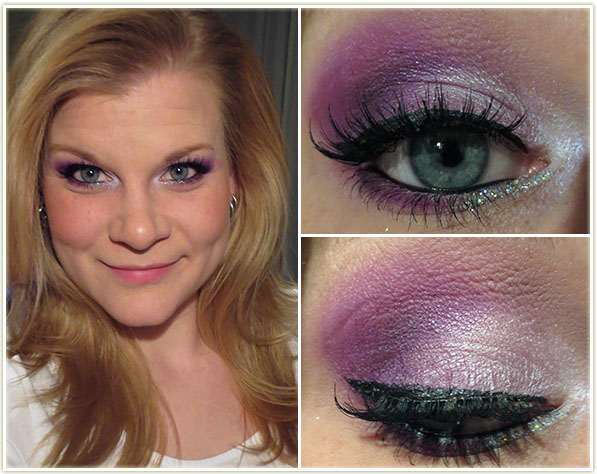
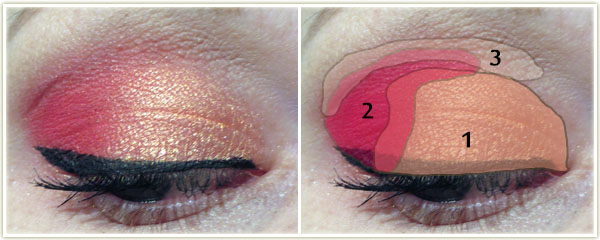
I *love* this one. It’s not particularly hard to achieve, I just think it’s the colour combination that I love so much. Excuse the derp face – I find if I smile in pictures, my eyes crinkle up too much to actually show what the shadows look like on a full face shot!
Eyes:
InglotAMC Shine 15 (shimmery orange) all over the inner two-thirds of the lid.
InglotMatte 382 (matte red) on the outer third of the lid and blended slightly into the crease.
Urban DecayNaked in the crease to blend all the colours together.
MACBrule was used to highlight my brow. And, of course, I used MACBlacktrack fluidline to create the wing and applied L’OrealVoluminous Carbon Black mascara to my top lashes. For brows, I used MACOmega.
Rest of the Face: Bourjois Healthy Mix Serum foundation in 52 Vanilla with Revlon‘sBronzed & Chic bronzer on the high points of my face. I used TarteCharisma on my cheeks and since that blush has enough shimmer to it, I didn’t bother with a highlighter. On my lips is Benefit Ultra Plush Gloss in Coralista.
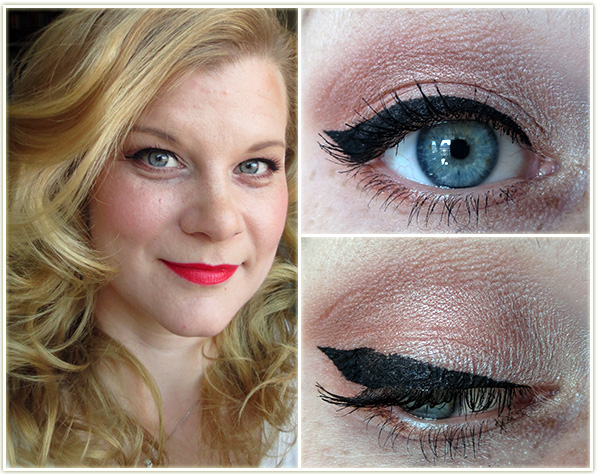
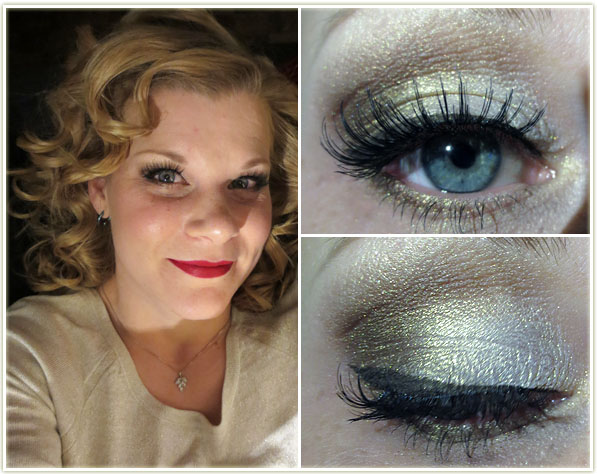
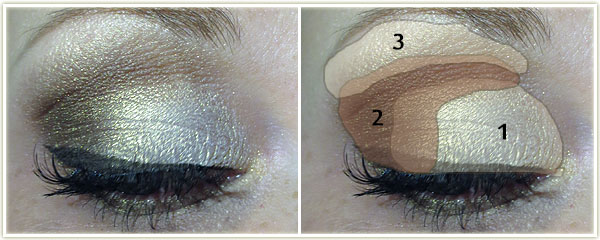
I wore this one out to a (friend of a) friend’s Christmas party. Red, gold, false lashes. All the staples of holiday season makeup!
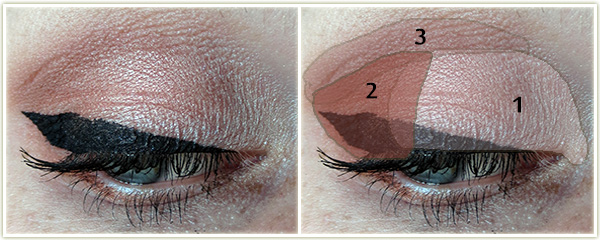
Eyes: To make the white-gold eyeshadow show up better, I have to lay down a white base. For that I use NYX‘s Jumbo Eyeshadow Pencil in Milk. Make sure to keep the white base below the crease and also blend it out so you don’t have any harsh lines.
On the inner two-thirds of the lid, pack on the white-gold shade in MAC‘s Illusionary: Burning Ambition duo (limited edition from several years ago). And when I say pack it on, I mean, PACK it on. This stuff is fallout city and gets everywhere, but it’s really way too pretty to ignore.
Using the brown side of that same duo, apply it to the outer third of the lid and sweep it through the crease.
Using the white-gold shade again, use it to highlight your brow and to blend out the brown shade in the crease. This is a LOT of shimmer and it may even be overkill for some people. You’ll notice that the brow ends up being more gold, while the lid colour is has more of a white-cast due to the base that we put down.
I used MACDipdown fluidline to create the wing and applied L’OrealVoluminous Carbon Black mascara to my lashes. False eyelashes are ArdellDemis applied with Duo adhesive.
Lips: Since the eyes are so shimmery, I stuck with a matte red. I used MACBrick lipliner to line and fill in my lips, then followed it up with MACRussian Red lipstick.
Rest of the Face: Foundation is Bourjois Healthy Mix Serum in 52 Vanilla. I used Joe FreshSand bronzer to contour since it’s matte. On my cheeks is TarteExposed.
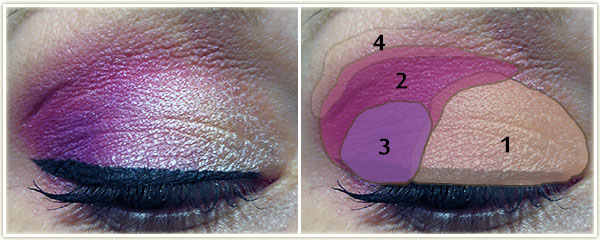
With this one I just knew I wanted it to be bright! I also tend to get stuck in ruts and keep re-using the same colour combinations because I generally know they’ll work. While trying to break out of that rut, I ended up going with a fail-safe colour palette anyway. Whoops!
Eyes:
From the MUAPretty Pastels palette, I applied the second shade from the left on the bottom row all on the inner half of my lid. The shade looks rather peach in the pan, but as you can see, it came out almost white.
Using the SleekAcid palette, I applied the first shade on the top row (a fuchsia pink) to the outer half of my lid and pulled it through the crease. Then, using the same palette;
I took the bright purple colour directly below the fuchsia and dabbed it right in the outer corner of my eye, on top of the fuchsia. You’ll need to blend some of the edges otherwise it’ll be pretty stark.
I then used Urban DecayNaked to very lightly blend out the bright fuchsia.
As per usual, I used MACBrule to highlight my brow. Followed it up with MACBlacktrack as my liner and L’OrealVoluminous Carbon Black mascara. MACOmega was used to fill in my brows.
Lips: NYXStrawberry Parfait
Cheeks: Wet n WildHeather Silk
Rest of the Face: My foundation is MUA‘s Matte Foundation in Shade 1 Soft Sand withRevlon‘s Photoready bronzer in Bronzed & Chic.
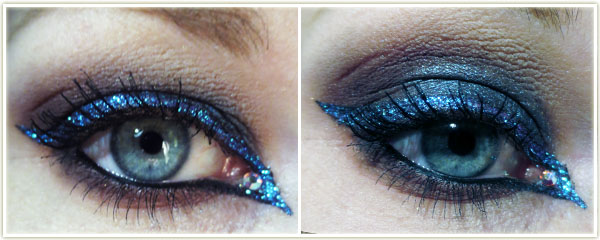
No full face for this one because I was only messing around. I wanted to play around with my Too FacedA Few of my Favorite Things palette and then it kind of developed into this glitter bomb.
I first used NYX‘s Jumbo Eyeshadow pencil in Black Bean and applied it all over the lid as a base. I then;
applied Too FacedParty Time on the inner half of my lid (this really needs some kind of coloured based or it’ll apply very, very sheer). I really packed this one on.
Too Faced Soiree was applied to the outer half of the lid and through the crease. I didn’t use a blending shade to fade this colour out, instead I very slowly blended it up through the crease. I also used this shade on my lower lashline.
I don’t usually number my liner in my diagrams, but there were a few steps involved with this one. I first created an inner and outer wing with Maybelline‘s black gel liner. With the inner half of the wing, I made sure to do it far out enough so that I could leave a gap near my inner tearduct and drew the line right back to my lower waterline, creating a small triangle. After the gel liner had set, I use Too FacedGlitter Glue and went over top of the liner. Once that became tacky, I used MAC Reflects Glitter in Transparent Teal and placed it on top of the liner.
I used MACFeline Kohl Power pencil to line my upper and lower waterlines. I appliedL’OrealVoluminous Carbon Black mascara heavily to my upper and lower lashes. The small crystal was from some set that I got at Michael’s a few years ago and I stuck it to inner corner of my eye with some Duo clear lash adhesive.
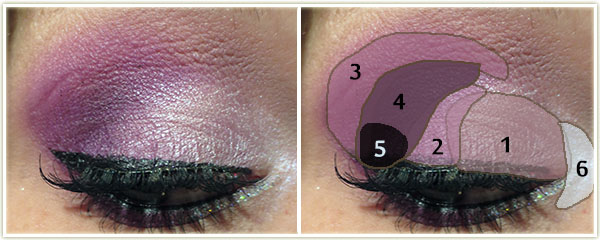
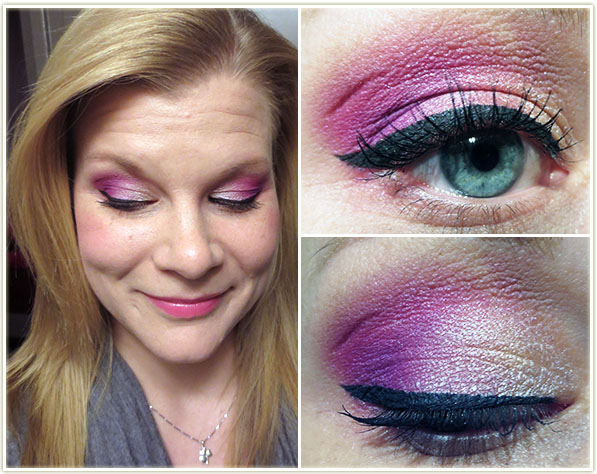
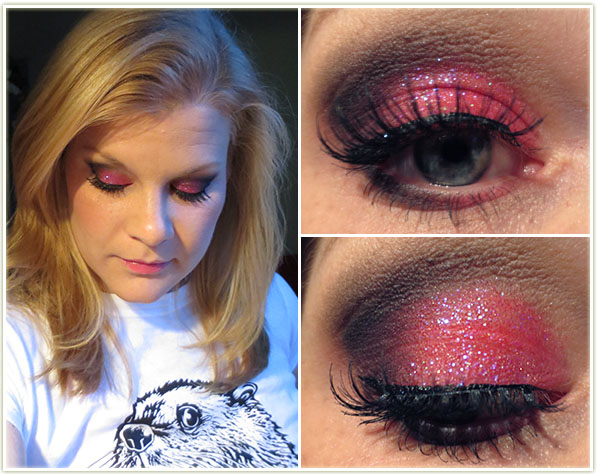
Wore this one out to a concert (Phildel was playing at the Drake Hotel in Toronto – check her out). I’ve been hoarding this pink cosmetic glitter for what feels like eons now (seriously, a friend gave me some of this about ten years ago) and never really thought to wear it because I didn’t used to wear a lot of pink (I still don’t really). For whatever reason, it sprung into my head as I was getting ready for the show so I decided to give it a shot.
Eyes: I used Urban Decay Primer Potion in Original to prime the lid. I then applied SleekPout all over the lid (take a while to pack this on) and then used Urban Decay Blackout in the outer corner and into the crease. To blend out the black, I used Urban DecayBuck at the top of the crease to help blend it into my brow highlight which was MACBrule. I also lined the lower lid with Pout (inner half) and Blackout (outer half).
To add the glitter, I first applied Too FacedGlitter Glue wherever the pink eyeshadow was, then dabbed the glitter over top. I wish I knew what the glitter was, but I don’t as it’s been decanted into an unlabeled bottle. It’s a very transparent pink glitter with a slight blue iridescence.
I then lined the upper lash line with Physicians FormulaUltra Black liquid liner and applied ArdellDemi lashes with some Duo adhesive. To finish off the look I appliedL’OrealVoluminous Carbon Black mascara (waterproof).
Face: Bourjois Healthy Mix Foundation in 52 Vanilla with RevlonBronzed & Chic as my bronzer.
Lips:NYX Butter Gloss in Strawberry Parfait
Cheeks: TarteBlissful
Just a very plain, neutral look.
Eyeshadows: Urban Decay Primer Potion in Original all over the lid and up to the brow. Maybelline Color Tattoo in Bad to the Bronze layered on top of the primer (all over the lid, barely into the crease). I then applied Urban DecaySidecar (be careful with this one, the glitter gets EVERYWHERE) to the inner two-thirds of the lid with Urban DecayHustle in the outer corner and slightly blended into the crease. MACBrule was used to highlight the brow and blend Hustle in slightly.
Liner:Maybelline Gel Liner in Blackest Black
Lashes: Well, according to my notes on this look, I have single lashes glued in, so they would be by Ardell. Good thing I wrote it down, because I wouldn’t have picked up on them from these shots. I used CoverGirl Clump Crusher in Very Black as my mascara.
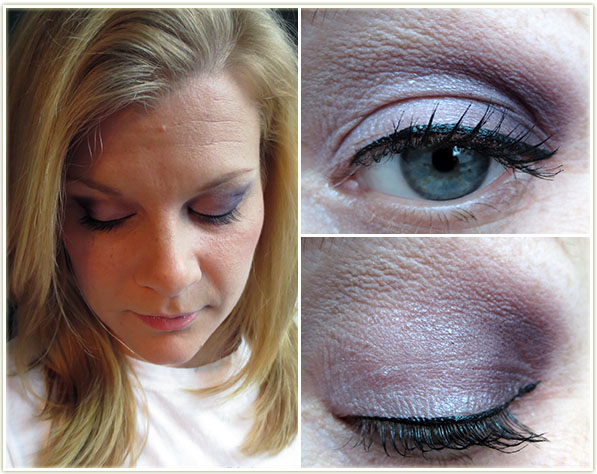
Playing around with my Laura Mercier Artist palette.
Primer: Urban Decay Primer Potion in Original
Eyeshadows: I used the light lavender shade from the MUAPretty Pastels palette all over the lid with Laura Mercier Ink on the outer third of the lid. Laura Mercier Vanilla Nuts was used to highlight the brow.
Liner: Physicians Formula Eye Booster in Ultra Black
Mascara: L’OrealVoluminous Carbon Black (waterproof)
Rest of the Face:
Cheeks – TarteDollface
Lips – NYX Butter Gloss in Maple Blondie
No foundation or bronzer
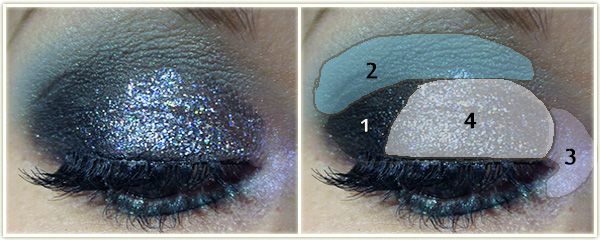
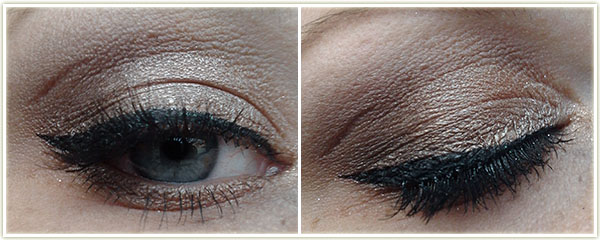
Just an easy one I did while getting ready for work in the morning.
Primer: Urban Decay Primer Potion in Original
Eyeshadows: Inglot AMC Shine 24 over the entire lid with Urban DecayGunmetal in the outer corner and blended into the crease. MAC Brule as my brow highlight.
Mascara: L’Oreal Voluminous Carbon Black (waterproof)
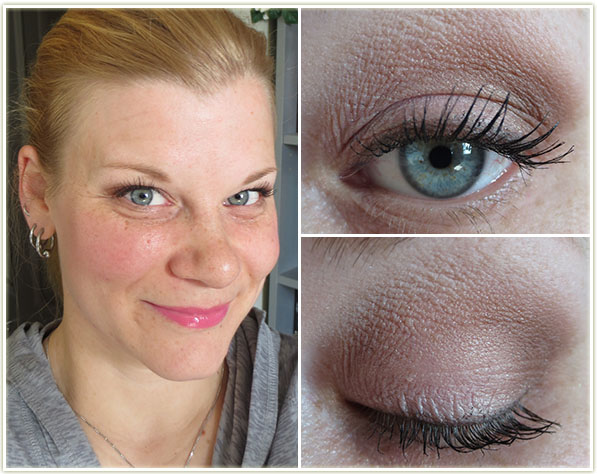
Jeez, this one just looks boring looking at in pictures! Although I’m sure there’s some neutral lovers out there that will prefer this to my more colourful looks.
Eyeshadows: UDPP in Original all over the lid. (All Laura Mercier) Guava all over the entire lid, Truffle blended into the outer corner and through the crease with Vanilla Nuts as a brow highlight. I then pressed Espresso into the lashline to create a soft liner.
Mascara:L’Oreal Voluminous Carbon Black (waterproof)