Halloween 2017: Captain Marvel

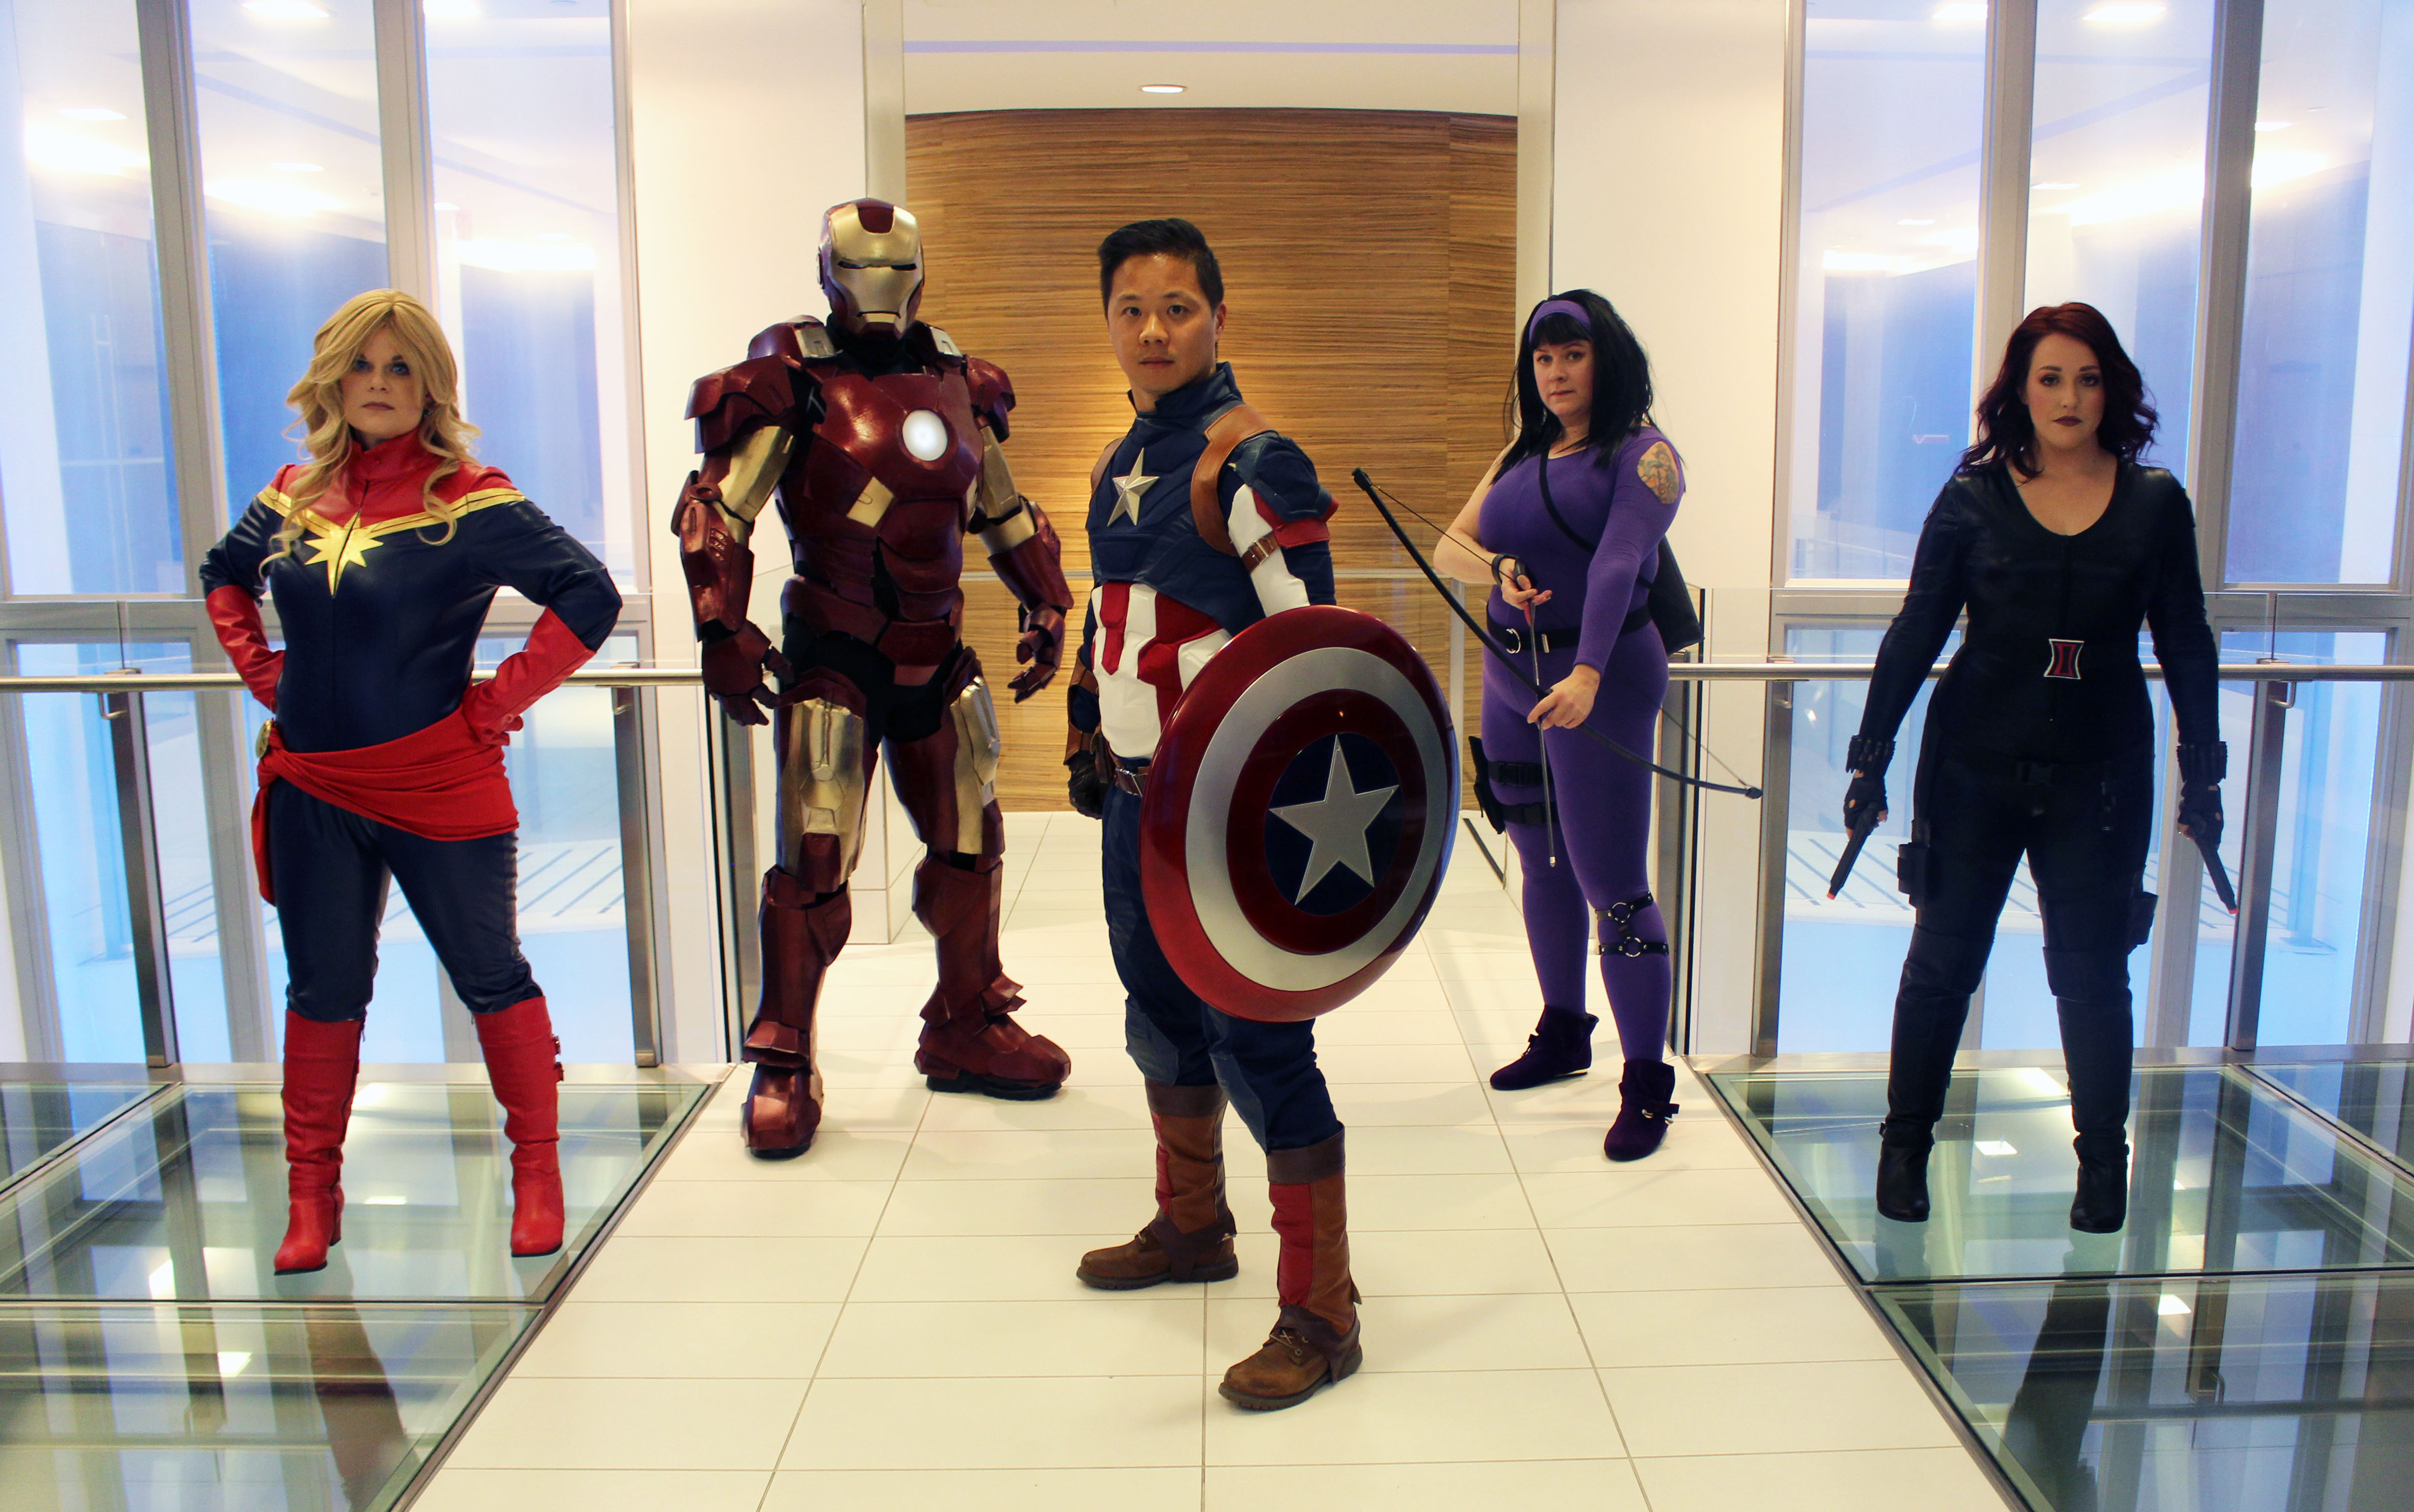
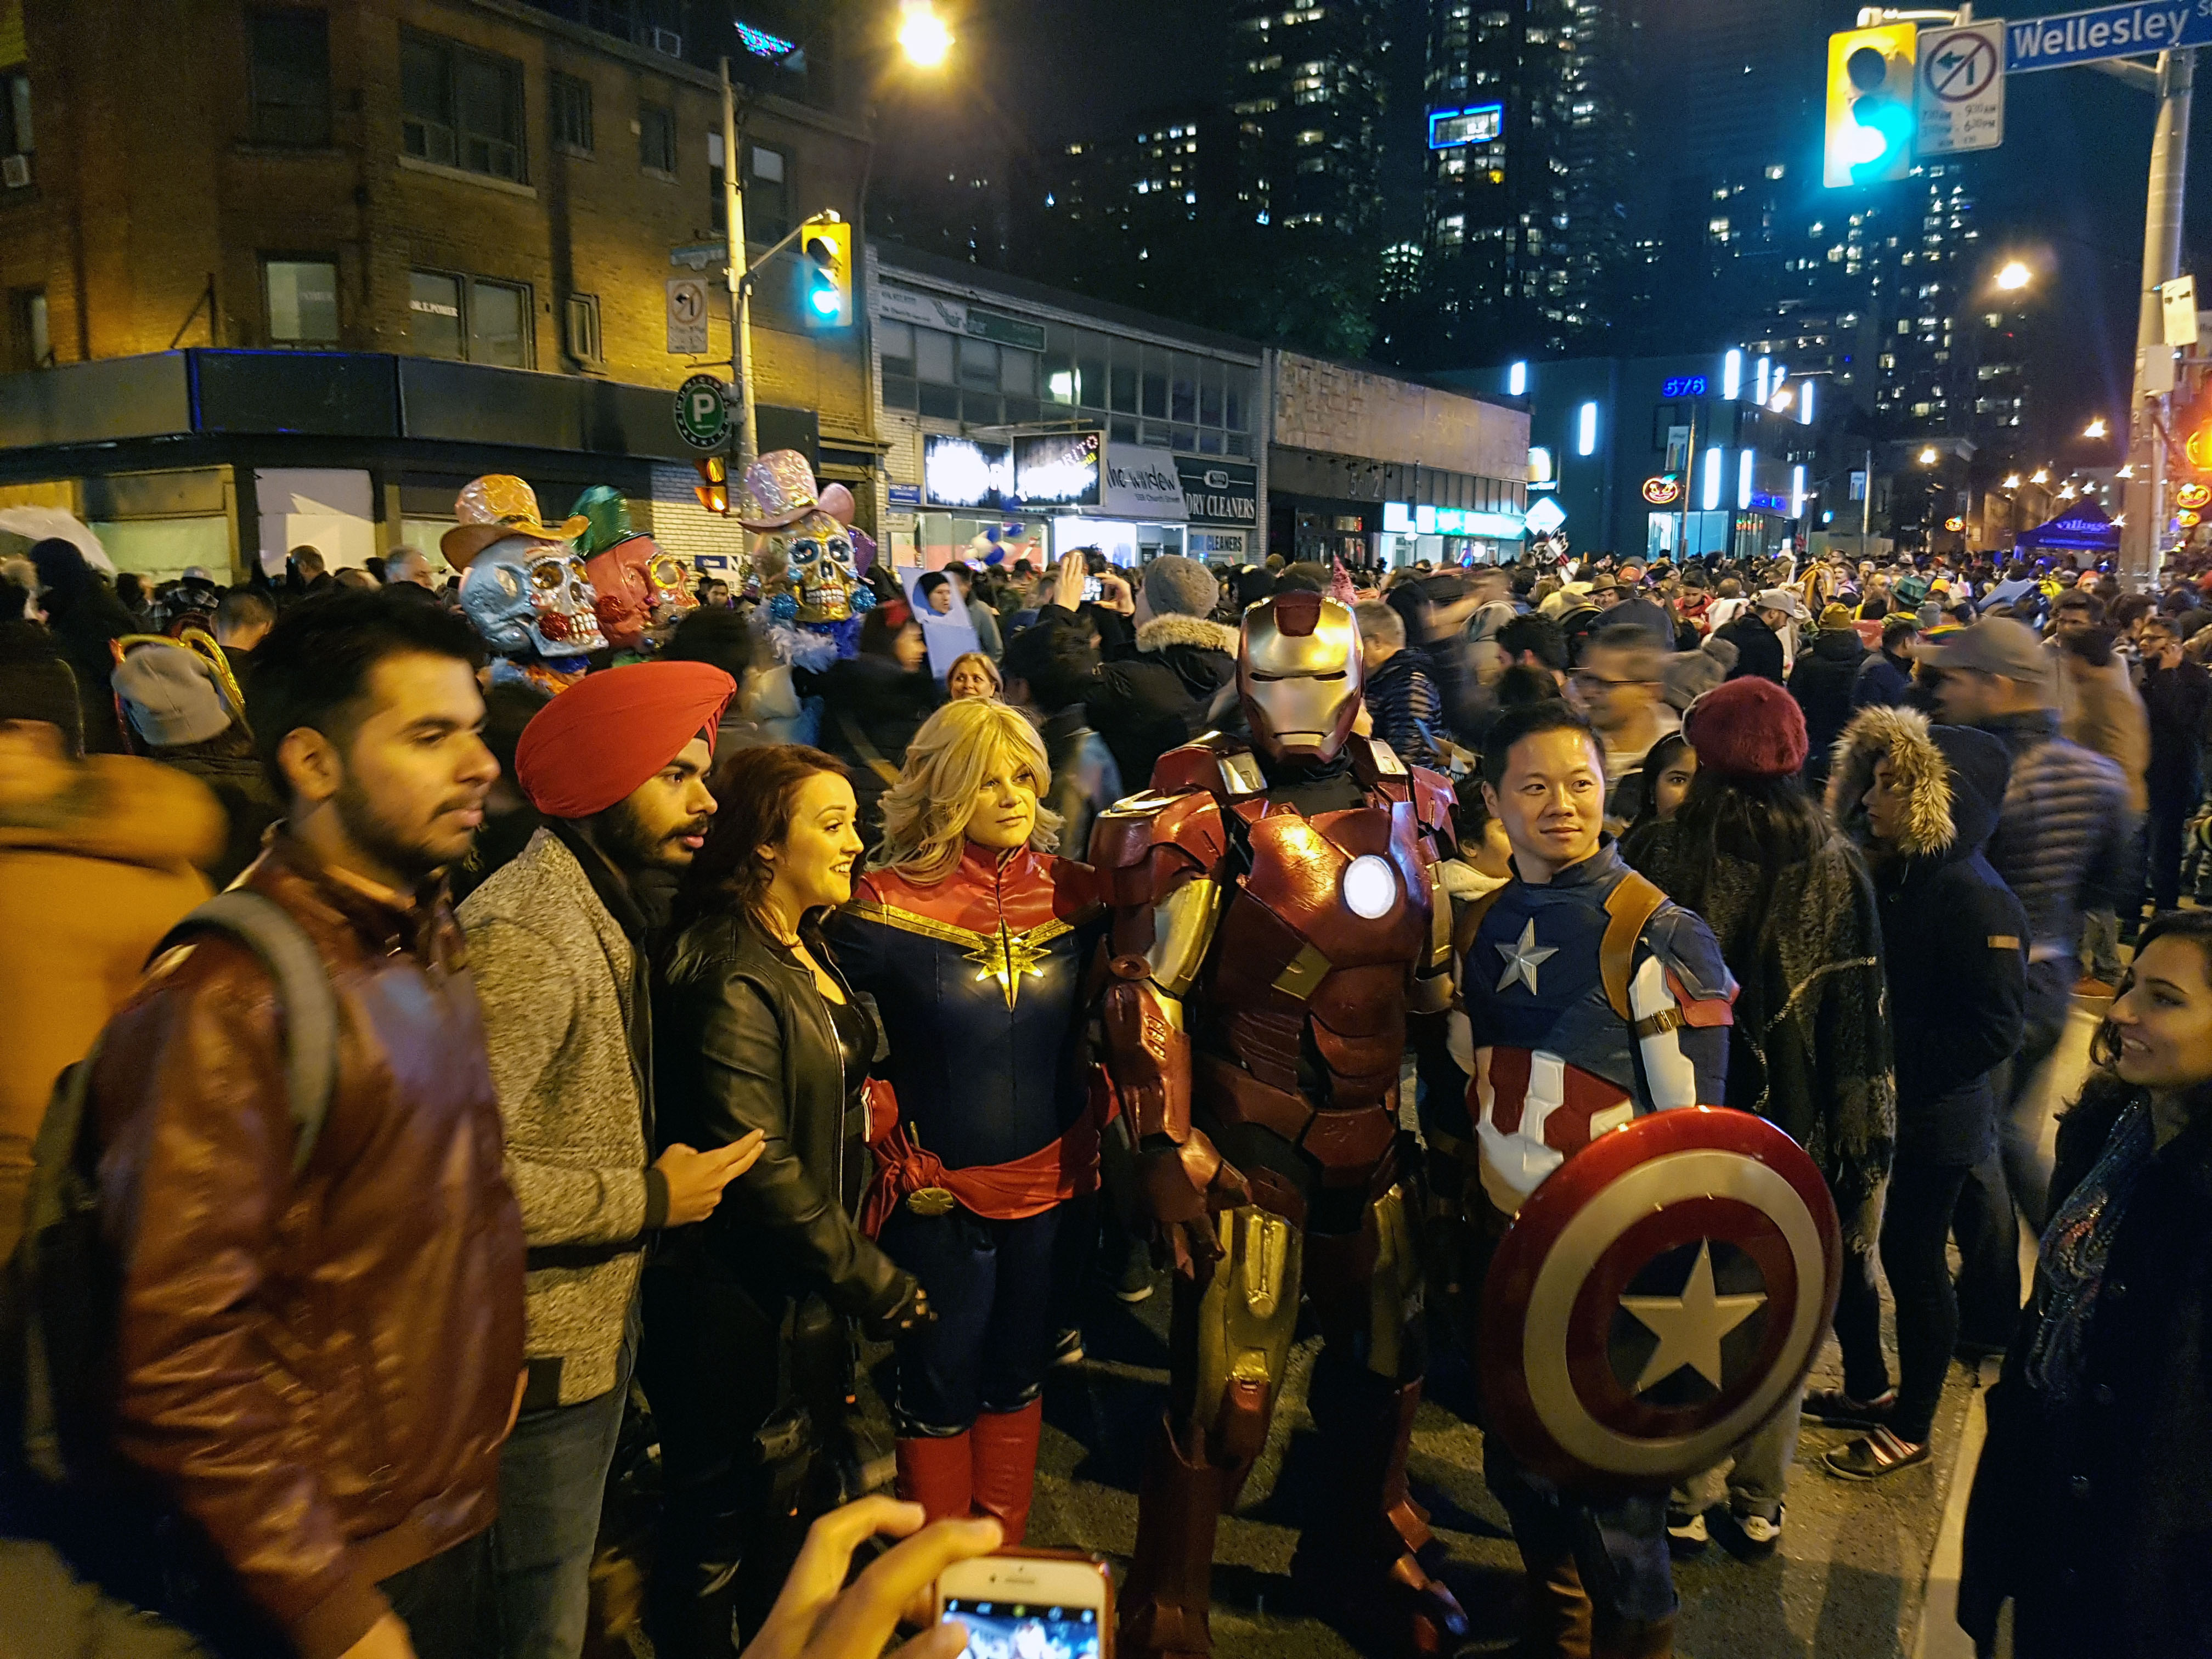
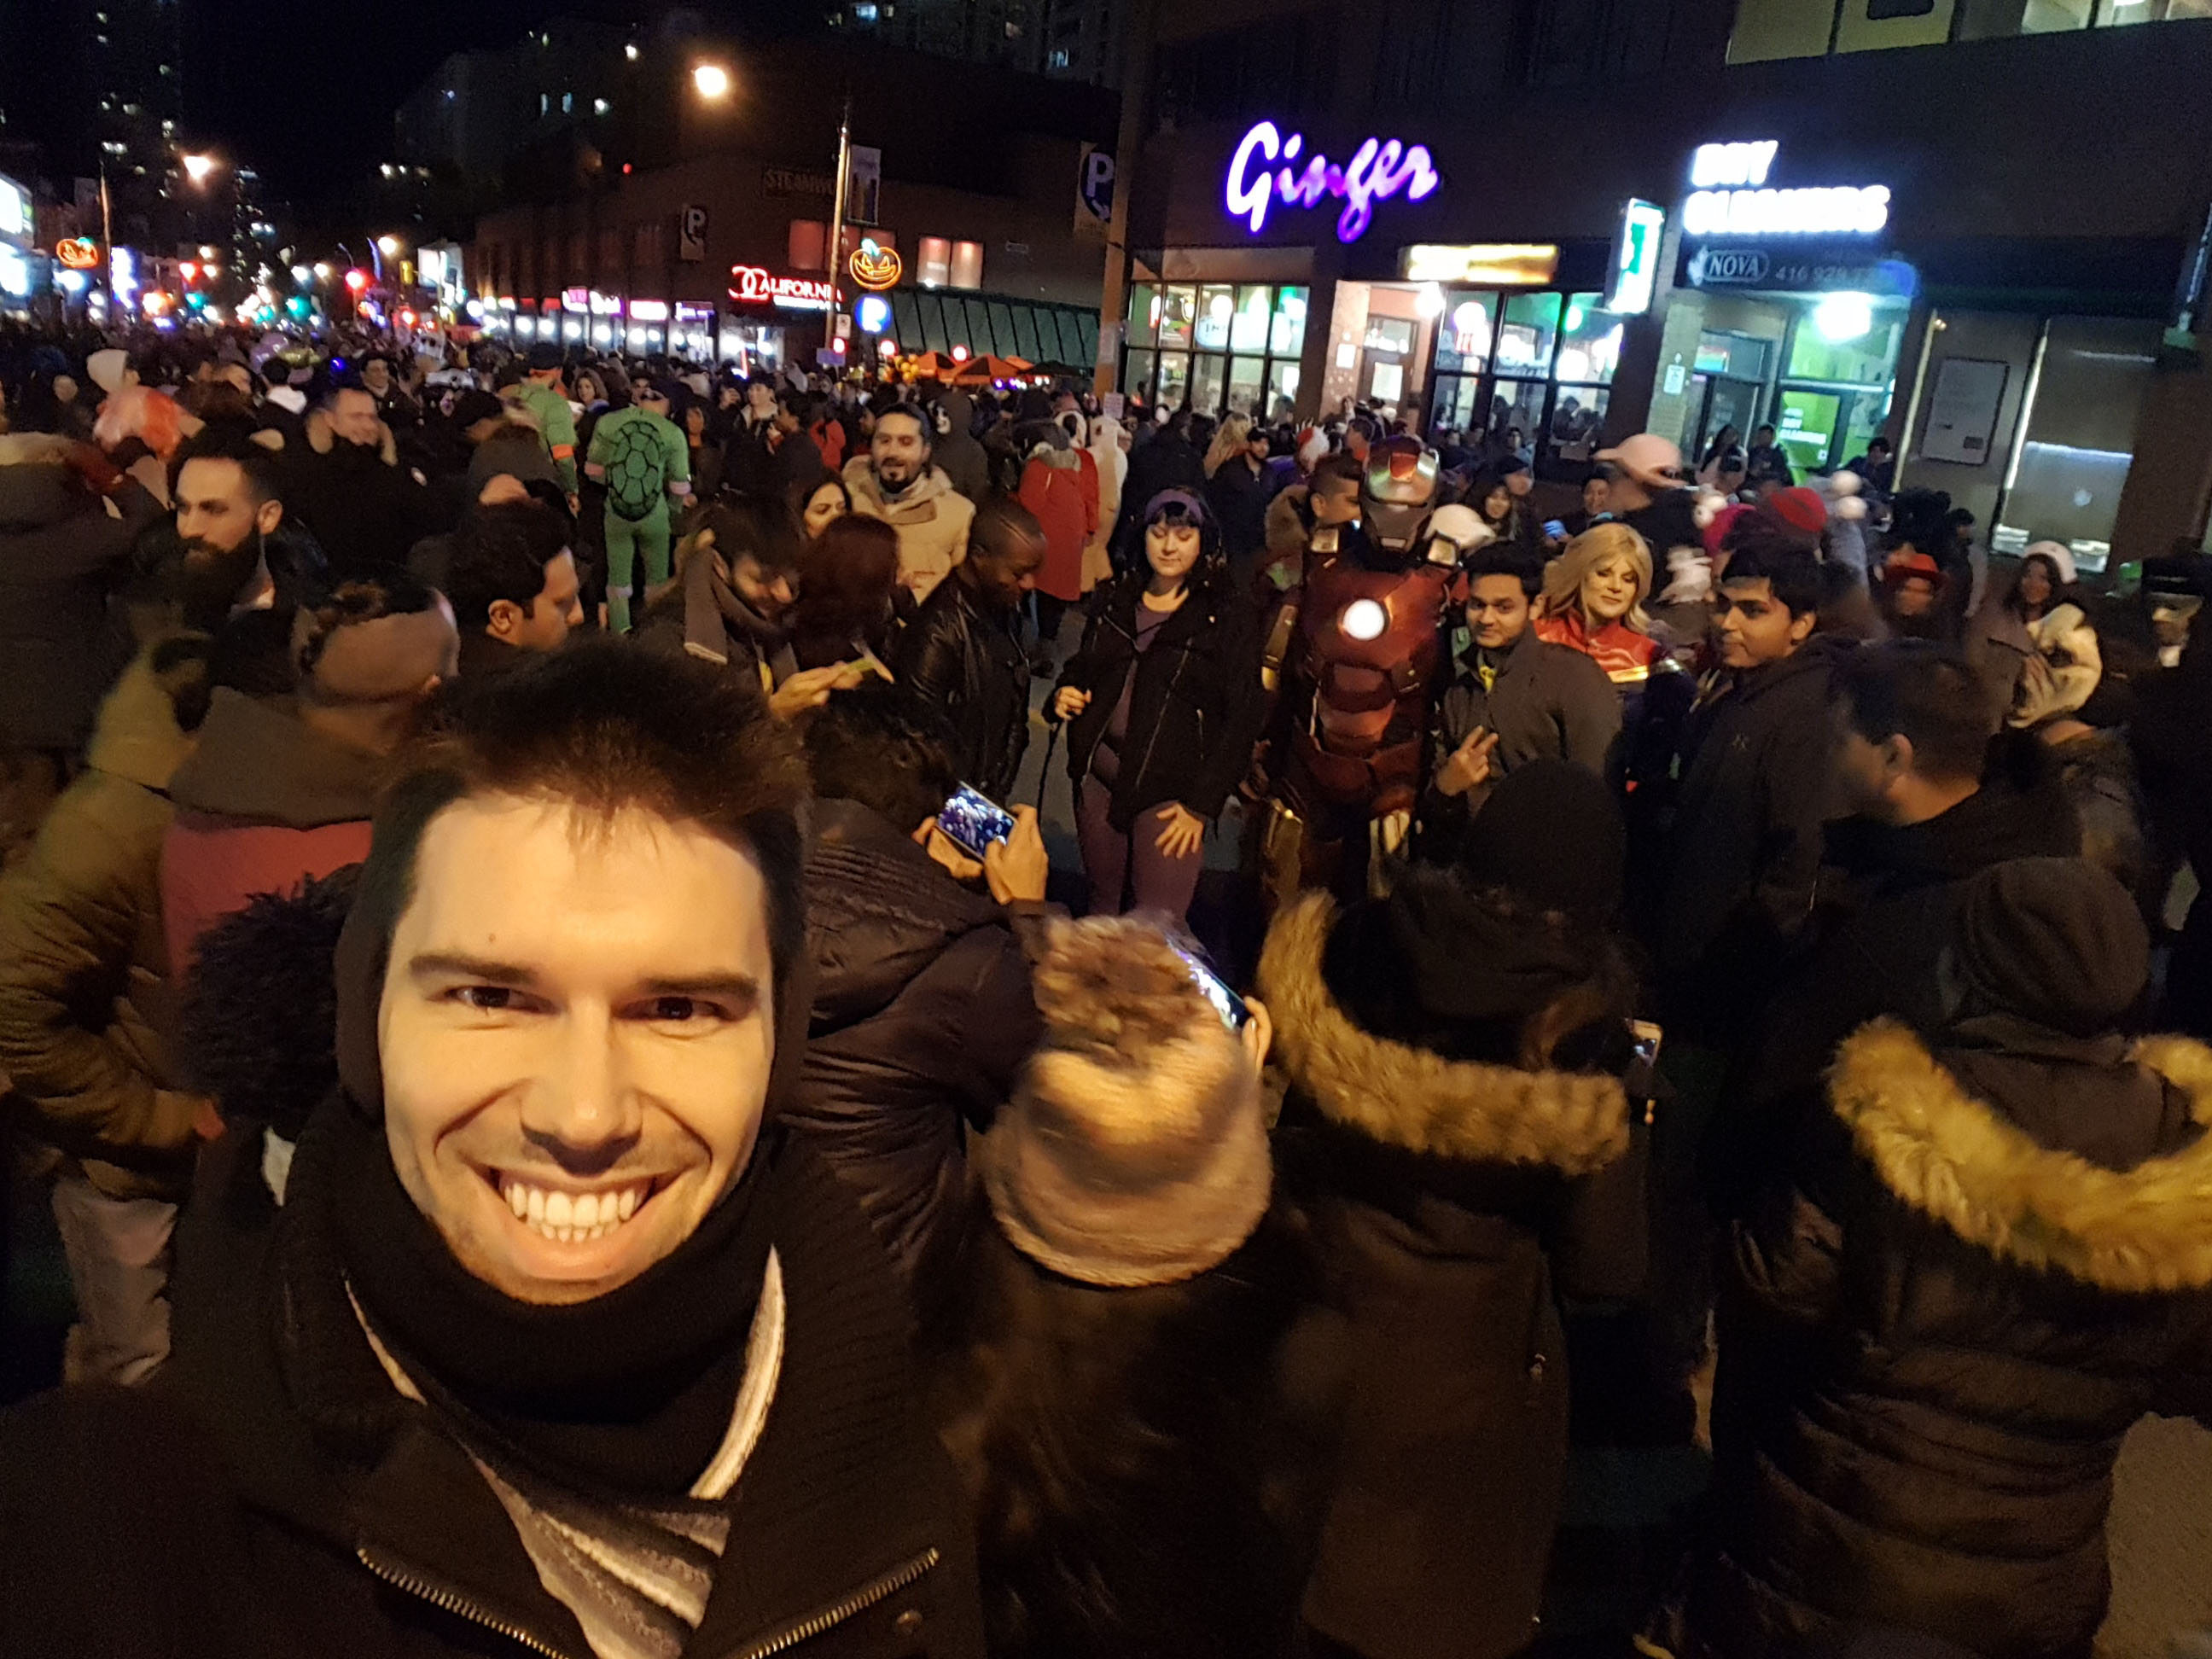
Halloween 2017 was absolutely amazing! We’ve been doing this for a few times yet, and I think this was one of the best sets of costumes to come out of it all. (All pictures in this post are clickable so you can zoom in to see details if you want.)

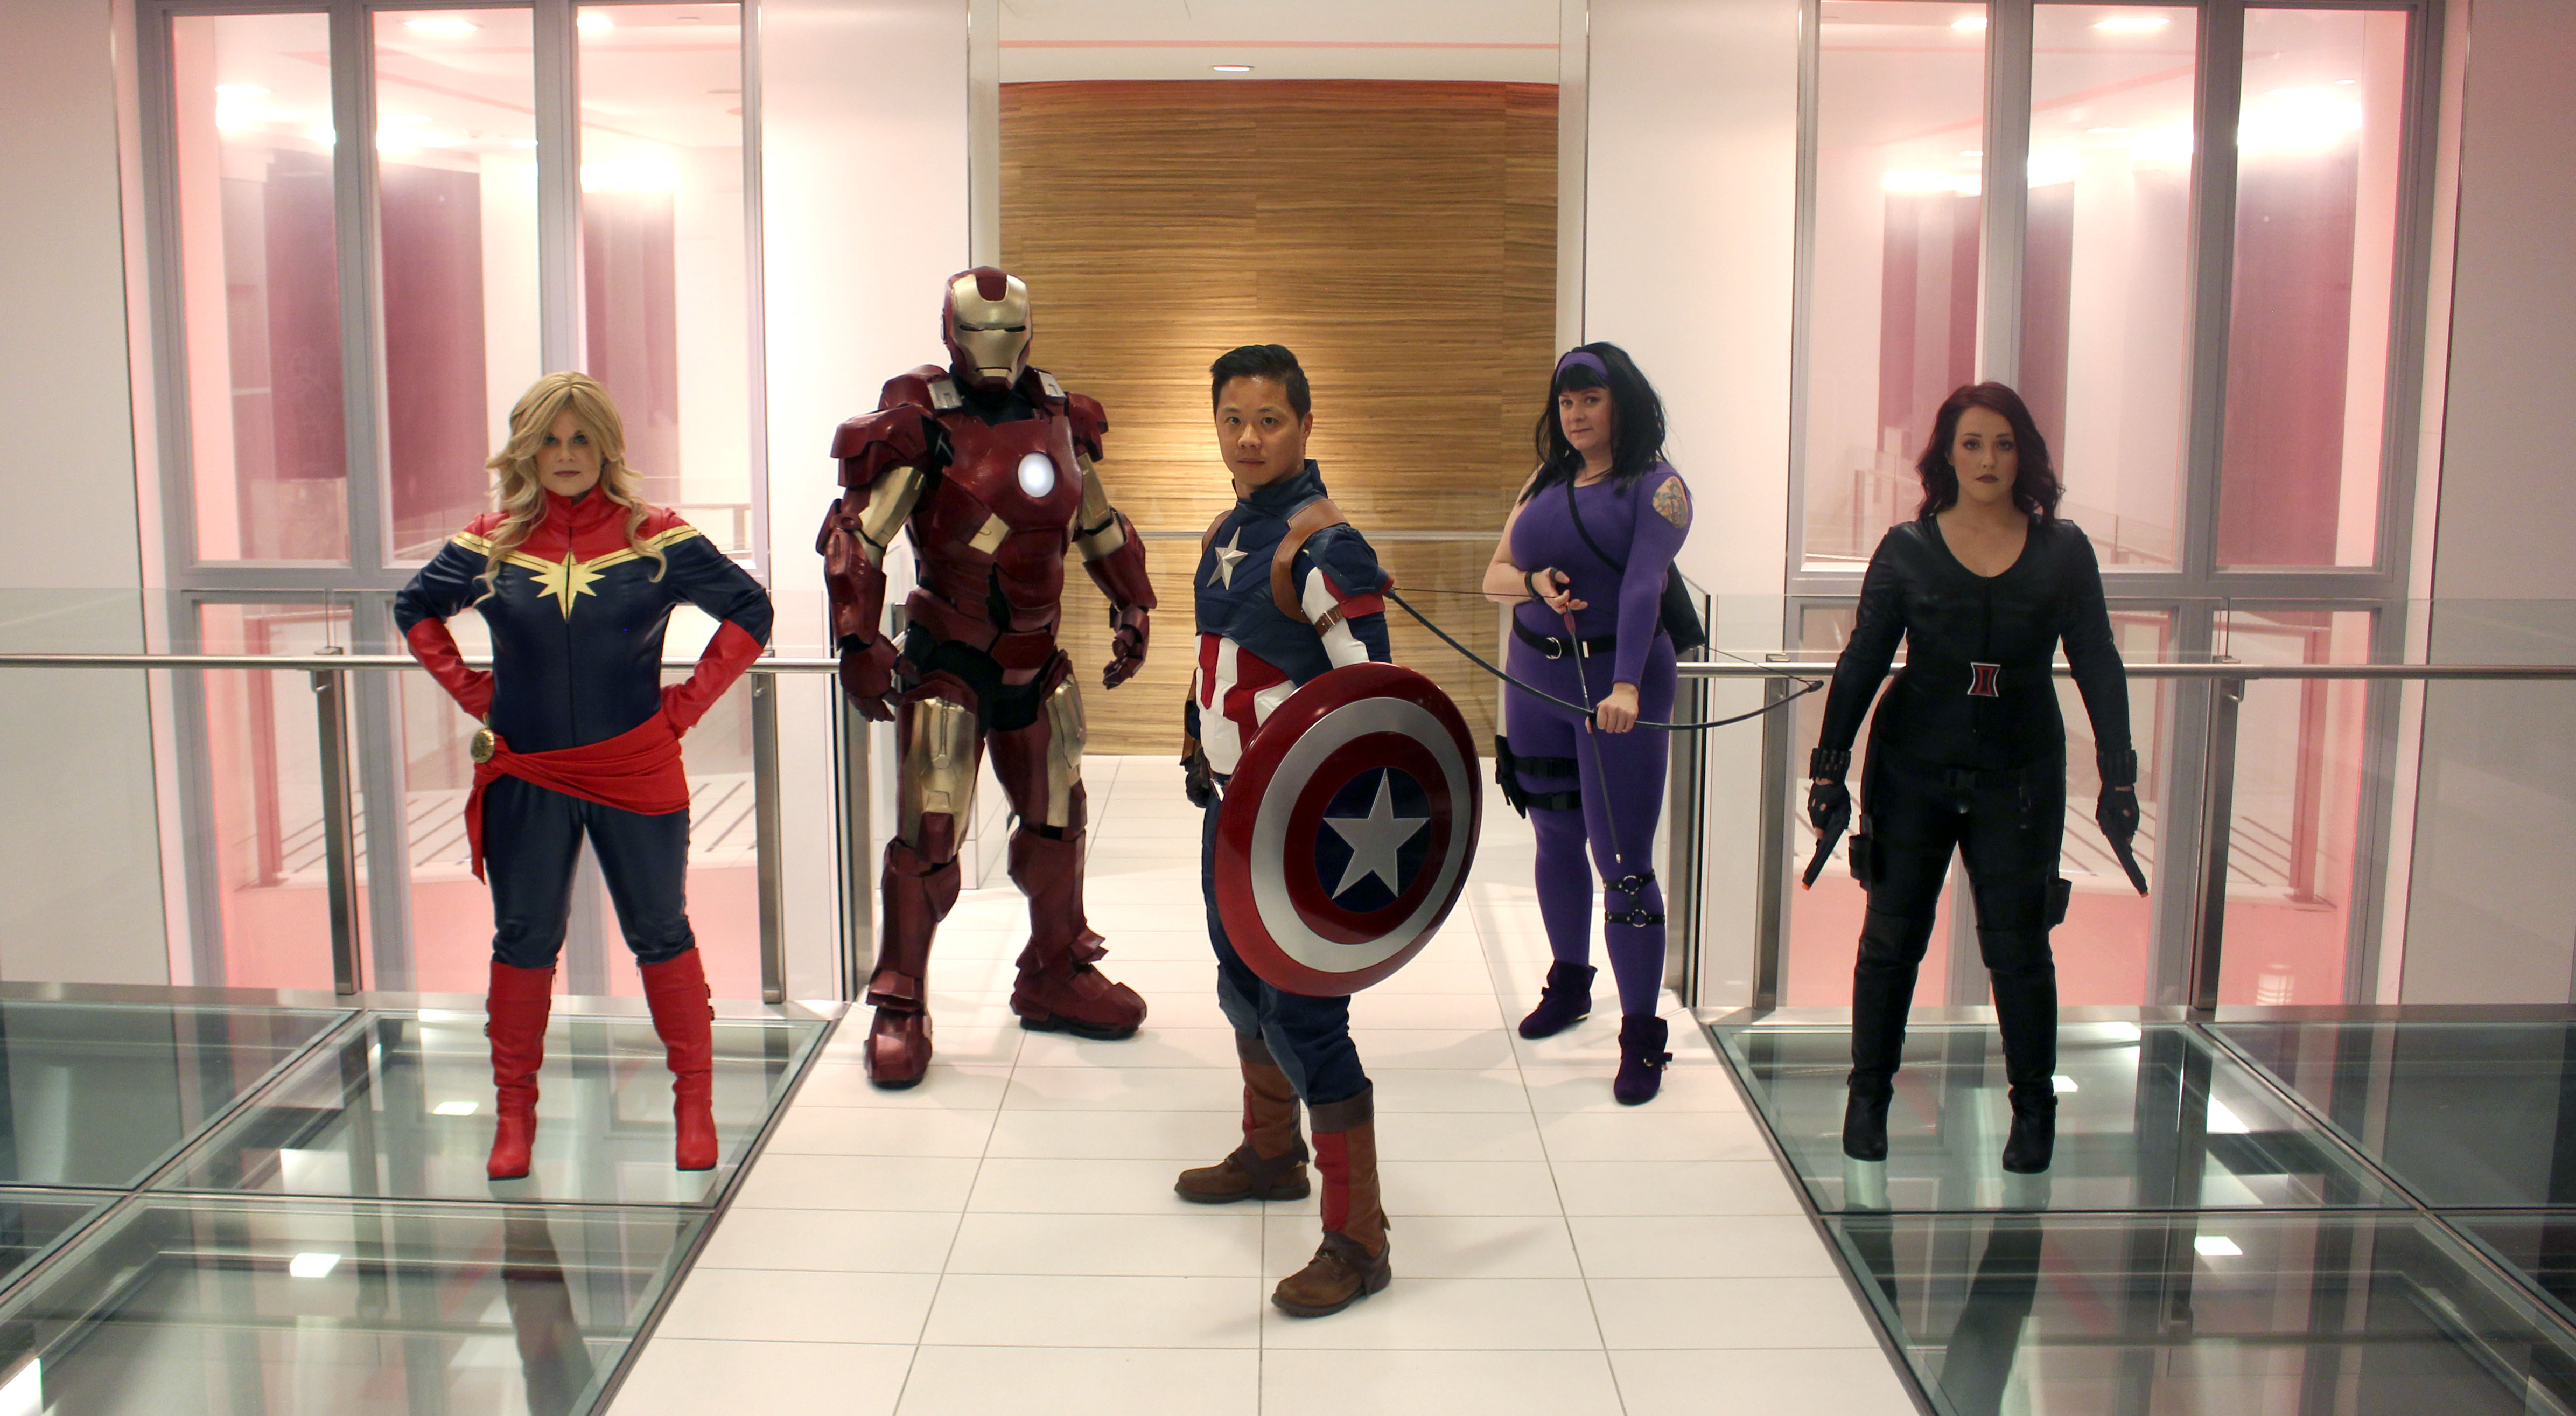
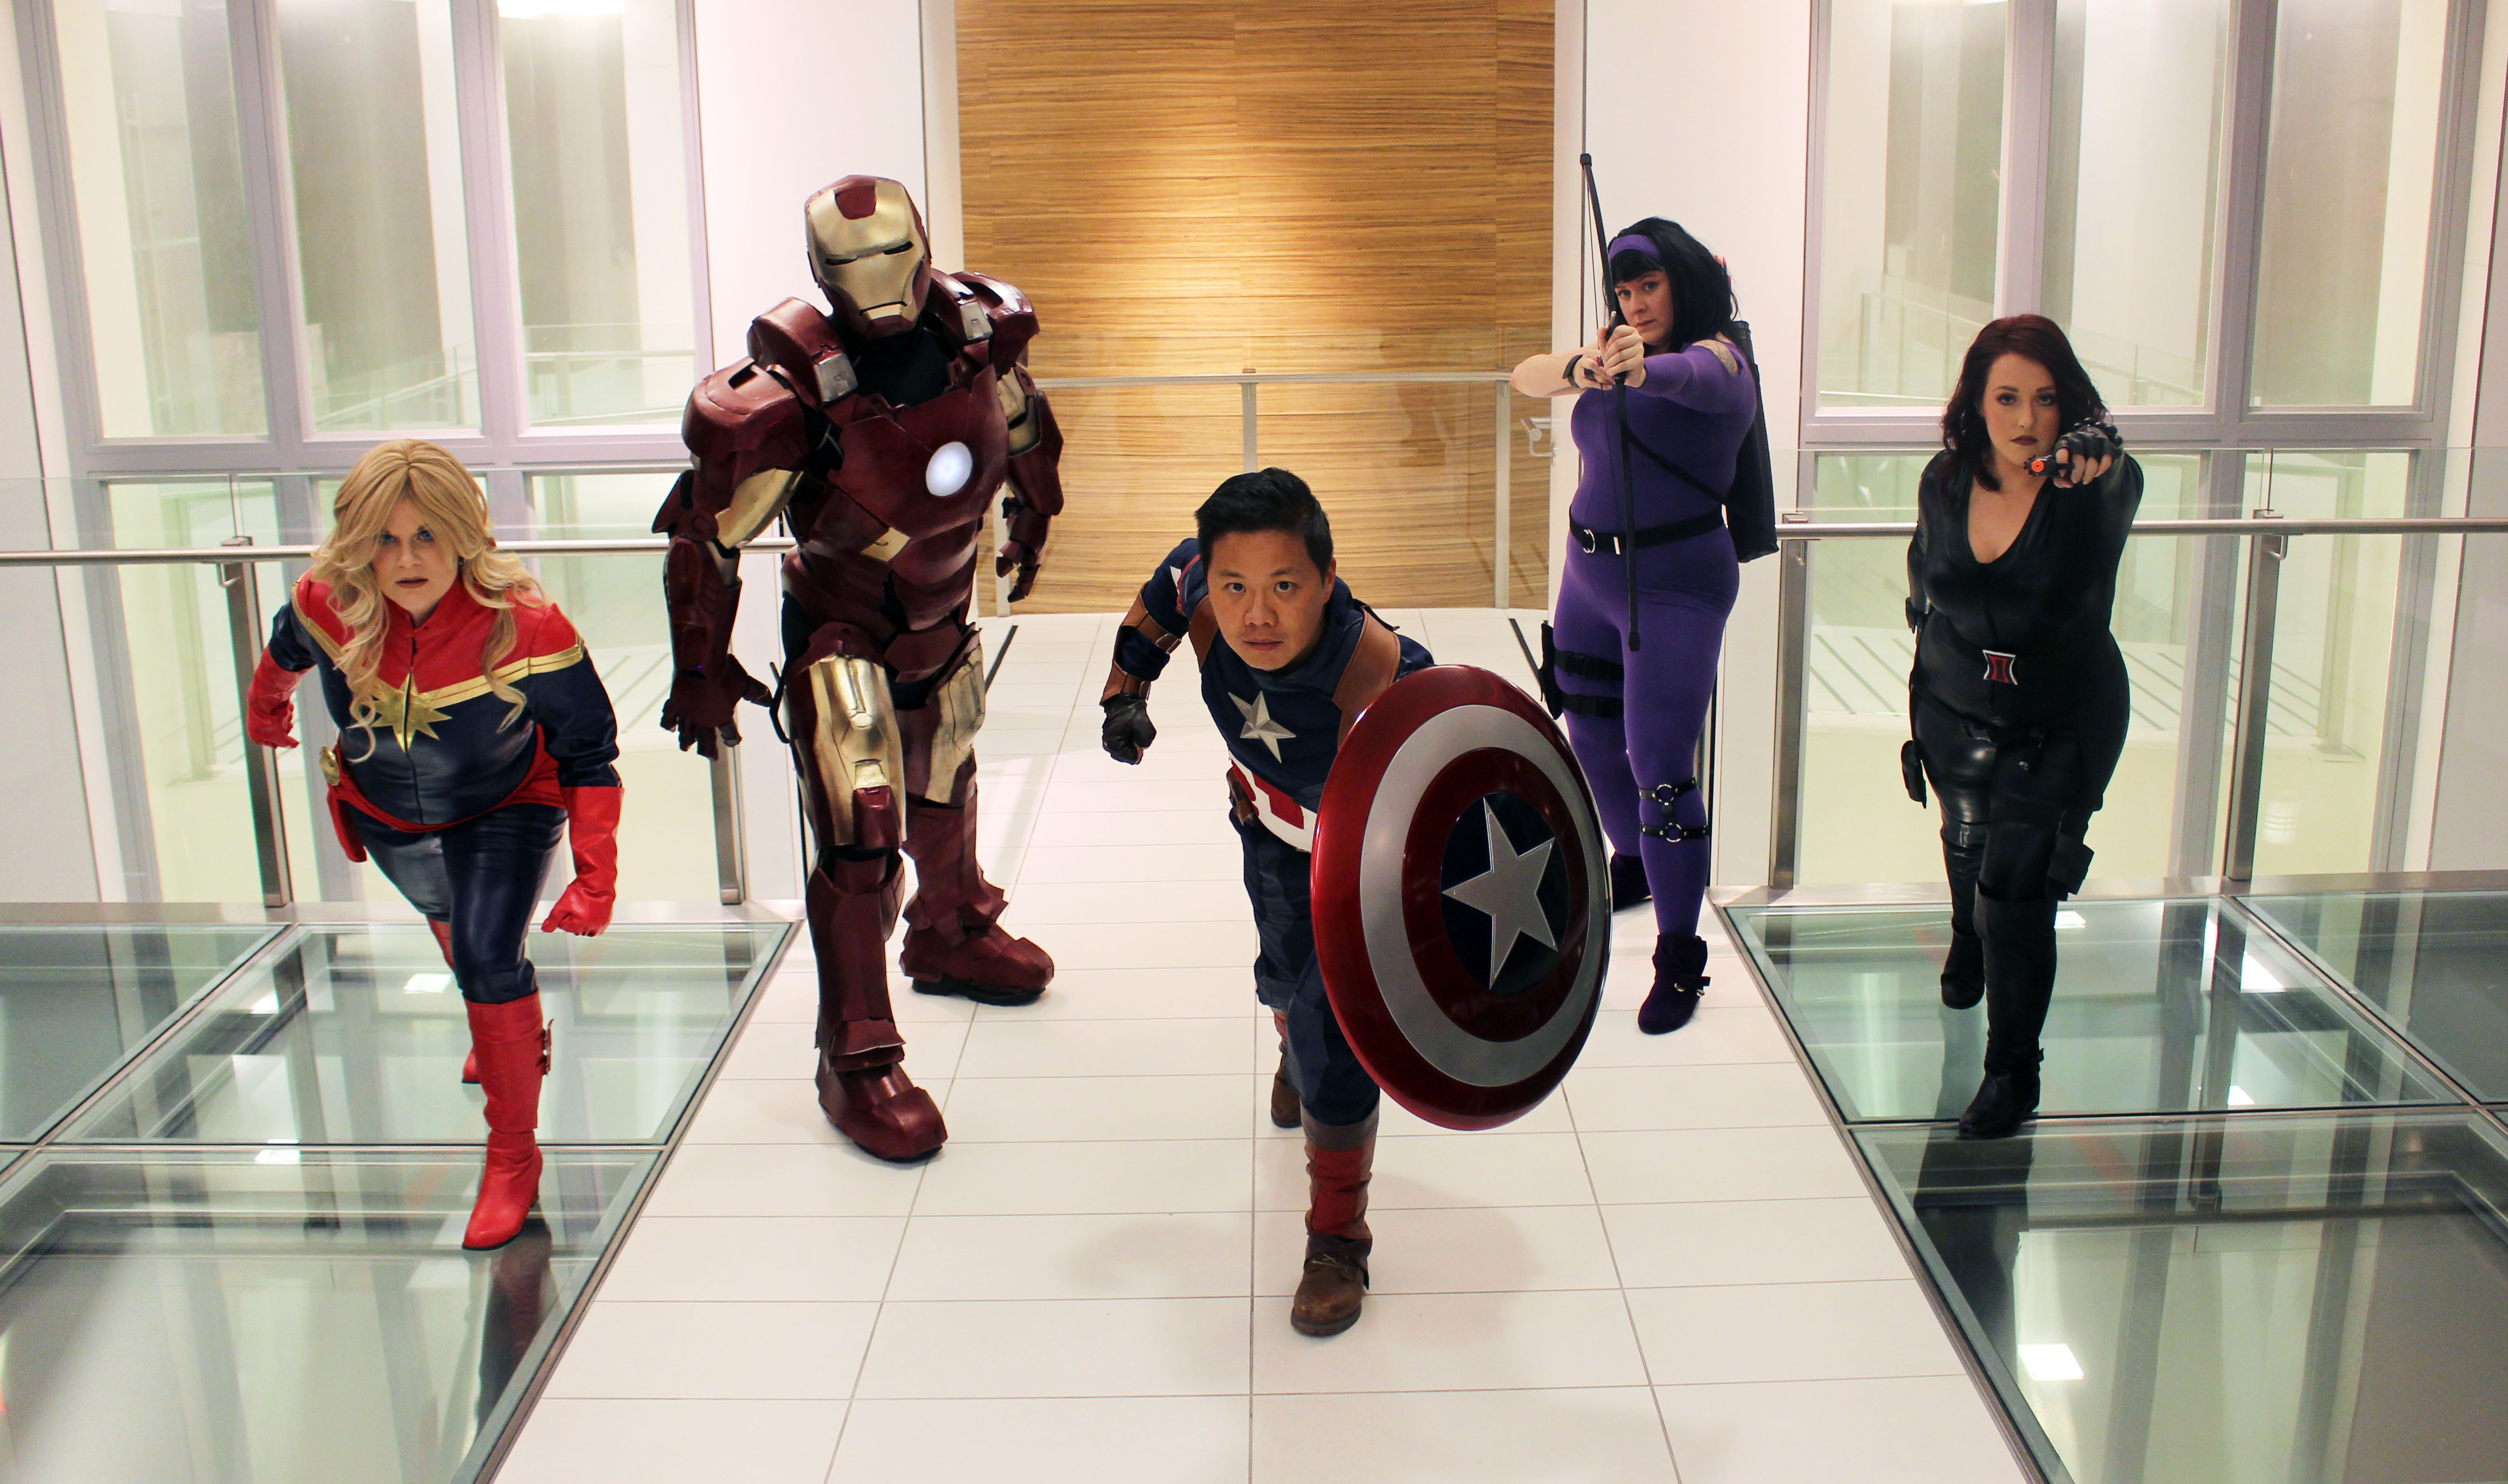
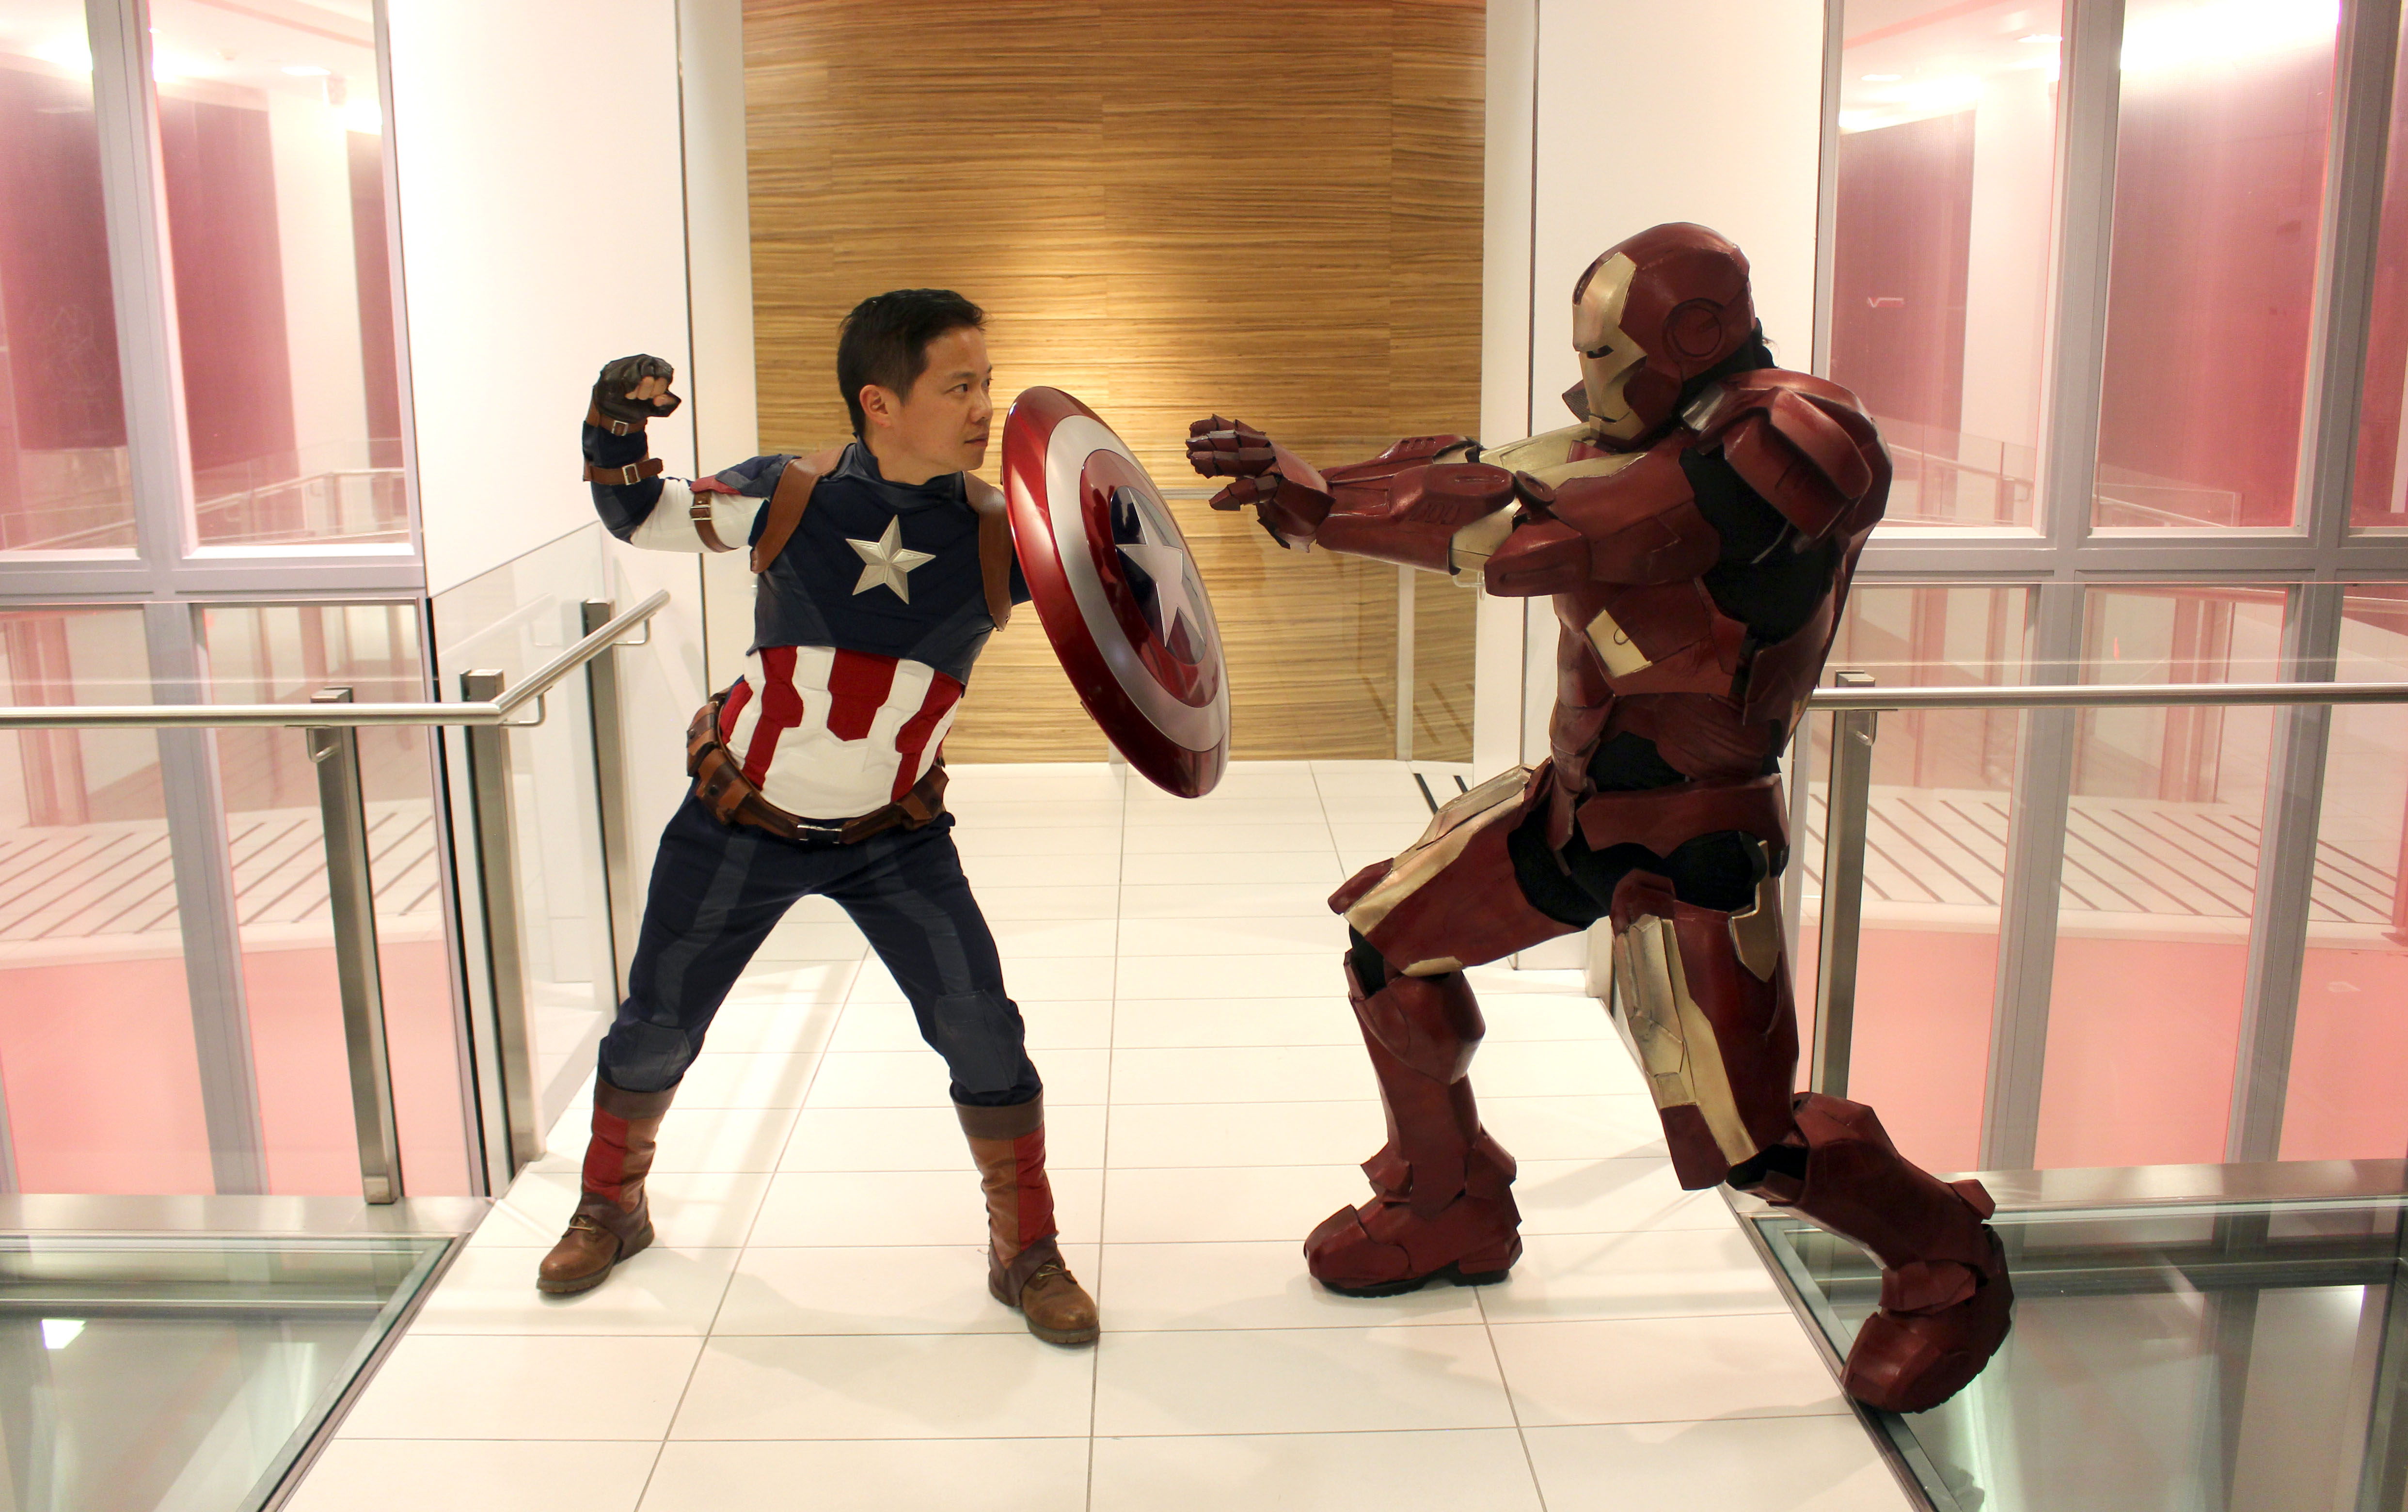
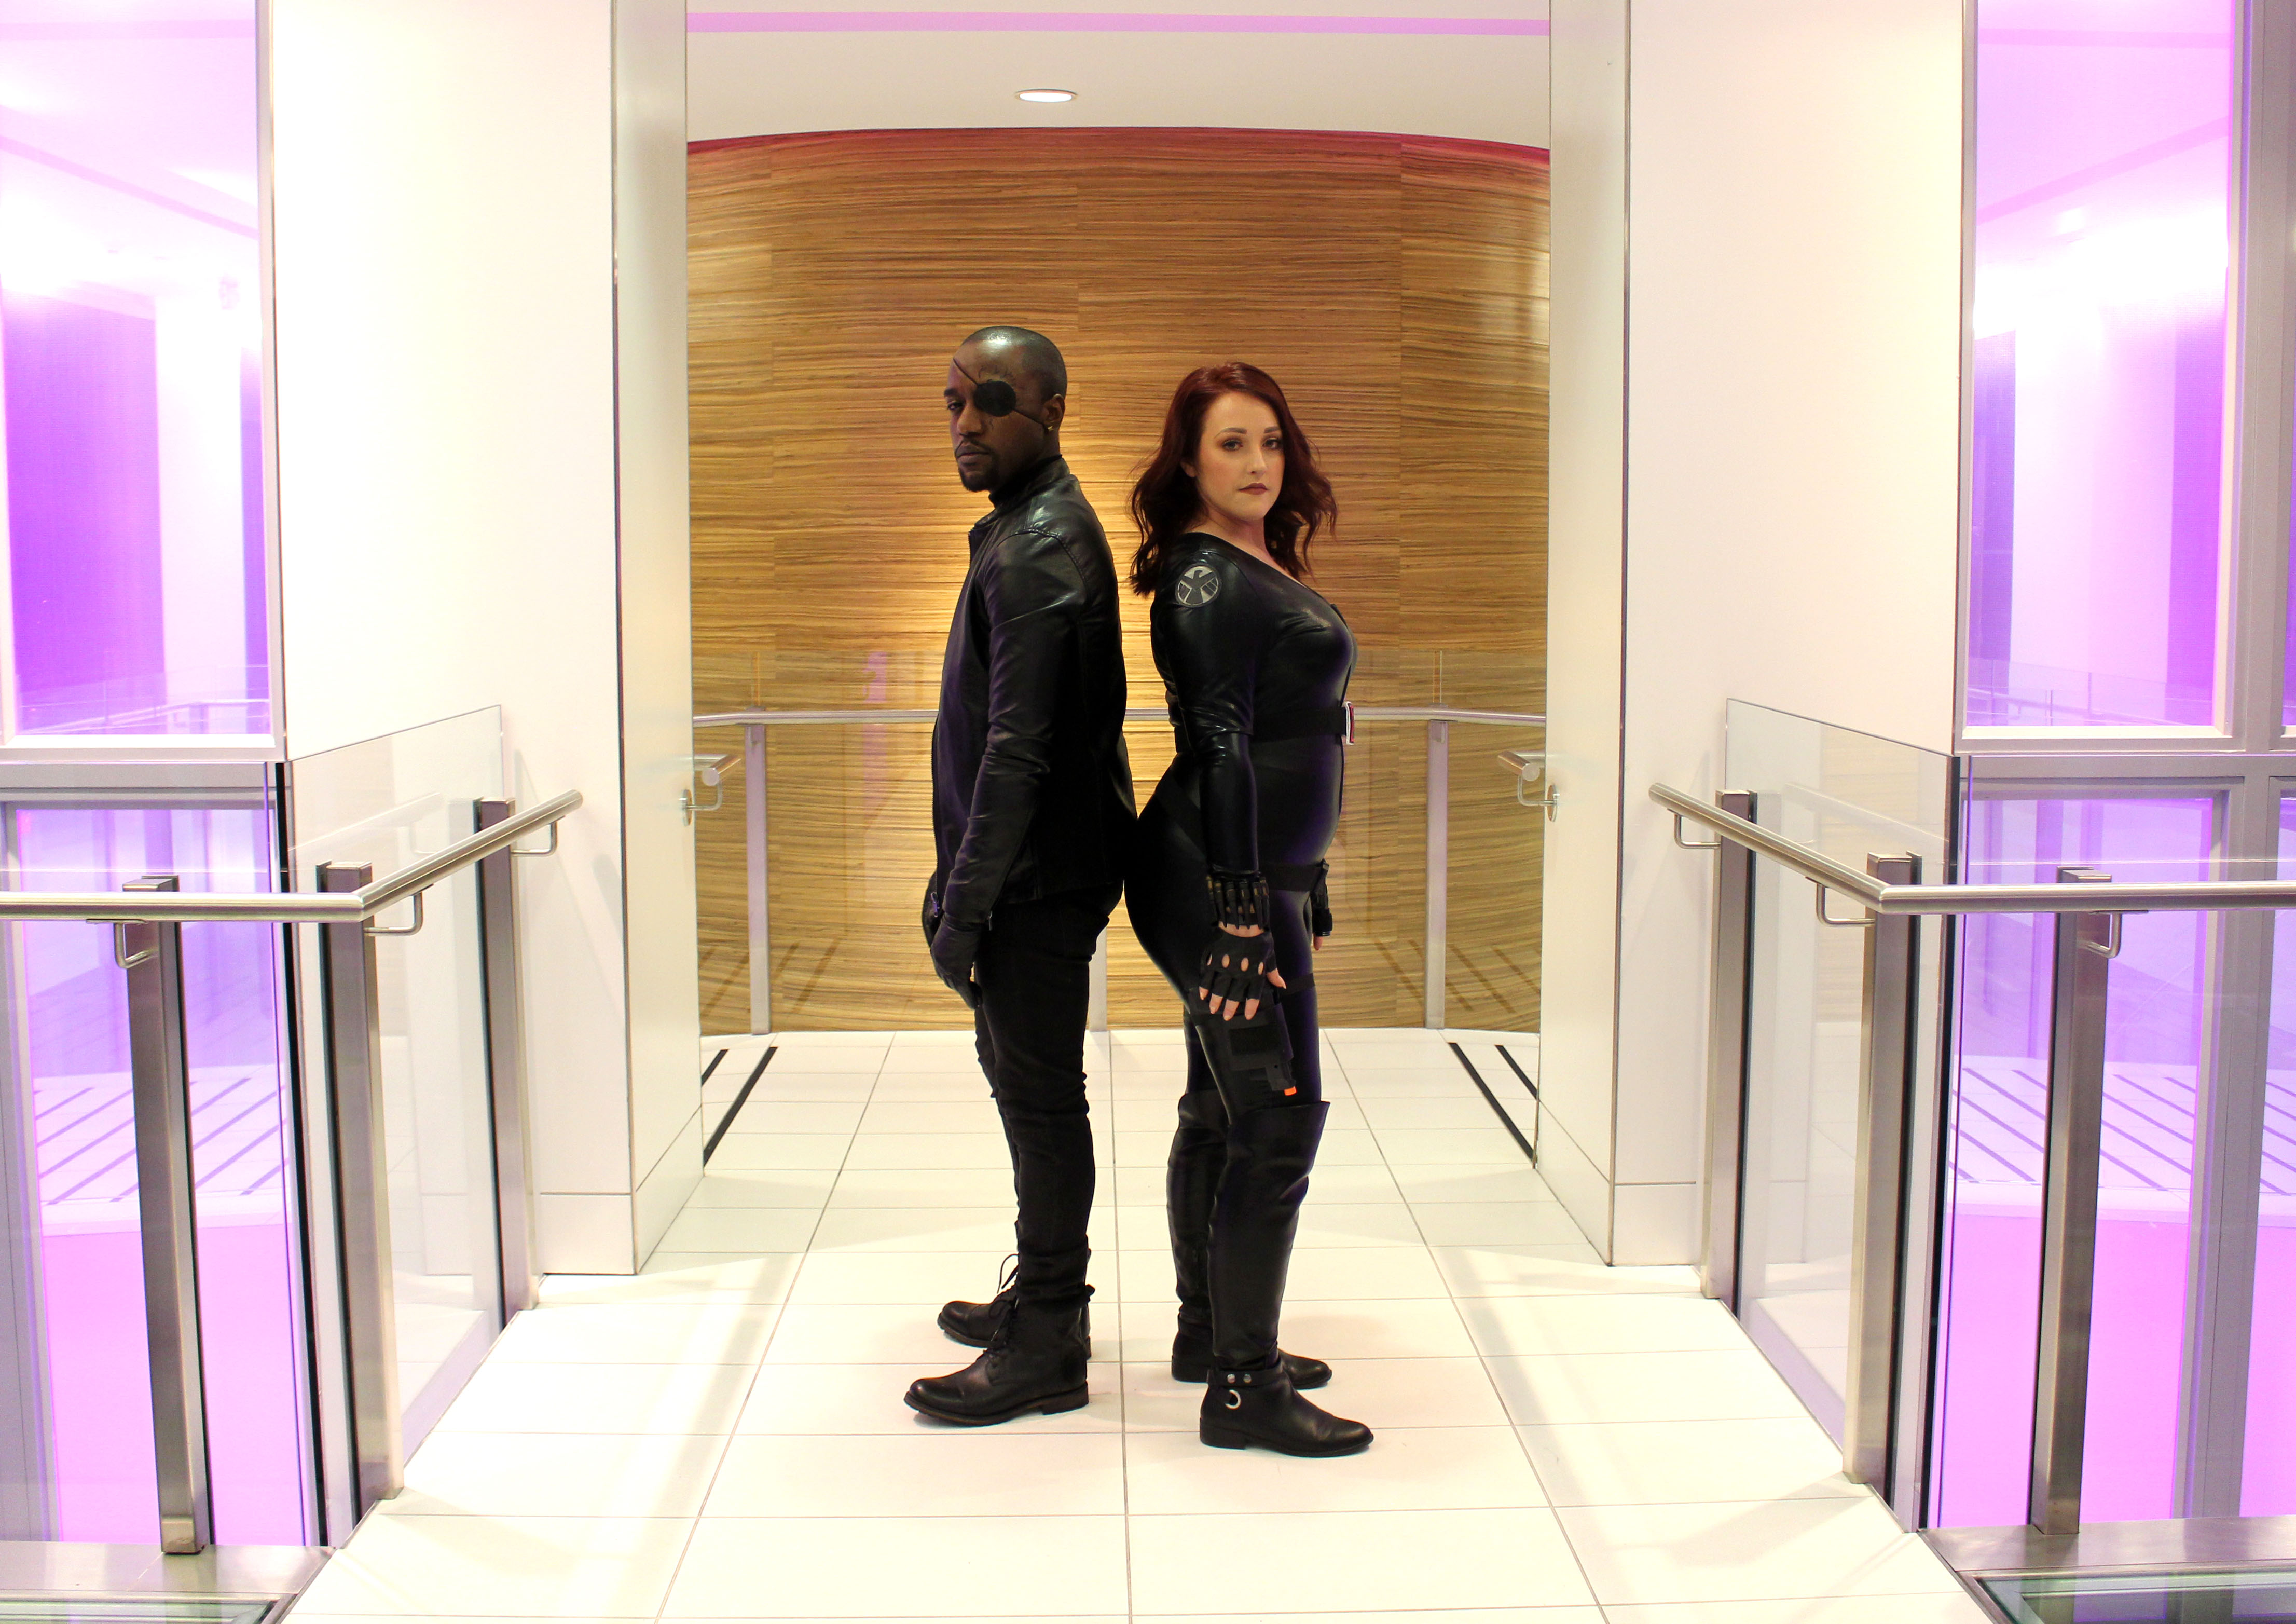
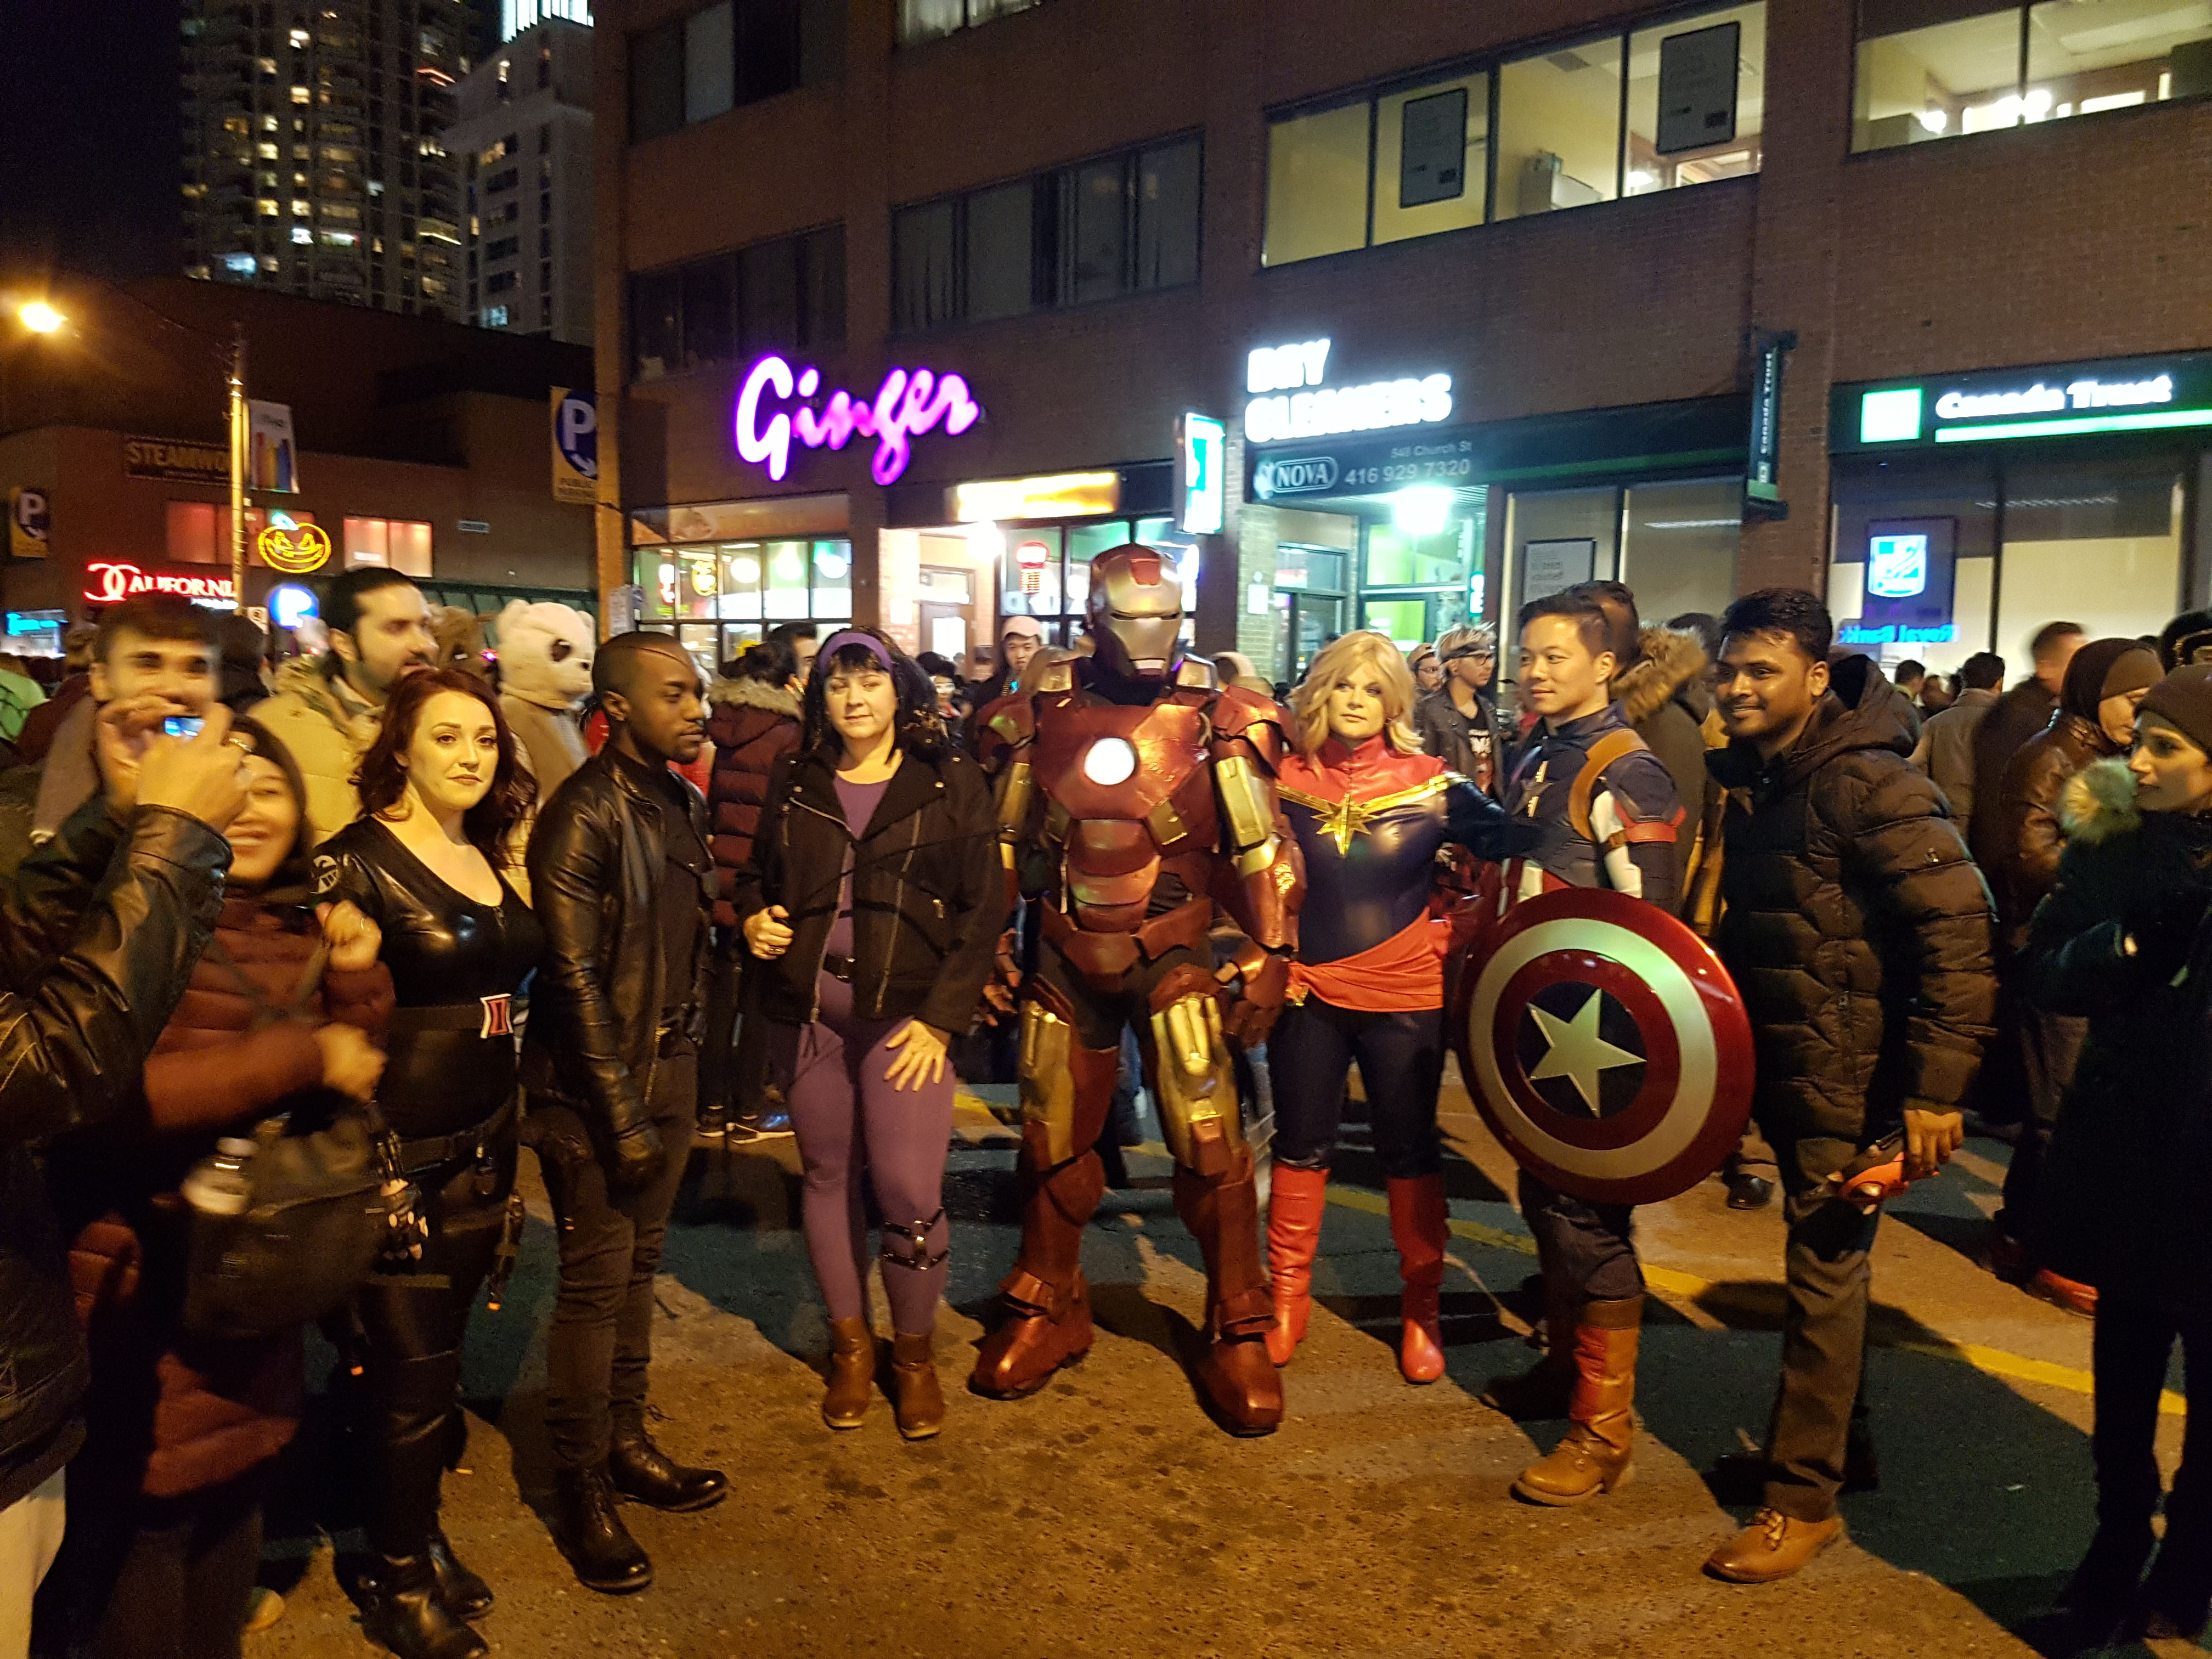
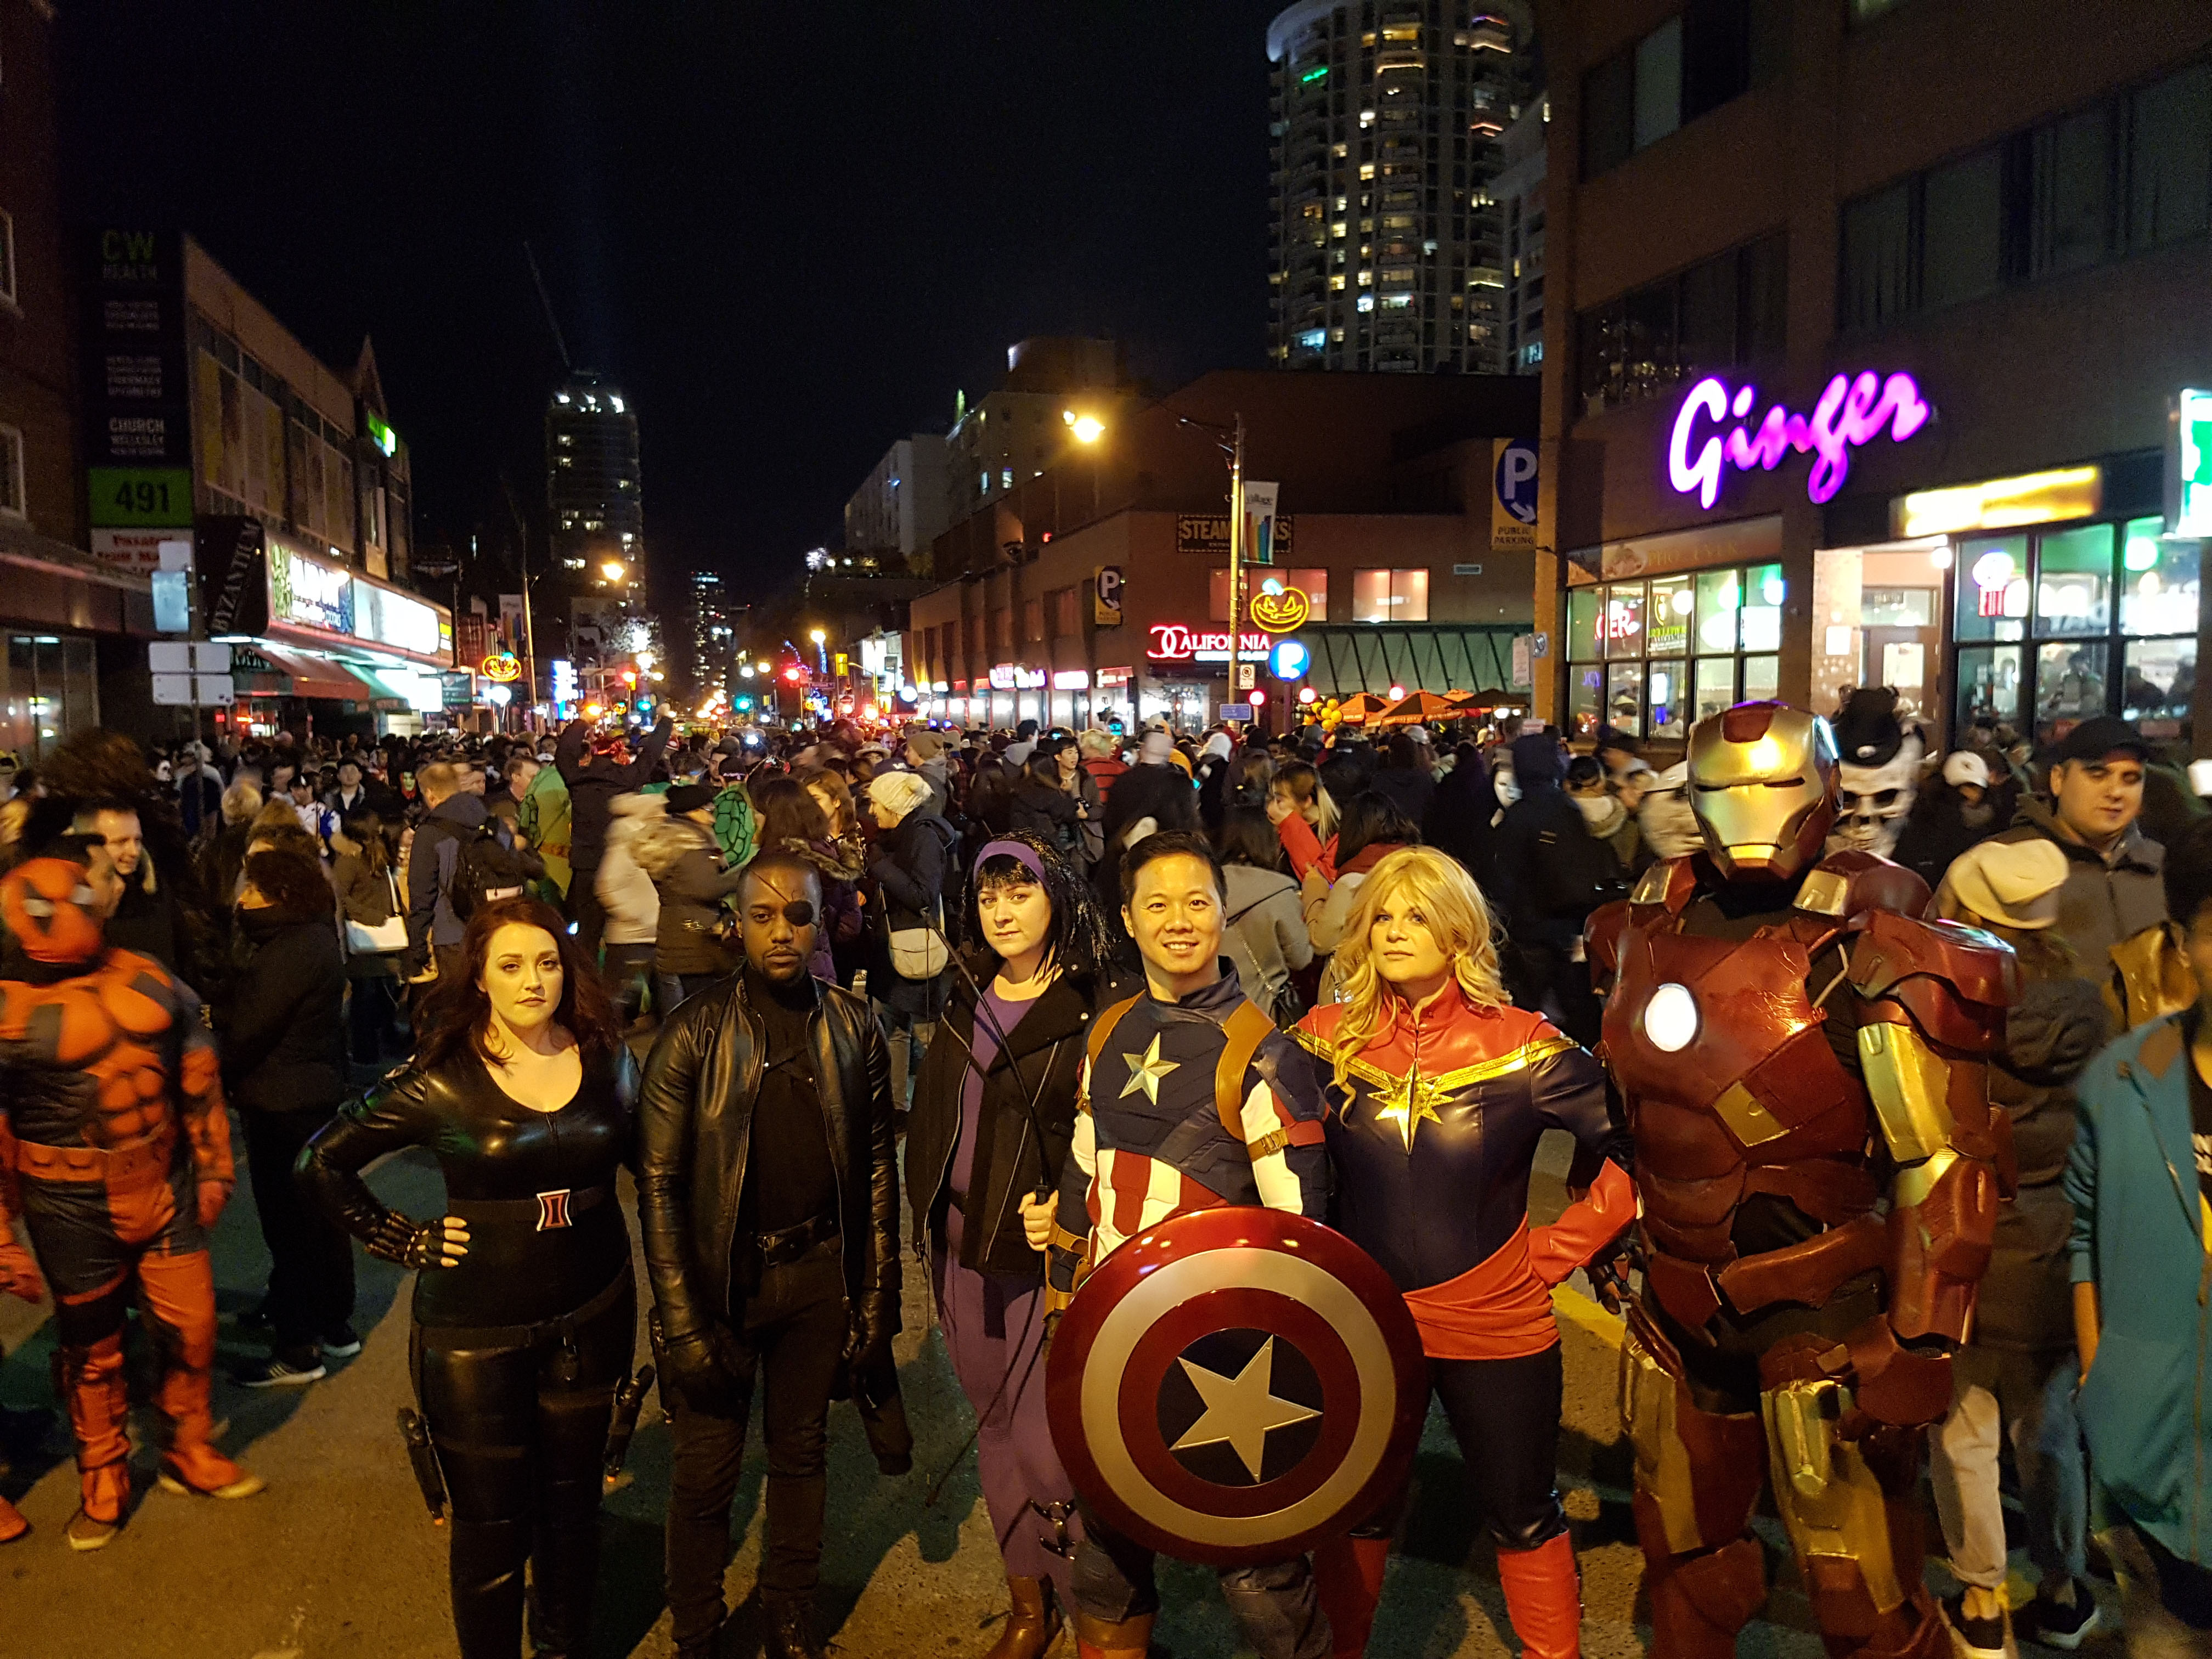
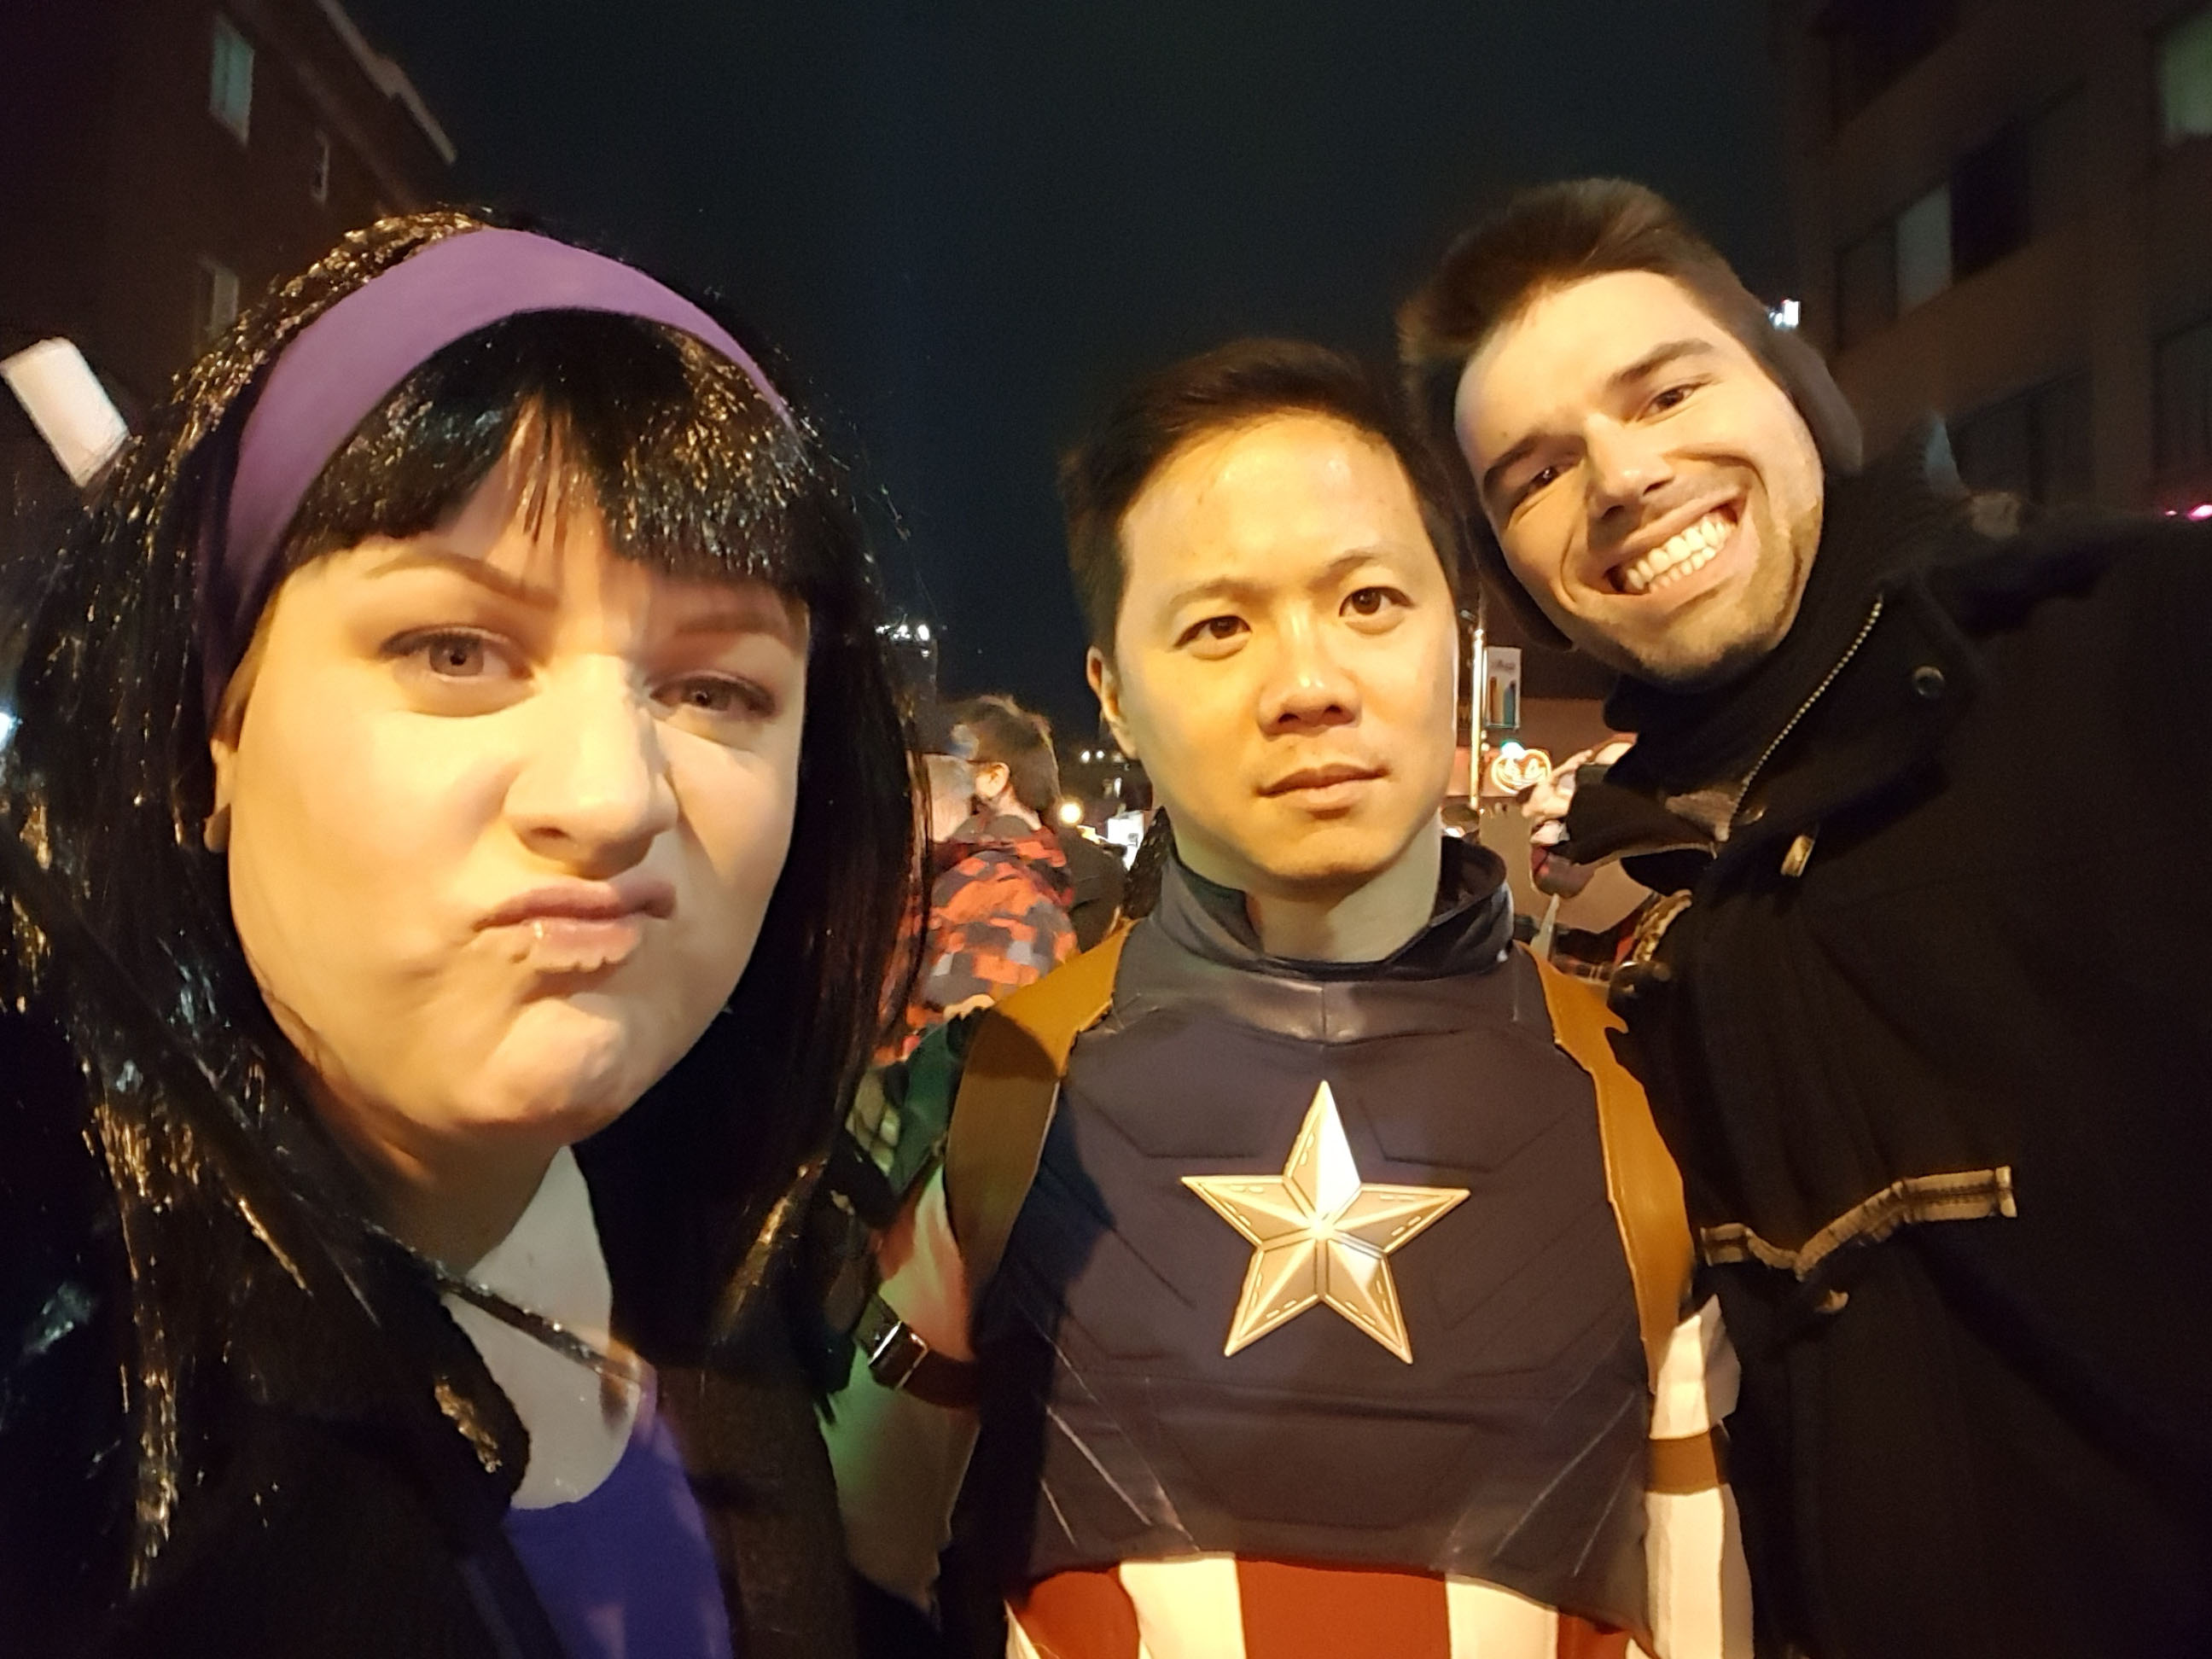
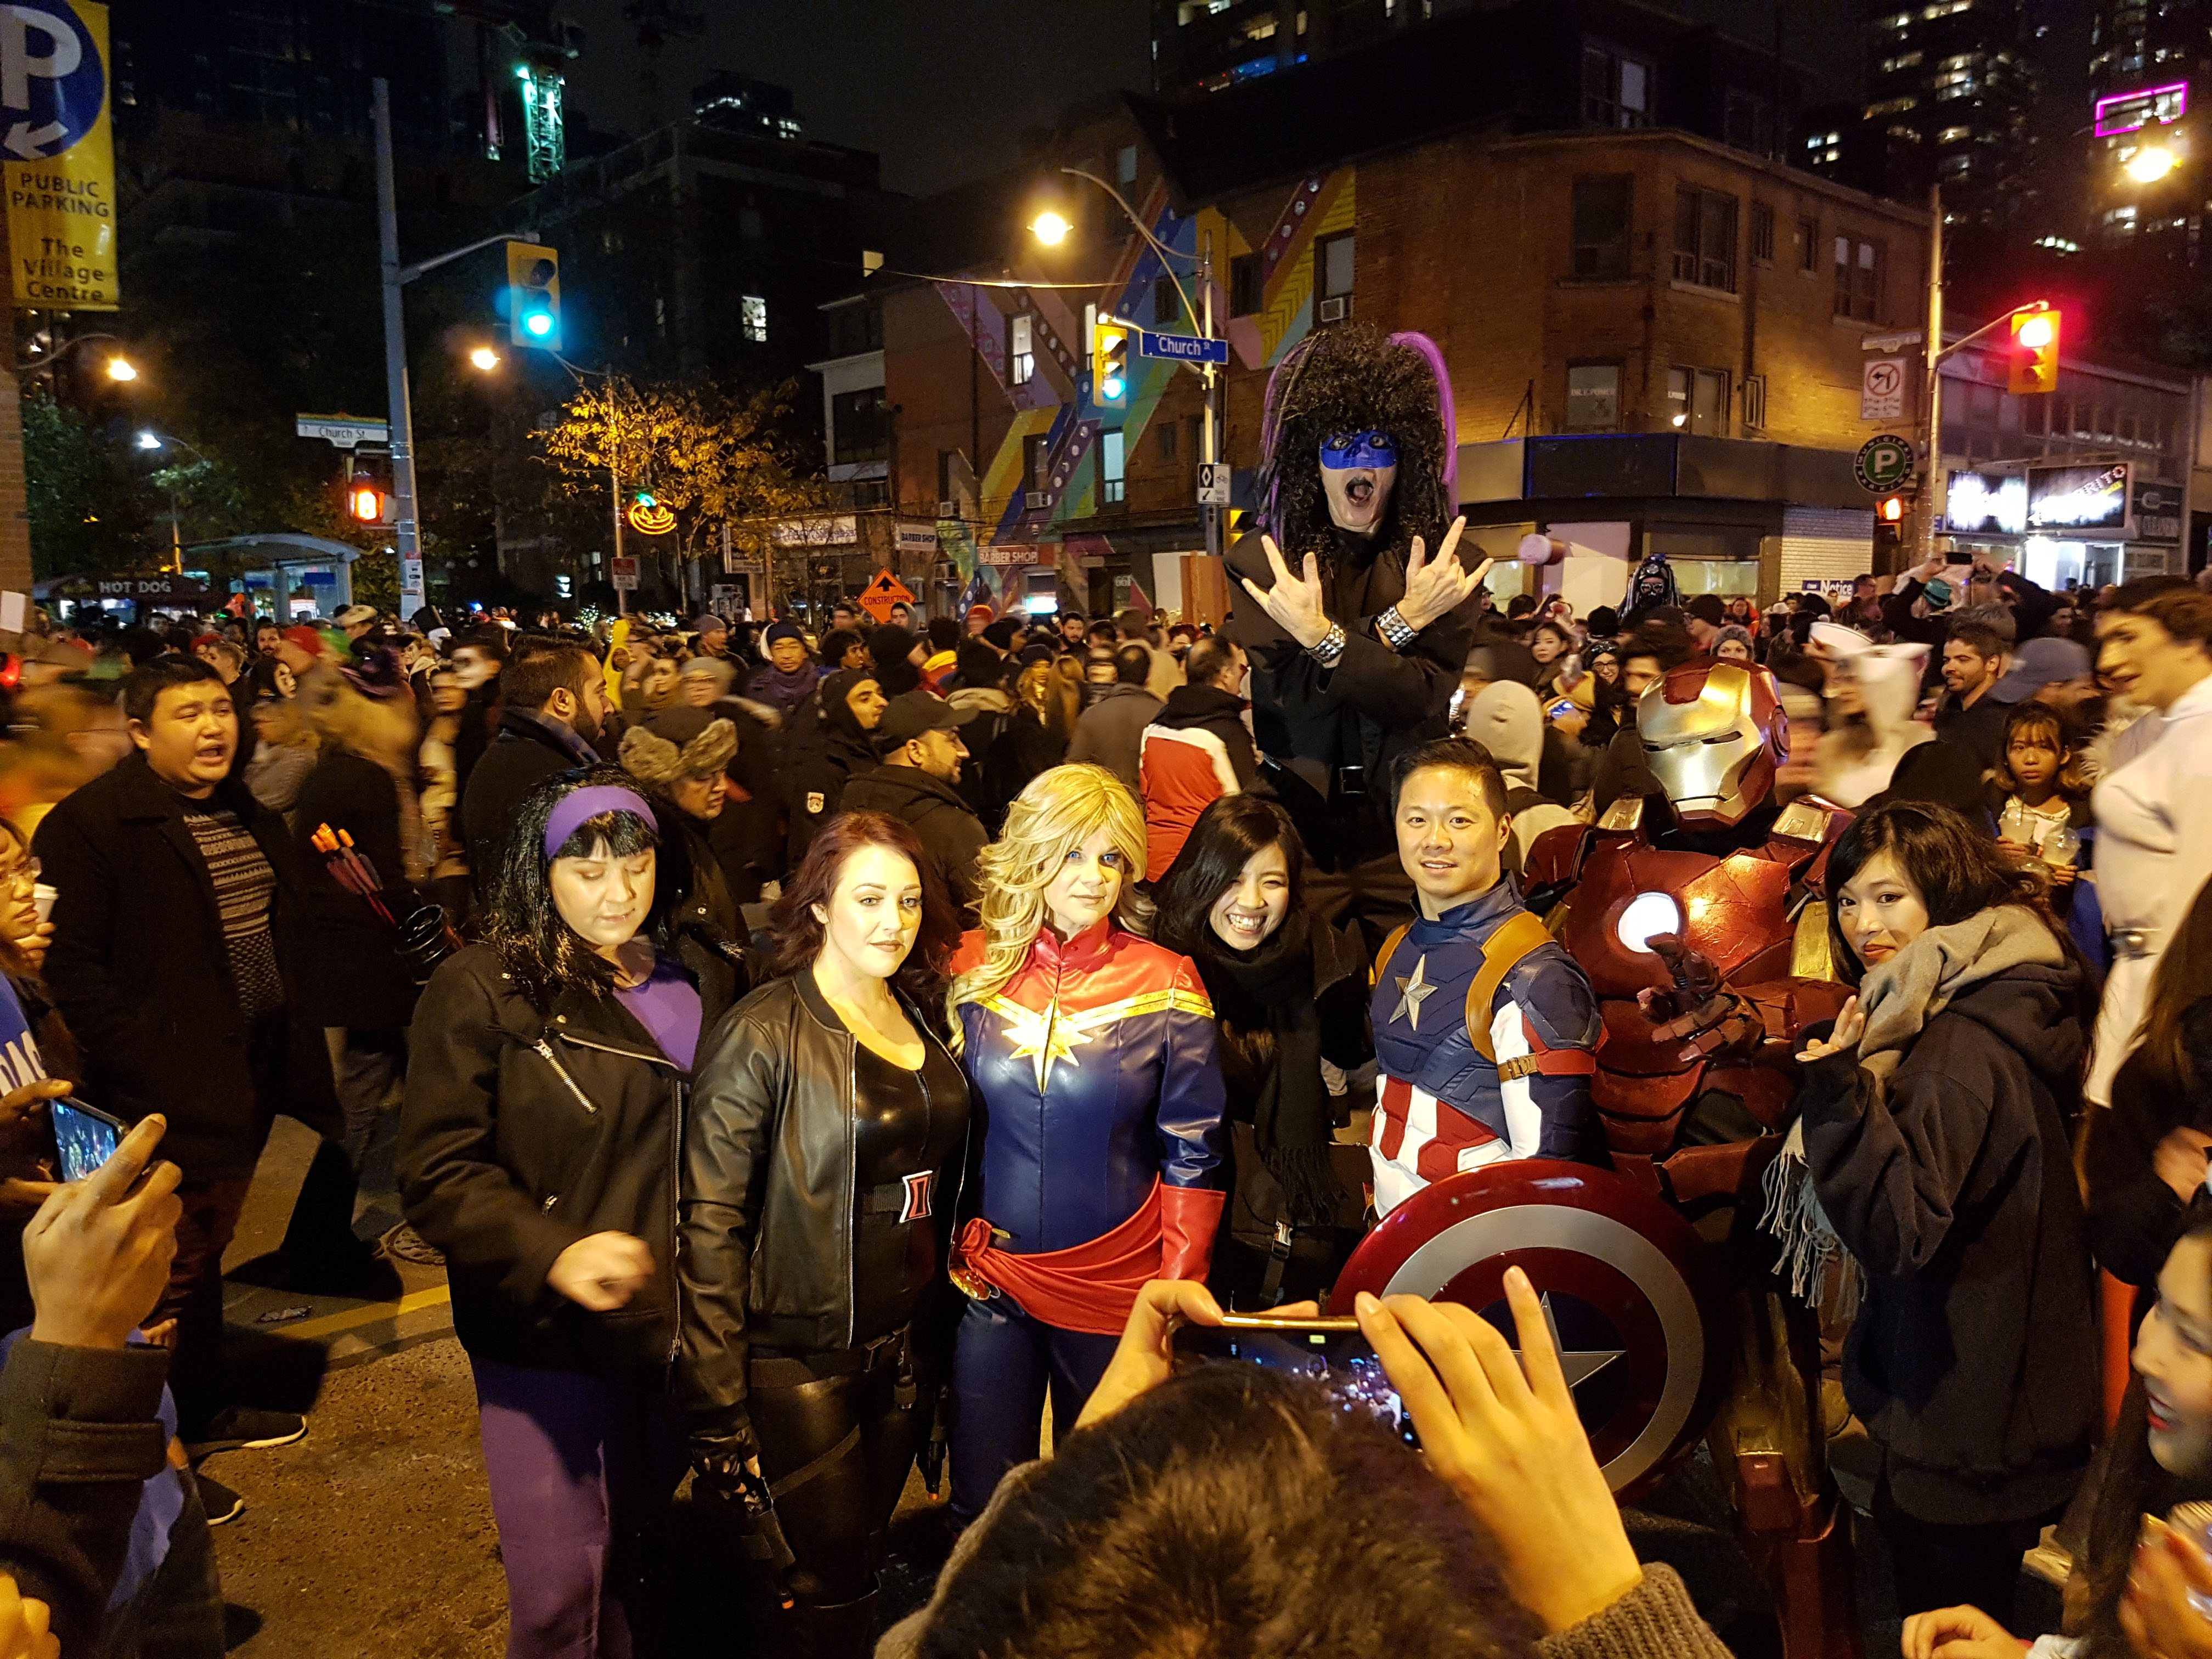
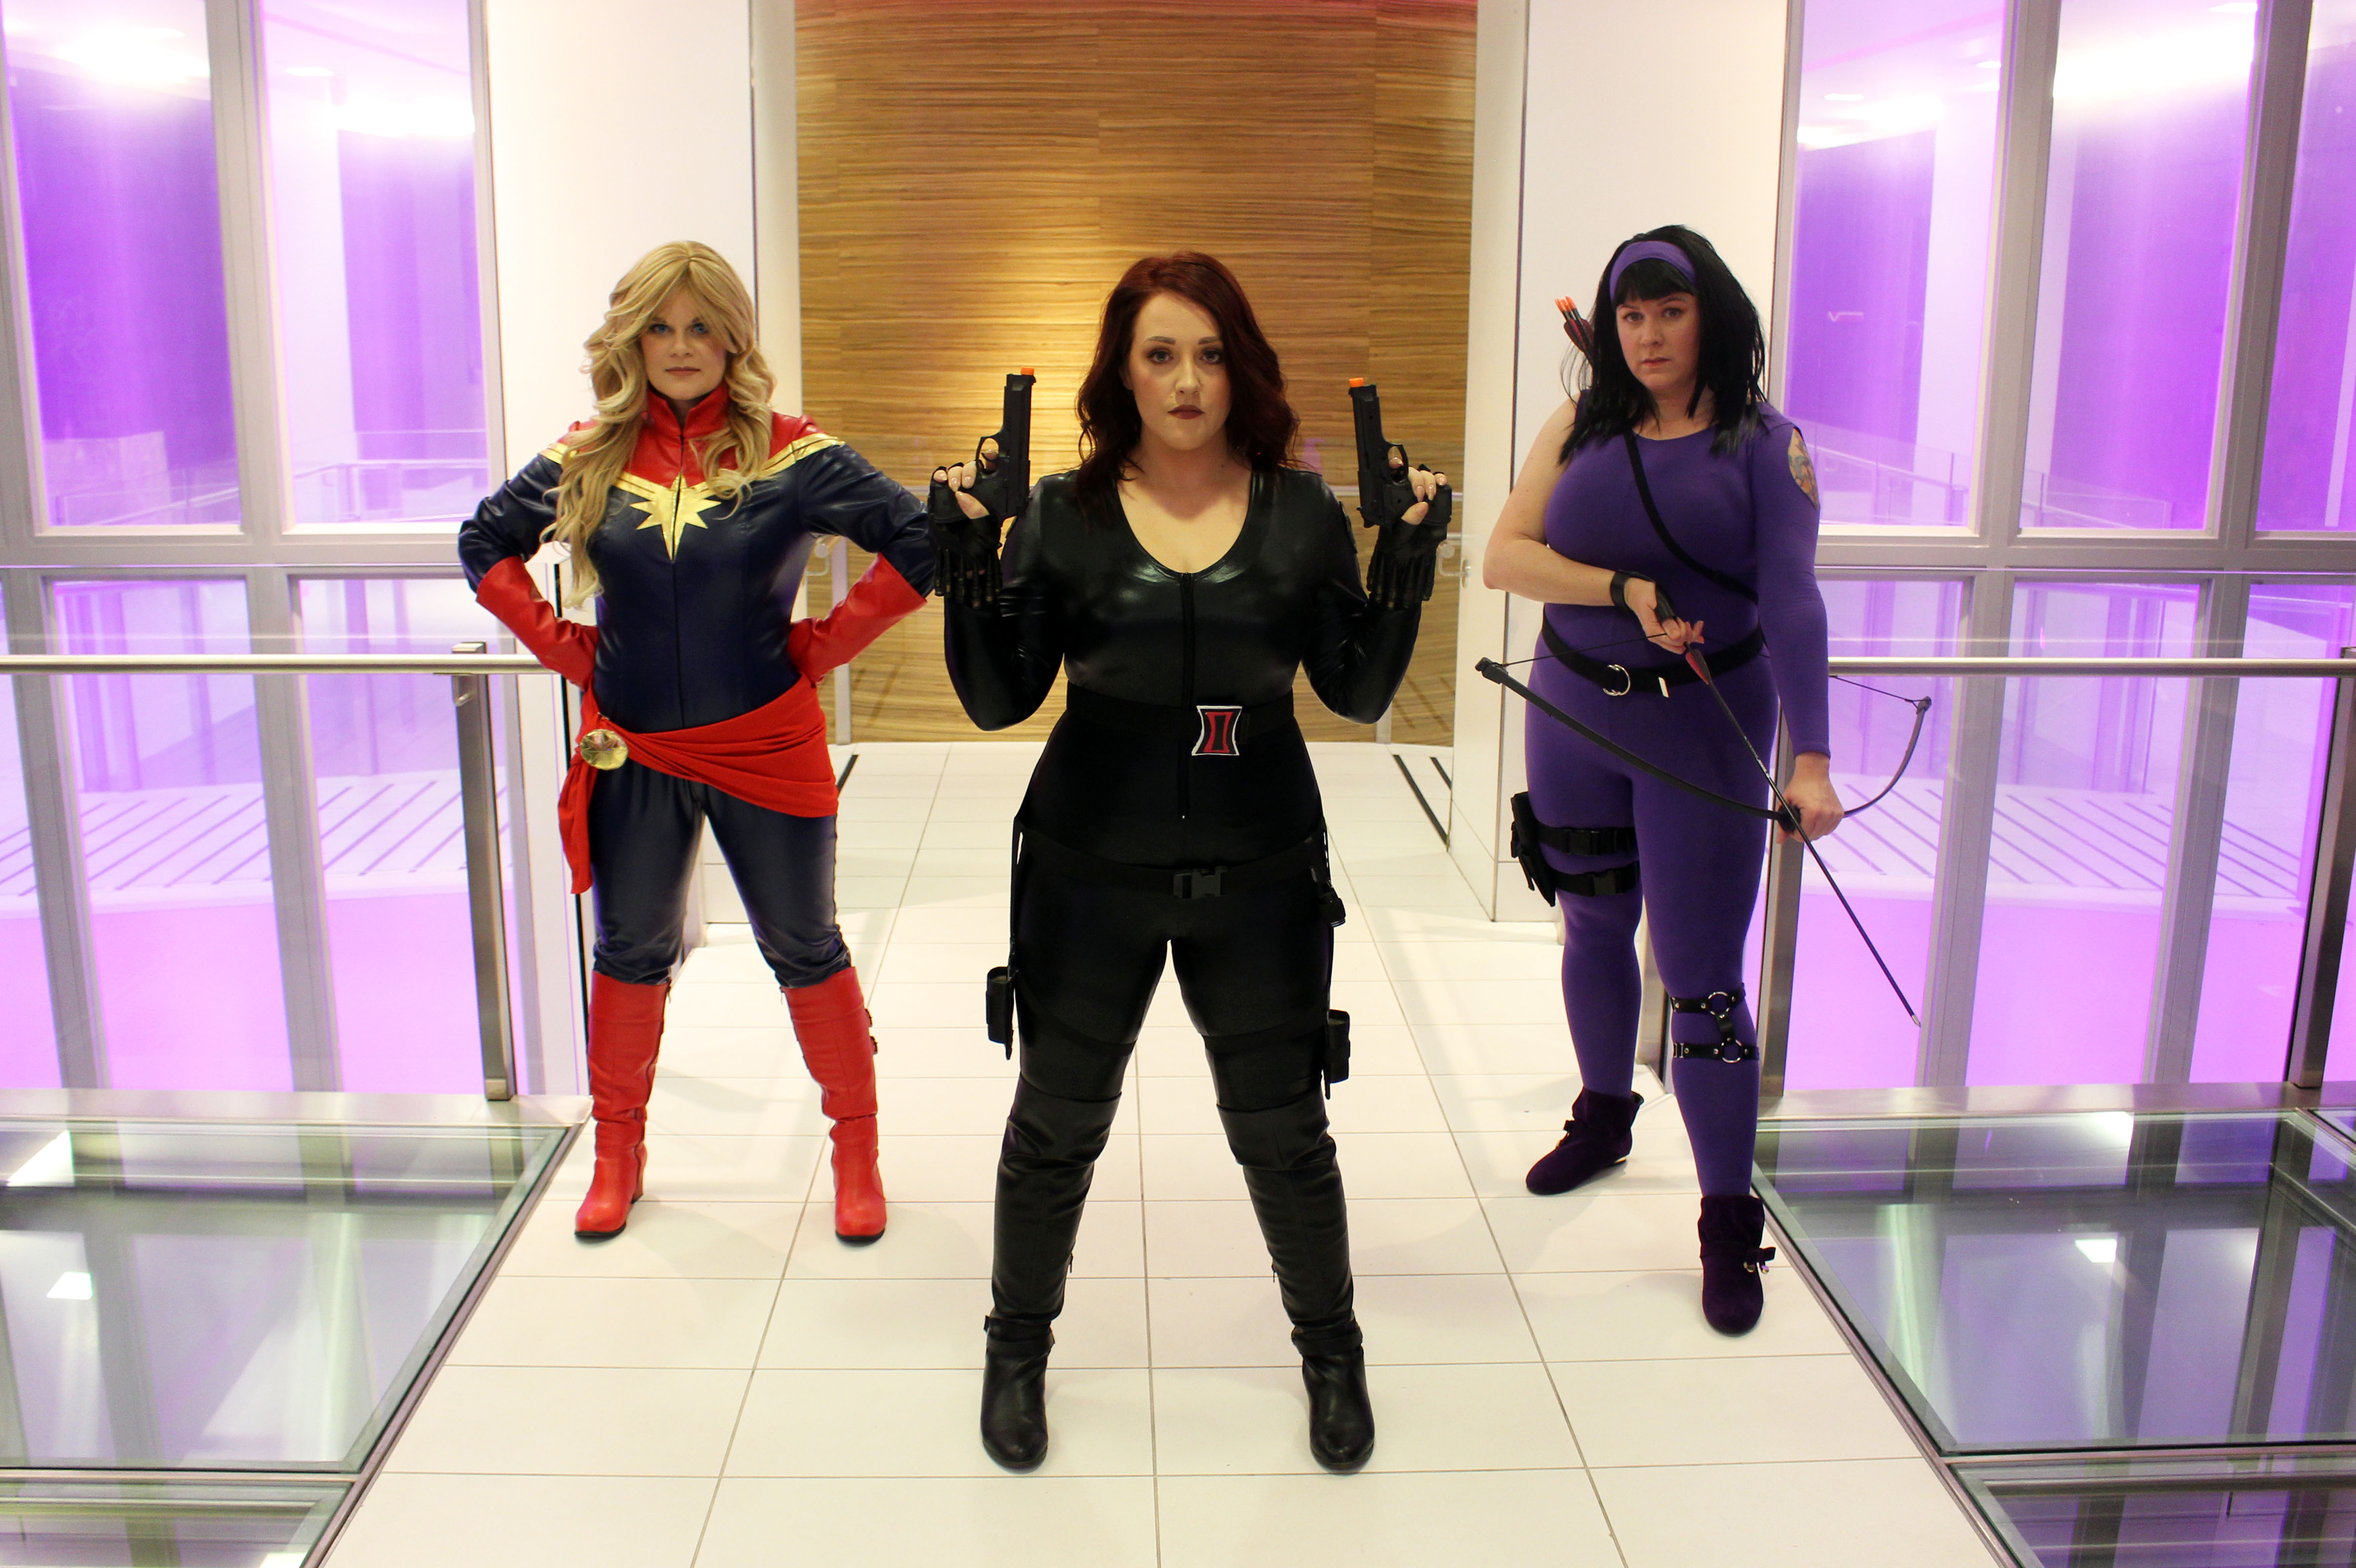
We decided to go with The Avengers because it was an easy enough ask – the costumes weren’t too indepth (for the most part) and there was enough variety amongst the characters that we could pick and choose what we wanted to be without feeling too constrained.

Image result for captain marvel

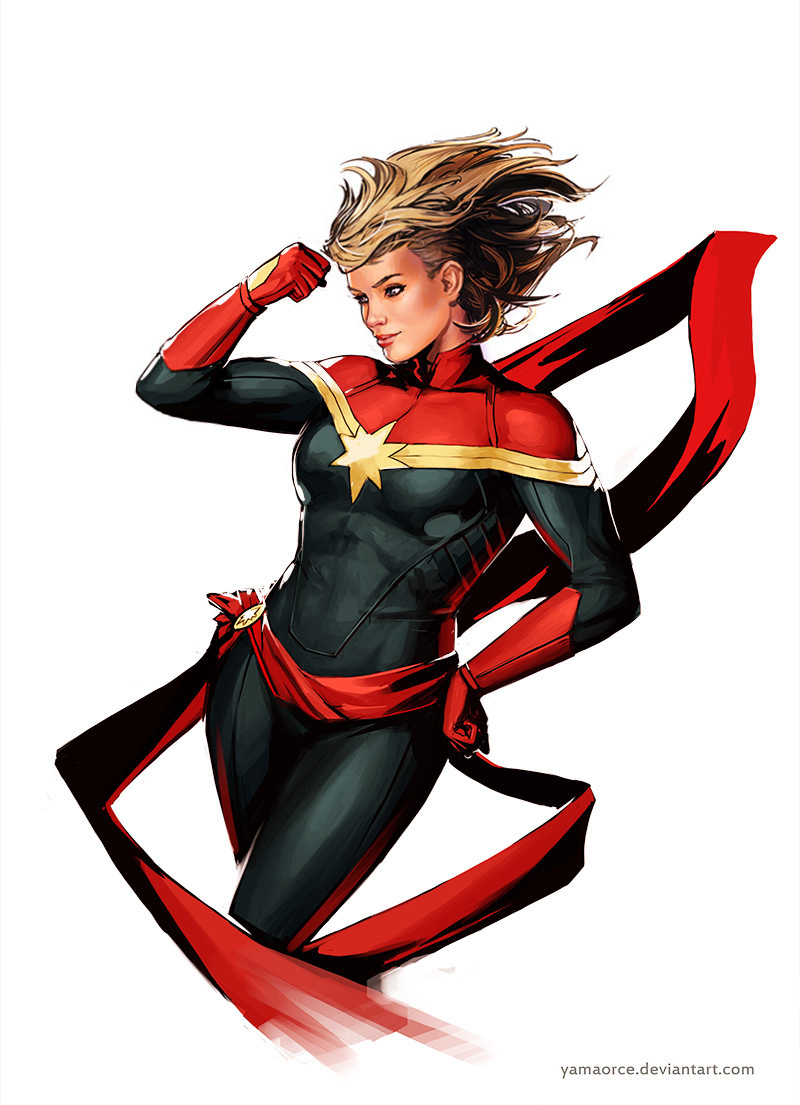
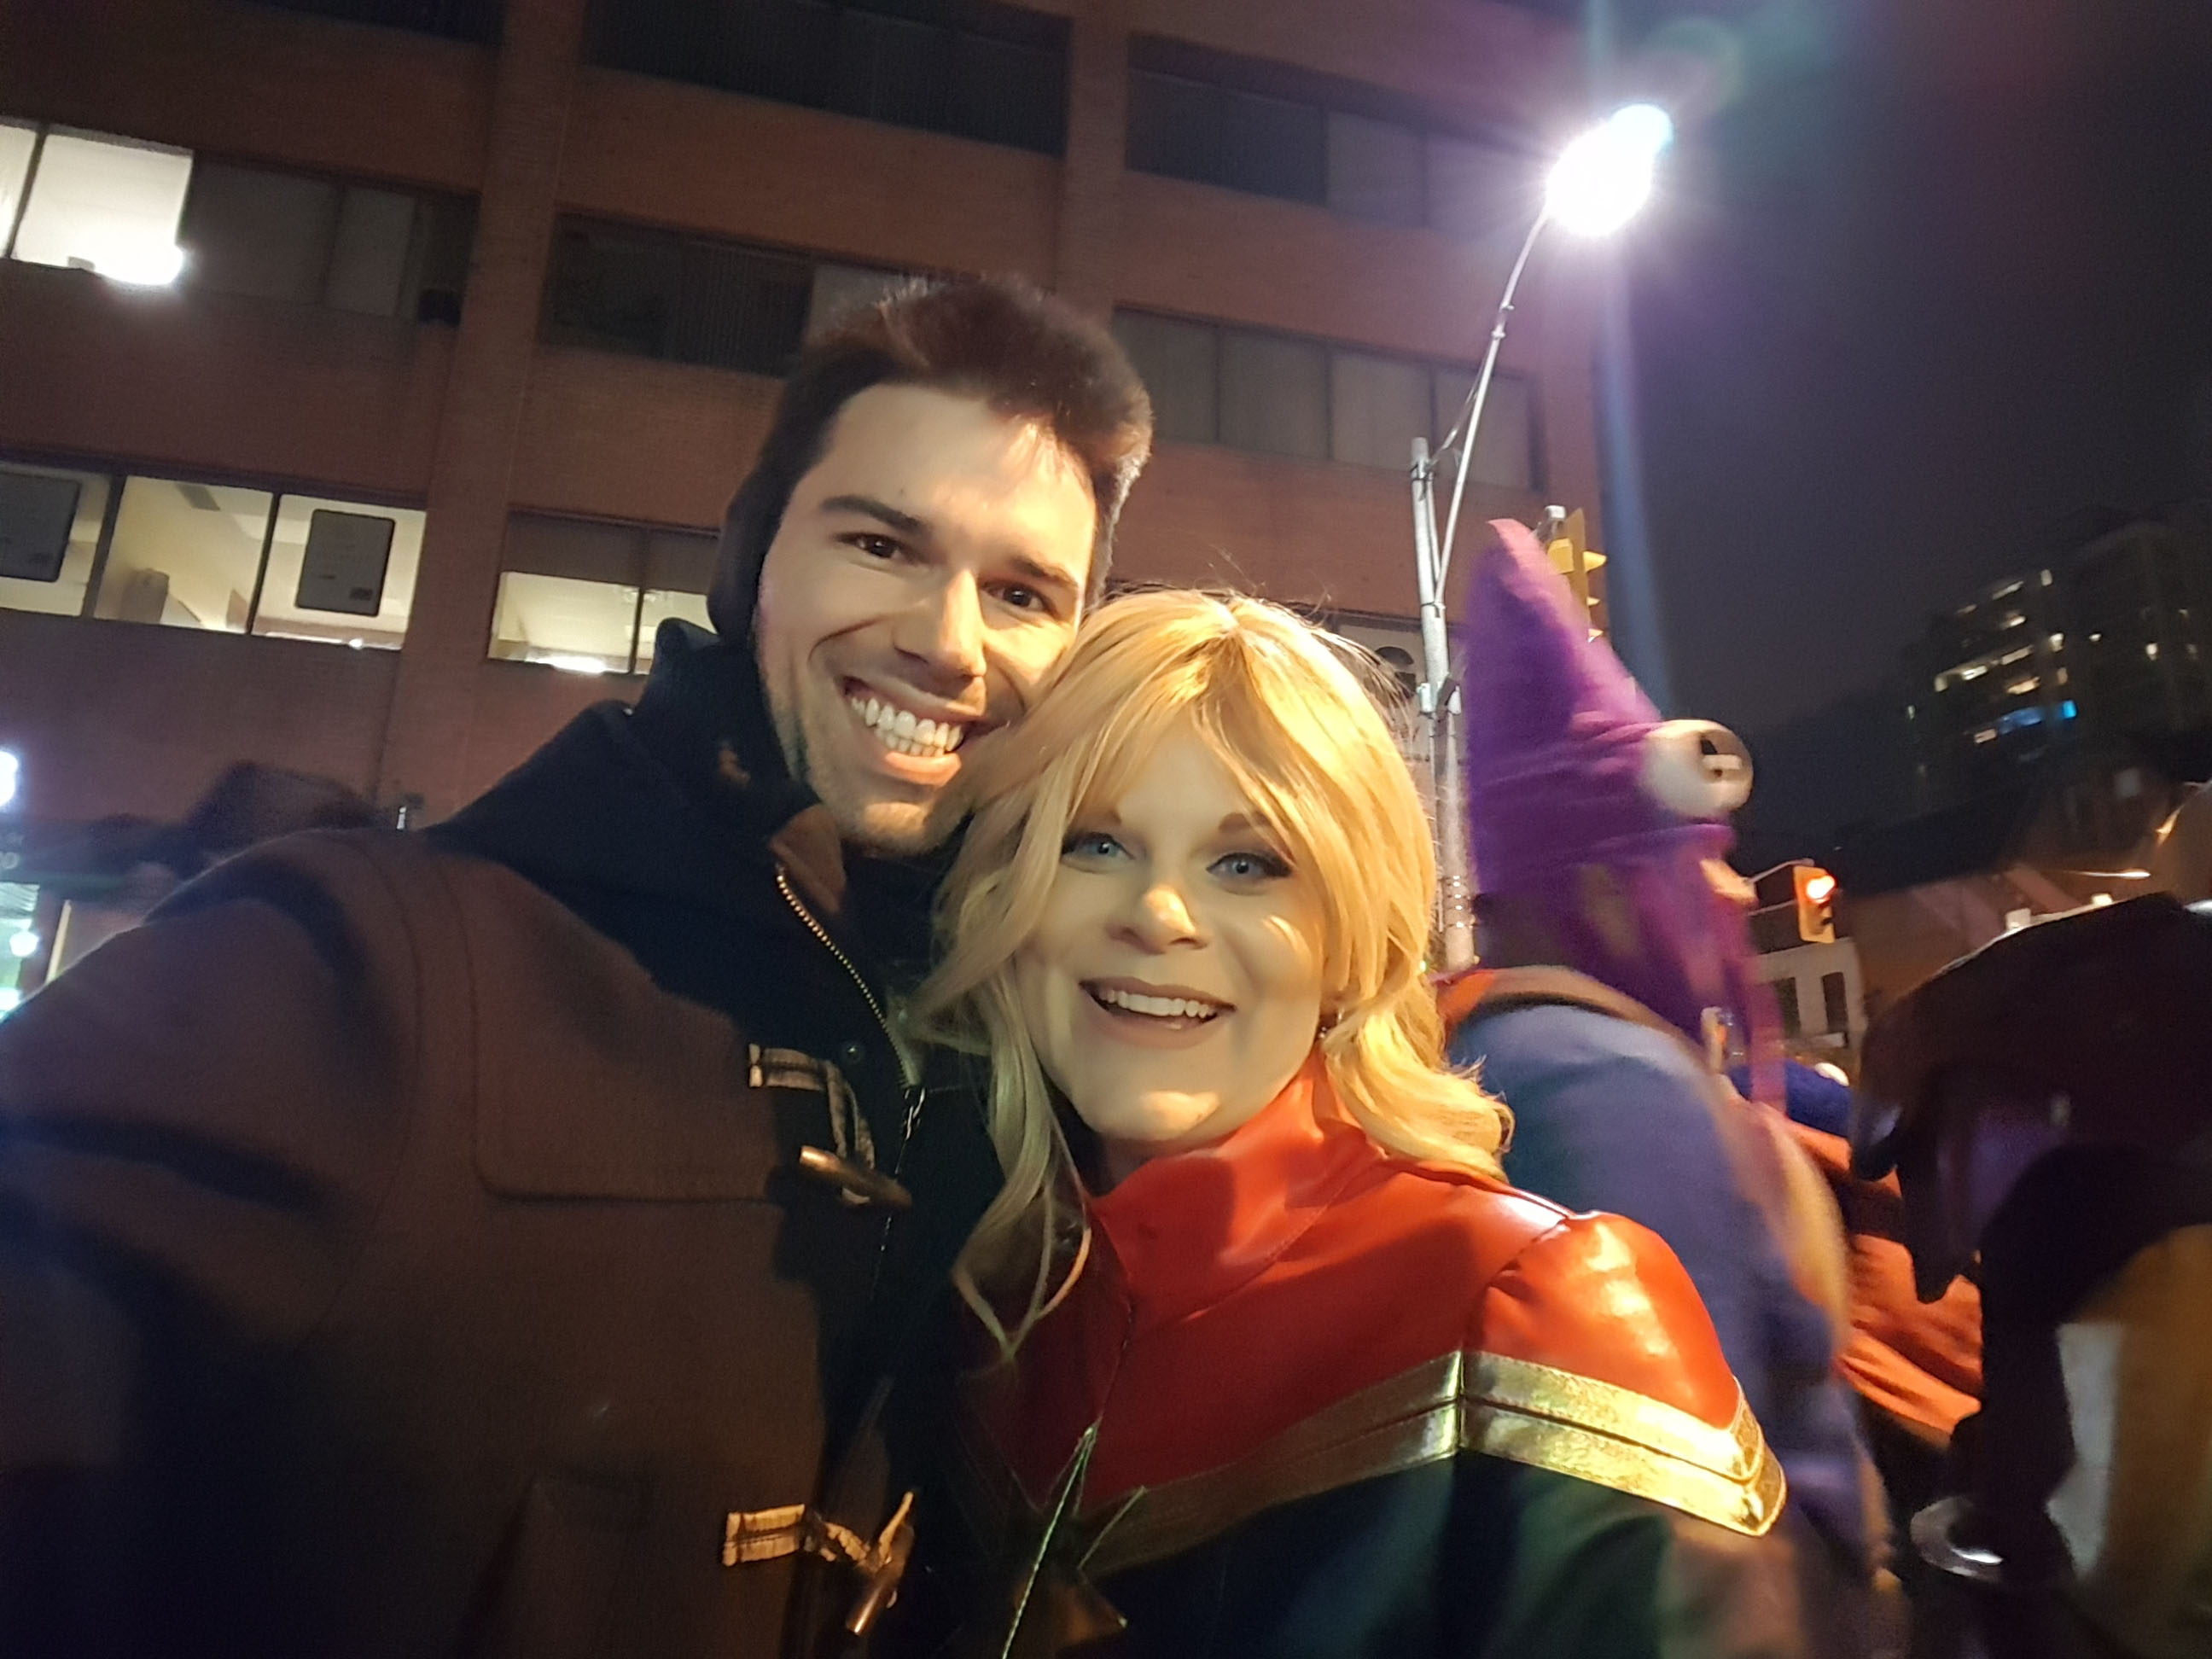
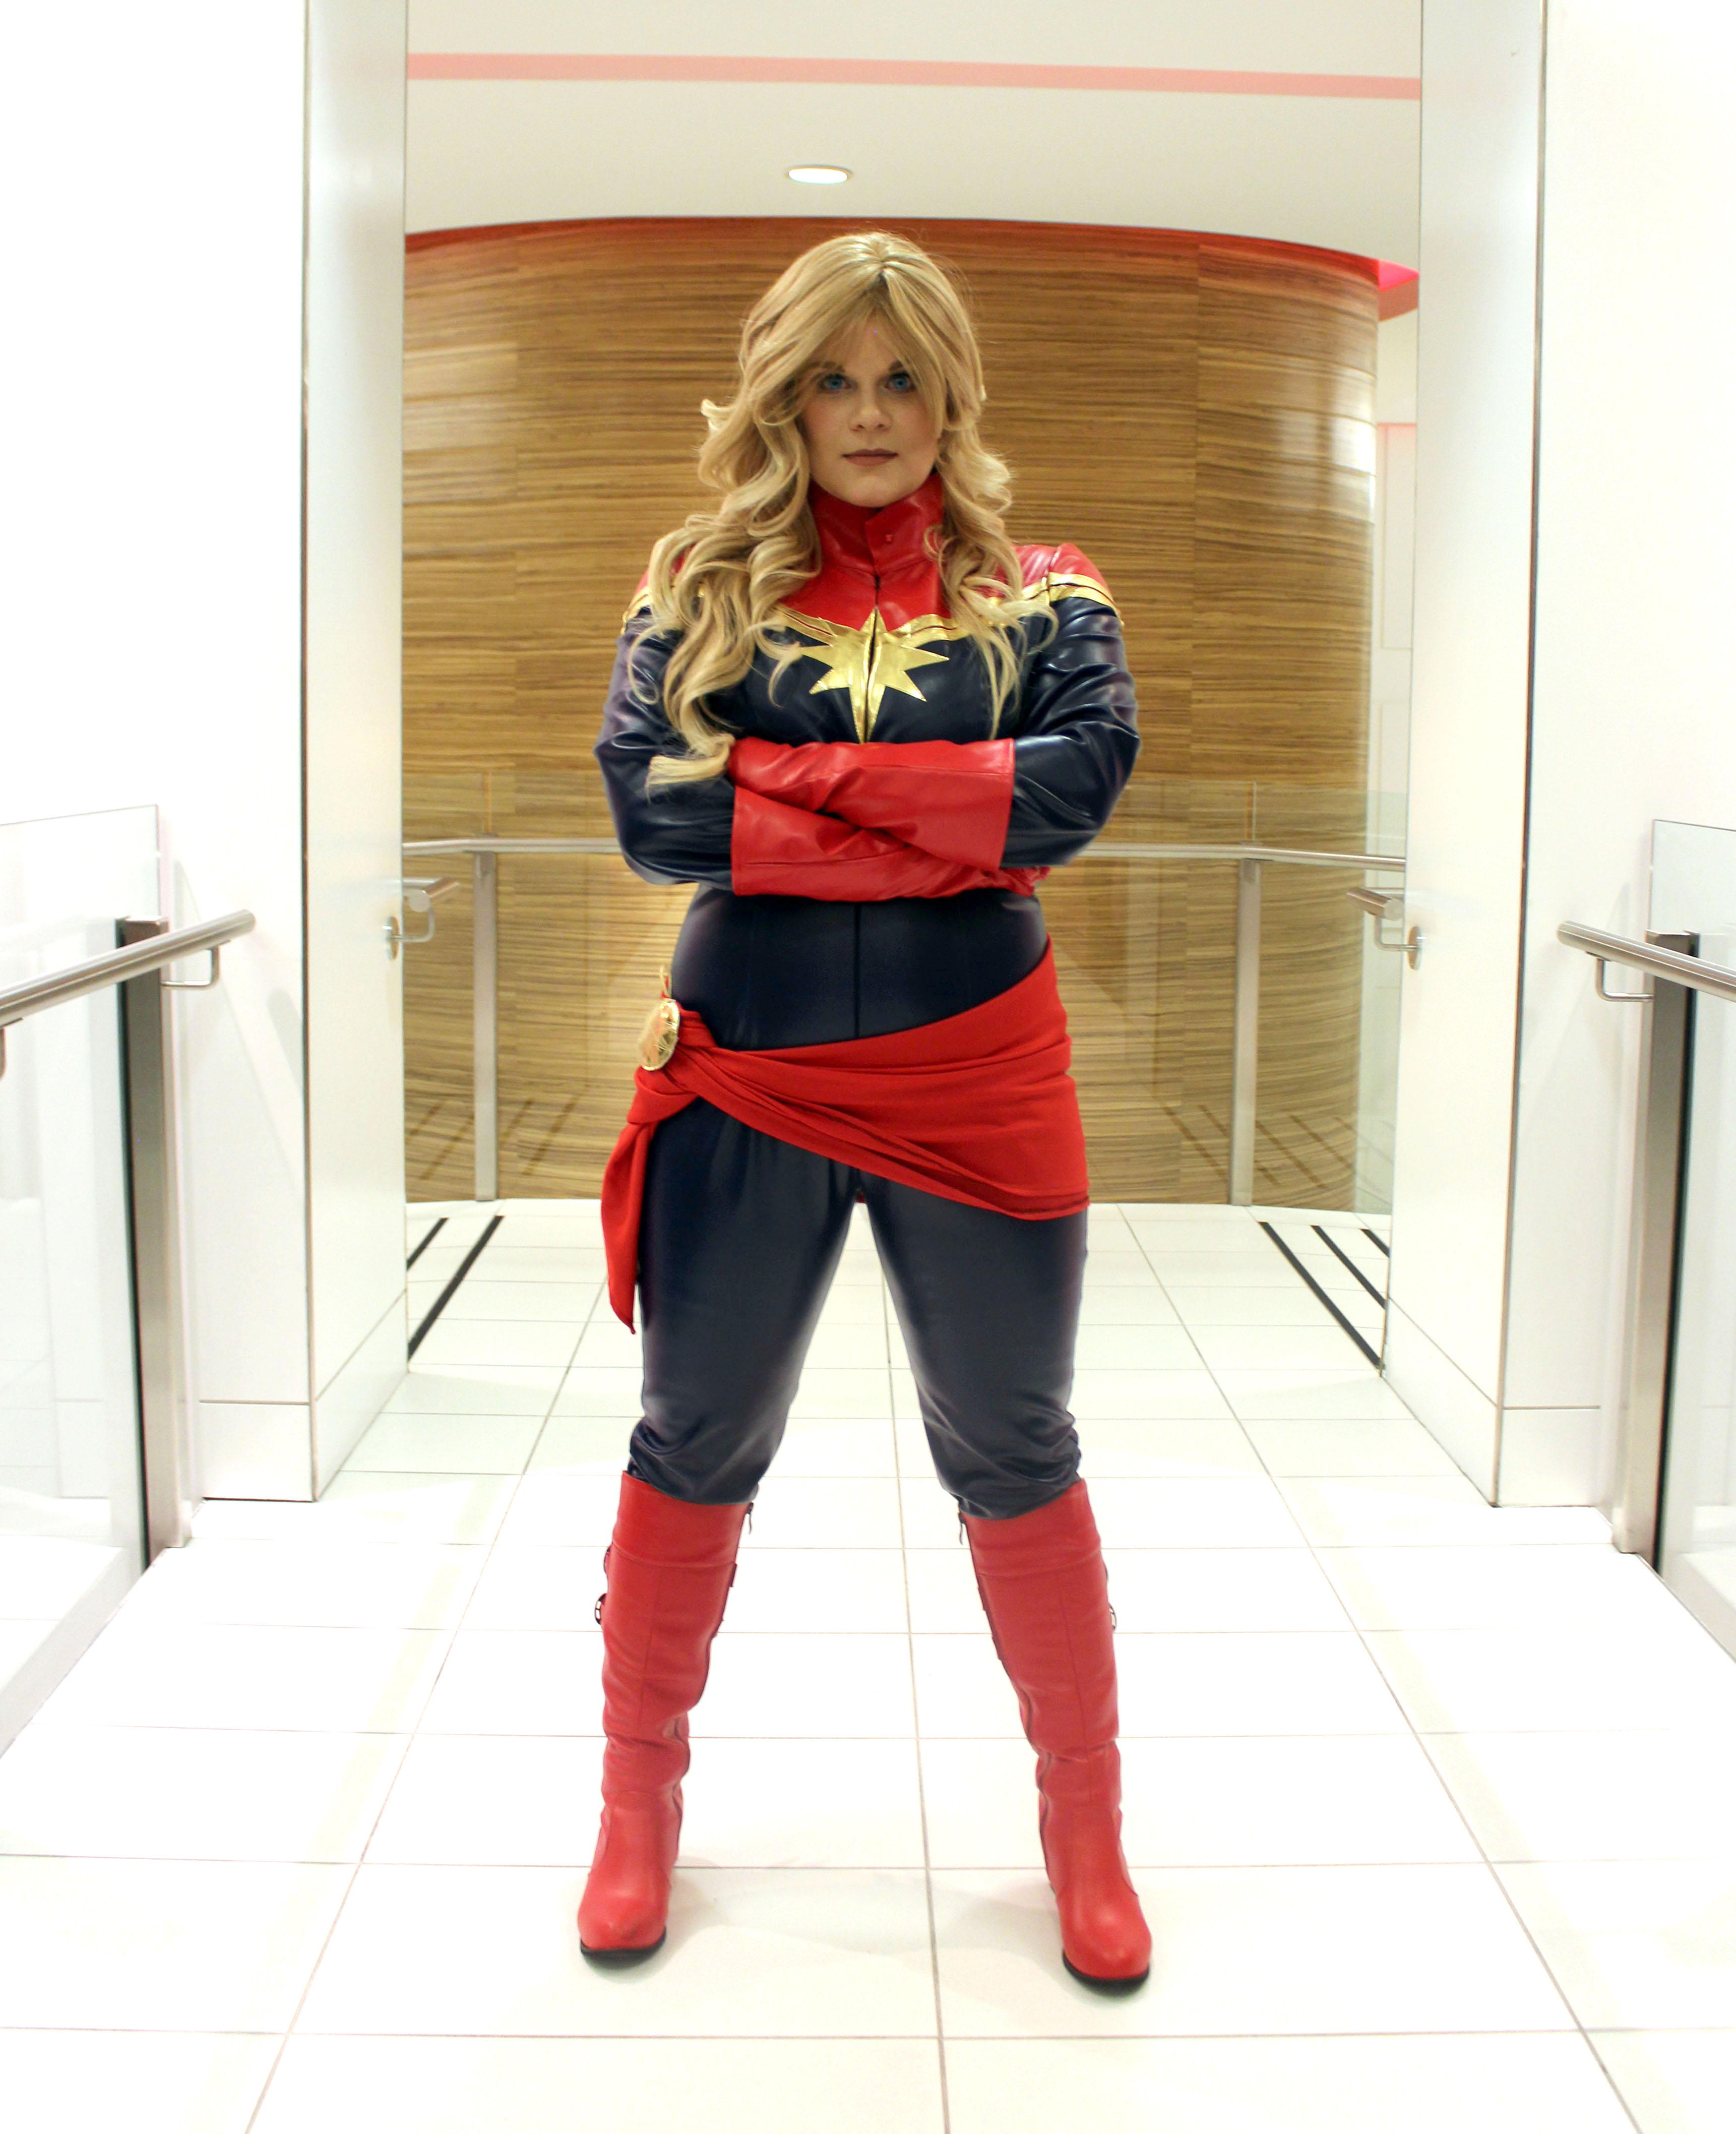
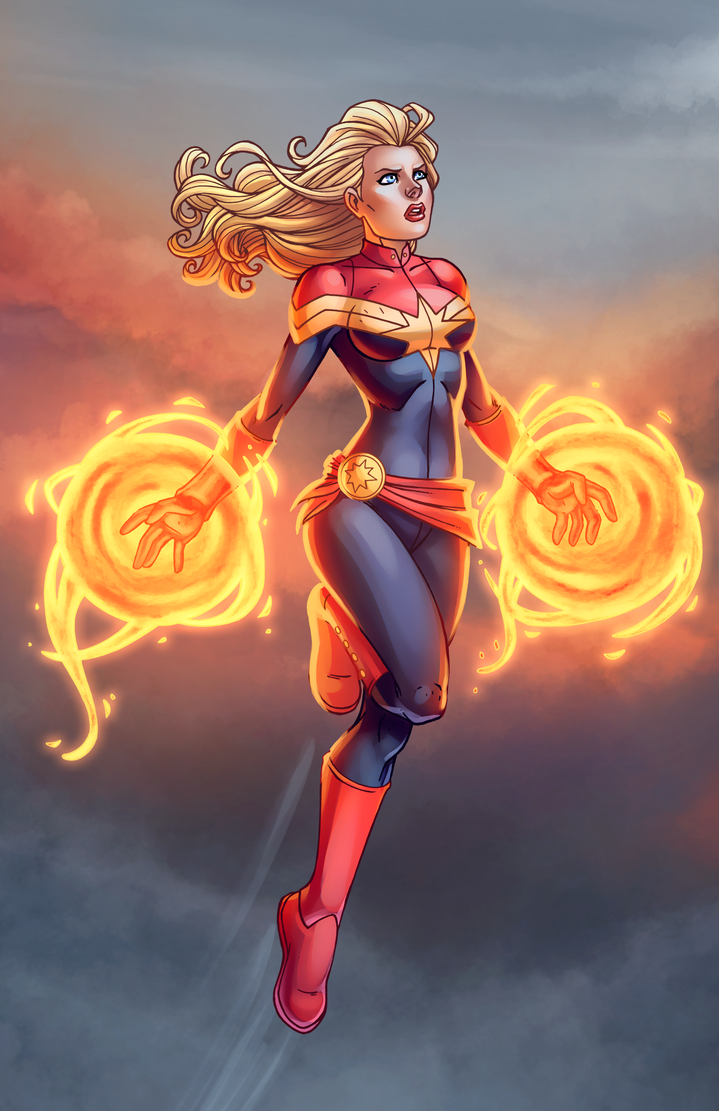
It was suggested to me that I do Captain Marvel since I basically looked like her anyway. I’m always drawn to blonde characters, so I decided to go with it after looking her up. In terms of mainstream media, she’s a completely unknown character because she’s never been in any of the Marvel movies so far. That’s going to change soon though! Brie Larson was cast in the Captain Marvel movie which will begin filming in 2018 and has an anticipated release date for 2019! So much like my Harley Quinn from 2015, I’m ahead of the curve! 😉

Captain Marvel Takes Flight by JamieFayX

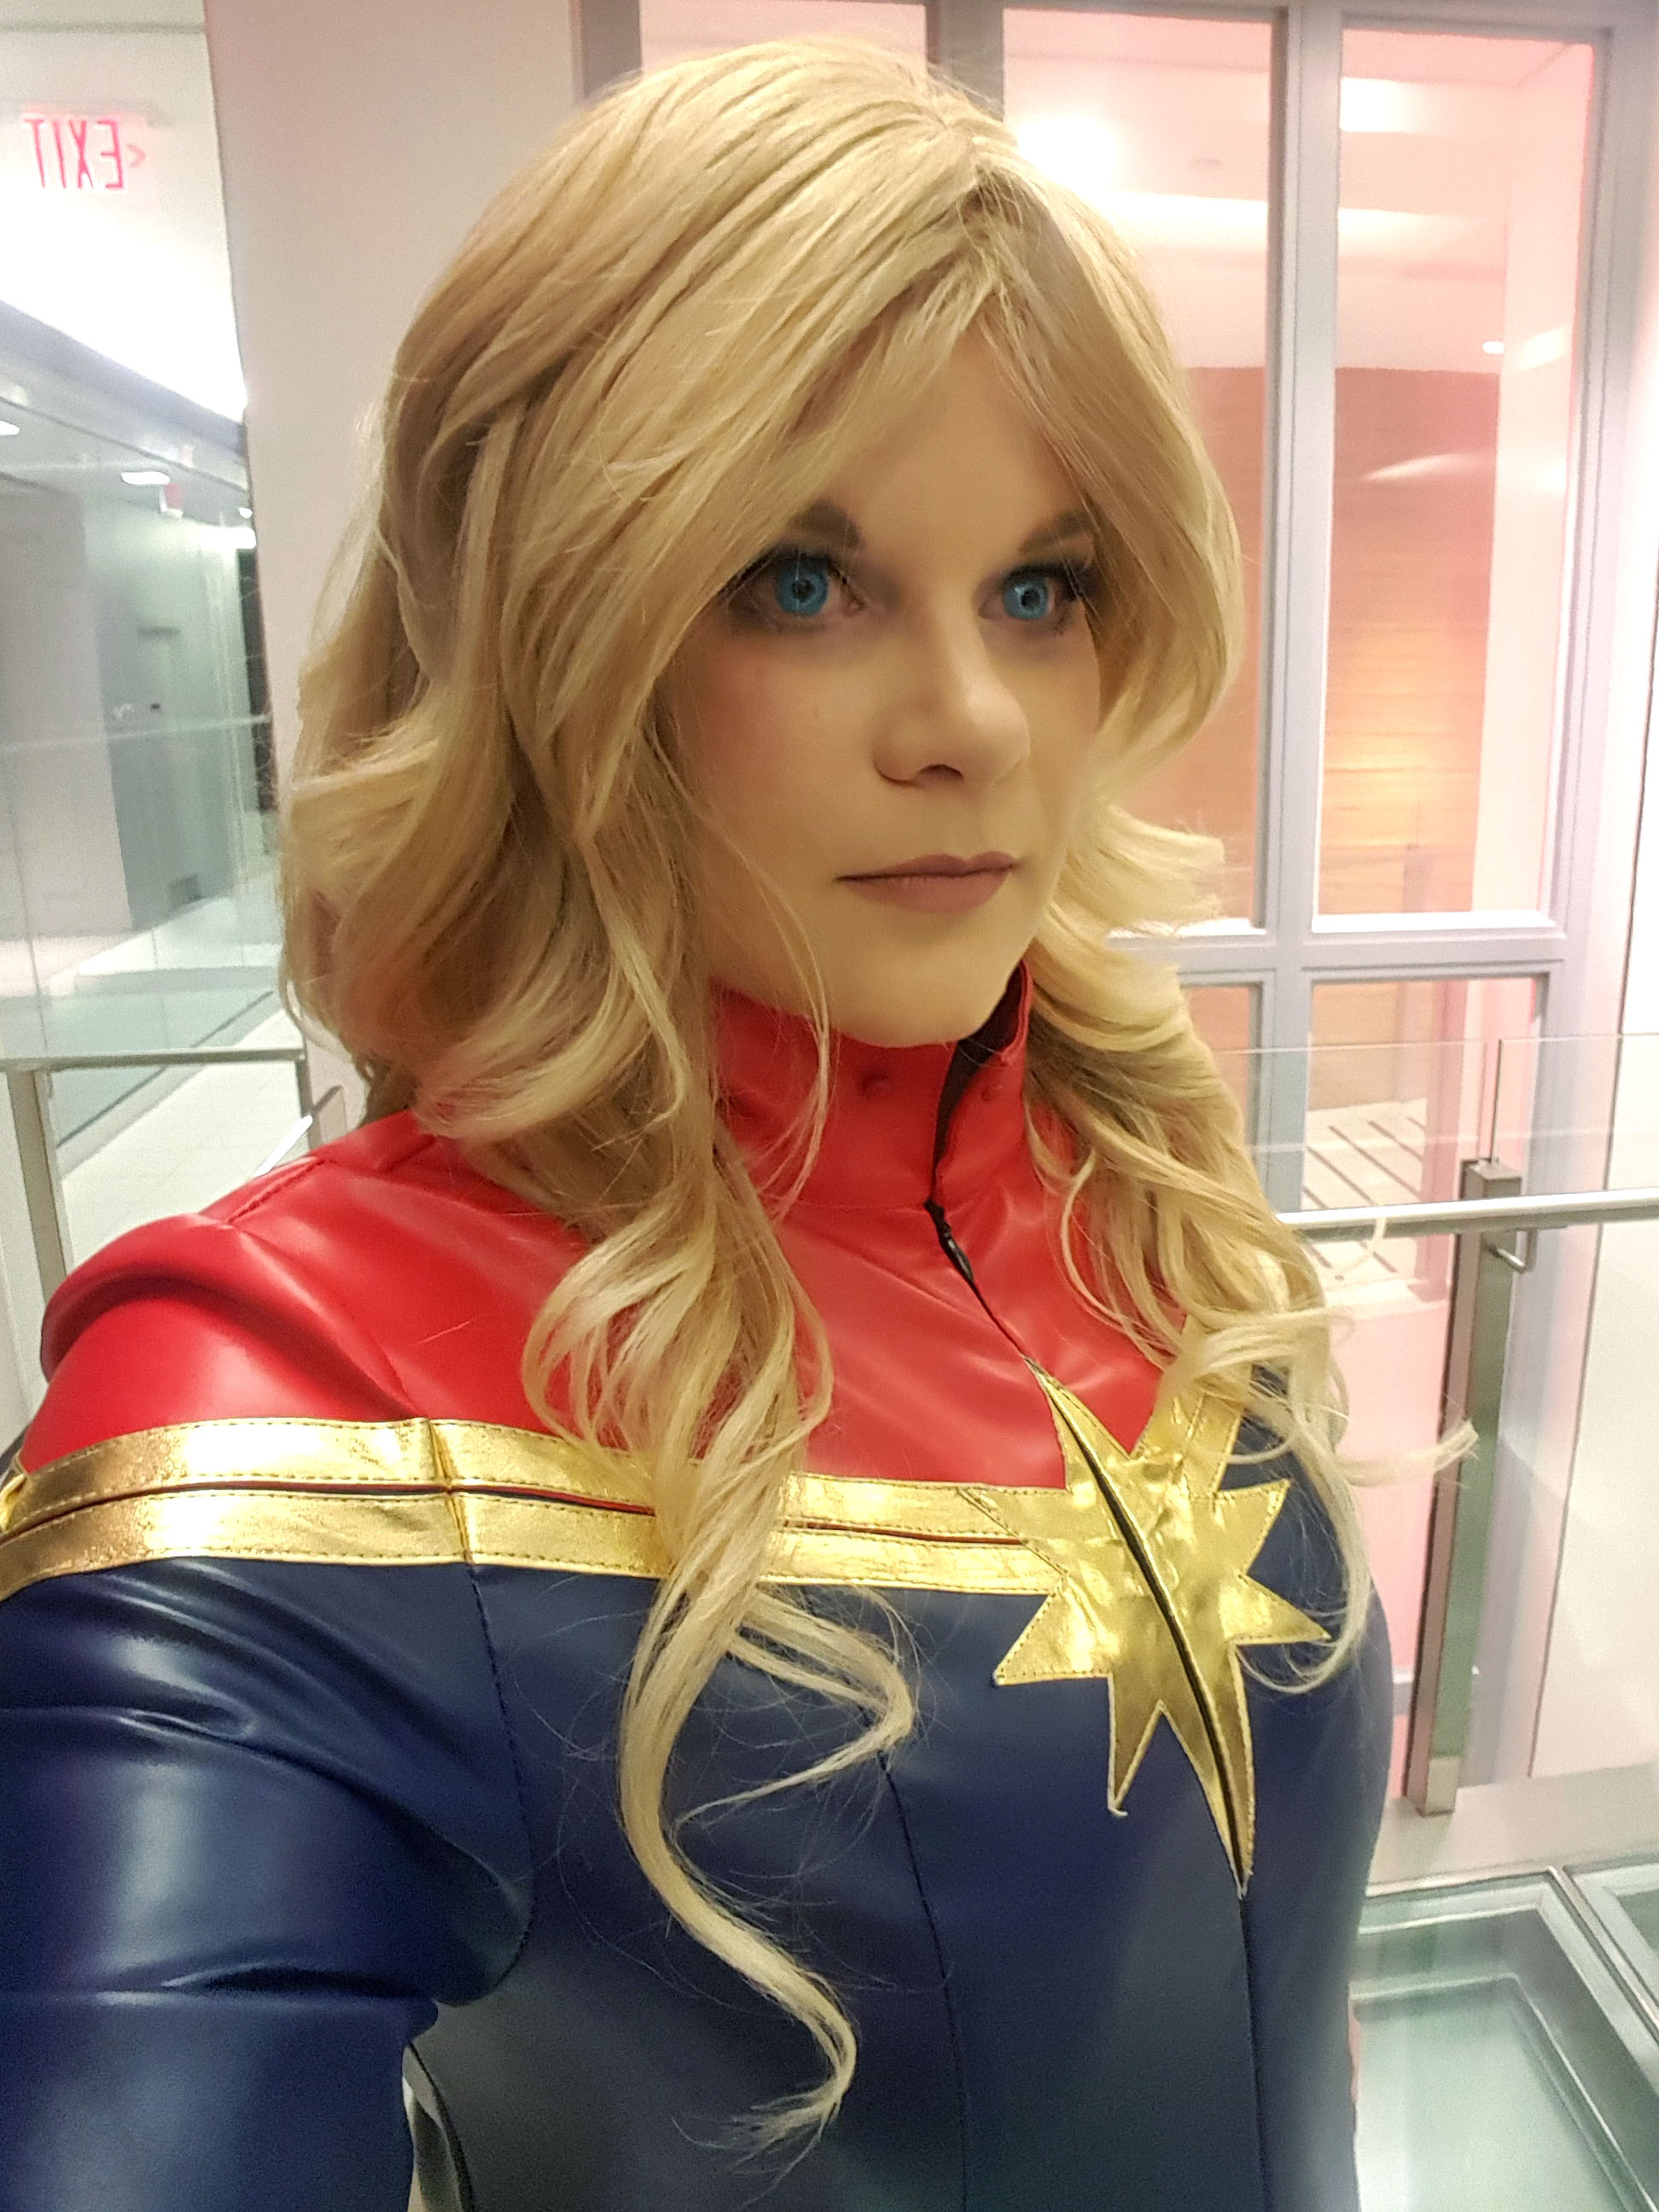
There are a few takes on her hair style – it used to be long, but in more recent years they’ve started doing a faux hawk on her. I had originally thought to actually cut off my own hair to replicate the new look, but ended up just not doing it for no reason other than I was lazy and kind ran out of time.  So I decided to take inspiration from pictures of her where she has longer hair.

I originally thought I’d use my own hair and model it after hers, but in the end I opted to buy a wig since it’d just be easier than dealing with my own hair the day of Halloween. After a bit of searching on eBay, I ended up selecting this wig because I thought it looked the best. It was honestly a bit too long in the back, but it was the right colour and texture that I was going for. This was one of the more expensive wigs I’ve bought (in previous years I usually chose the cheapest plastic wigs I could find but that’s generally because the hair colours were so abnormal) and it was definitely the nicest to wear. While it was still made of plastic, the texture was a lot nicer and it brushed out easily to help loosen up the curls.

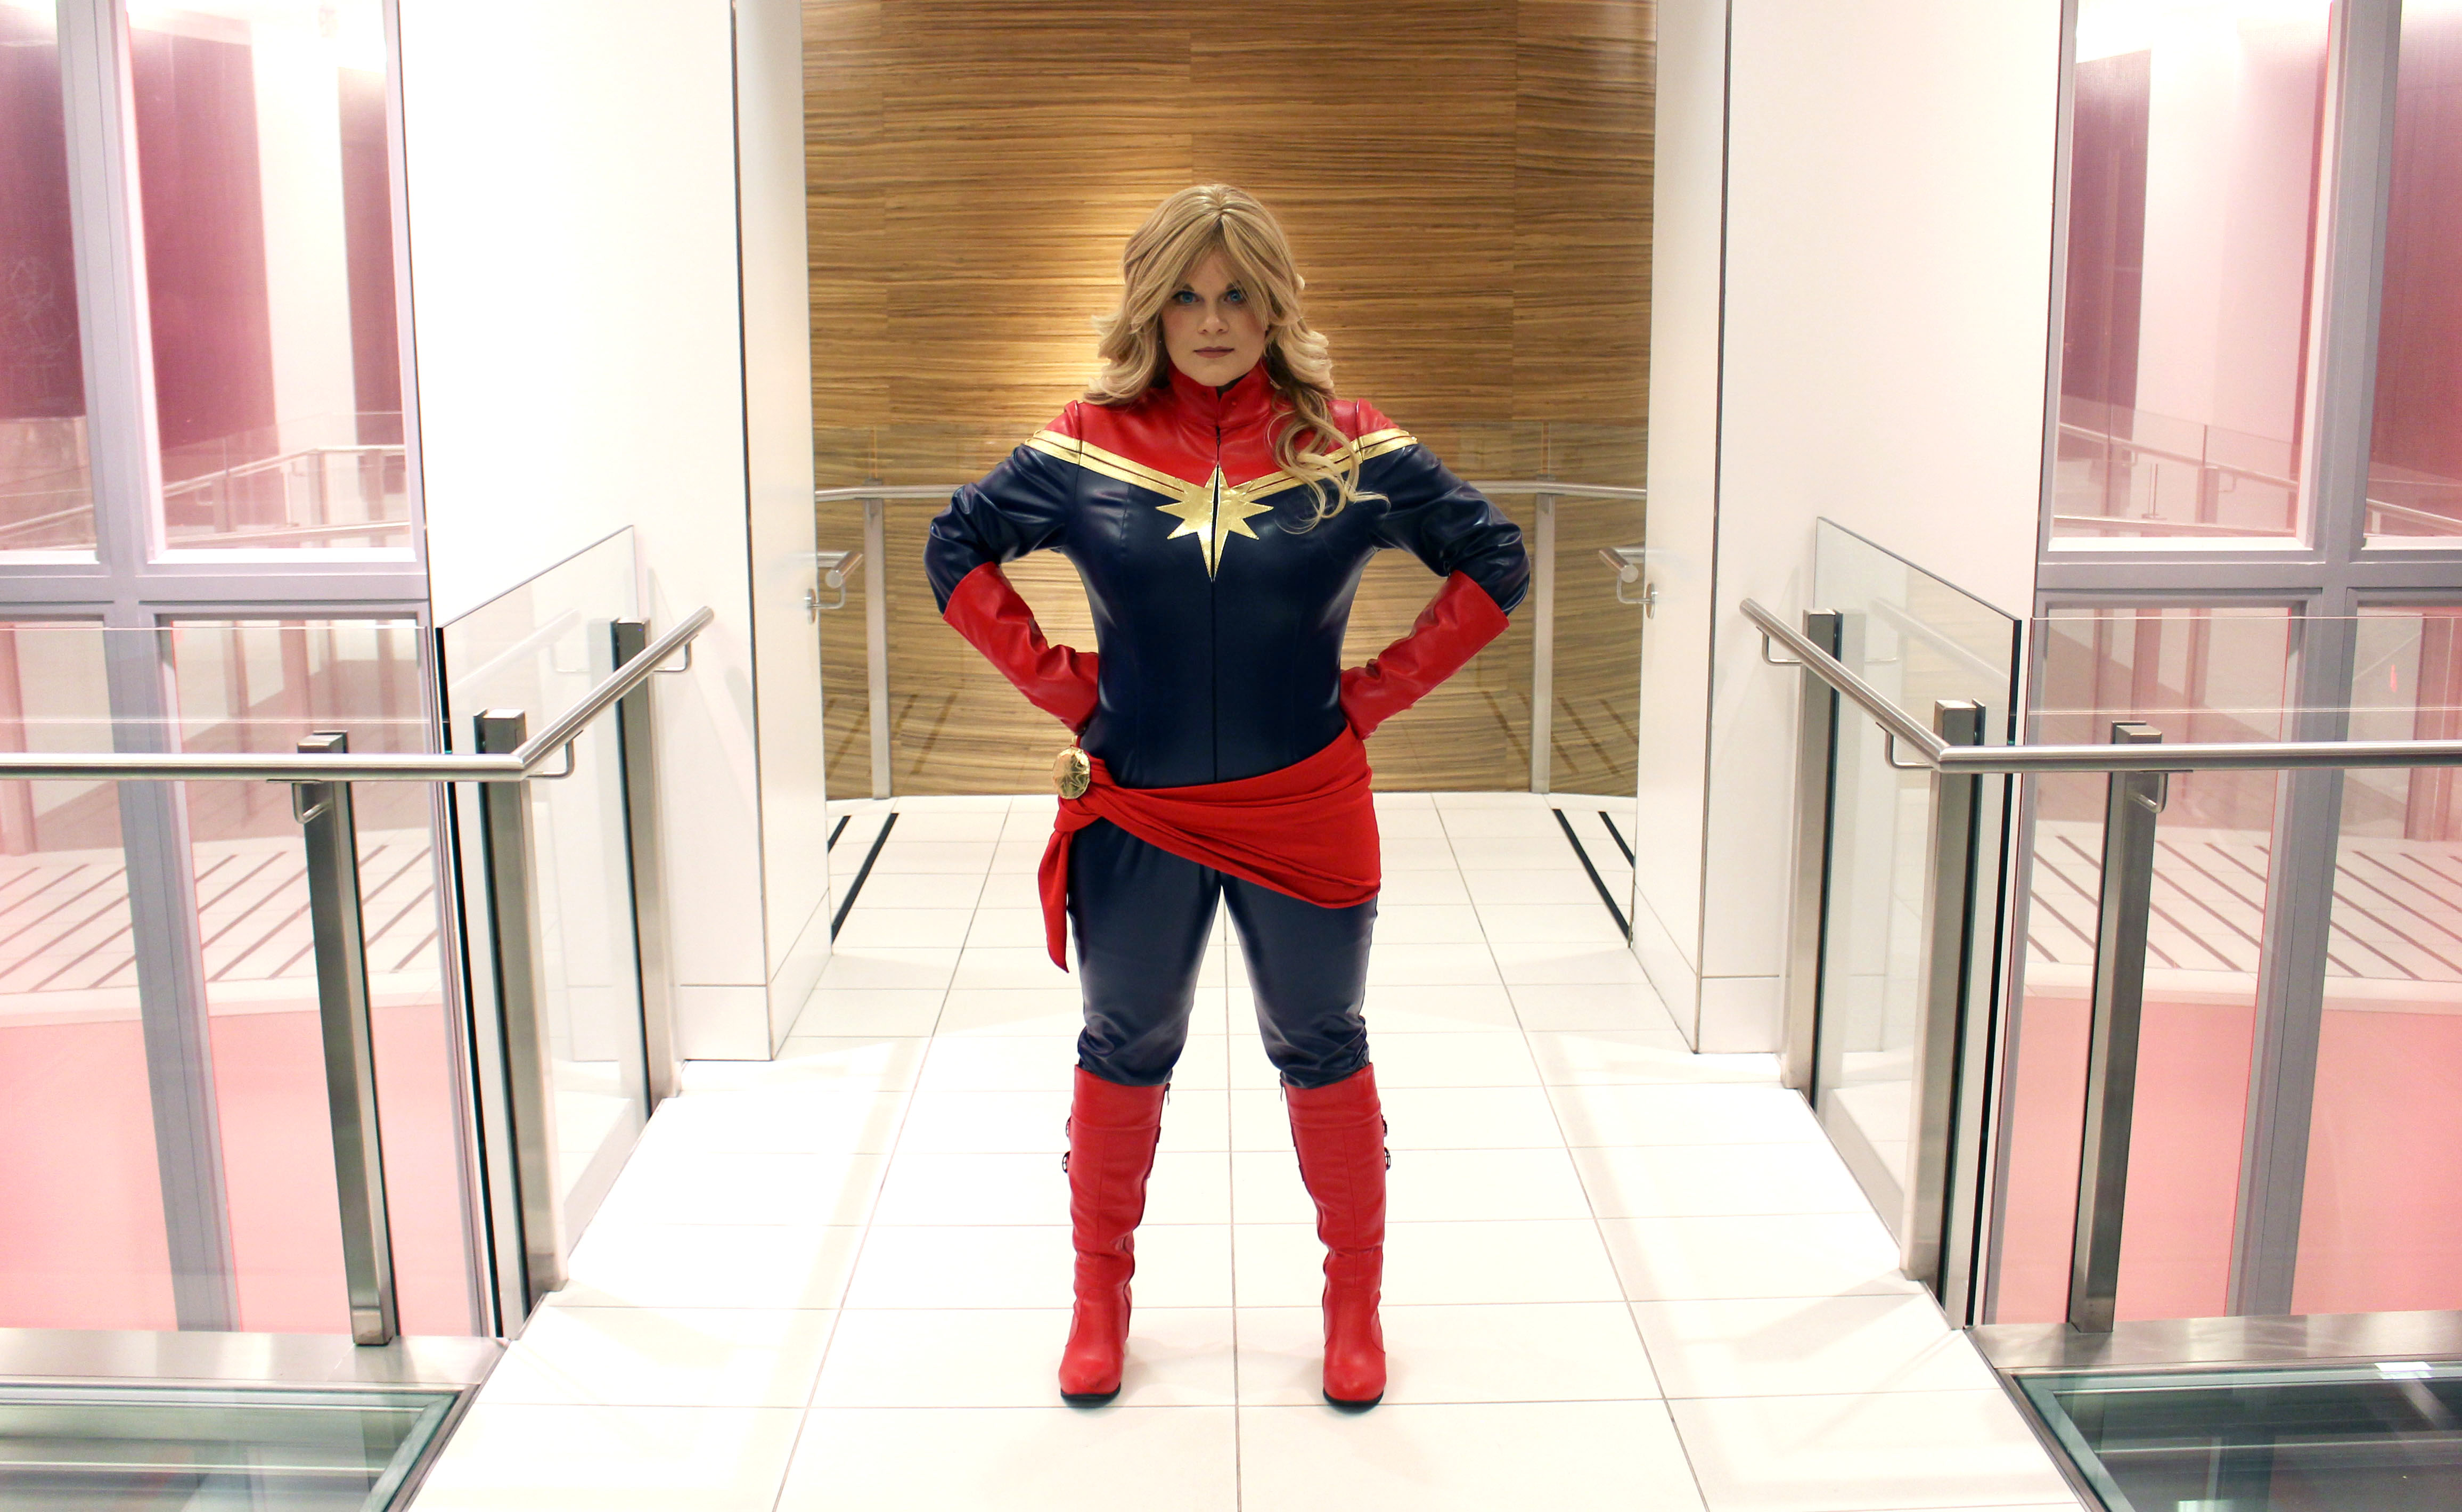
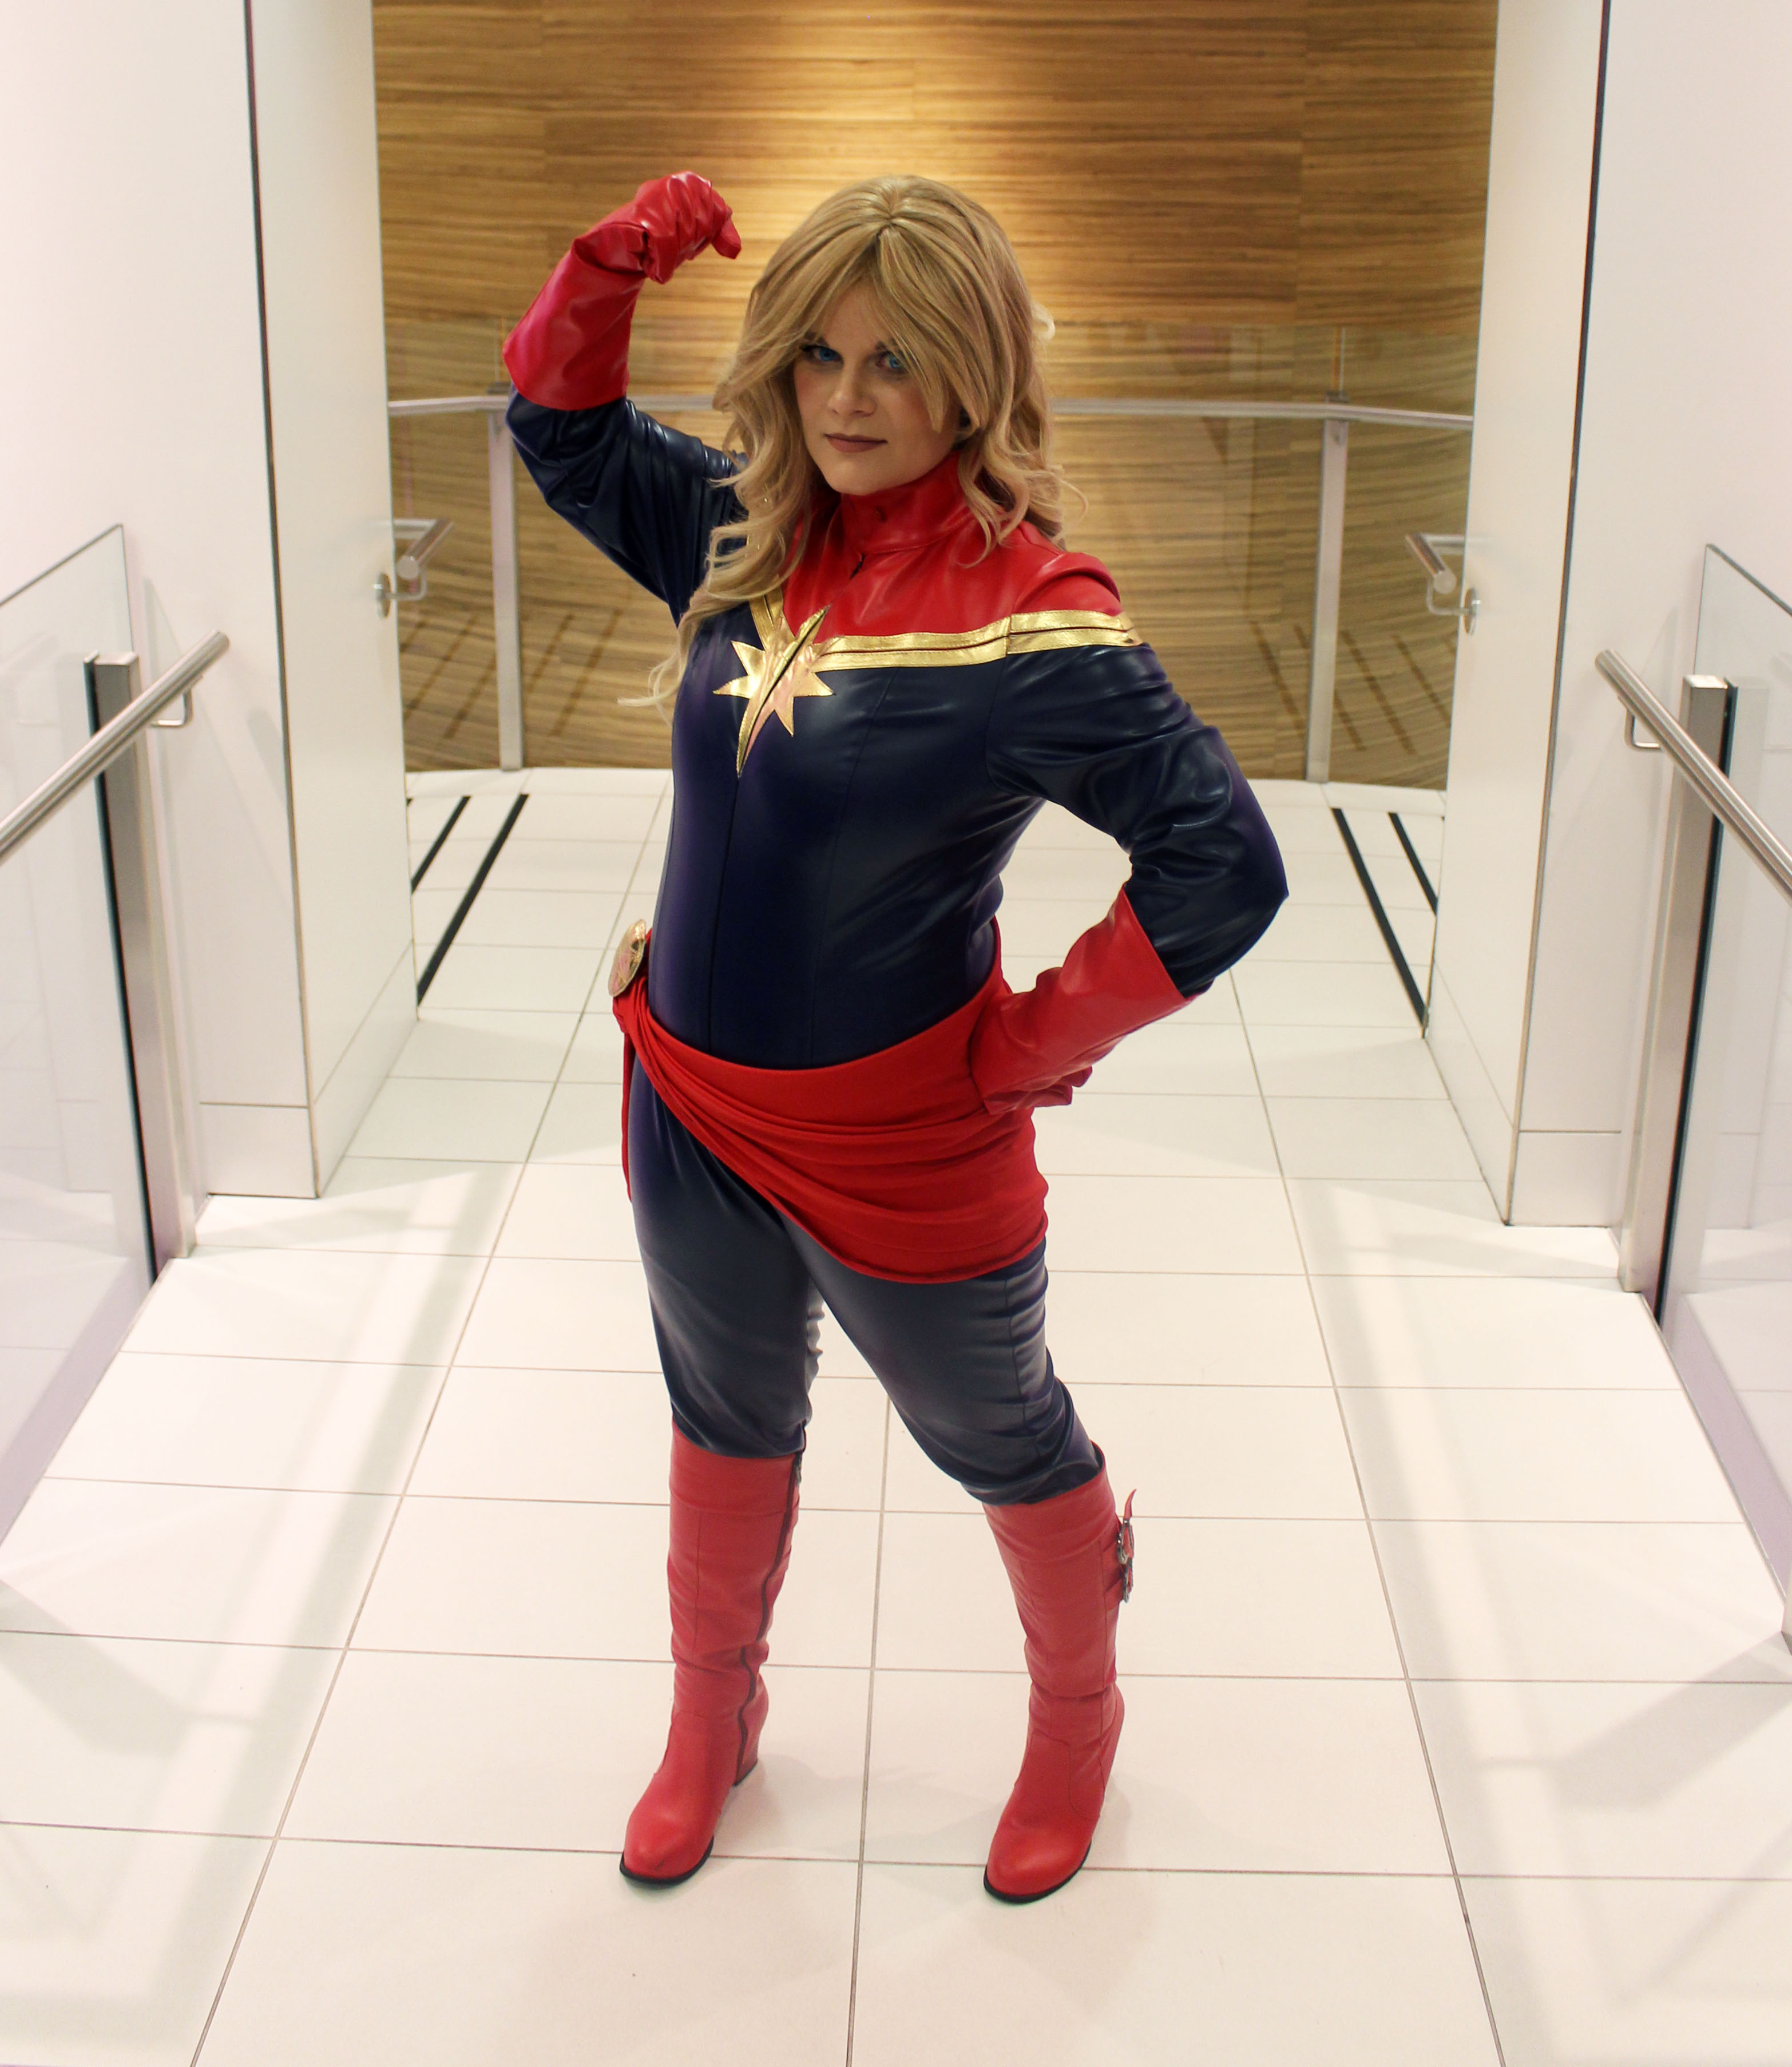
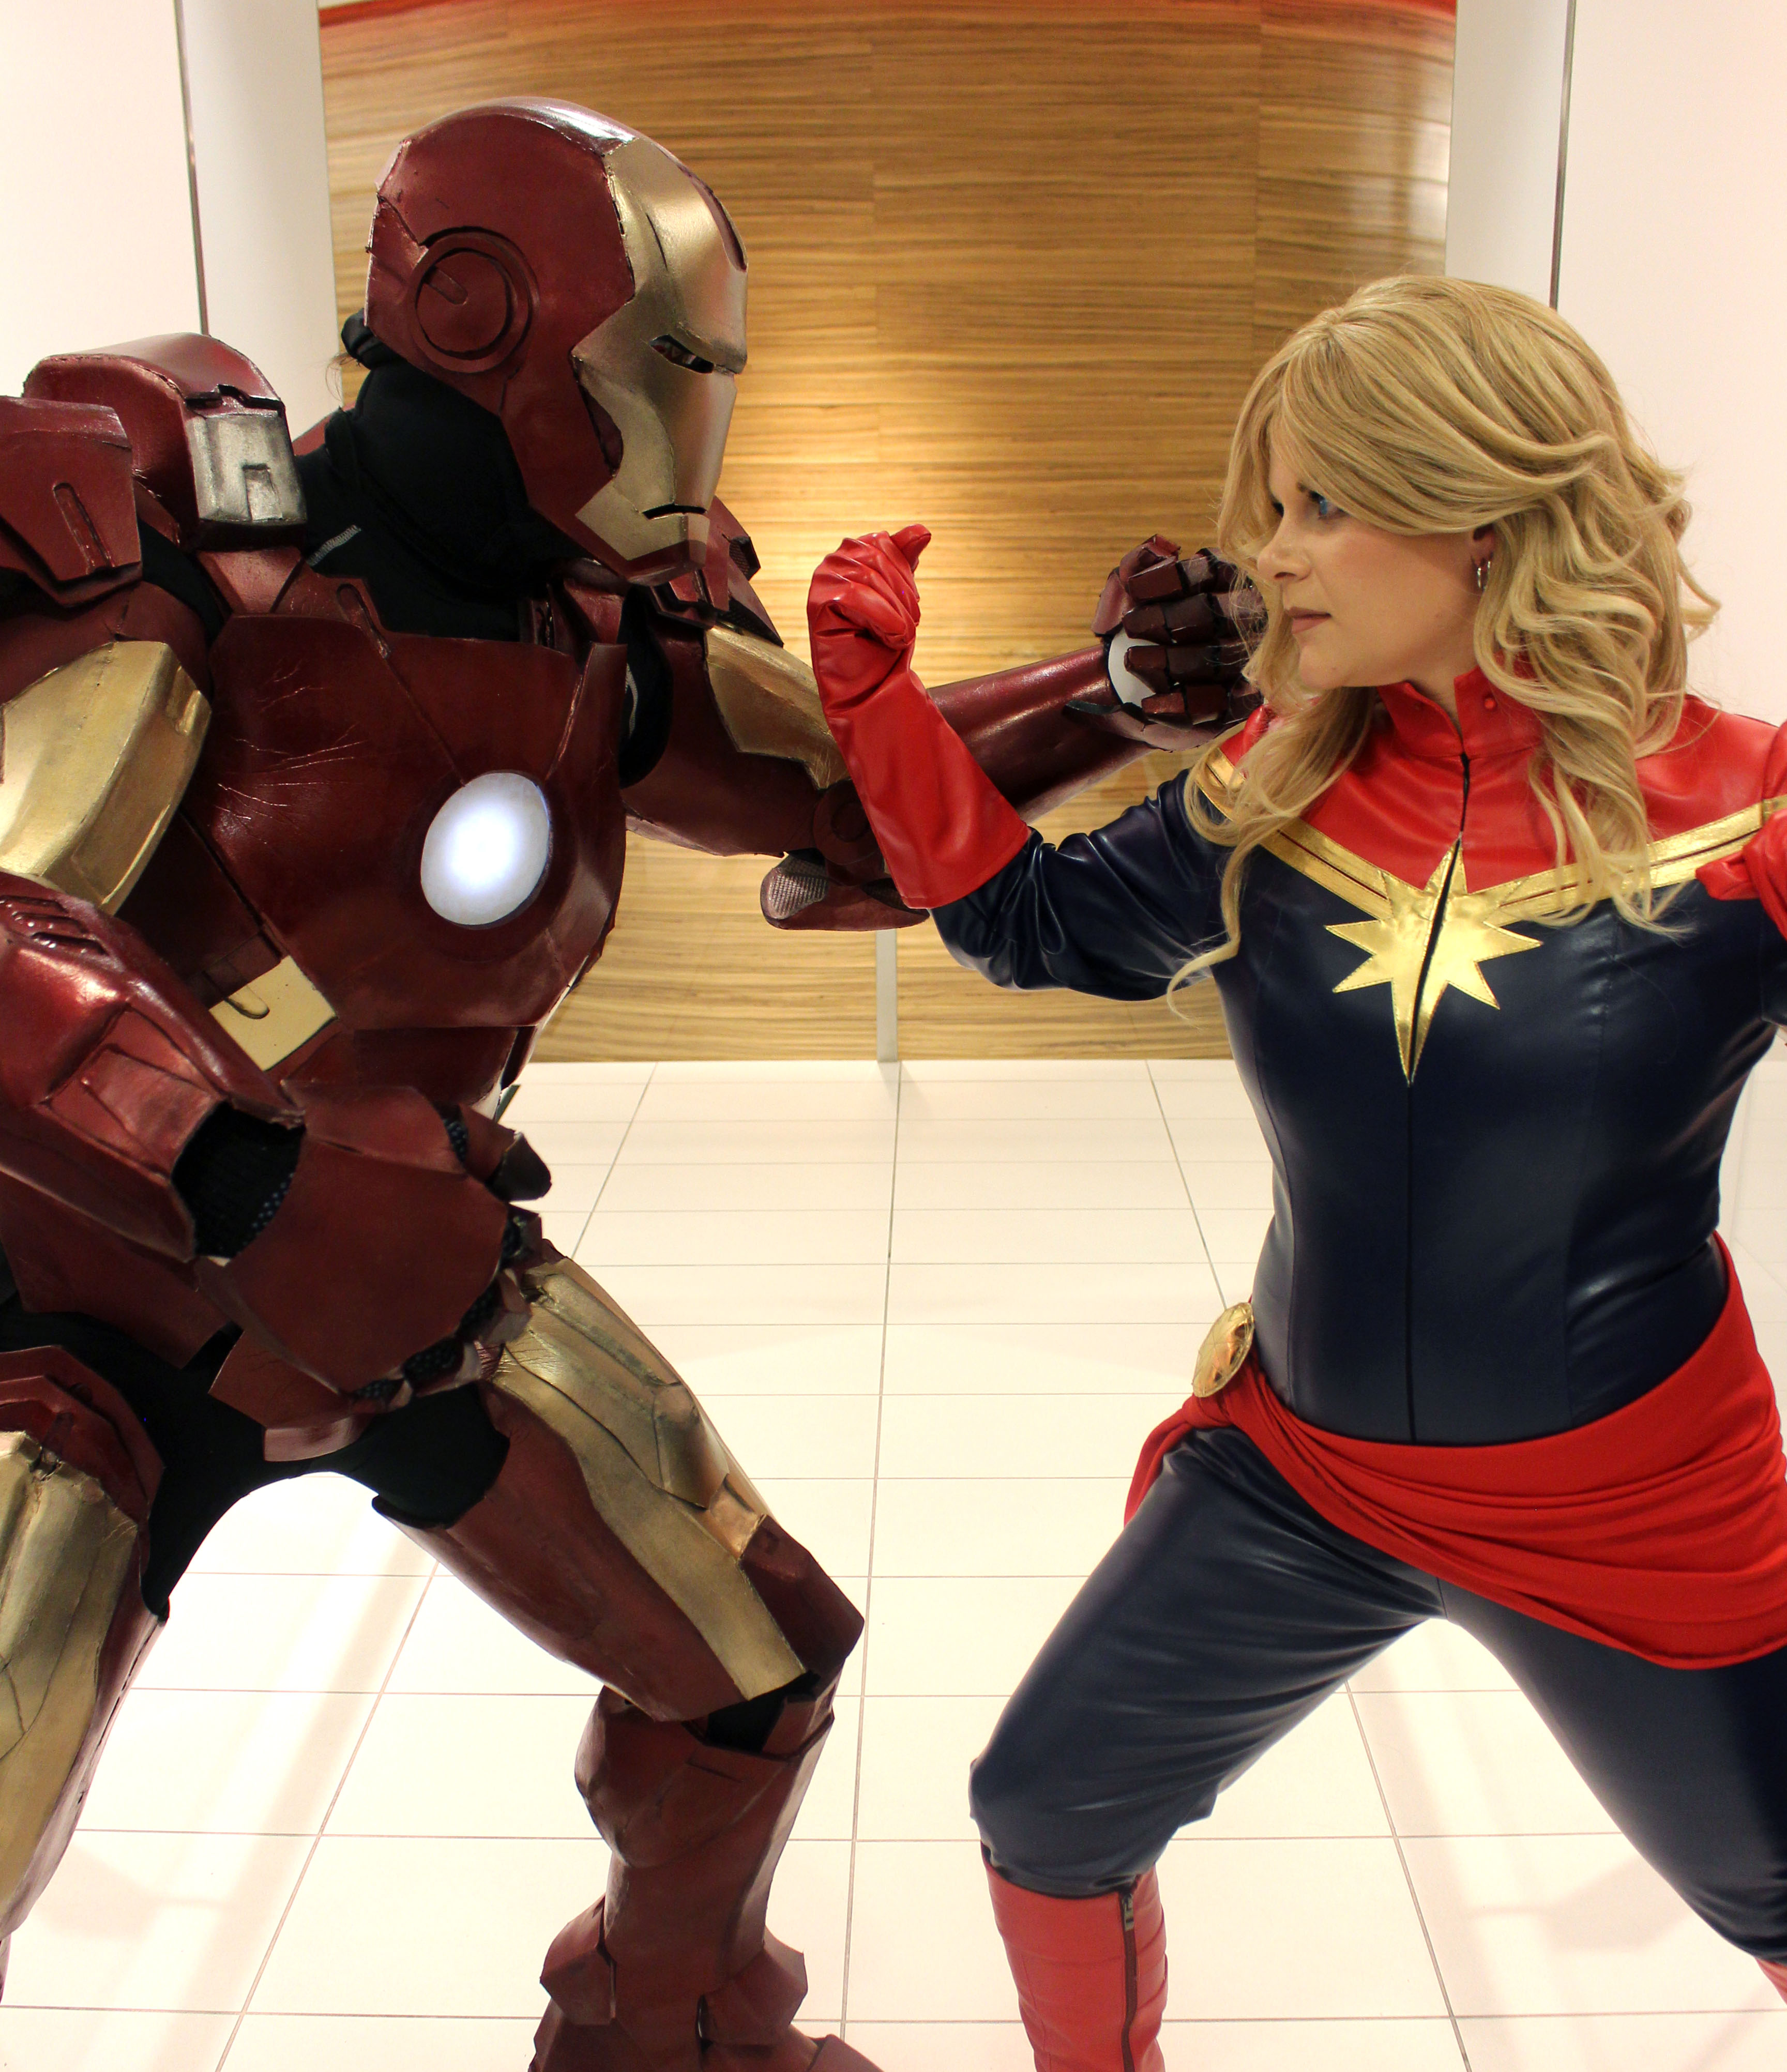
Of course, the most important item I picked out was Captain Marvel’s suit. I was really happy that, for once, I was actually going to be wearing an outfit that covered the entirety of me. In past years, the super heroes I’ve chosen to wear have all been much less clad and since I live in Toronto and Halloween usually equal bitter cold, I was really happy to be completely covered up.

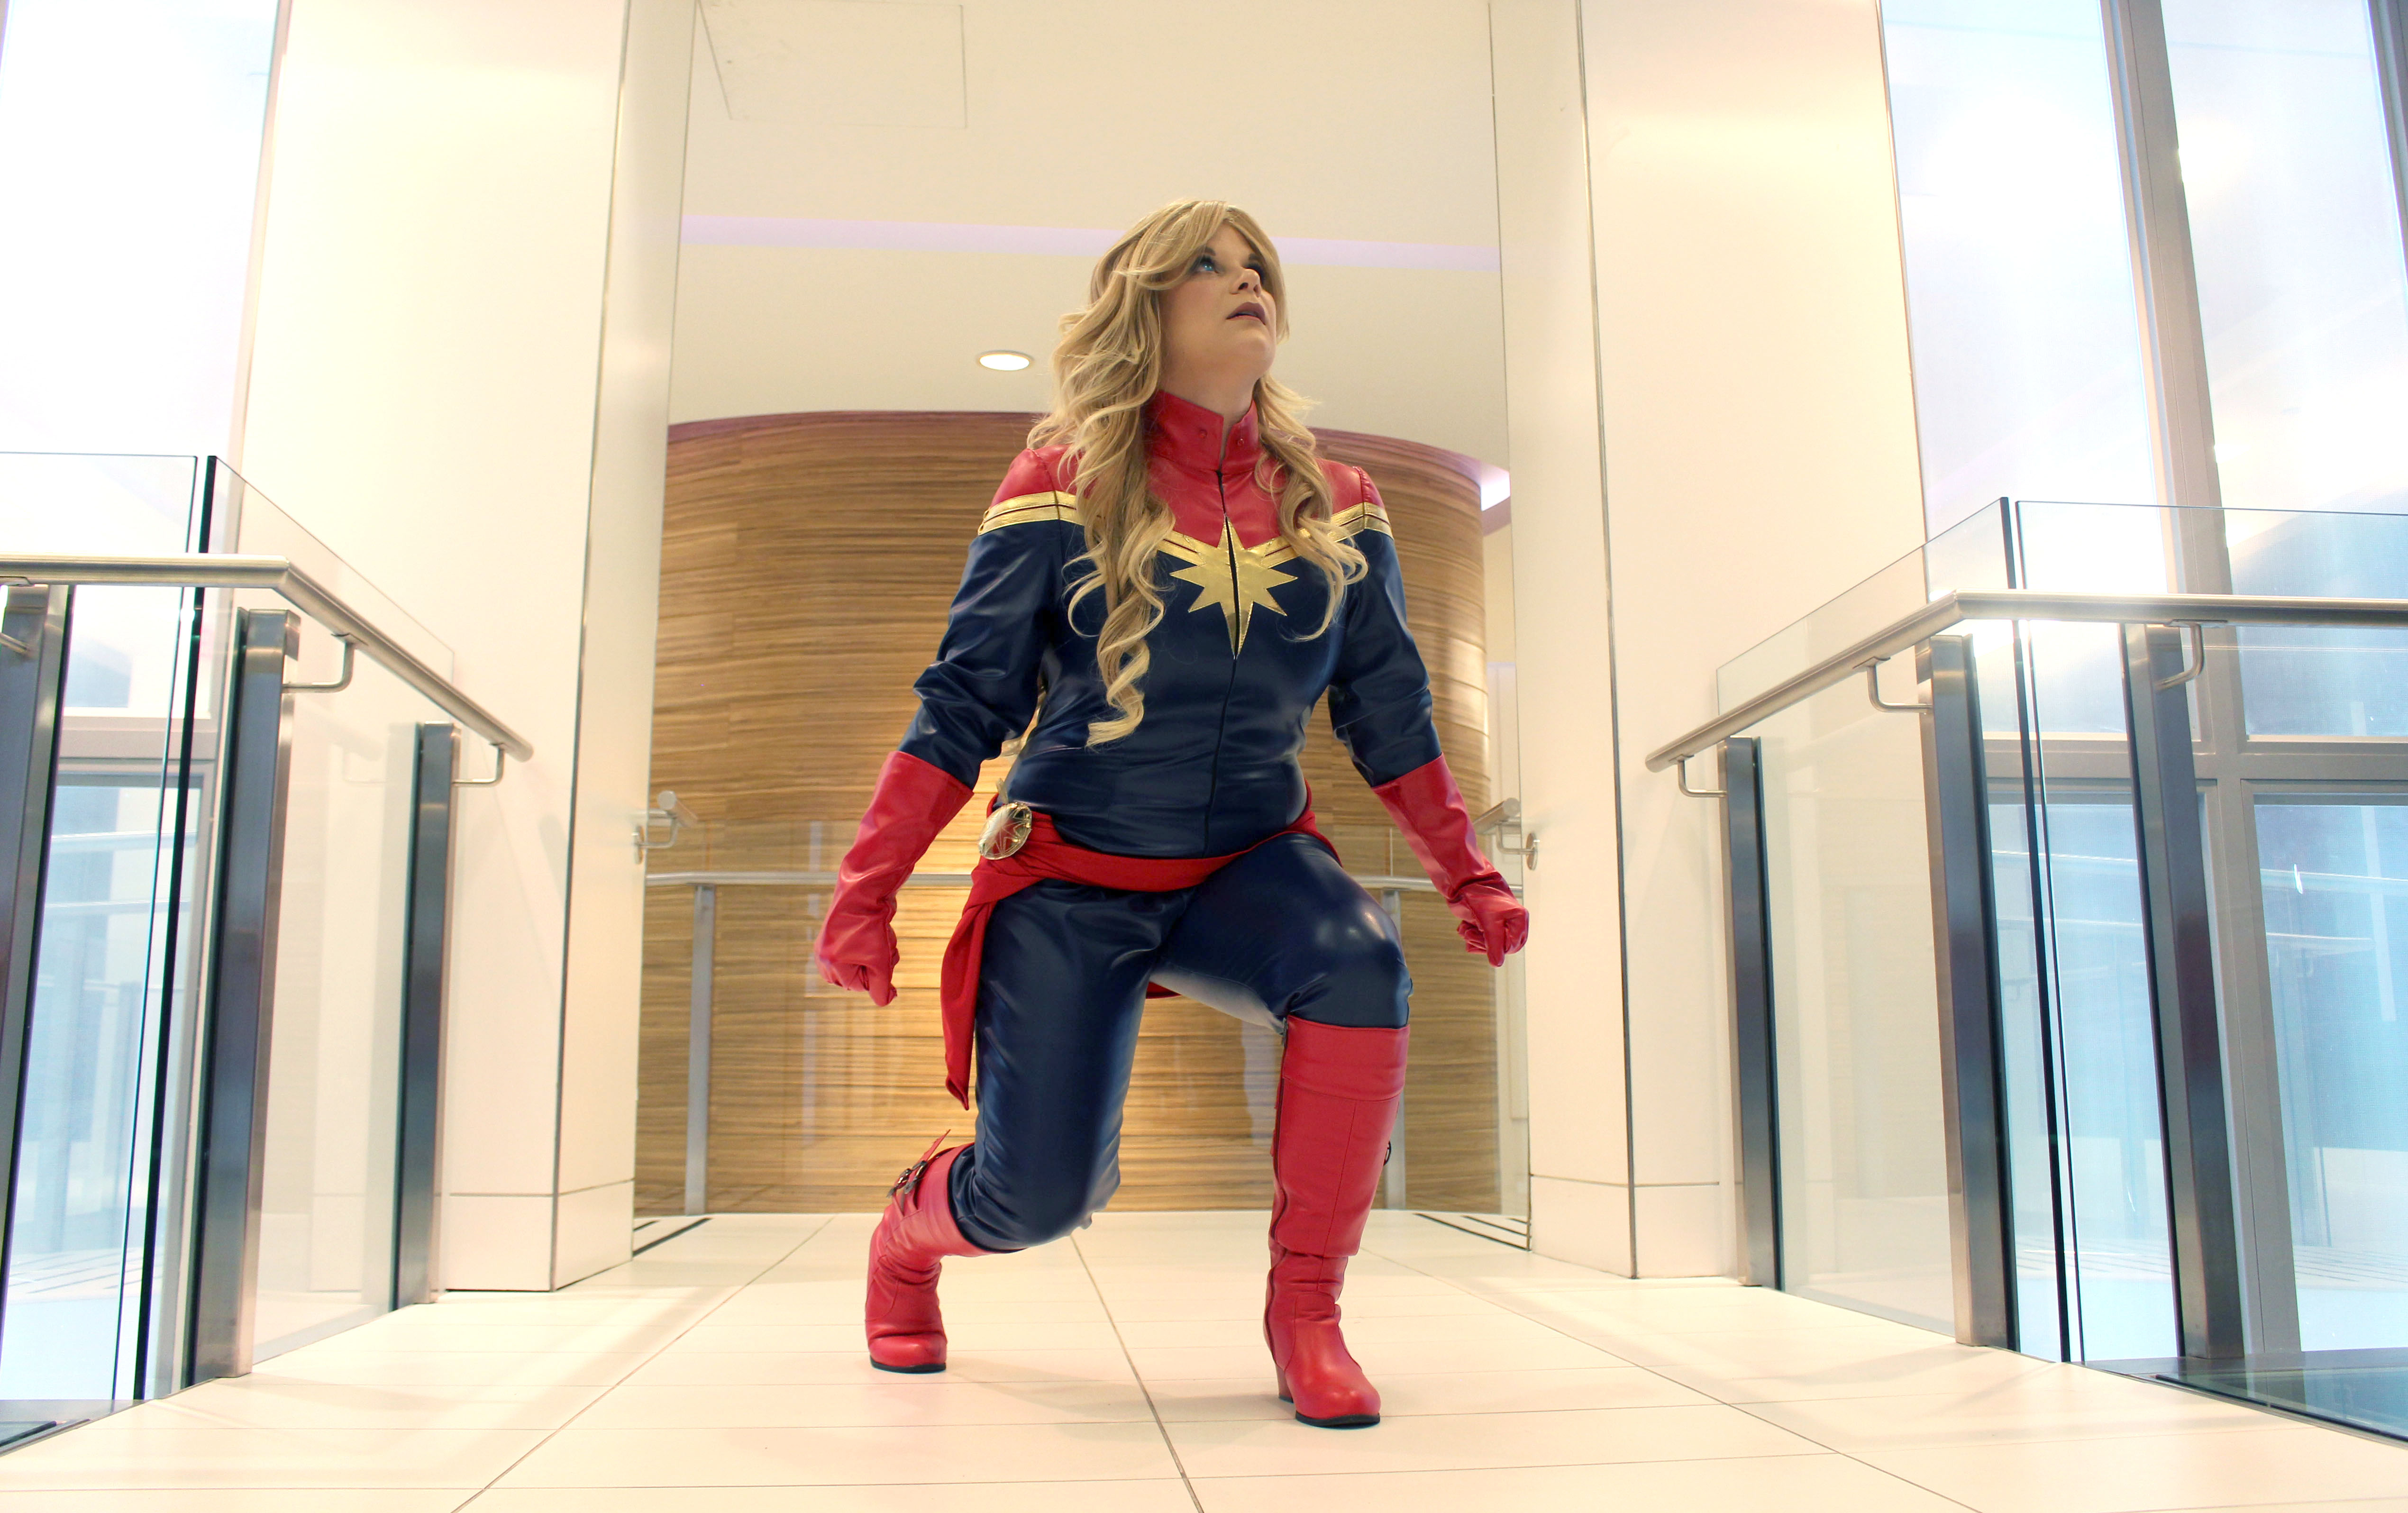
The suit was definitely the most expensive piece I picked up, but it was worth it as I had seen many, many other TERRIBLE looking costumes on eBay and didn’t want to waste my money on a shitty looking costume (I also knew I had no talent at all to make this costume). I opted for this one by the eBay seller cosplayfly2010. They can do custom sizes, but I opted for a Large without any alterations. They have a handy sizing guide and I fit into what they said a large would be so I went with that. I was a bit nervous about how it would fit, but in the end it was a really, really good fit. The only thing I’d say is that the distance between where it hits me in the crotch right up to my shoulders is fairly tight. It says this is for people who are 170 cm tall, but I’m 160 cm tall and if I was any taller I don’t think it would’ve fit me in the length of my torso. As it was, bending down was hard without running the risk of splitting a seam in my butt.

The boots didn’t come with the suit though, so I had to pick up a pair of my own. I grabbed this pair from eBay because they seemed to look the best and it turned out they were an absolute perfect colour match to the red in my suit!

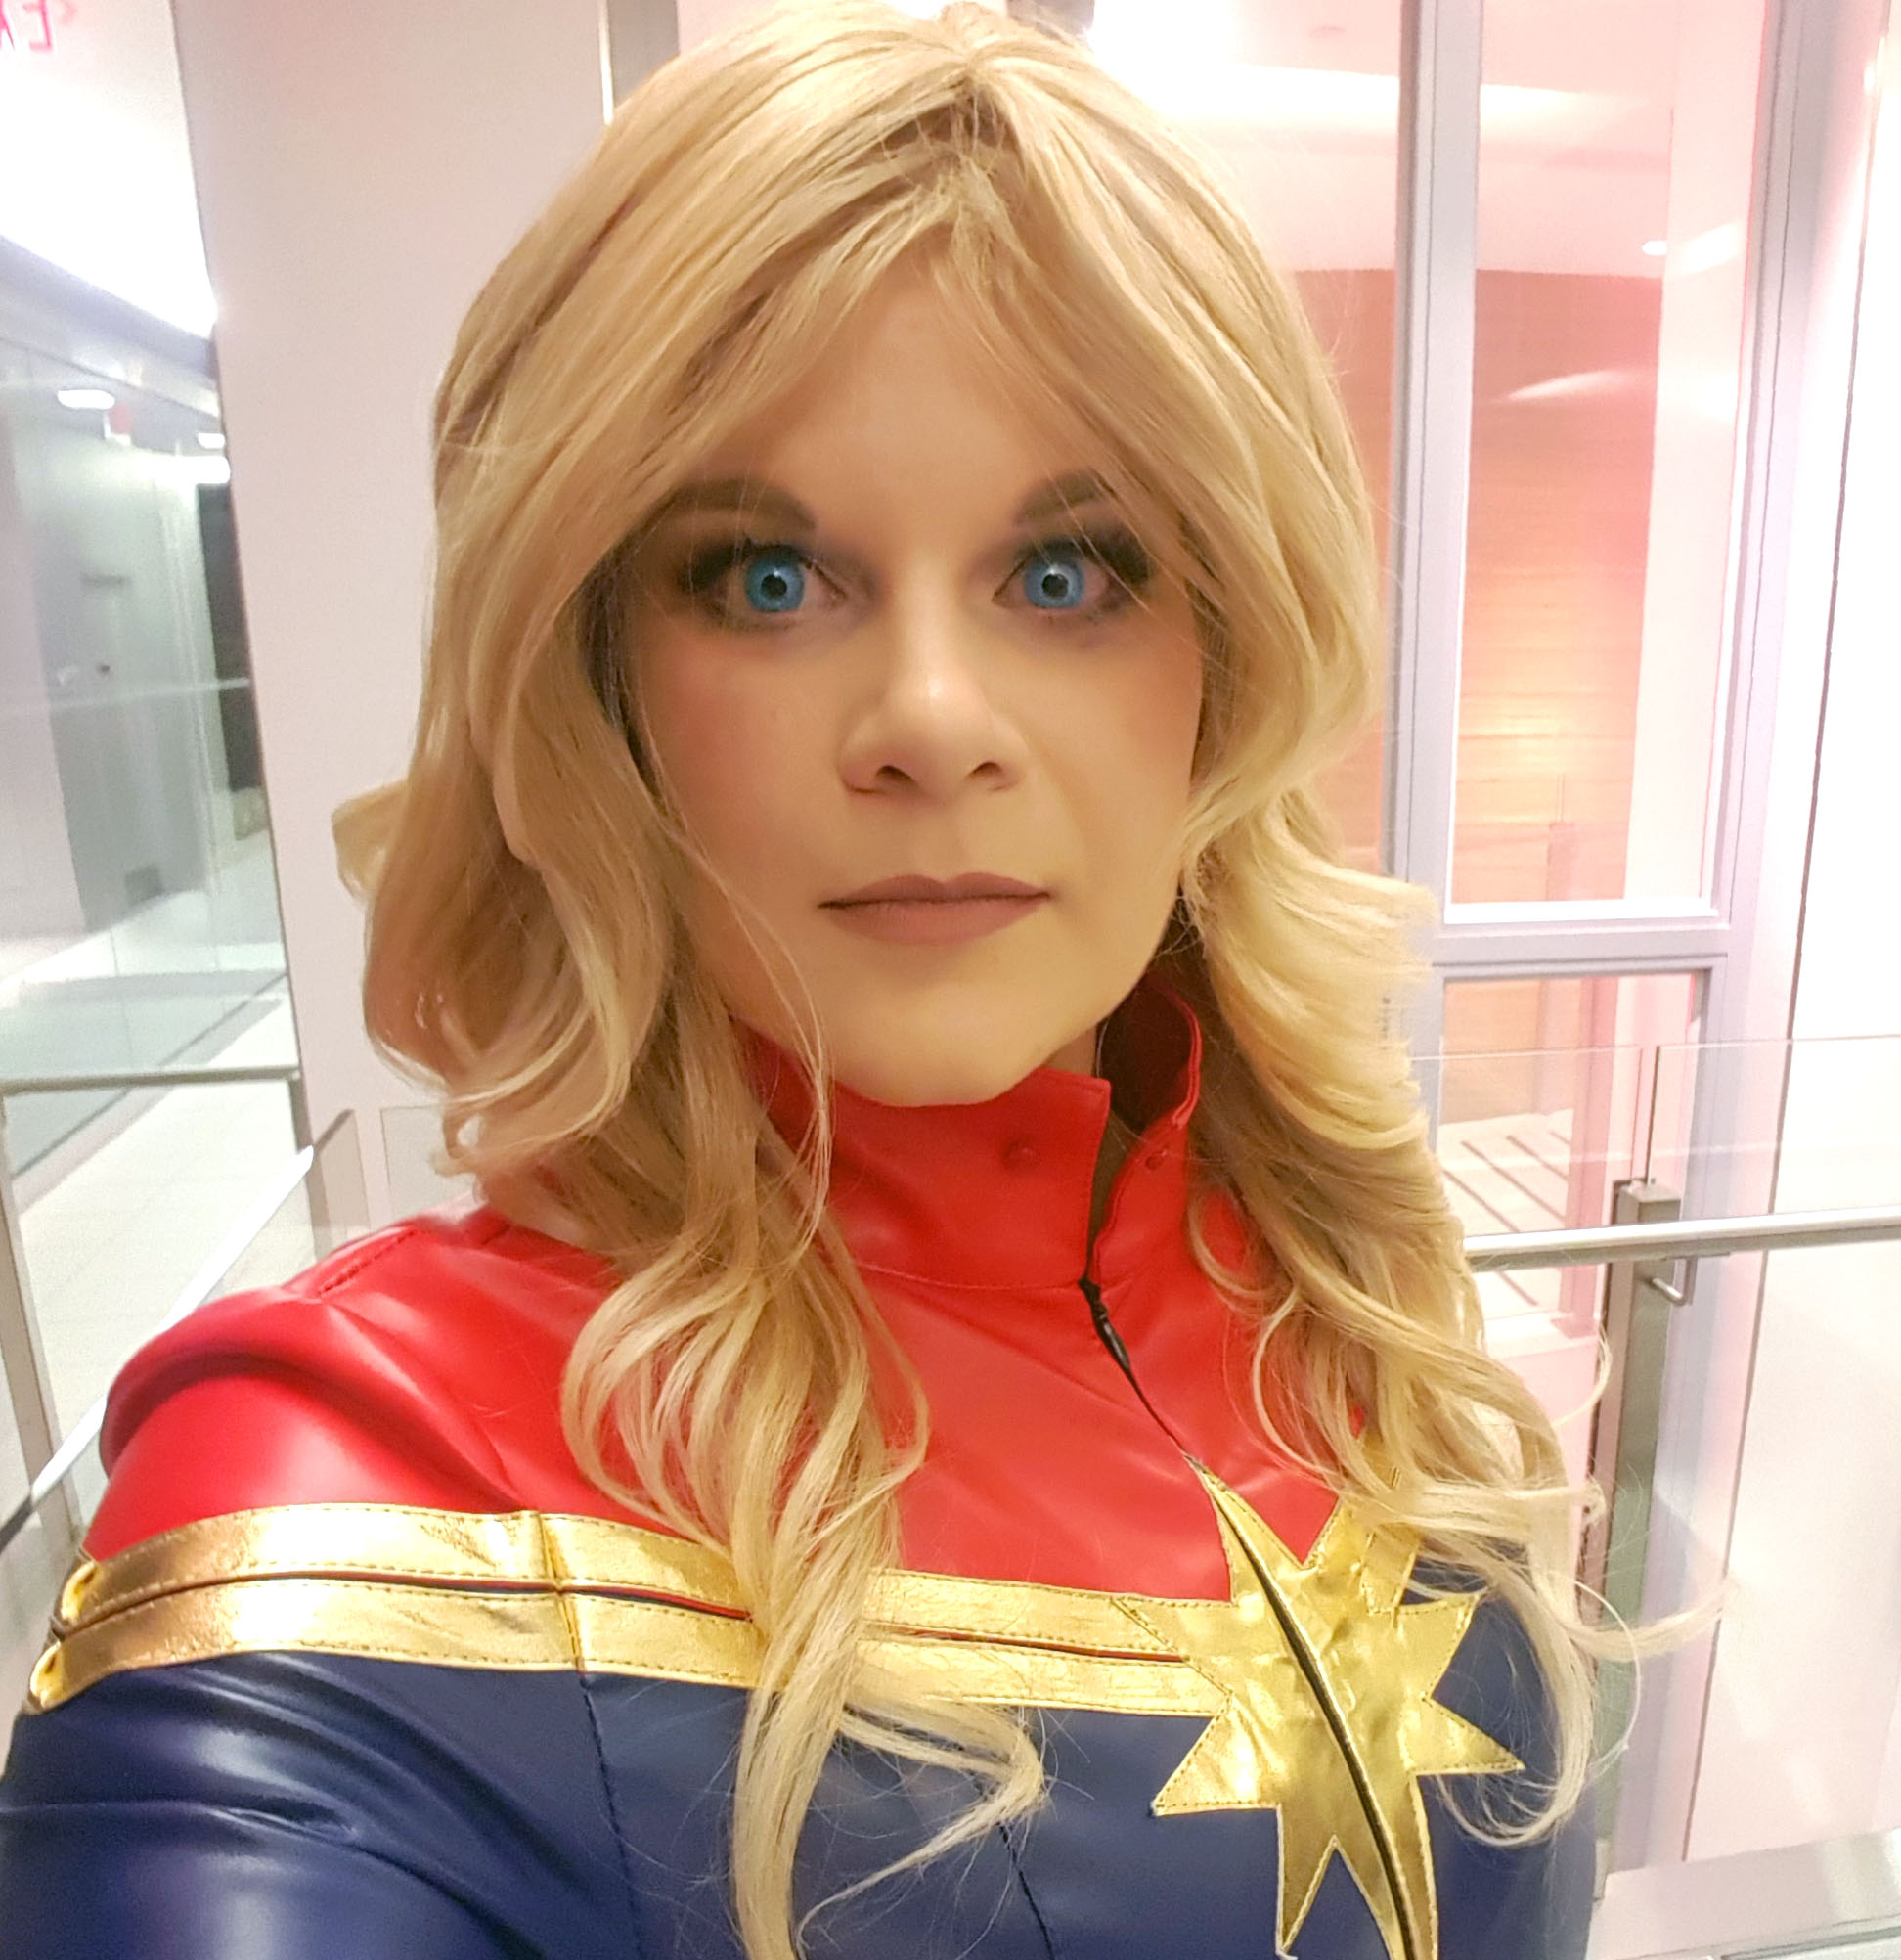
The eyes were such a neat added touch too. My eyes are already blue, but they’re almost grey at times and I knew they wouldn’t stand out enough for this costume. (Kind of funny that I chose this character based on me having similar features and attributes and I still went out and got a wig and coloured contacts!) I had loved my gold Mystique contacts from last year’s Halloween costume so much, that I reached out to Spooky Eyes and asked if they would be willing to send me more contacts this year. They obliged, and I asked for the Glimmer Blue set. Upon receiving them, I thought they were pretty, but I didn’t think they’d add that much colour. I was so wrong – these lit up my eyes making them look completely ethereal. I absolutely LOVED the effect and was so pleased with how they turned out!

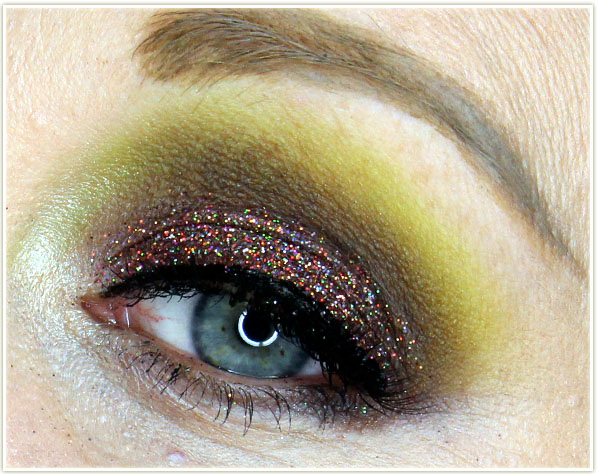
Captain Marvel is a barely done up character so I kept my makeup incredibly simple. This is way less makeup than I even wear on a day to day basis, so it was really hard to keep it toned down!

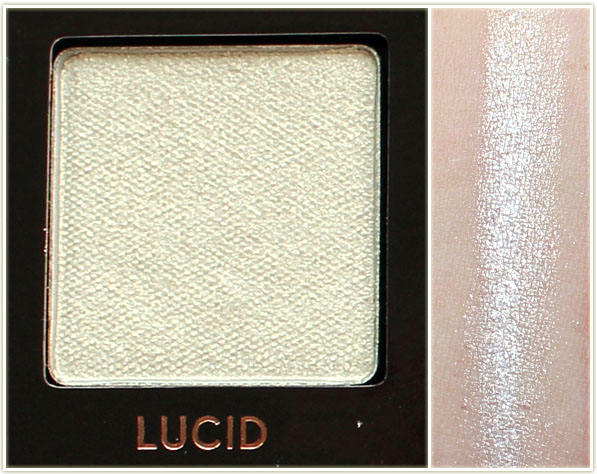
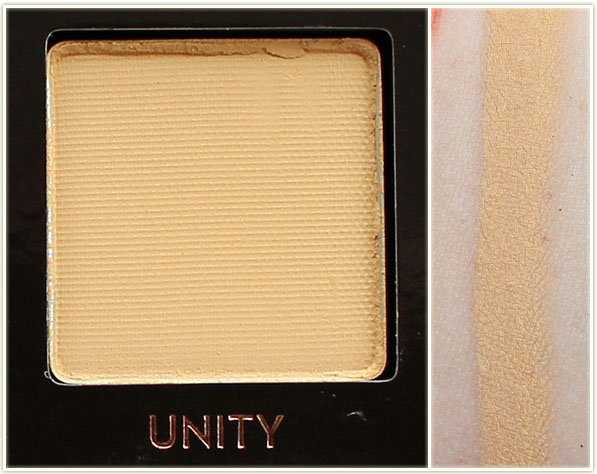
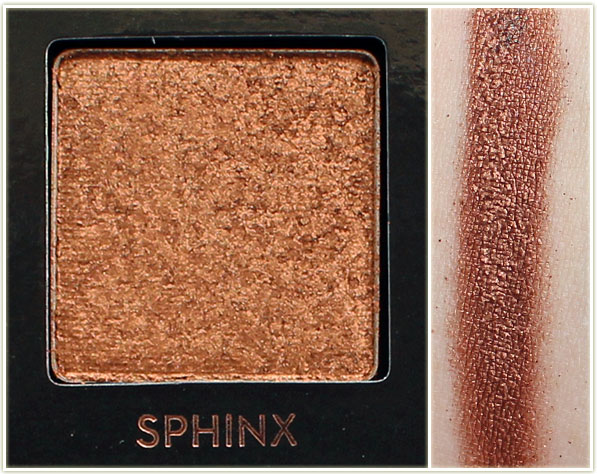
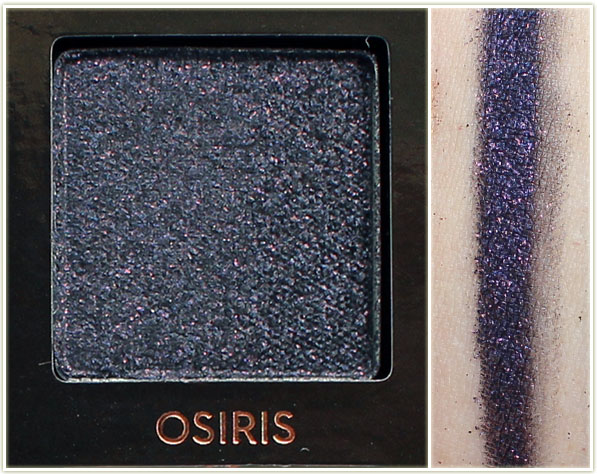
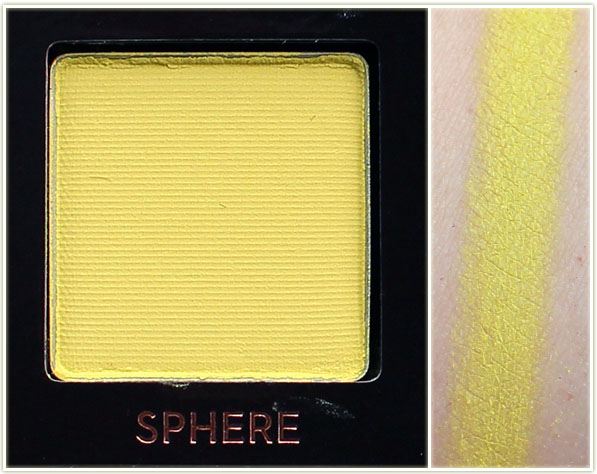
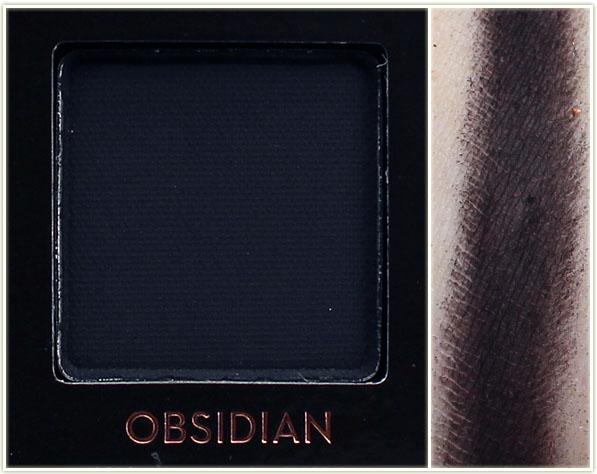
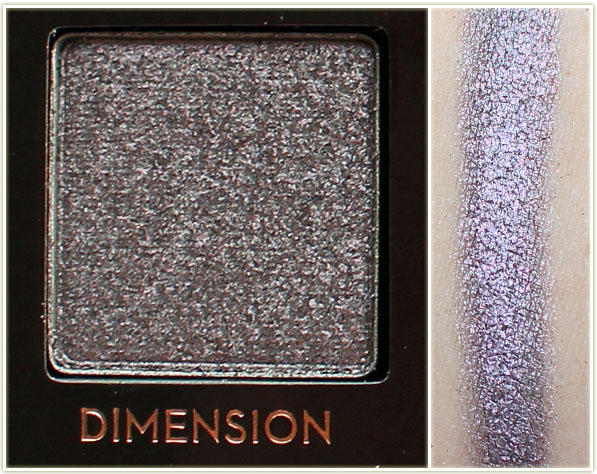
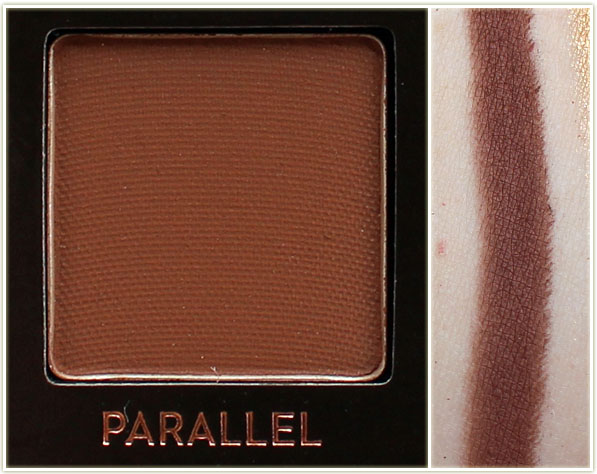
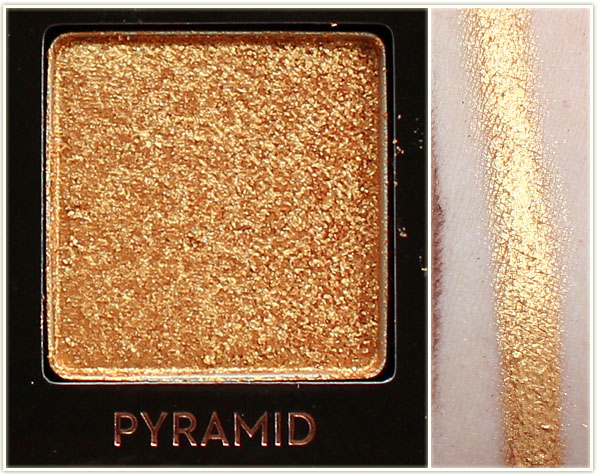
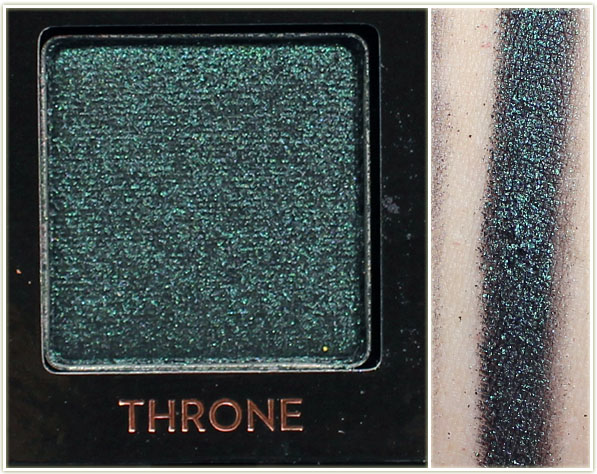
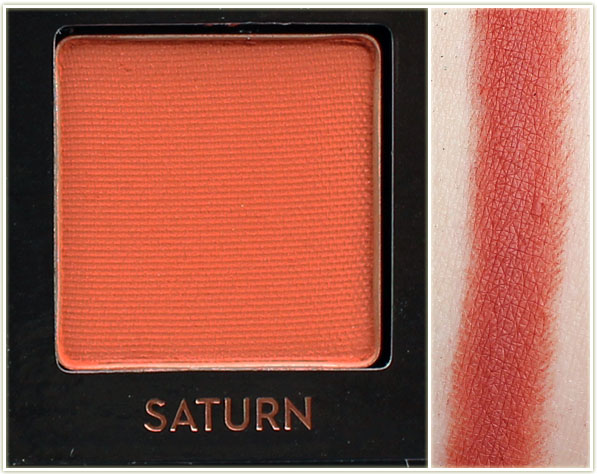
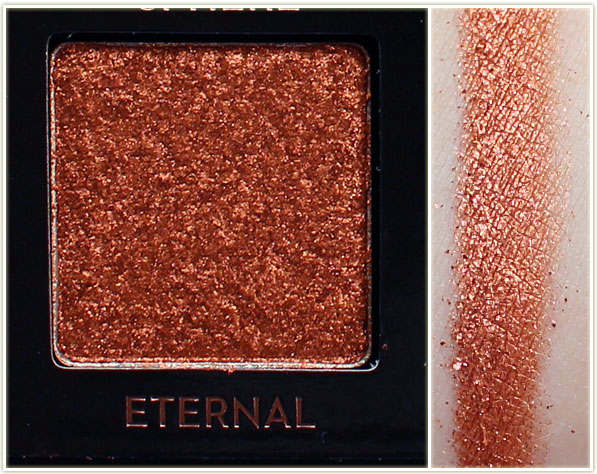
For my eyes, I used the Kat Von D Shade + Light Eye palette and stuck to pale, neutral shades. The only thing I really did was try to deepen up my crease to make it look like my eyes were a bit bigger. I added in some NYX Epic Ink Liner along my lash line (and didn’t wing it out!) and some Too Faced Better Than Sex mascara to my top and bottom lashes. I then popped on my smallest pair of fake lashes – the House of Lashes Au Naturale falsies. That was the eyes completely done!

For my face I used my beloved Dermablend Smooth Liquid Camo foundation in the shade 10N Cream since it’s the best full coverage foundation I own. I used a bit of Too Faced Chocolate Milk Chocolate Soleil bronzer to contour my cheekbones and a bit on my temples. I then used tarte’s Exposed blush on my cheeks and tarte’s Exposed Lip Paint on my lips. And that’s it! It was super hard to hold back without adding highlighter and just MORE makeup in general, but I really like how the whole look came out.

So that’s it for the whole round up on this costume. Let me know if you have any questions and I’ll do my best to answer them. And with that, let me leave you with a few more shots. 🙂

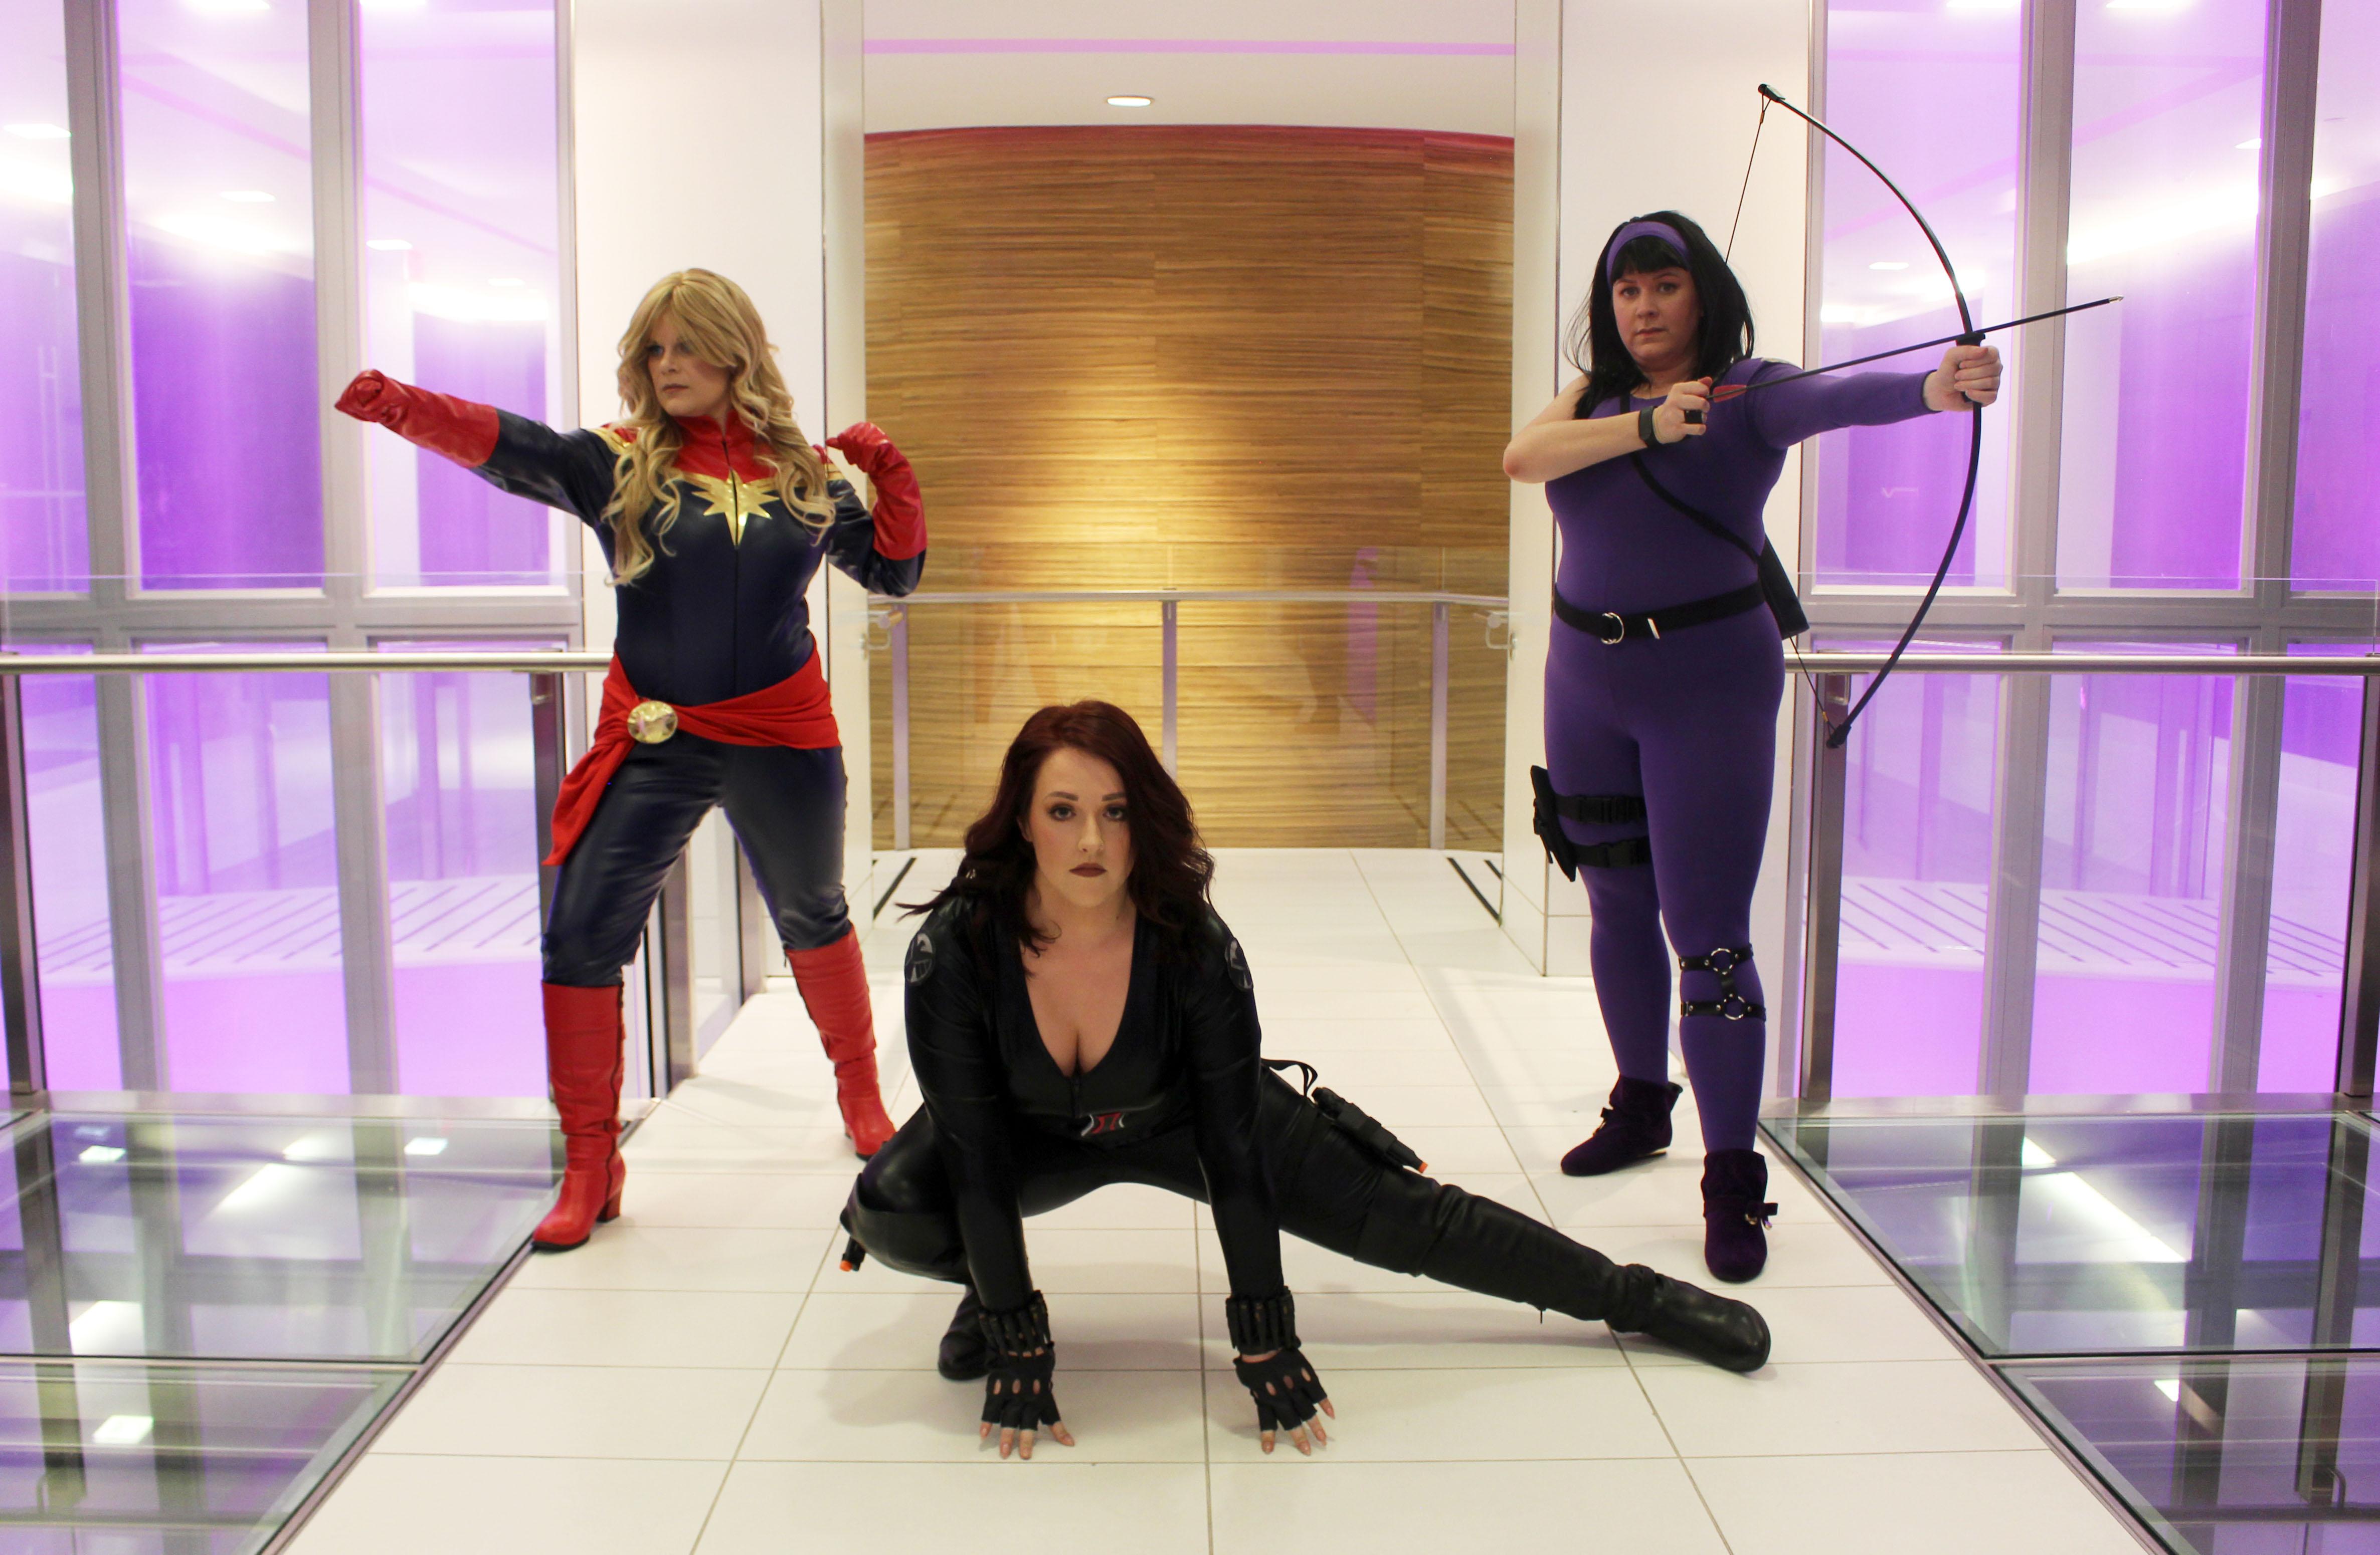
To see a roundup of the whole group, including individual photos, please see my previous post!

Post contains affiliate links. Spooky Eyes contacts are a PR sample.

Halloween 2017: The Avengers

Halloween 2017 - The Avengers
Halloween 2017 – The Avengers

For Halloween 2017 we decided to go with Marvel’s Avengers! This gave us a huge amount of opportunity to use current well-known characters as well as a few more obscure ones.

This post is going to be a photo sump of some of the best shots (individual and group) because I’ve had a lot of messages asking for them asap! (I love that you guys love Halloween as much as we do!) You can click all of the photos to get the full resolution image if you want to see more detail. Enjoy!

Halloween 2017 – The Avengers

David as Iron Man
David as Iron Man
Stephen as Captain America
Chelle as Captain Marvel
Kaitlyn as Black Widow
Julie as Kate Bishop (Hawkeye)
Andre as Nick Fury
Andre as Nick Fury
Avengers Assemble!
Avengers Assemble!

Sadly, we didn’t have our Nick Fury around for the group shots!

Marvel's Avengers
Marvel’s Avengers
Captain America vs Iron Man
3 bloggers, 1 bad ass photo!
Civil War 2!
Civil War 2!
Captain Marvel, Black Widow and Kate Bishop
Nick Fury & Black Widow

And of course, we took our awesome costumes over to Toronto’s gay village and paraded down Church Street for photos! Our friend Shawn was a trooper and took all of the staged photos above, as well as some candid ones out on Church Street. Huge thank you to him, otherwise we wouldn’t have all of these amazing photos!

If you’re in Toronto for Halloween, Church Street is definitely the place to be!  There’s tons of people, both in and out of costume, and it’s a really fun and friendly vibe in the Village.

Hope you enjoyed all the photos! I’ll have another post coming up later on today with more details of my own costume. Thanks for reading!

Swatch Sunday: Anastasia Beverly Hills Prism

Anastasia Beverly Hills Prism

When Anastasia Beverly Hills launched their holiday 2017 palette and I was extremely apprehensive. I held off buying Prism because I wanted to see how others were reacting to it after the Subculture disaster (which I *hated* – post on that here). The overall consensus was that it didn’t seem to be on the same level as Subculture, so I went ahead and picked it up.

Anastasia Beverly Hills Prism

It’s definitely a very odd mix of shades, but I don’t find that particularly off-putting with her palettes. Somehow they just end up working even though I always feel like the layout of them is such a headscratcher.

There will be a video review of the Prism palette coming up, but it won’t be up for about a week and a half, so in the meantime, please enjoy the swatches!  Full review is here:

Just remember, this is a limited edition for the holidays item, if you want it, you definitely need to grab it before they sell out!

Anastasia Beverly Hills Prism Swatches

Anastasia Beverly Hills Prism - Lucid
Anastasia Beverly Hills Prism – Lucid
Anastasia Beverly Hills Prism - Eden
Anastasia Beverly Hills Prism – Eden
Anastasia Beverly Hills Prism - Unity
Anastasia Beverly Hills Prism – Unity
Anastasia Beverly Hills Prism - Sphinx
Anastasia Beverly Hills Prism – Sphinx
Anastasia Beverly Hills Prism - Osiris
Anastasia Beverly Hills Prism – Osiris
Anastasia Beverly Hills Prism - Sphere
Anastasia Beverly Hills Prism – Sphere
Anastasia Beverly Hills Prism - Obsidian
Anastasia Beverly Hills Prism – Obsidian
Anastasia Beverly Hills Prism - Dimension
Anastasia Beverly Hills Prism – Dimension
Anastasia Beverly Hills Prism - Parallel
Anastasia Beverly Hills Prism – Parallel
Anastasia Beverly Hills Prism - Pyramid
Anastasia Beverly Hills Prism – Pyramid
Anastasia Beverly Hills Prism - Throne
Anastasia Beverly Hills Prism – Throne
Anastasia Beverly Hills Prism - Saturn
Anastasia Beverly Hills Prism – Saturn
Anastasia Beverly Hills Prism - Eternal
Anastasia Beverly Hills Prism – Eternal
Anastasia Beverly Hills Prism - Lure
Anastasia Beverly Hills Prism – Lure

The Anastasia Beverly Hills Prism palette can be purchased on sephora.ca for $55 CAD and on sephora.com for $42 USD.

Halloween: Getting Creative with DAVIDsTEA!

DAVIDsTEA Haunted Mansion Survival Kit

This post is sponsored by DAVIDsTEA.

So, I’m a tea drinker (well, and a coffee drinker – but that’s more of a morning thing), and I always, *always* have a cup around noon just after I’ve finished my lunch. I think it was my mom that got me hooked on DAVIDsTEA a few years ago and I really haven’t looked back ever since! While they do have stores in the US now, I love that DAVIDsTEA is Canadian and that they opened their very first store here in Toronto on Queen Street. It gives me the warm fuzzies to know that I’m celebrating something local with my daily cuppa.

DAVIDsTEA Haunted Mansion Survival Kit

DAVIDsTEA already makes some of my favourite teas (although RIP Red Velvet Cake, I loved you so much!), so nothing could make me happier than them also releasing a Halloween collection! (Cuz you know how I feel about Halloween!)

DAVIDsTEA Haunted Mansion Survival Kit

The Haunted Mansion Survival Kit has some of the cutest packaging I’ve ever seen for a tea set! Six teas are served up in a spoopy little cardboard haunted mansion.

DAVIDsTEA Haunted Mansion Survival Kit contains six teas to try

For $14 CAD, you get to try out six of DAVIDsTEA‘s favourite sweet teas. They’ve even gone so far as to rename some of them for this set!

The set includes:

  • Pumpkin Die (aka Pumpkin Chai): a seasonal favourite of mine, this black tea has caramel, cinnamon, cloves and tiny little pumpkin candies!
  • Cardamummy French Toast (aka Cardamom French Toast): black tea with cardamom, cane sugar and cinnamon (a new favourite!).
  • Glittering Ghost (aka Glitter & Gold): this one has become a staple for me over the last year. It’s a sweet, spiced black tea with sugar crystals and gold stars.
  • Haunted Kombucha (aka Happy Kombucha): a blend of oolong, mango, pineapple and powdered kombucha.
  • Magic Potion (no name change here): this one will change colour if you add lemon! It’s a mix of berries and flowers.
  • Stormy Night (aka Organic Stormy night): a limited edition chocolate-coconut black tea.

Since this IS a beauty blog and my love of tea may be a bit of a strange thing to bring up, I wanted to keep this post consistent with my content. I’ve posted in the past about finding inspiration for makeup in odd places (like my boss’ socks from this post in 2016), and I thought that doing makeup looks inspired by the loose leaf teas in this set would be a neat challenge for myself.

So here you have it, three eye looks based on my three favourite teas from the DAVIDsTEA Haunted Mansion Survival Kit!

DAVIDsTEA - Glittering Ghost
DAVIDsTEA – Glittering Ghost

Glittering Ghost was the first one that struck me because it’s just so beautiful. Not only are the little stars such an attention grabber, but there’s also tiny translucent shards of sugar dispersed throughout the black tea leaves.

DAVIDsTEA - Glittering Ghost makeup look
DAVIDsTEA – Glittering Ghost makeup look

Here’s my Glittering Ghost eye look. I love, love, LOVE how this came out! Drawing stars on my face was a new experience (holy precision, Batman!), but they add a fun touch to the otherwise typical smokey eye. I translated the translucent sugar crystals into my inner corner highlight and then took inspiration from the colour of the black tea to create the black smokey eye that fades into brown.

DAVIDsTEA - Pumpkin Die
DAVIDsTEA – Pumpkin Die

And how could I not do a look centered around Pumpkin Die??

DAVIDsTEA - Pumpkin Die makeup look
DAVIDsTEA – Pumpkin Die makeup look

I changed it up a bit for this one and opted to use those bright orange pumpkin candies as inspiration for the colour of the winged liner. I layered that wing on top of a dark black eye that fades out to orange in the crease. I’ve never done something like this before and I ended up really loving the contrast between the super bright liner on top of a black eye.

DAVIDsTEA - Cardamummy French Toast
DAVIDsTEA – Cardamummy French Toast

And lastly, I decided I wanted to try something with the colours that called out to me from Cardamummy French Toast. While it is a black tea that is littered with brown sugar that glitters back at me, what I also loved about it are those yellow-green cardamom pods. I thought it’d make for an interesting colour combo.

DAVIDsTEA - Cardamummy French Toast makeup look
DAVIDsTEA – Cardamummy French Toast makeup look

And I was right! This look is such a different one for me and it was so much fun to create. I used that yellow-green cardamom colour and put that in my crease and made it fade down into a dark brown eye. Overtop of the brown lid shade I layered on a holographic brown glitter that, to me, reflected the sugar crystals in the actual tea.

So there we have it – you can absolutely get inspired to create makeup looks from very unconventional places! I do highly recommend the DAVIDsTEA Haunted Mansion Survival Kit – either for yourself, or for a tea lover as a gift.