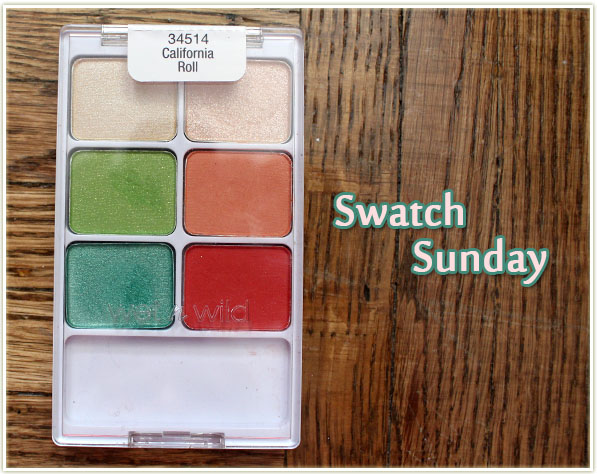
Wet n Wild released a few new limited edition palettes for Spring 2015, calling the whole collection “Silver Lake”. Frankly, I have no idea what “Silver Lake” refers to, but a quick Google search says it could be a neighbourhood in Los Angeles.
Anywayyyyy, I was struggling to find these in Canada, although I’d heard they were available at Rexall. Julie from Swatch and Review managed to hunt down the entire collection not once, but TWICE for me, and man am I ever glad she found these.
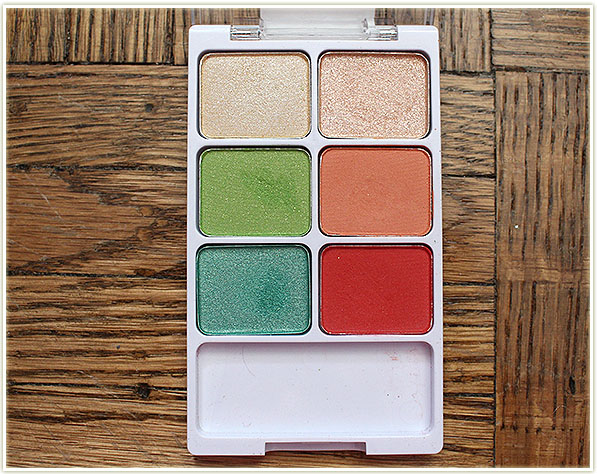
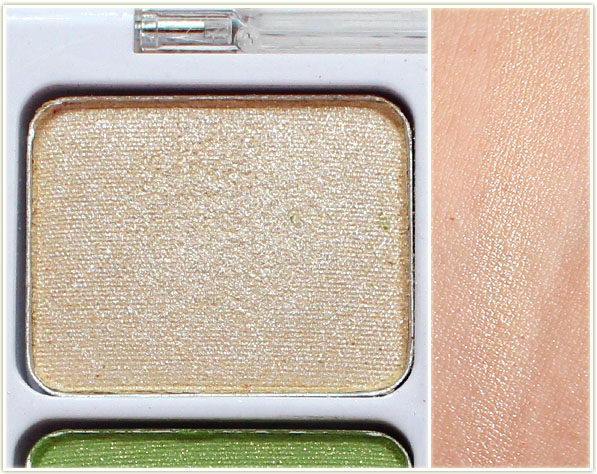
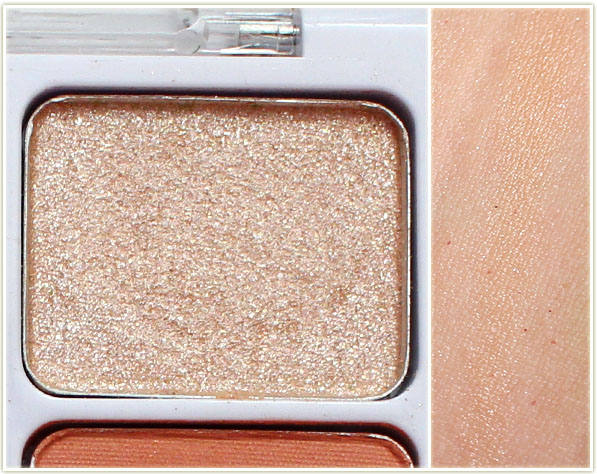
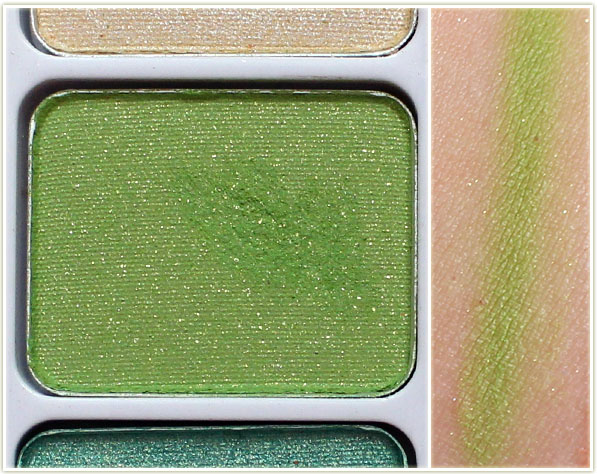
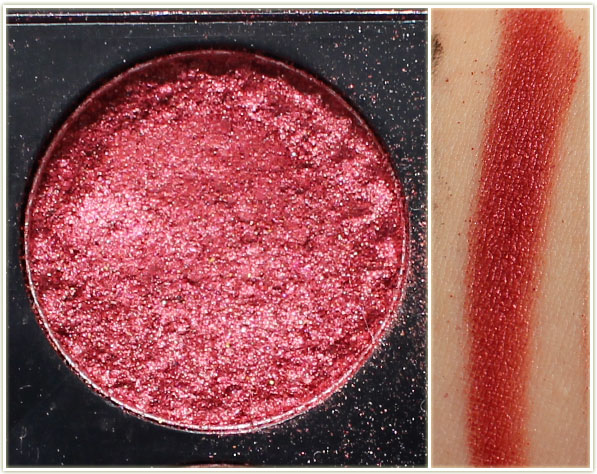
Up first for Swatch Sunday is California Roll. Enjoy!
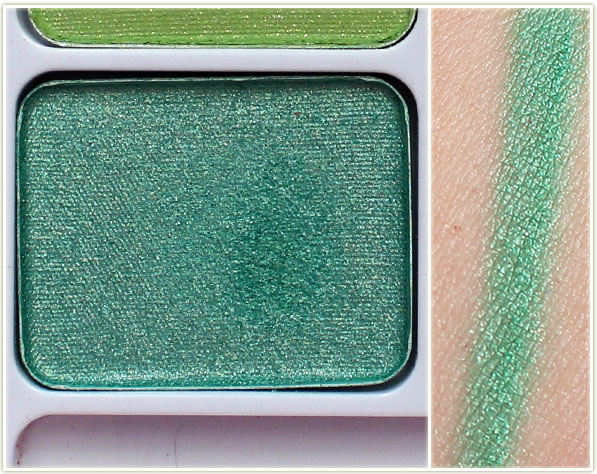
Wet n Wild – California RollWet n Wild – California RollWet n Wild – California RollWet n Wild – California RollWet n Wild – California RollWet n Wild – California RollWet n Wild – California Roll
I hit up Workaday Ramblings yesterday for a guest post that was intended to be pastels, but kind of ended up being neon pastels. I’m okay with this, and you should really mosey on over there to check out my post!
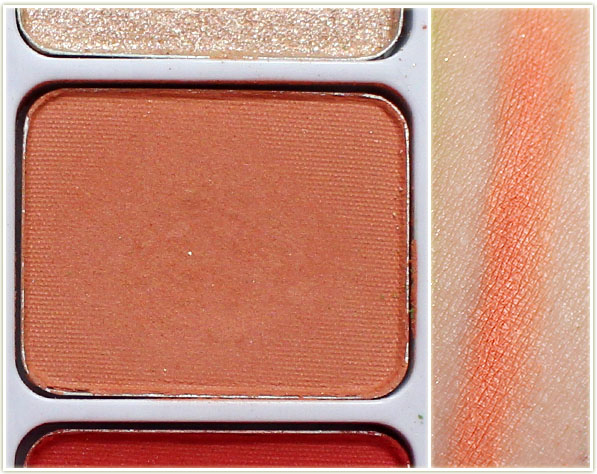
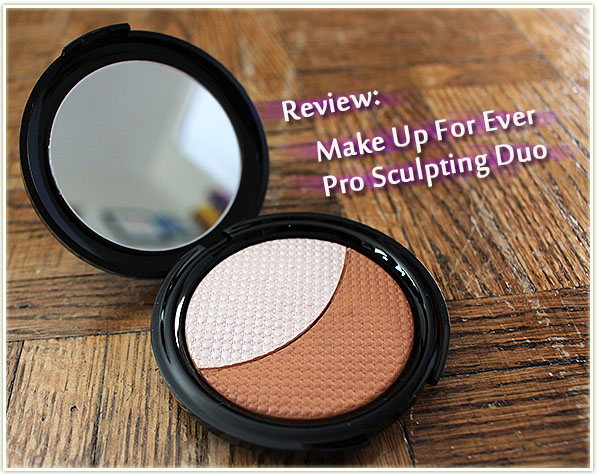
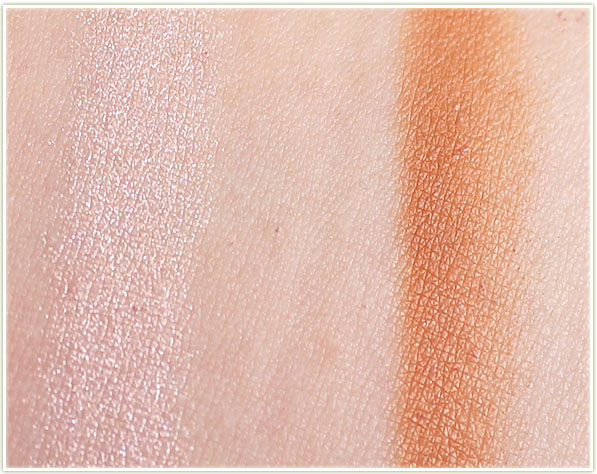
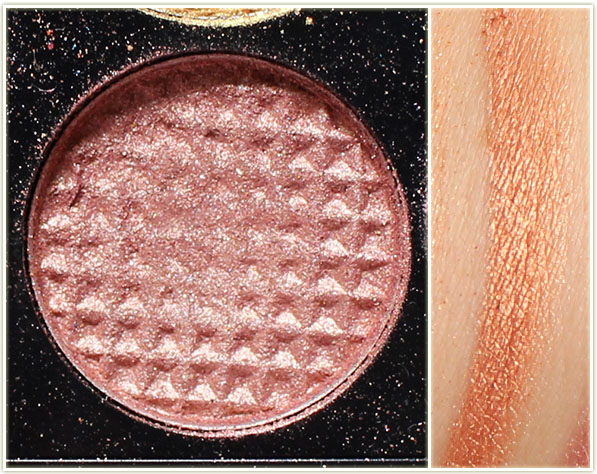
During the Make Up For Ever Spring 2015 product launch event I went to, we were kindly gifted one shade of the Pro Sculpting Duo. I chose Duo #1 which is described as a Pink Beige. The other option is Duo #2 which is more golden.
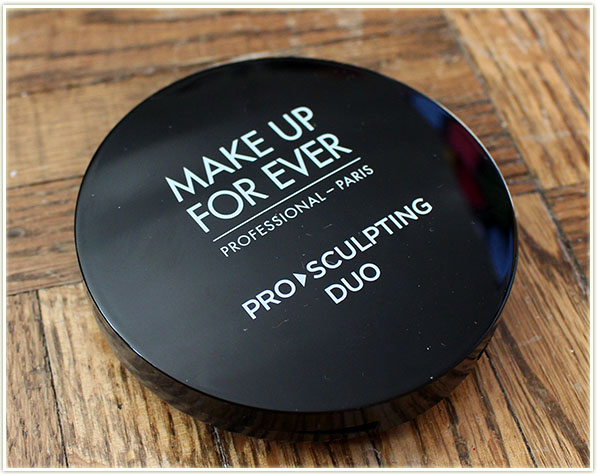
Make Up For Ever Pro Sculpting Duo
Encased in a solid compact with a handy mirror, the Pro Sculpting Duo is split roughly down the middle; one side has an orangey-brown sculpting shade and the other a pearlescent white-pink highlighter. The compact contains 8 grams of product, which is a little bit shy of the typical 10 grams average for a compact of this size. However, that may have something to do with the fact that this product comes from a gel-to-powder formula (I believe it goes on the terracotta plate as a gel and then is baked into a powder formula). It’s also talc-free.
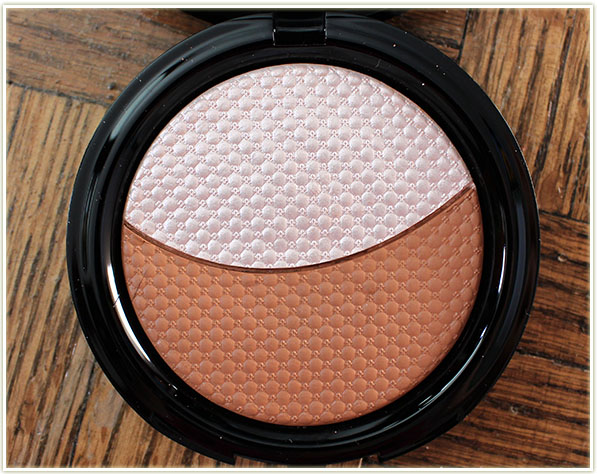
Make Up For Ever Pro Sculpting Duo #1
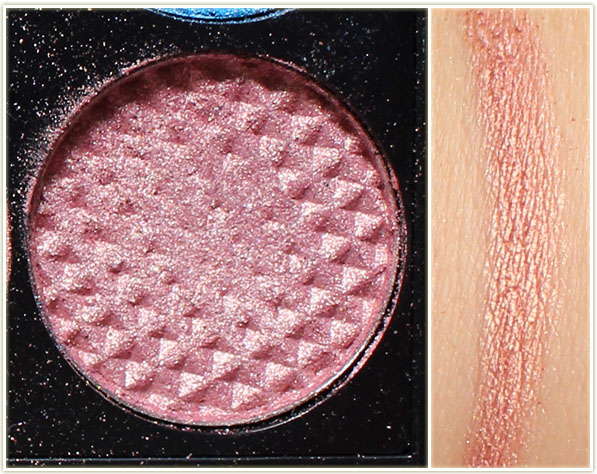
Of course, one can’t get over how gorgeous the product is. Give us beauty consumers a two-colour product with a print, and you’ve pretty much got us cornered!
Make Up For Ever Pro Sculpting Duo #1 – close up
Ugh I can’t. So gorgeous.
Make Up For Ever Pro Sculpting Duo #1 – swatches
So how does it play out on the skin?
Sculpting Shade
Well, the sculpting shade is just… too orange. I wouldn’t encourage anyone to sculpt their faces with an orange shade – it’s just not how contouring works. Even worse is that it has a sheen to it which does nothing to help sink your cheekbones in, or recede areas of your face. If you want to contour, you need to be using shades tinted grey as that’s what a natural shade creates on your face.
It does, however, work as a bronzer. While it is still rather orange for my tastes, you can blend this in, or use a light hand to get the shading you want. I focus on the high points of my face, the areas that get the most sun, such as the back of my cheekbones, my temples and forehead, and along my jawline and nose.
Highlighting Shade
This is where the duo really shines! The pink-beige shade is hard to describe, and the swatch really doesn’t do it justice because it is GORGEOUS. If you have any experience with MAC’s Vanilla pigment, this is rather similar, just without the yellow flecks. It’s creamy to the touch, smooth blending with a pinky-white sheen. It’s unlike anything I have in my collection, which surprised me, because highlighters don’t tend to be particularly unique on the whole. (I’ve heard Duo #2 is a dupe for MAC’s Whisper of Gilt, if you’re interested!) The pigmentation on this is very strong, so go easy if you’re not looking to be super highlighted, but if you love a solid glow to your skin, this one’s for you!
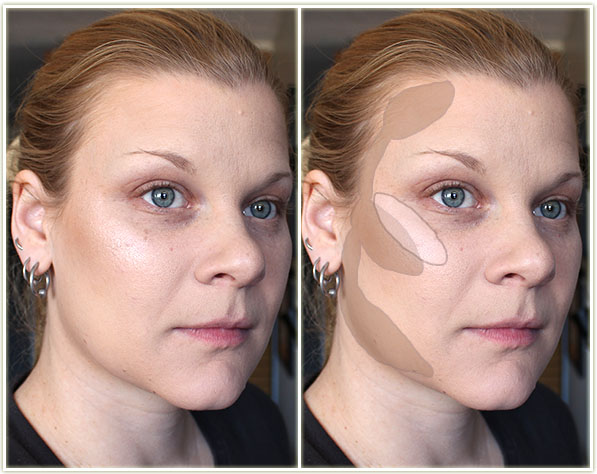
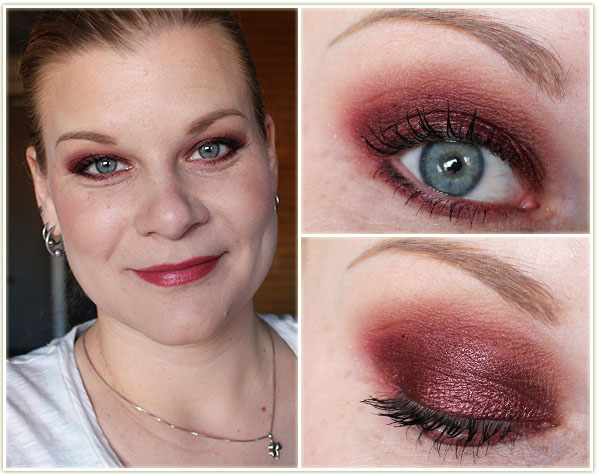
Make Up For Ever Pro Sculpting Duo #1 – applied to the face
Here’s what it looks like on my face. As I said, I won’t use that sculpting shade to contour my face, but I will use it as a bronzer. I stuck to the areas of my face that get the most sun, choosing to blend it down slightly on my upper cheekbones (it’s not directly UNDER my cheekbone though). The highlighting shade was applied directly to the tops of my cheekbones. It really stands out and adds a beautiful amount of luminosity to my cheekbones.
Final Thoughts
I’m confused by the sculpting shade, especially from a brand that definitely knows how to do makeup right. If you ignore the fact that you’re encouraged to contour your face with it, you can definitely use this as a glowing bronzer for the skin. I love how it looks on my face to make it seem like I’ve gotten way more sun that I actually have.
The highlighter is what really makes this compact for me though, it’s beyond gorgeous and looks stunning on my face. In fact, I keep swatching it on my finger just to keep looking at the different facets to it. I honestly think the whole compact is worth it just for the highlighter alone, but if you can use the bronzing shade, all the better!
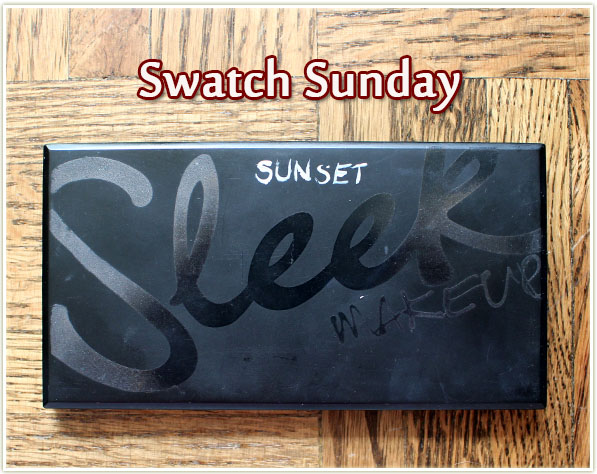
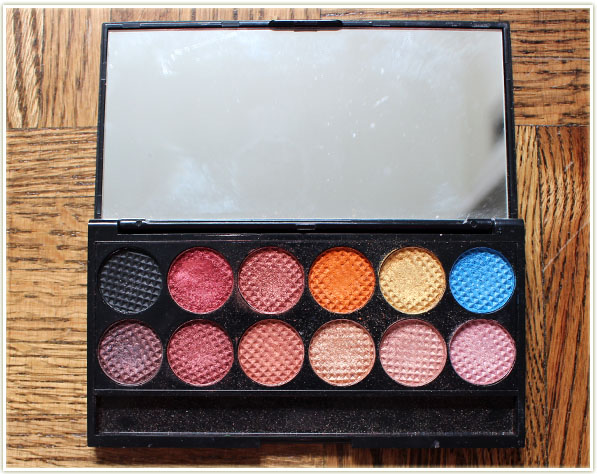
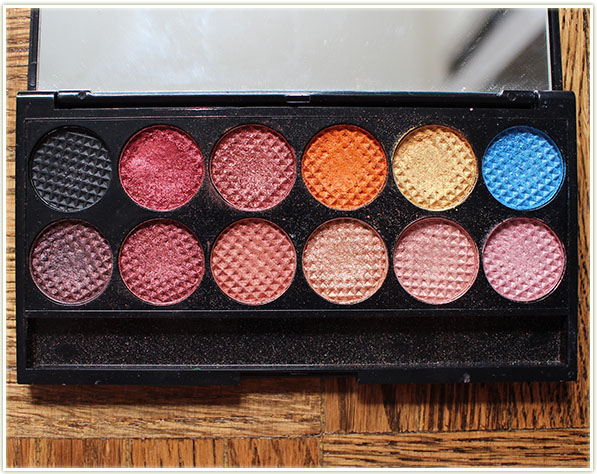
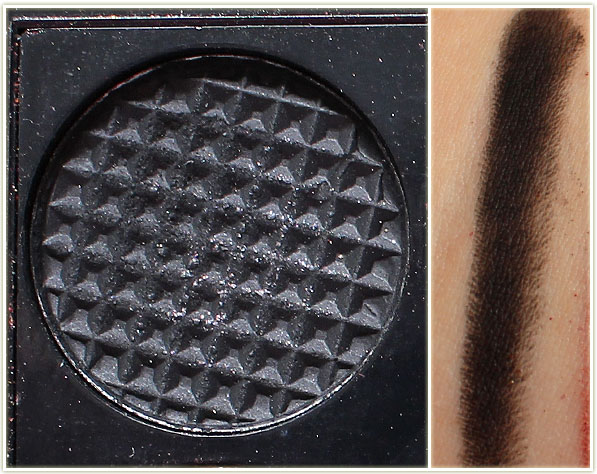
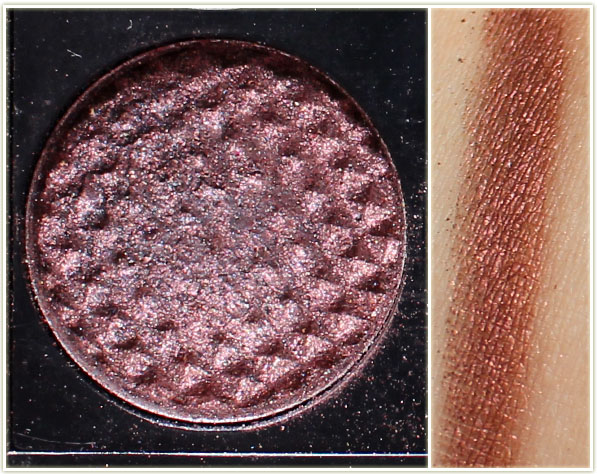
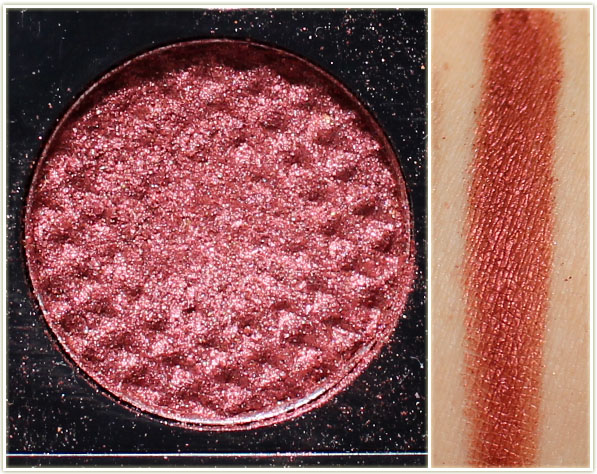
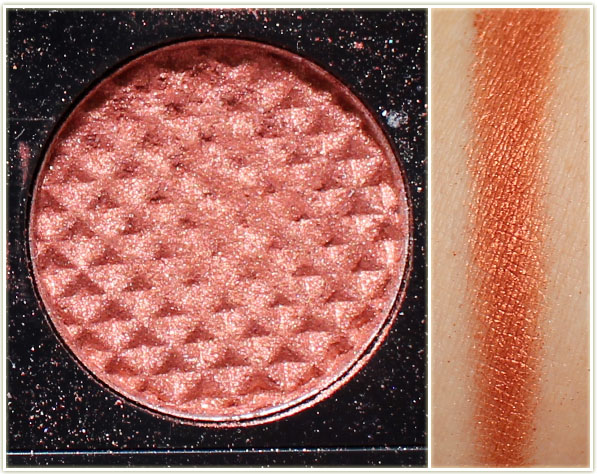
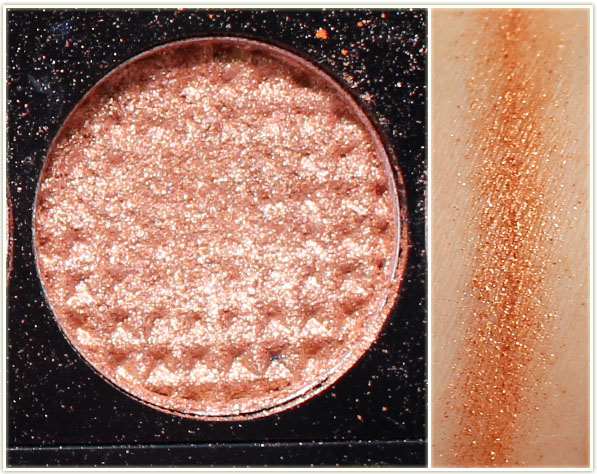
More swatches from Sleek this week! This time I’m showing off my well used and abused Sunset palette. (Yes, that’s my shoddily painted on “Sunset” – none of Sleek‘s palette have any identifying markers on the outside so I was trying to label them myself.)
This is one of those palettes that just takes your breath away. The cranberry and orange hued shades in this palette are unbelievable showstoppers. Unfortunately, this is one ofSleek‘s older paletttes and therefore the shades don’t have names.
If you need inspiration after seeing the swatches, you can check out the Challenge Week I did featuring this palette. Enjoy!
A few randoms, some from my vacation in Florida and one from a guest post last month. Enjoy!
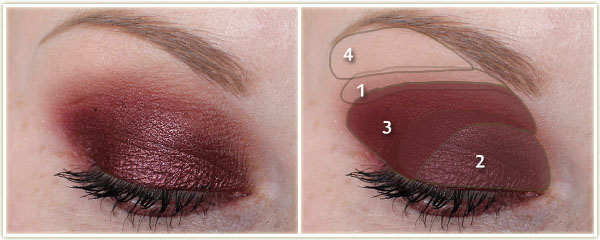
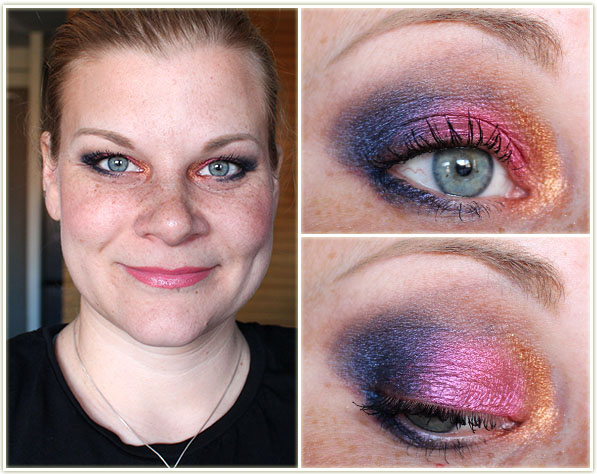
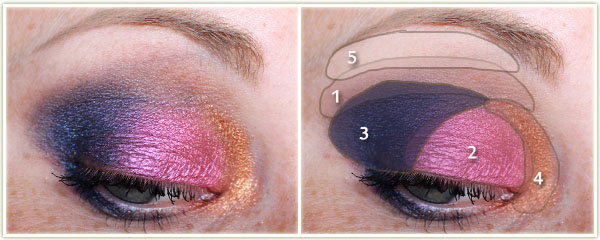
Red and burgundy eyeshadows… I’ll never quit you.
Eyes
(all Makeup Geek)
Frappe through the crease.
Showtime all over the lid.
Bitten on the outer corner and through the crease.
Vanilla Bean on the brow bone.
I then ran MACPhone Number eye pencil on the outer corner of my bottom lash line and then ran MUGBitten over the entire lower lash line. On my lashes is Make Up For EverSmoky Stretch mascara.
Rest of the Face
Foundation: Bourjois Healthy Mix Serum in shades 51 Light Vanilla and 52 Vanilla mixed together
Bronzer: Joe FreshSand
Blush: MACSea Me, Hear Me
Highlighter: Too FacedCandlelight
Lips: MACMystical
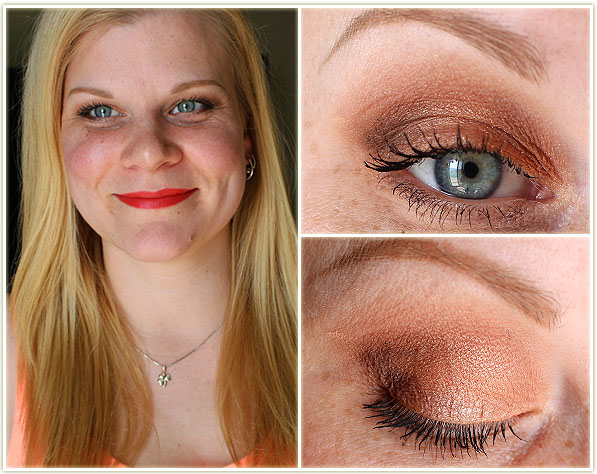
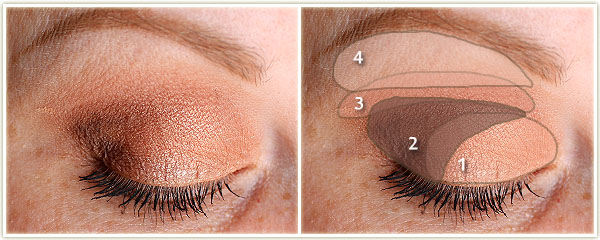
Playing around with my new Milani Bella shadows. “Rouge” is not nearly as red as I hoped it would be.
Eyes
Urban DecayNaked through the crease.
MilaniBella Rouge on the middle of the lid.
MilaniBella Navy on the outer corner.
MilaniBella Copper on the inner corner.
Wet n WildBrulee on the brow bone.
I then ran MAC‘s Phone Number eye pencil along my lower lash line and brushed Bella Navy on top of it. On my lashes is Make Up For EverSmoky Stretch.
Rest of the Face
Bronzer: Hard CandyHula Hula
Blush: HourglassLuminous Flush
Highlighter: MACWhisper of Gilt
Lips: BiteFig
I put this together while on vacation in Florida – it’s one of my favourite combinations from the Too FacedSemi-Sweet palette.
Eyes
(all Too FacedSemi-Sweet Chocolate Bar palette)
Bon Bon all over the lid.
Peanut Butter through the crease.
Truffled in the outer corner
Coconut Creme on the brow bone.
On my lashes is Make Up For Ever Smoky Stretch.
Rest of the Face
Bronzer: Hard CandyHula Hula
Highlighter: BenefitWatts Up
Blush: AstorFeeling Feline (this is a lip product, but I completely forgot to pack my blushes!)
Lips: MACBarbecue
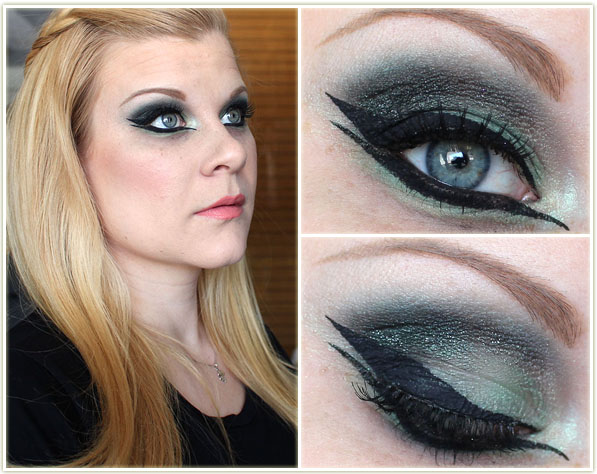
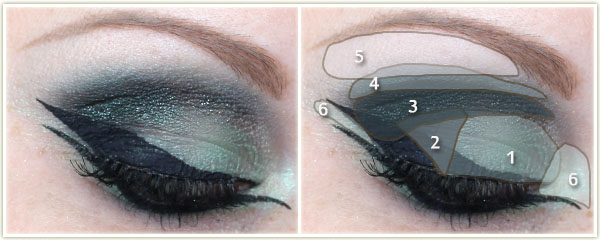
Another vacation one!
Eyes
(all Too FacedSemi-Sweet Chocolate Bar palette)
Mousse through the crease.
Rum Raisin all over the lid.
Blueberry Swirl on the outer corner.
Coconut Creme on the brow bone.
I used Catrice‘s liquid liner in Dating Joe Black to create the wing and applied Make Up For EverSmoky Stretch mascara to my lashes.
Rest of the Face
Bronzer: Hard CandyHula Hula
Blush: MACBarbecue lipstick (once again… I had no blush with me!)
Highlighter: BenefitWatts Up
Lips: MACBarbecue
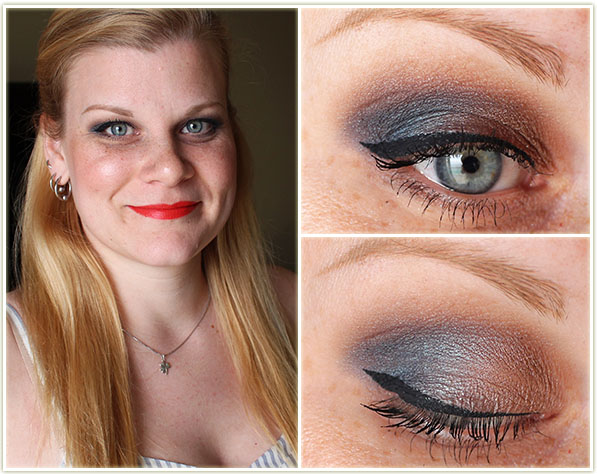
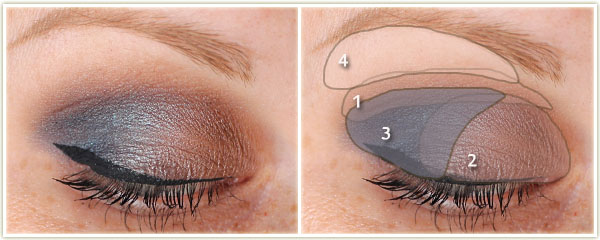
I can’t believe how well this look came out! I did this one for Prairie Beauty Love as a guest post for the month of March. Cross posting it here for my own archives!
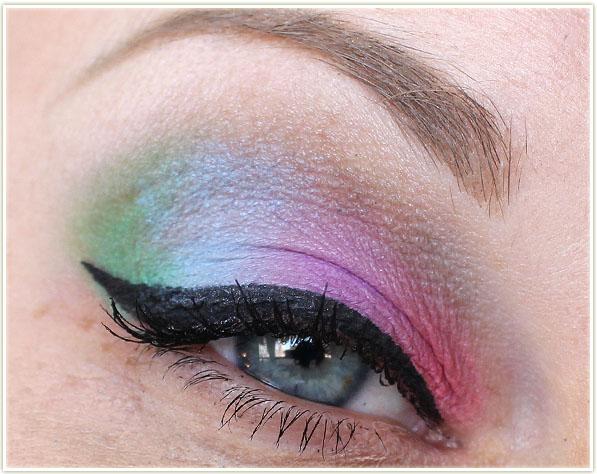
Eyes
Makeup GeekAppletini on the inner two thirds of the lid.
Makeup GeekShark Bait on the outer third of the lid.
Makeup Geek Envy through the crease and right through to the eyebrow.
Shark Bait was then patted and blended along the upper edge of where Envy was blended through the crease.
On the brow bone is Makeup GeekVanilla Bean.
On the inner tearduct and on the very outer edge of the eye, I applied Naked Cosmetics‘ pale green from the Ivory stack.
To get the dramatic winged liner, I used Catrice‘s Dating Joe Black liquid liner. Go slowly with this! I then lined my upper and lower water line with Urban Decay‘s Black Velvet liner. I applied CoverGirl‘s Clump Crusher mascara to my lashes and threw on a pair of J. Cat lashes in EL13. To amp up the crease, I patted on some Too FacedGlitter Glue and layered on some (super ancient) Tony + Tinasilver glitter.
Rest of the Face
Foundation: Bourjois Healthy Mix Serum in shades 51 Light Vanilla and 52 Vanilla mixed together
Bronzer: Joe FreshSand
Blush: Physicians Formula Happy Booster in Natural
Lips: Wet n Wild903C Just Peachy with NYX‘s Butter Gloss in Tiramisu on top