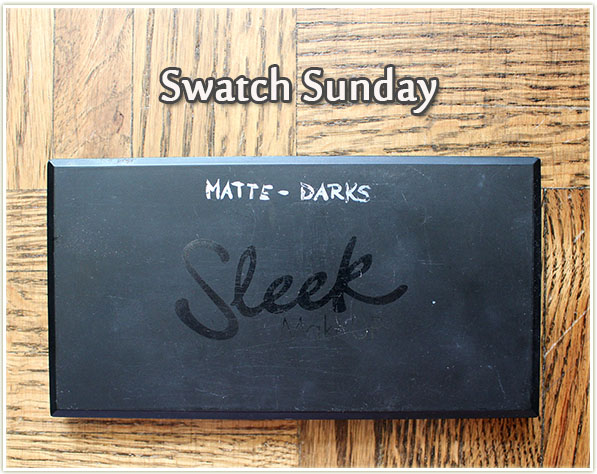
I must be getting to the end of my Sleep palettes here! This is Sleek’s Ultra Mattes V2 palette. Or, how I refer to it, the Matte Darks.
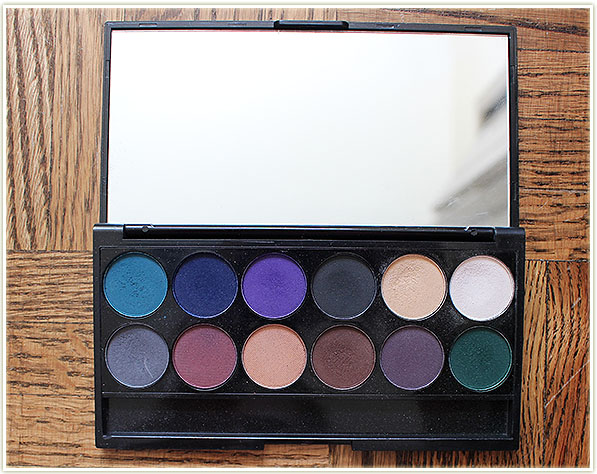

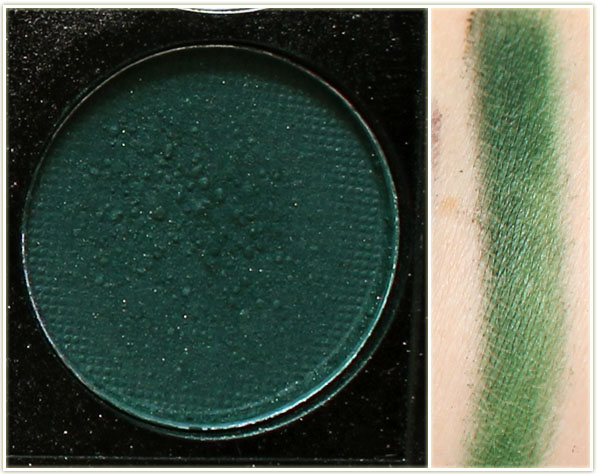
I must be getting to the end of my Sleep palettes here! This is Sleek’s Ultra Mattes V2 palette. Or, how I refer to it, the Matte Darks.
In my (not so humble) opinion, there’s some pretty epic makeup looks in this post. Either I love how my makeup turned out, or I love how the shots came out. I hope you like them too!
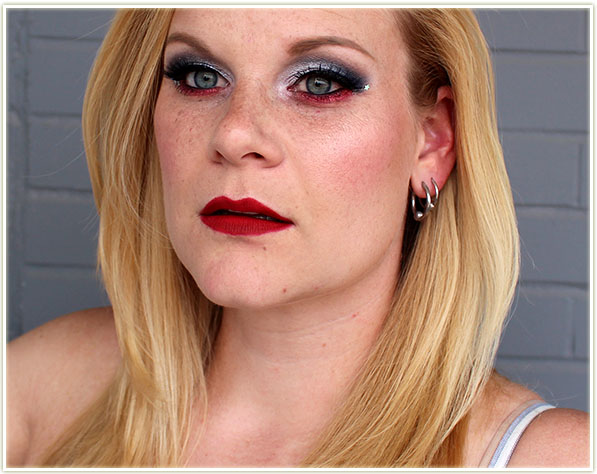
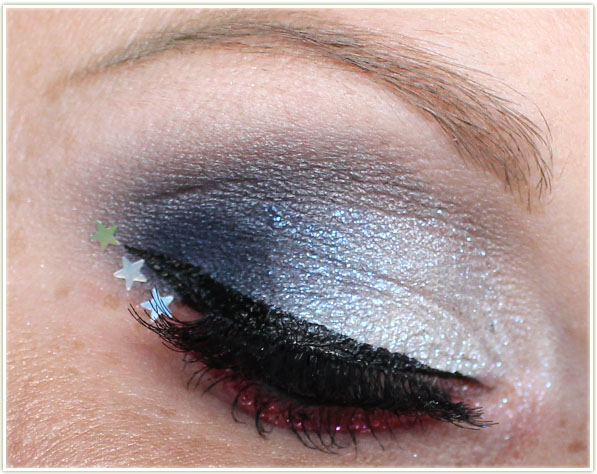
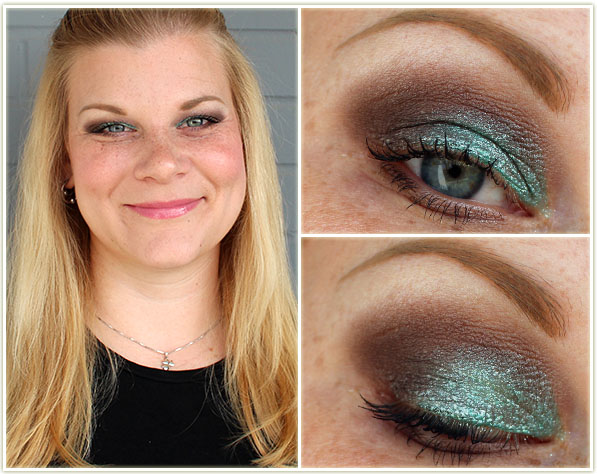
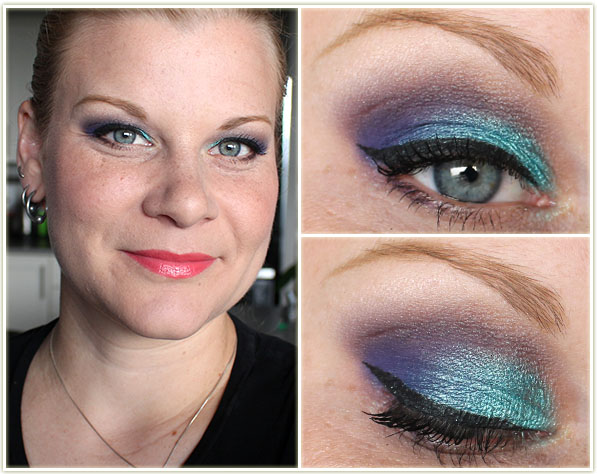
Let’s start this off with what I feel is probably my best makeup look accomplished to date. (So I’m going to post a few extra shots of it because I’m really pleased with how this turned out.)
We were going to the pub to watch the Womens’ World Cup final (USA versus Japan), and since my husband is American, I defaulted to supporting the USA. It was so close to the Fourth of July too, so this could’ve doubled as an Independence Day theme as well.
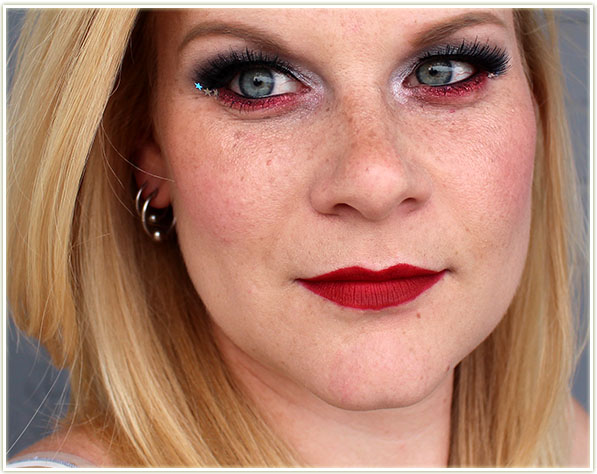
I don’t always post huge eye shots because I typically take photos of my makeup before work and don’t have the time to perfect everything. Smaller photos hide some mistakes so I have less to worry about. But when I do guest posts, or feature products specifically, I like to make sure that I get as close to a perfect makeup look as I’m physically capable of (since I don’t airbrush my photos). But this one, despite being done in a relative rush, was done soooo well that I just had to post a full-sized shot!
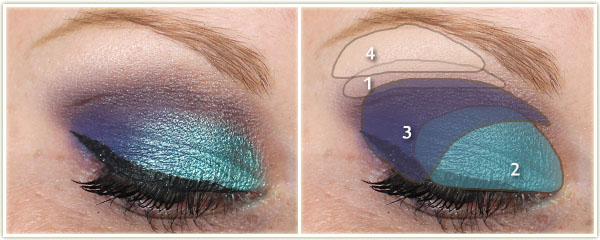
And here’s what I used:
Eyes
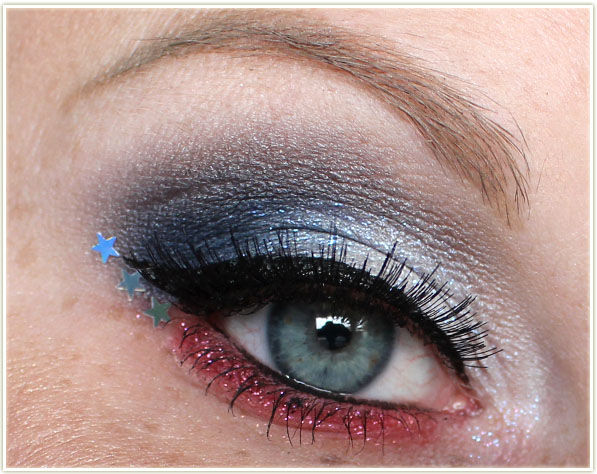
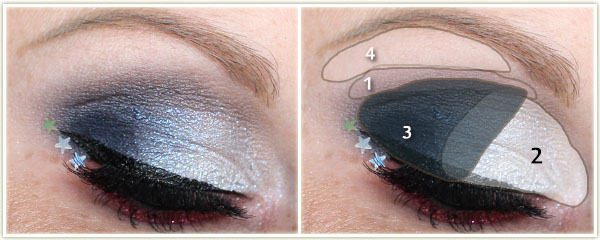
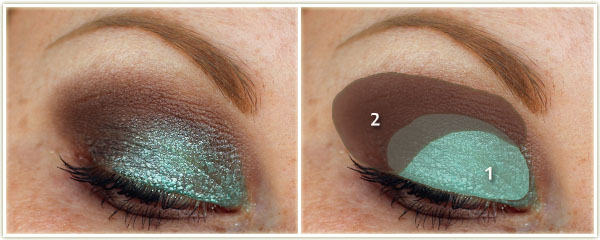
I then patted MAC‘s Transparent Blue Glitter on top of the whole lid using Too Faced‘s Glitter Glue to make sure it stayed in place. I then used MAC‘s Strike While Haute shadow all along the bottom lash line, and applied MAC Reflect Red glitter overtop (again with the Glitter Glue).
The winged liner was done with Kat Von D‘s Tattoo Liner in Trooper and I lined my lower water line with Marc Jacobs‘ Blacquer. I applied a coat of CoverGirl‘s Clump Crusher mascara and then popped on a pair of Bombshell lashes by House of Lashes.
Rest of the Face
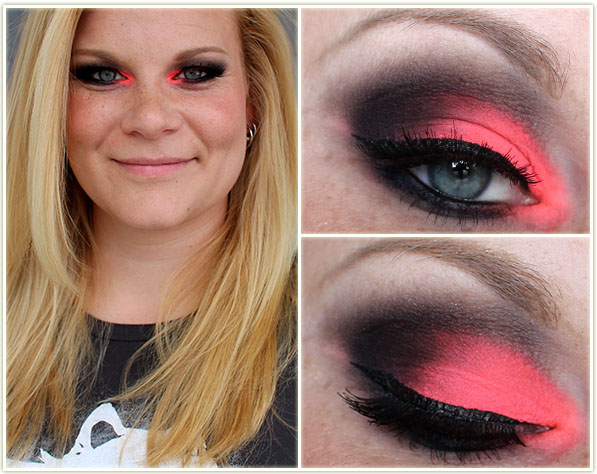
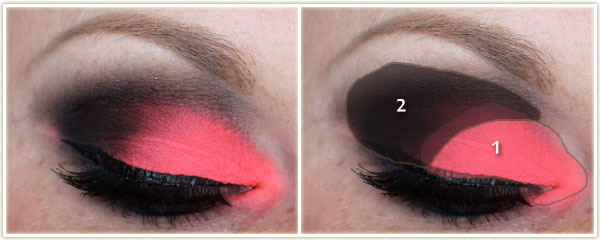
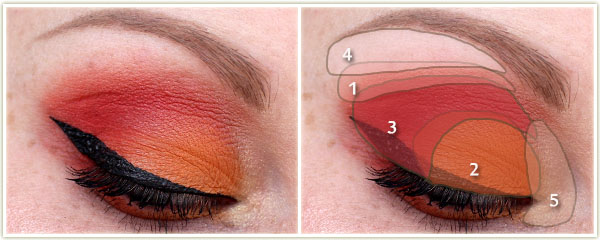
Next up is a product I waited far, FAR too long to use. It had been sitting in my “to use” pile but I never got around to it. And as soon as I did, I wore it three times that week! That beautiful neon red? That’s Kryolan‘s UV-Red pressed shadow and it is INCREDIBLE. Since it is a neon, it does need a sticky white base to make it pop. But damn… seriously amazing.
Eyes
I first applied NYX‘s Jumbo Eyeshadow Pencil in Milk to the entire lid, blended it out, then:
I created the wing with Kat Von D‘s Tattoo Liner in Trooper, coated my lashes with CoverGirl‘s Clump Crusher and then put on a pair of Bombshell lashes by House of Lashes. I tightlined both waterlines with Marc Jacobs‘ Blacquer.
Rest of the Face
Playing around with some Makeup Revolution foiled shadow.
Eyes
On my lashes is Make Up For Ever‘s Smoky Stretch mascara.
Rest of the Face
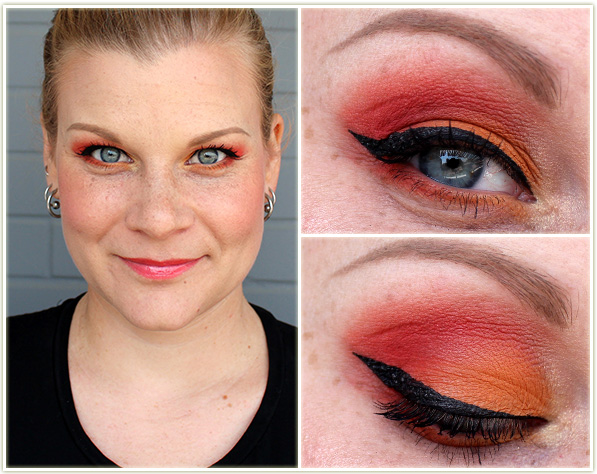
I swear this is such a vain post, but anyway… That shot on the left is my favourite shot of myself I think I’ve ever taken. It’s all thick lash line, fiery eyeshadow, chubby cheeks and intense steel blue eyes. AND I LOVE IT. I did this for a guest post on Vancouver Eyeshadow Addict back in May and somehow forgot to cross post it!
Eyes
I used Poppy on the outer corner of the lower lash line and used Chickadee for the remainder of the lower lash line. I then created the wing with Kat Von D Tattoo Liner inTrooper and tightlined with Urban Decay‘s Black Velvet liner. On my lashes is essence‘s Lash Princess mascara.
Rest of the Face
Lips: Revlon Papaya gloss
And lastly, a Makeup Geek look because I hadn’t yet played around with the new foiled shadow Pegasus.
Eyes
I created the wing with MAC‘s Blacktrack fluidline and coated my lashes with essence‘s Plump, No Clump mascara.
Rest of the Face
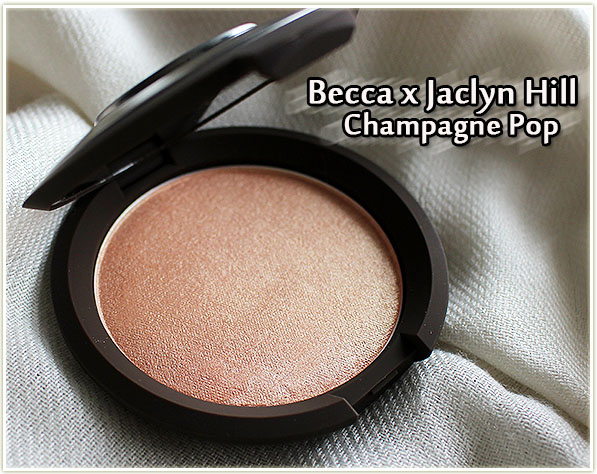
Becca. Jaclyn Hill. Champagne Pop. For the last two weeks, those have been the most repeated words in the beauty community.
And it’s not hard to see why. Jaclyn Hill is a YouTube beauty phenomenon, that has stayed truly devoted to makeup tutorials over the years. (Something I appreciate since a lot of beauty gurus have become lifestyle vloggers instead.)
And then there’s Becca Cosmetics. A makeup brand known for creating gorgeous highlighters formally known as Shimmering Skin Perfectors – Pressed.
Combine them and suddenly the internet’s beauty lovers explode with product lust.
The gist of this story is that Jaclyn Hill has been a devotee of Becca highlighters (and blushes) for years. She got the opportunity to work with Becca recently and created Champagne Pop – a limited edition Shimmering Skin Perfector Pressed (aka a highlighter) that is intended to work on any shade of skin.
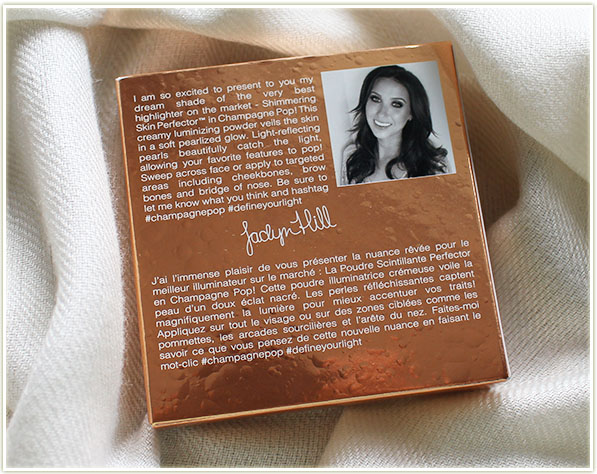
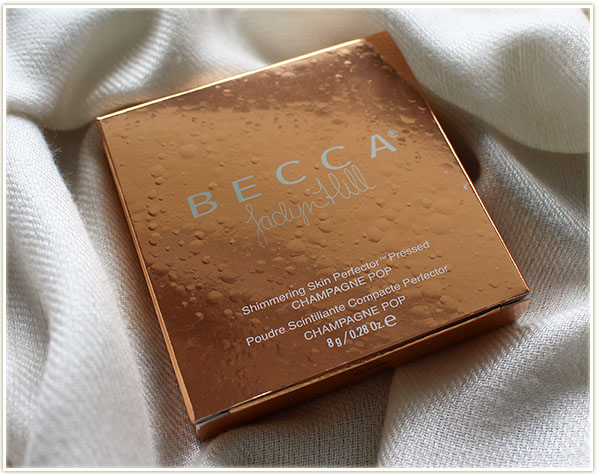
I’m not usually one for box packaging, but it’s hard not to love this one – it was designed to look like champagne bubbles! I don’t keep the boxes for my products, but man was I ever a bit remorseful when I finally threw it out last night!
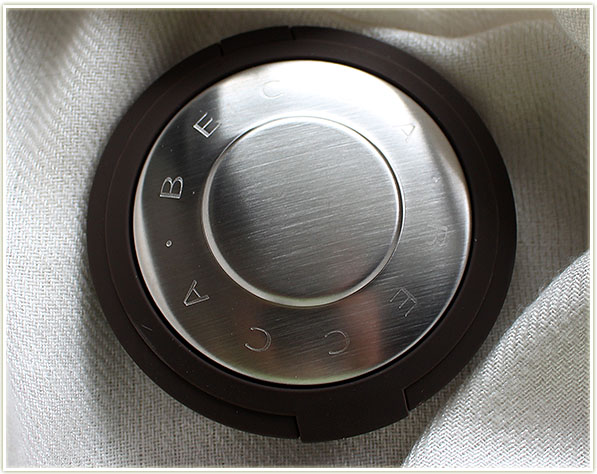
As with all Becca highlighters, Champagne Pop comes in a clam shell compact and contains 8 grams of product. It also set me back a whopping $46 CAD – easily the most money I have ever paid for a highlighter. (Even when I take into consideration Charlotte Tilbury‘s Bronze & Glow!)
However, like everyone else out there, I wasn’t to be deterred by the price point! As a regular viewer of Jaclyn Hill’s videos I wanted to support her creation, and I *had* been meaning to bite the bullet on purchasing a Becca highlighter, I just hadn’t gotten around to it.
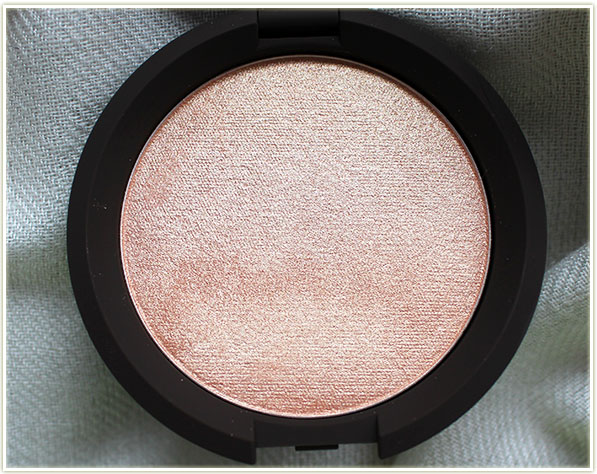
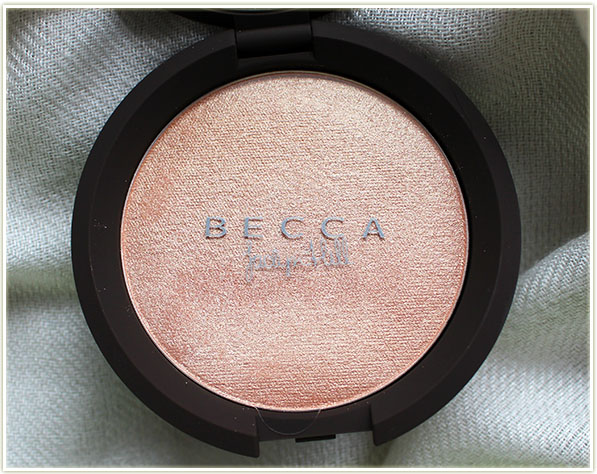
When I first opened the compact I was absolutely dazzled. Champagne Pop is a champagne shade with a peach undertone and a golden reflect. It is *beautiful*. The powder has this insane reflect to it that is near impossible to capture in pictures.
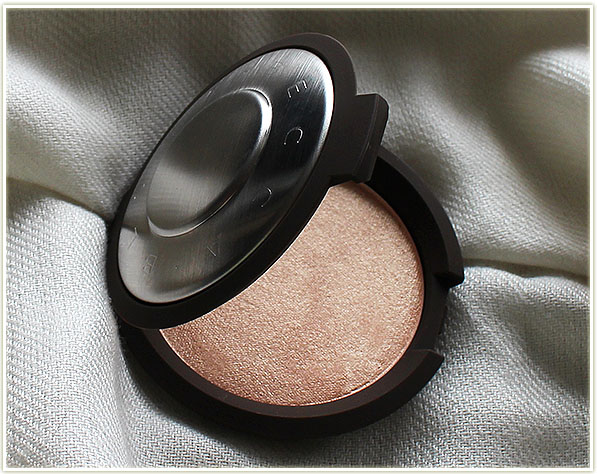
Having never used a Becca product before, I need to mention that I was happy with the packaging. It’s sturdy, compact and snaps shut with a click. It has a solidity to it that I really appreciate, especially when I’m paying $50 for it!
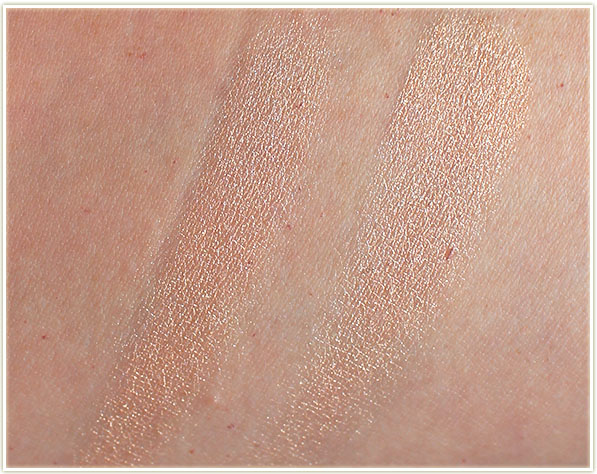
From the swatch above, you can see that there’s almost a duochrome iridescence to it as it curves around the outer edges of my arm. It goes from a champagne/gold to a peach gold on the bottom edge. While I don’t necessarily see that on my face, I do feel like it gives the product a lot of dimension.
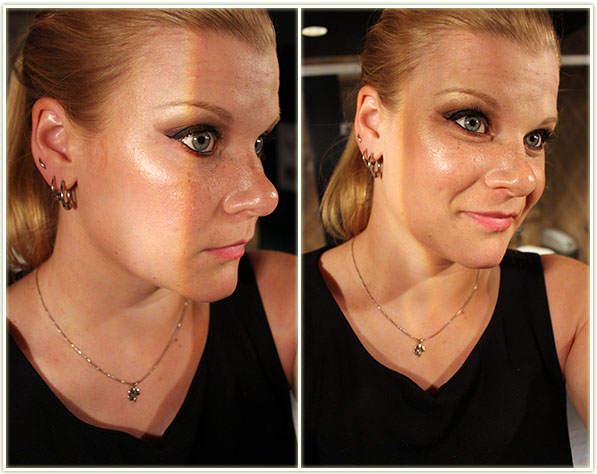
Trying to capture the effect a highlighter gives your face is difficult. It’s one of those products that you catch a glimpse out of the corner of your eye as you turn your head towards a mirror, but never one that you see when you look at yourself straight on. However, if you see it on someone else (and I have, because everyone I know is wearing it!) holy god does it ever look gorgeous. It pops your cheekbones like nobody’s business.
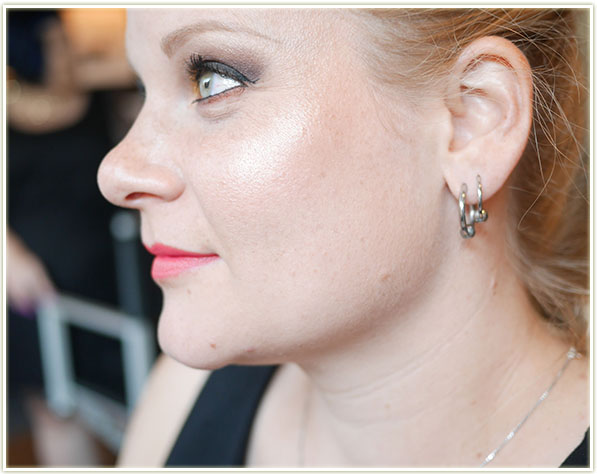
There was a lot of concern from lighter skinned people that this shade would verge on being too dark. The shot above is my relatively pale skin in daylight (thanks Julie!) with Champagne Pop on the tops of my cheekbones. I think it’s gorgeous and it is definitely light enough for me.
If you can afford Champagne Pop (and can still find it!), I think it’s worth the price tag. This is the only highlighter I’ve used since I purchased it which I think speaks volumes for any makeup obsessor out there. There’s a luminosity to Becca‘s Champagne Pop that I haven’t been able to find in other highlighters. It’s also pigmented as all hell so while you don’t need a ton of product to get that glow to your face, you may find yourself loving it so much that you decide to bathe your face in it like I do!
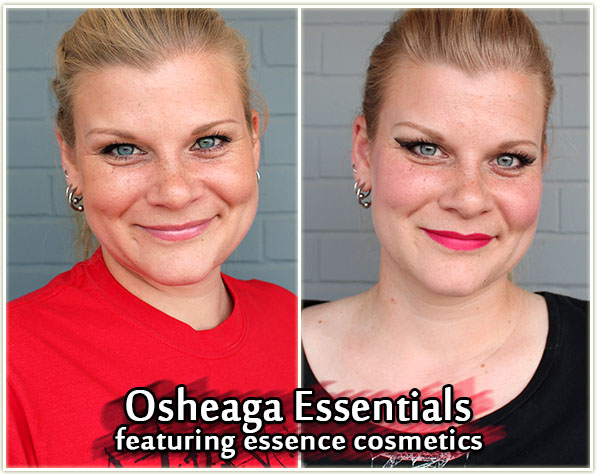
Montreal’s Osheaga weekend is coming up! Celebrating their 10th year, Osheaga will host more than 100 bands playing on six stages during the three-day festival.
At first I was really torn about how to do this post. When I’m going to an outdoor concert or, as they’re more commonly becoming known now, a festival, the reality is that there’s a look that I *want* to wear, and then there’s the look that I’m more than likely going to wear.
So what the hell, I thought I’d throw together both. One is for the realist (or the person who’s going to actually jump into the crowd) and the other is for the person who’s more inclined to stay on the outside of the pit and enjoy the ambiance (and not get nearly as dirty).

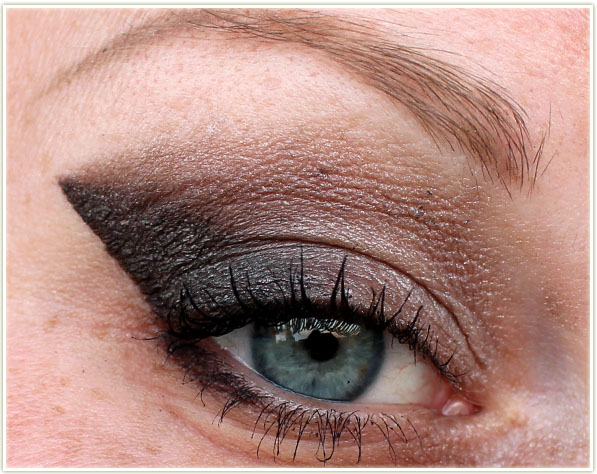
The reality is that when I go to an outdoor concert, I’m going to be right in the middle of the crowd. I’ll be in that pit moshing (or dancing depending on the music) and that means I’m most definitely going to be sweaty. The last thing I want to worry about is my makeup – so I’ll generally opt for something that’s waterproof and longwearing and very, VERY minimal. (Doesn’t sound like me much does it?)
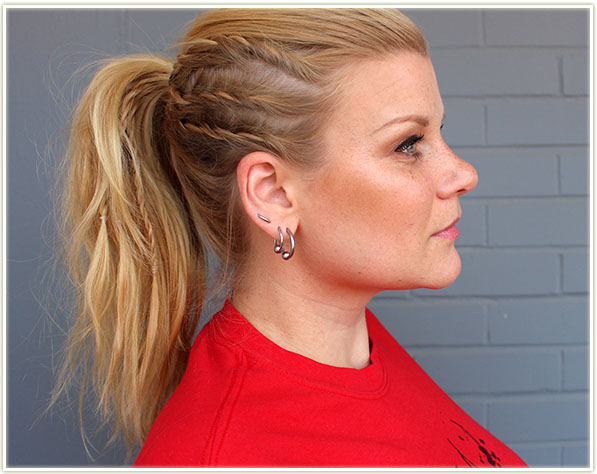
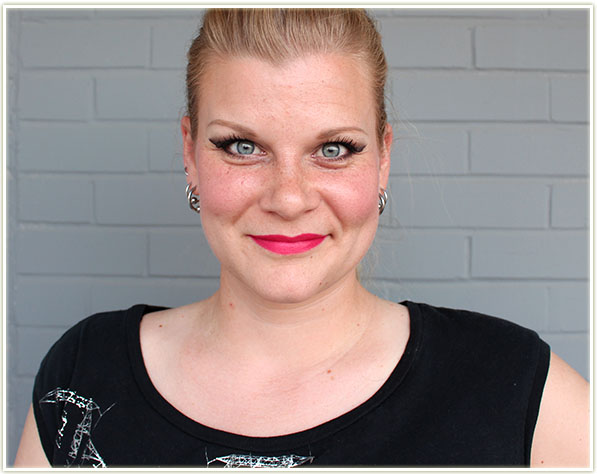
I’ll chuck on a band t-shirt, tie my hair back, slap on a bit of makeup and that’s it. For this look, I focused on getting bronzed up and making my eyes stand out.
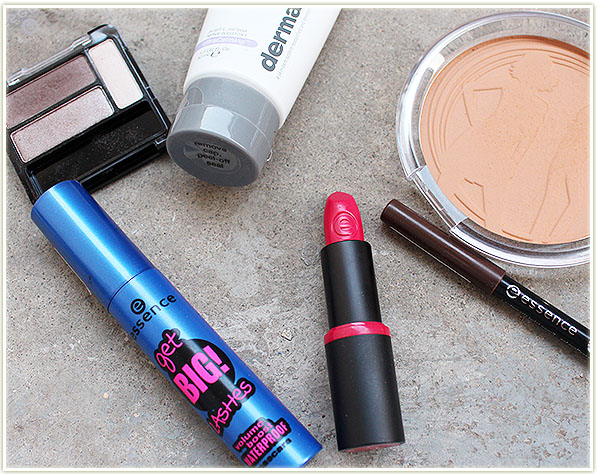
Here’s how you can get the same look using the following products:
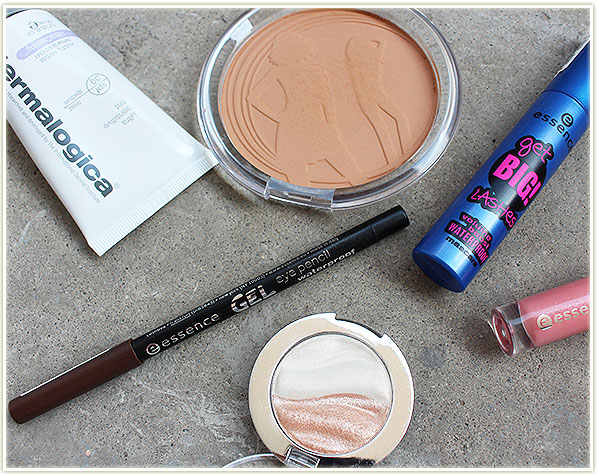
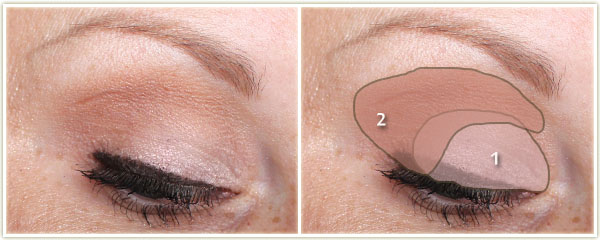
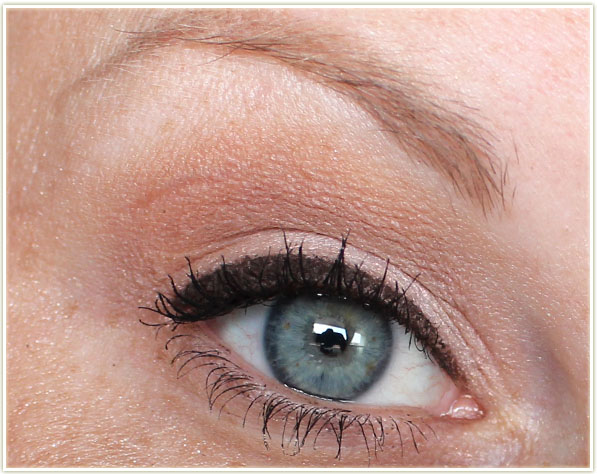
Eyes
(all essence)
I thickly lined my upper lash line with the waterproof gel eye pencil in Cocoa Bean and applied Get Big Lashes waterproof mascara to my lashes.
Rest of the Face
Overall, I love it. It’s simple, easy to wear, and I don’t have to worry about looking trashed by the end of the festival!
There’s always going to be people that enjoy the music at a festival, but just don’t want to be part of the crowd right in front of the gates of the stage. This gives you a lot more flexibility with your makeup since you’re less likely to have sweaty bodies rubbing up against your face (as a relatively short female at 5’3″, I would constantly find myself with my nose in some guy’s sweaty armpit or chest, much to my disgust).
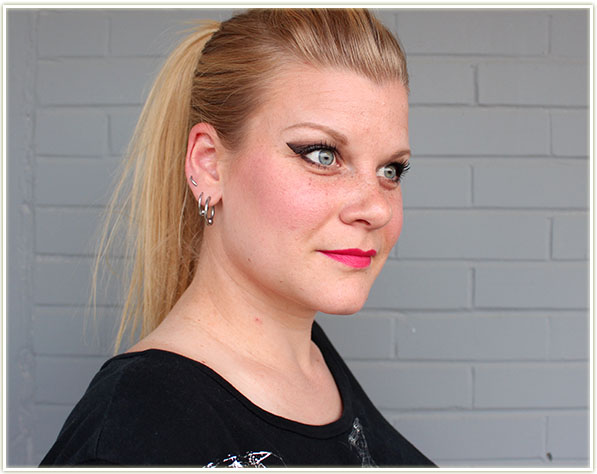
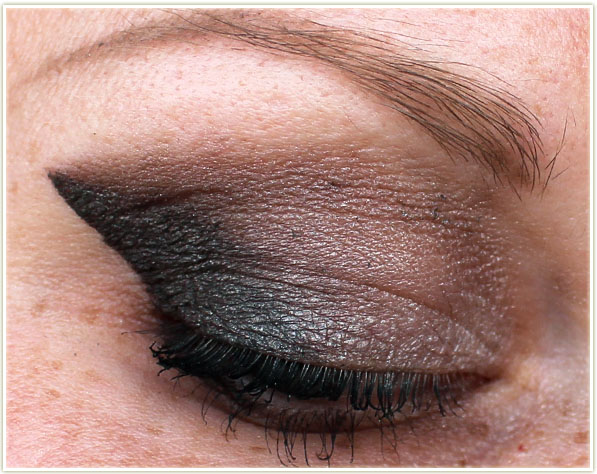
This is what I’d wear to a festival if I wasn’t worried my makeup would get smeared all over my face!
Here’s what you’ll need:
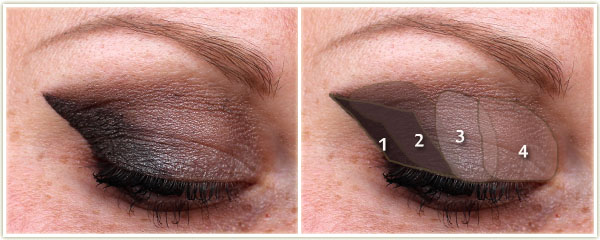
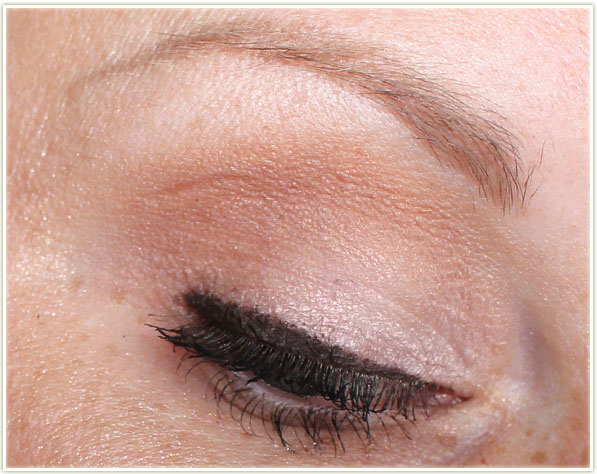
Eyes
(all essence)
I applied Get Big Lashes waterproof mascara to my lashes.
Rest of the Face
Obviously, this look has a lot more to it than my first one. It’s also a lot more fun, possibly edgy. It’s more of a rocker look (although I’m definitely getting a bit of 80s out of it too) and far more precise. But hey, if you end up dancing your heart out, you’ll just fit right in and look all grungy.
Is anyone headed to Osheaga? Who are you excited to see? My favourite on the listing is definitely Tove Lo at the moment! <3
essence cosmetics can be found at Shoppers Drug Mart and Pharmaprix in Canada.
This post features products sent by PR.
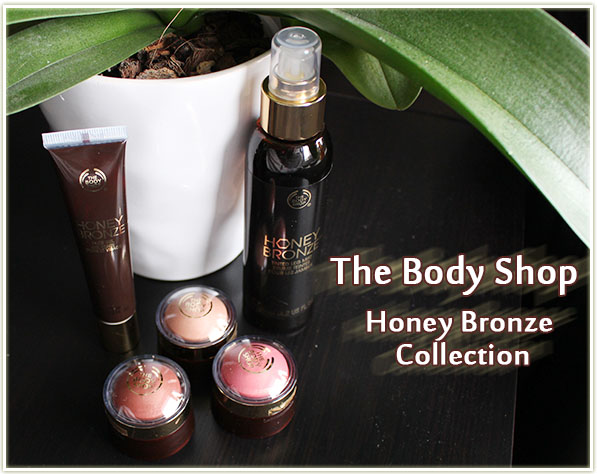
The Body Shop launched (somewhat) recently several additions to their already popular Honey Bronze lineup (made famous by their Honey Bronzer I believe). With these new additions they’re staying true to the golden goddess look that I’m looking for when when it gets sunny outside. Except, you know, without the added sun damage that comes along with looking tanned!

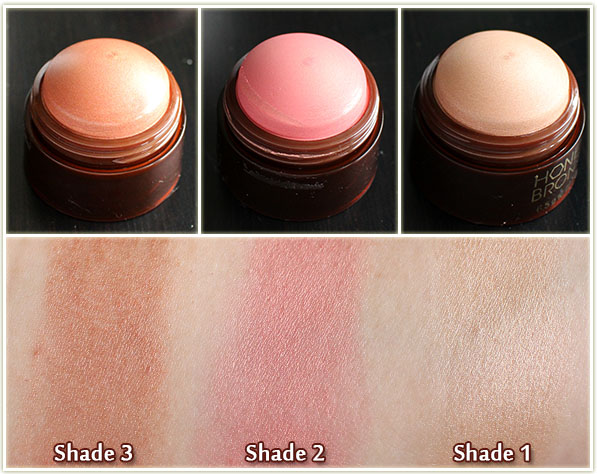
These were the absolute highlight (GET IT?!) of the collection to me. They’re labelled as the Honey Bronze Highlighting Domes, but they come in three colours that are very clearly suited towards traditional bronzer, blush and highlighter shades.
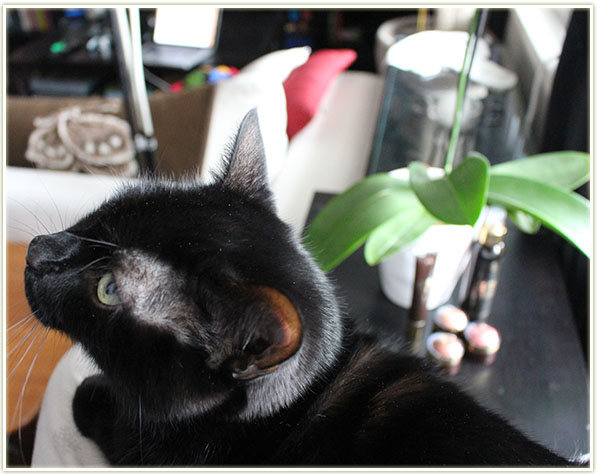
As I was shooting my photos, Nemo wanted a cuddle. And I wasn’t going to say no to that face!
Annnnd back to the Highlighting Domes. Although the packaging is quite bulky, it makes them look absolutely adorable. The product inside each of them is just incredible. Each dome has the same consistency: they’re a hard cream-like formula with a faint sheen. Since they do have that harder consistency, I use a firm brush to pick up the product and blend them into the skin.
I really can’t rave about Highlighting Domes enough. I love the finished look on my skin. The bronzer looks natural, the highlighter is doing its shiny thang and the blush… oh my god the blush. I can’t get over that blush shade. I love, love, LOVE how that looks on my face and I swear it’ll match any eye look I come up with too. LOVE!

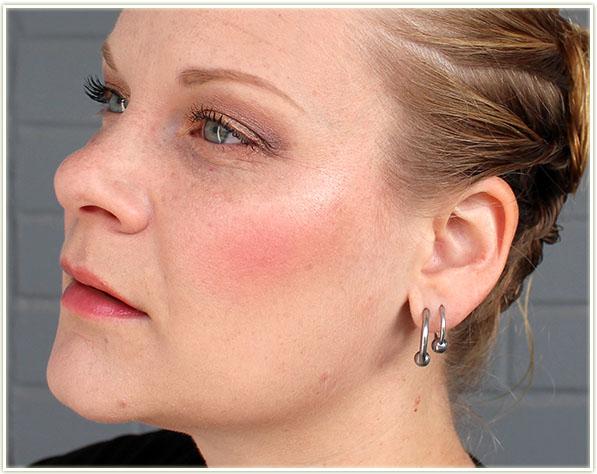
Also part of the collection is the Tinted Face Gel. I was excited, but a little bit nervous, to try this one out. I’ve never really done any kind of self tanning before (aside from actually laying out IN the sun) so this was a whole new world to me.
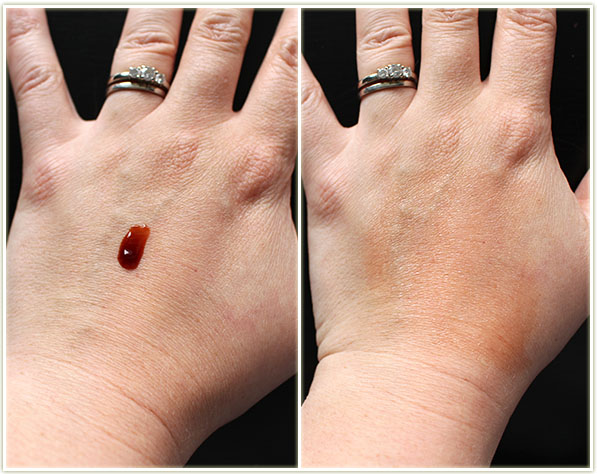
The gel is really, really dark when you first squeeze it out of the tube. Frighteningly so. Thankfully it spreads out to be a far more subtle shade once it’s blended into the skin.
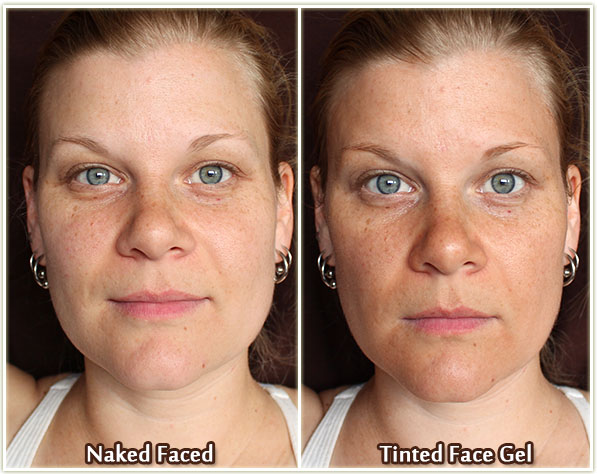
But… I’m not sold on it. In the above shot, I applied it directly to my face and rubbed it in like a moisturizer. It applied evenly and didn’t streak. However, now that I’m sitting here writing about it, I’m feeling kind of stupid – maybe I should’ve mixed it with my foundation and applied it to my face that way? Perhaps that’d give me a more natural look? I’m too distracted by the fact that my face looks like a completely different colour from my neck. Alright people, how do YOU wear tinted face gels? Give me your advice!
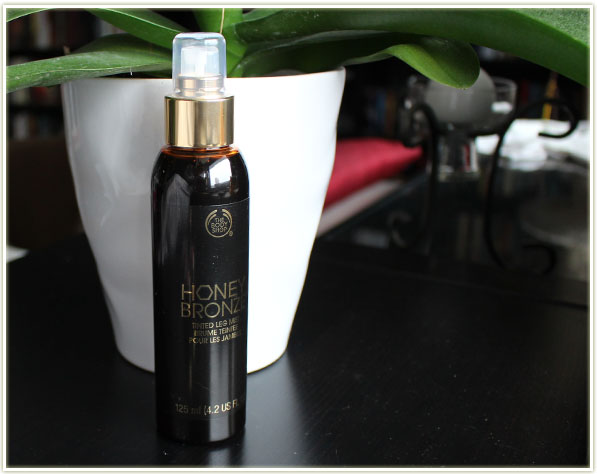
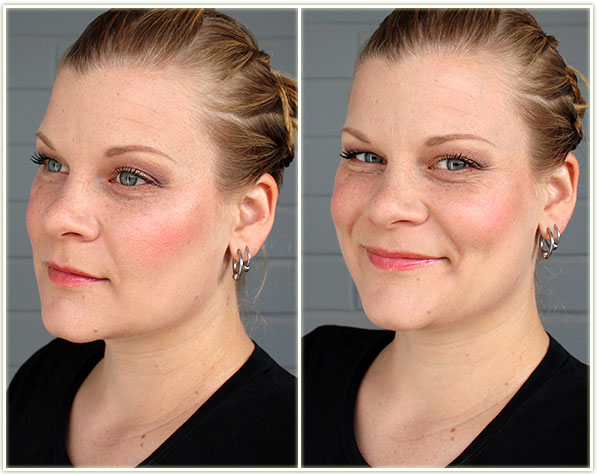
During the summer I often end up with a fairly annoying sock and shin pad tan lines from running and soccer, and they look pretty darn stupid when I’m wearing a dress and have bright white feet or shins. While my tan lines haven’t been extreme this year, I’d still really like to be able to add some colour to my legs while also covering up my usual mishmash of tan lines. The Tinted Leg Mist could be a possible solution to this.
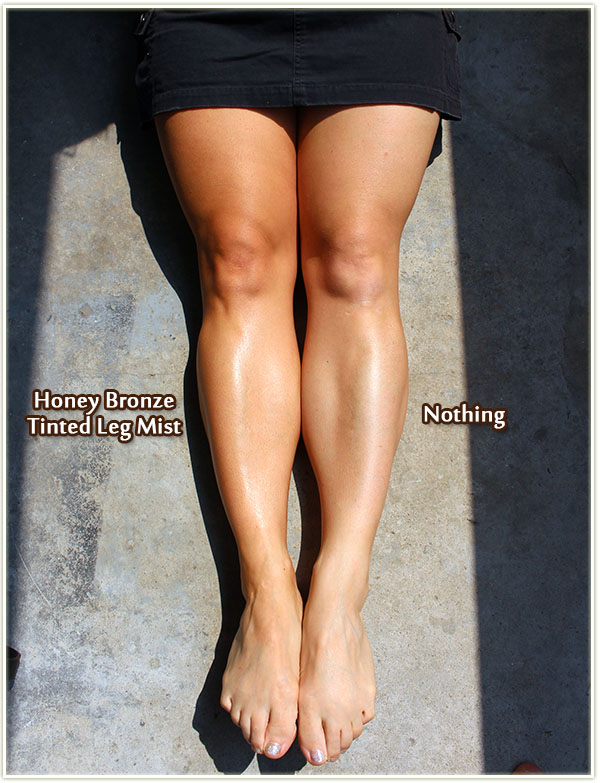
On the left side, I’ve applied several coats of the Tinted Leg Mist. On the right, nothing at all. The difference is subtle, but it is definitely there. I like how natural it is – it really does look like I’d gotten a tan and not like I’d covered myself in self tanner. I will say though, I’m not sure how well this will hold up if you’re sitting down. I would recommend this on nights when you know you’re going to be standing up a lot – at bars, dancing, or an event with a lot of mingling. I don’t feel like this would sweat off, but it does feel like you could rub it off on furniture, etc.
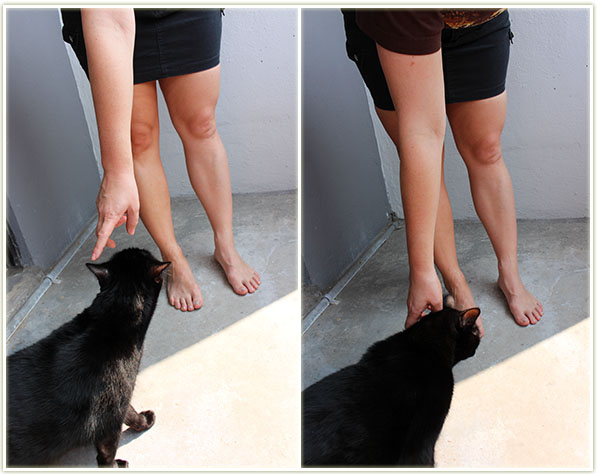
Nemo was all up in these products!
The Highlighting Domes knocked it completely out of the park for me! I love how they applied to my skin – all three shades worked well together to create beautiful glowing face makeup. I’m curious to see if The Body Shop will release more shades in this formula – I think it’d be a win for a lot of people.
The Tinted Face Gel was too far off the beaten path for me – although I am going to try mixing it with a foundation the next time I try it to see if I get better results.
The Tinted Leg Mist is very cool, but it’s kind of a take it or leave it product. If you’re in the market for a leg mist, this might be your jam. Unfortunately I can’t compare the longevity of it to anything else on the market as I’ve not tried anything else. But, I do love the natural looking colour it added to my legs.
If nothing else, you need to check out those Highlighting Domes. Serious winners in my book.
This review features press samples sent for consideration.