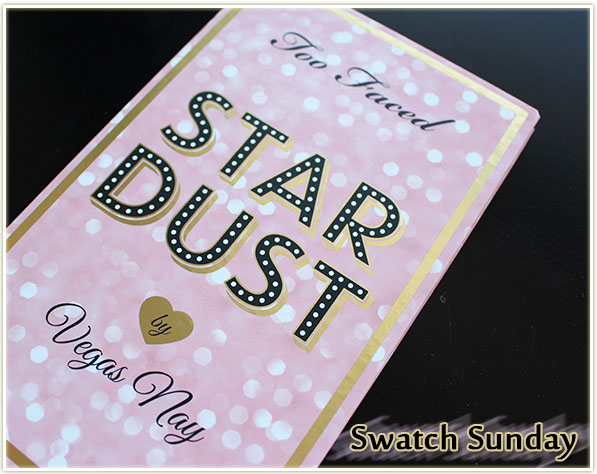
The Too FacedStar Dust by Vegas Nay palette is a recently released limited edition palette that is available only via Ultra or Too Faced’s web site (which kind of makes it a US exclusive). I had it shipped to a friend that I met up with recently in New York City, so that’s how I managed to get my hands on it!
I don’t normally post reviews with Swatch Sundays, so I’ll be brief because I want to get this out there – this is an EXCELLENT palette. One of the best I’ve ever seen Too Faced put out! It’s not a permanent product, so if you have the ability to get your hands on it, I would urge you to go out and get it as soon as you’re able. The Too FacedStar Dust by Vegas Nay palette is an absolute stunner and I’ll have a Challenge Week posted sometime this week featuring it as well.
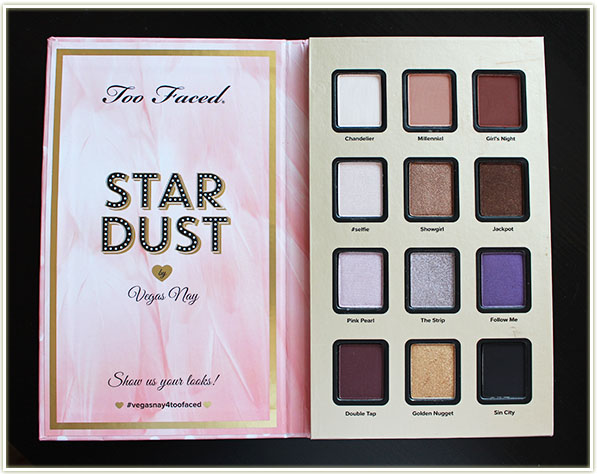
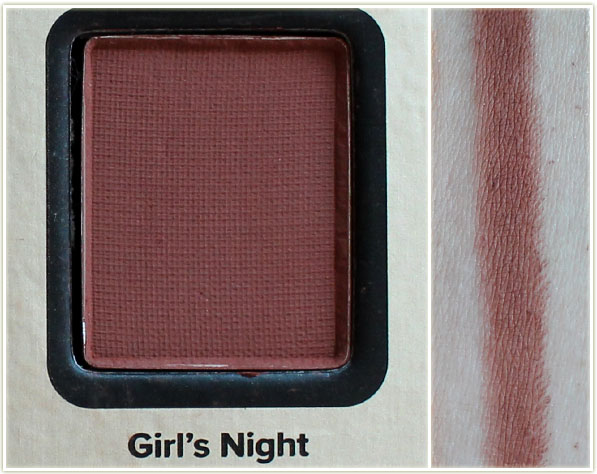
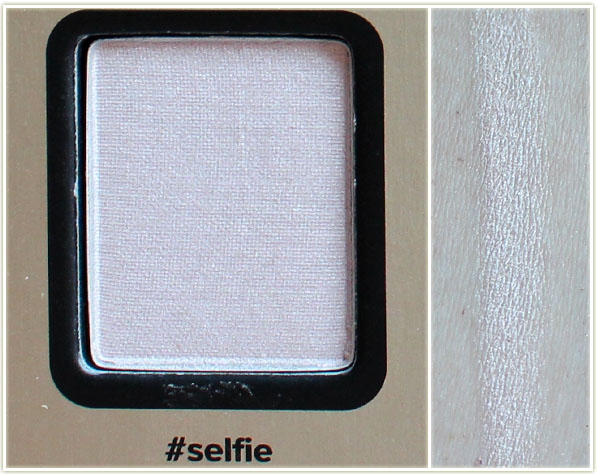
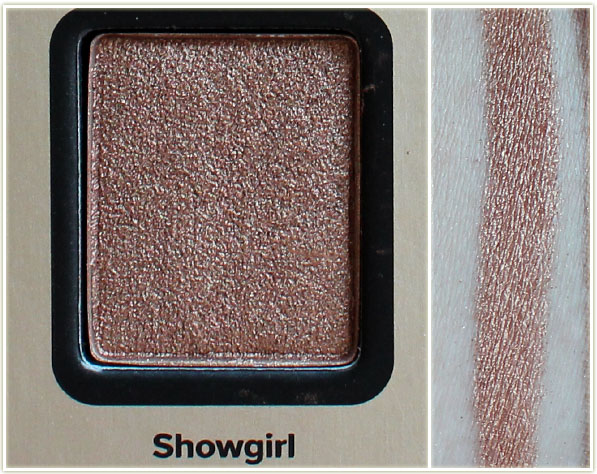
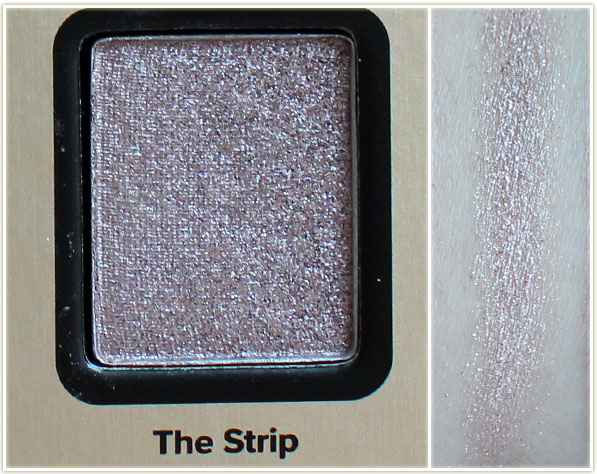
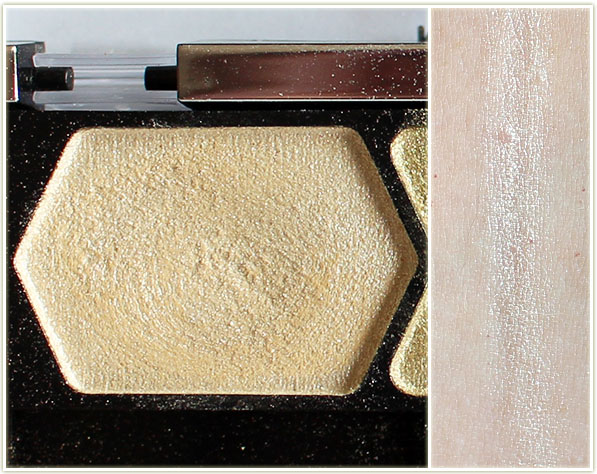
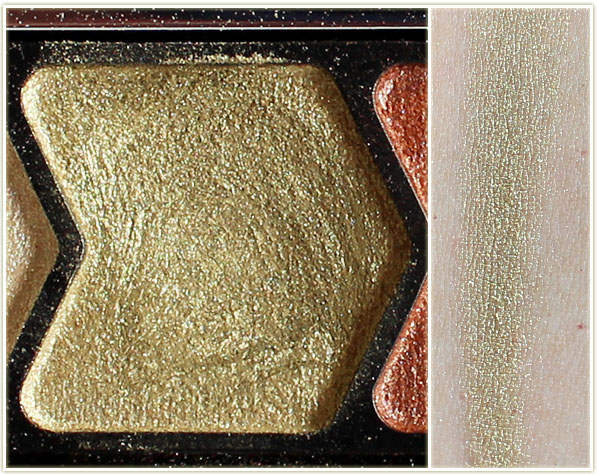
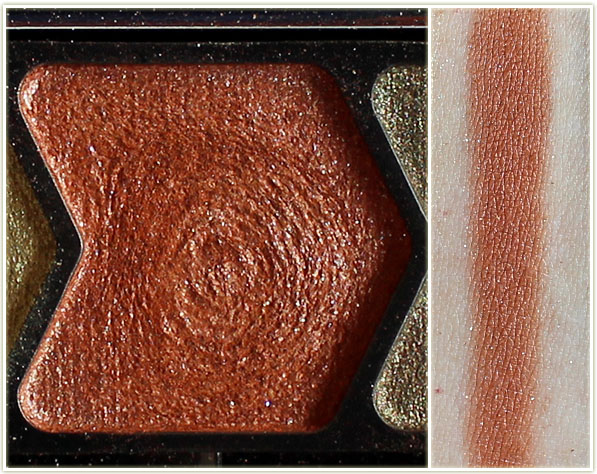
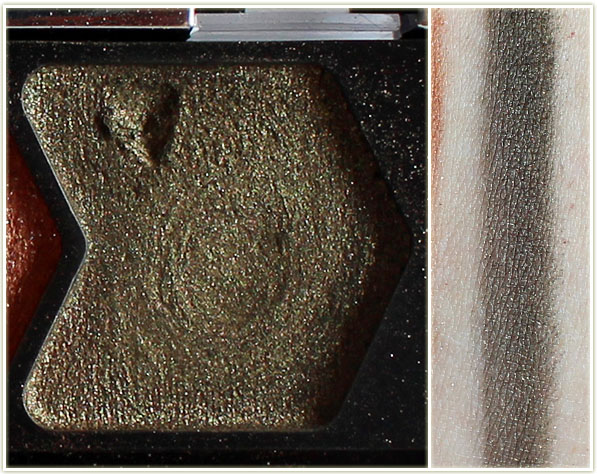
Too Faced Star Dust by Vegas Nay palette
Swatches
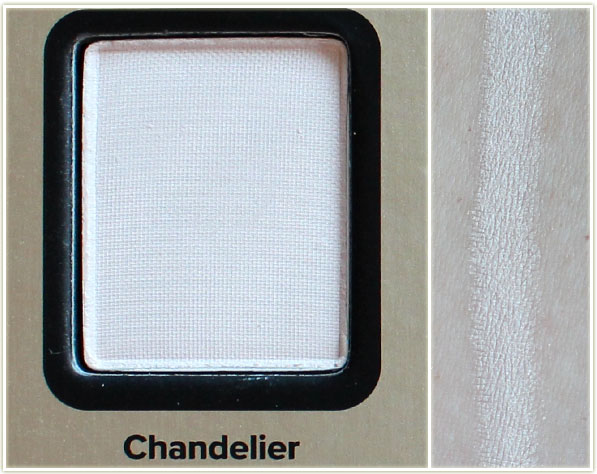
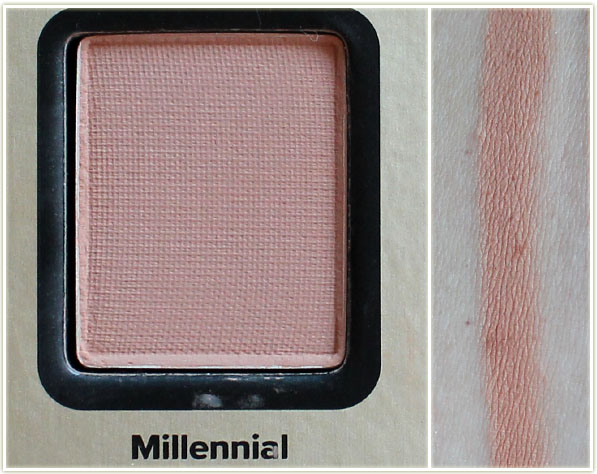
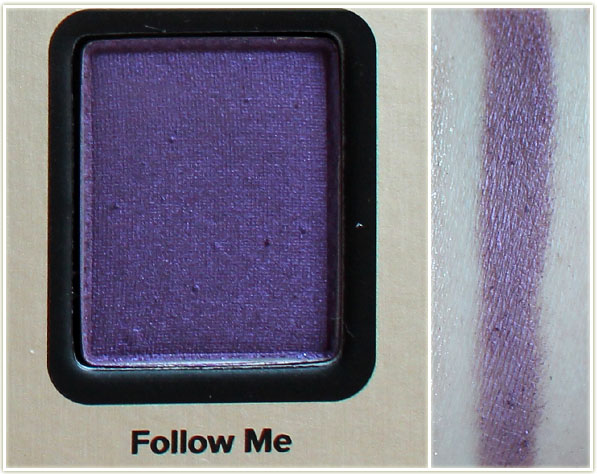
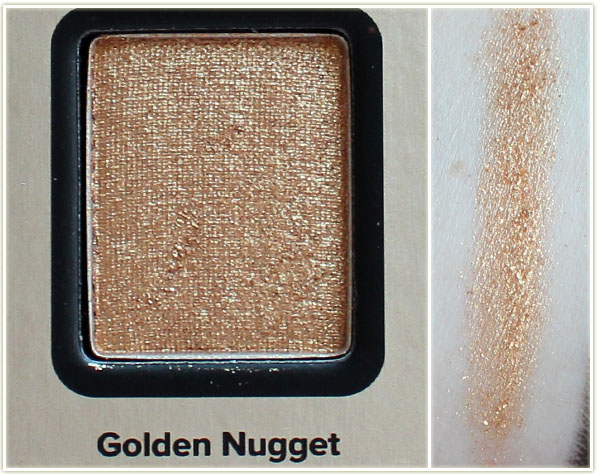
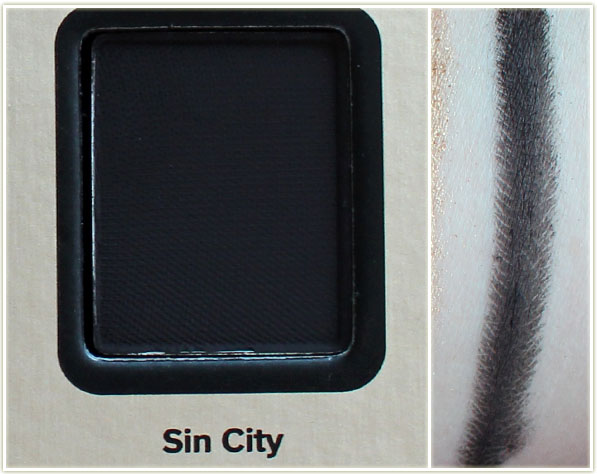
Too Faced – ChandelierToo Faced – MillenialToo Faced – Girl’s NightToo Faced – #selfieToo Faced – ShowgirlToo Faced – JackpotToo Faced – Pink PearlToo Faced – The StripToo Faced – Follow MeToo Faced – Double TapToo Faced – Golden NuggetToo Faced – Sin City
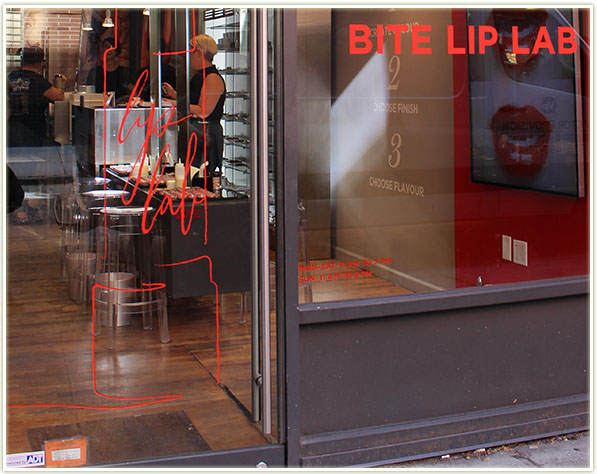
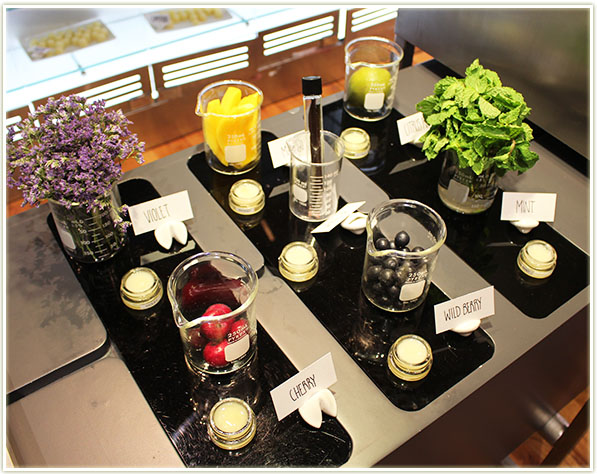
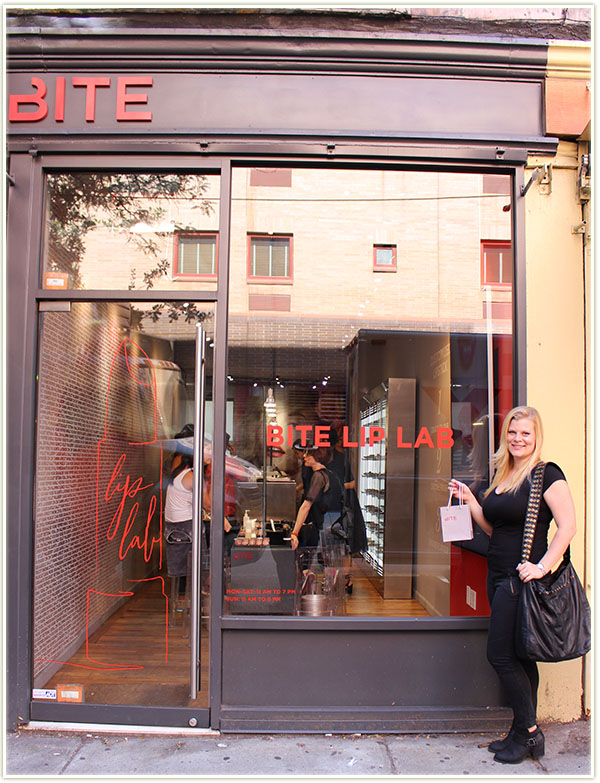
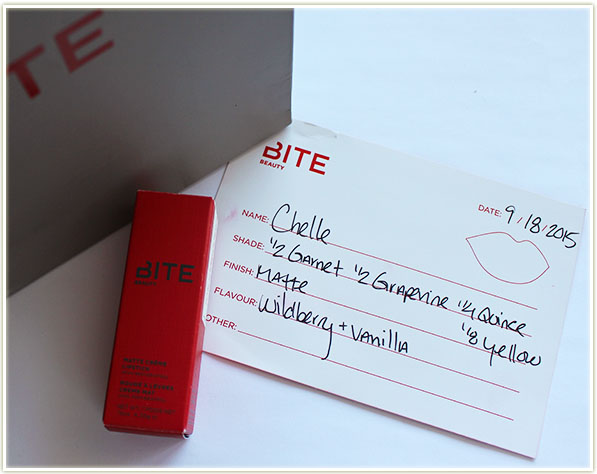
Last weekend, while on vacation in New York City, my friends and I headed over to the Bite Beauty Lip Lab in Soho. The Lip Lab offers you the ability to create your own lip colour for a $36 USD price tag. You get to choose your finish, colour and even your bullet cap!
The Bite Beauty Lip Lab
Of course, creating your own lipstick shade is actually kind of daunting. I wanted something unique, but wearable (so not like a hunter green or something), but I really wasn’t coming up with anything ingenious.
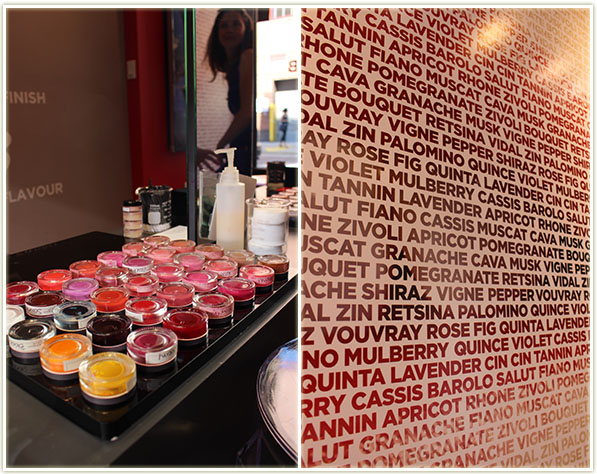
Mixing up colours
Instead, I opted to have them recreate my favourite lipstick ever – MAC‘s Relentlessly Red. I love Relentlessly Red because the colour is just flat out neon pinky-red gorgeousness, however the finish really could do with some work. It’s a bit patchy so it can look a bit chunky in places on the lips. (Not that I care, I’ll wear it till the cows come home regardless.)
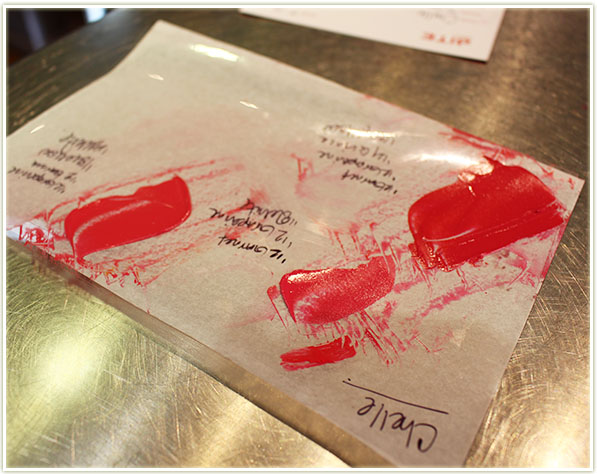
Third time’s the charm!
I had the lipstick I wanted copied with me so Lip Lab technician swatched it on the paper and went to town. On paper, she actually nailed the colour right off the bat. However, despite the paper colour being dead on, when I applied it to my lips it didn’t look right. It was too pink and not enough red. I pointed that out and she started remixing the shade. I kept telling her I felt like it needed more red, but she pointed out it would lose the neonness if we added more red.
After a second try that still wasn’t close enough, she tried a different colour combination. It wasn’t as neon, but it came out slightly more pinky-red and I was satisfied enough to go with that particular shade as my chosen colour. I didn’t get the exact dupe I was looking for (shots below!) but I like thinking of it as Relentlessly Red‘s more mature cousin.
Picking out a scent
With the shade selected, I opted for a scent. I FINALLY learned that the “Wild Berry” scent is what they use on their regular Bite lipsticks. I could never really place the scent so I was happy to finally know what the heck it was! I was going to opt for just Wild Berry, but my technician convinced me to mix it with another so I opted for Vanilla. Somehow I totally missed sniffing the Citrus Mango one at the back (on the right), I totally should’ve gone with that one but by the time I got around to smelling it after one of my friends pointed it out, my lipstick ingredients had already been amalgamated. Ah well, next time!
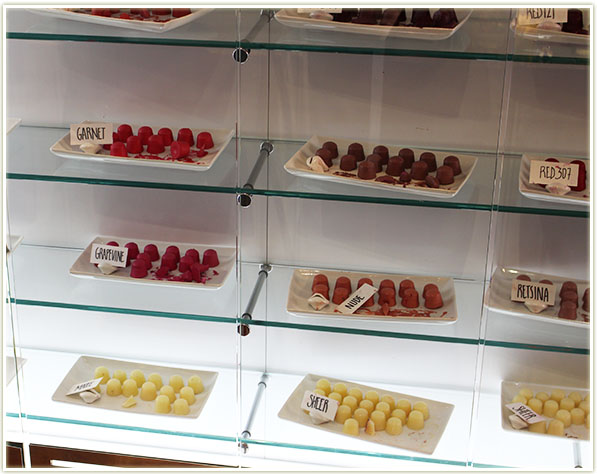
Lip colours for mixing
Cute lip lipstick colour blobs.
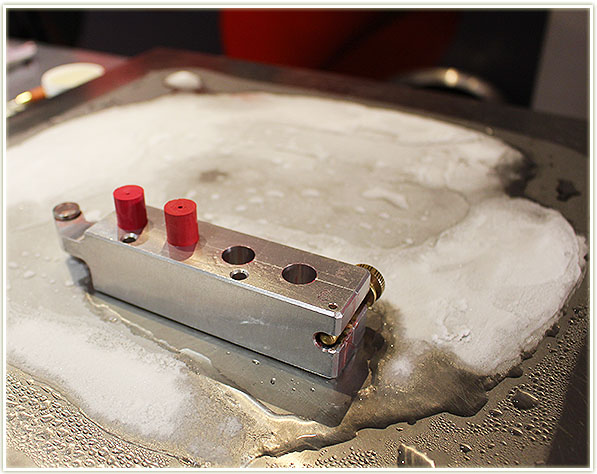
Our new bullets are set out to cool
Our lipsticks were set to cool into shape (one of those is mine and one is a friend’s – they look really similar on the block!) and then they were slowly pulled out with their casing by the technician.
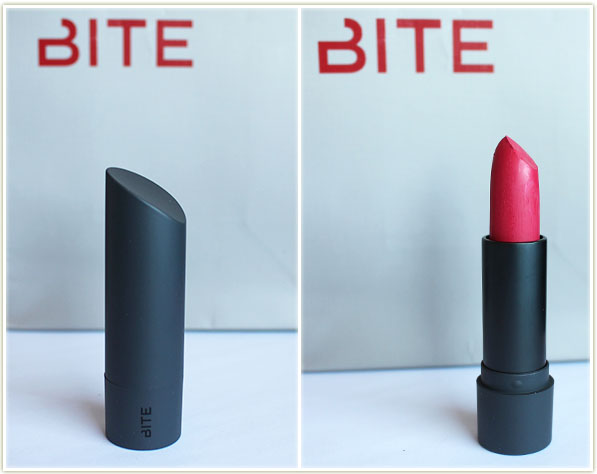
Lipstick made! Woohoo!Formula for the lipstick I createdBite Beauty Lip Lab final product
And this is the end result! I opted for the flat slanted bullet case shape because that’s how I wear my lipsticks down.
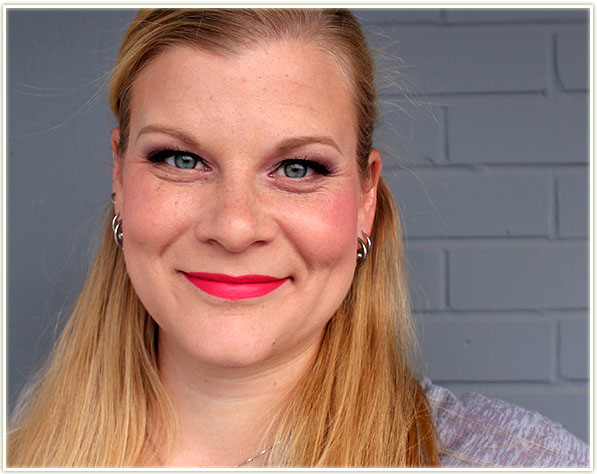
Wearing the Bite Beauty Lip Lab lipstick
On my lips it actually appears quite bright, which I, of course, love.
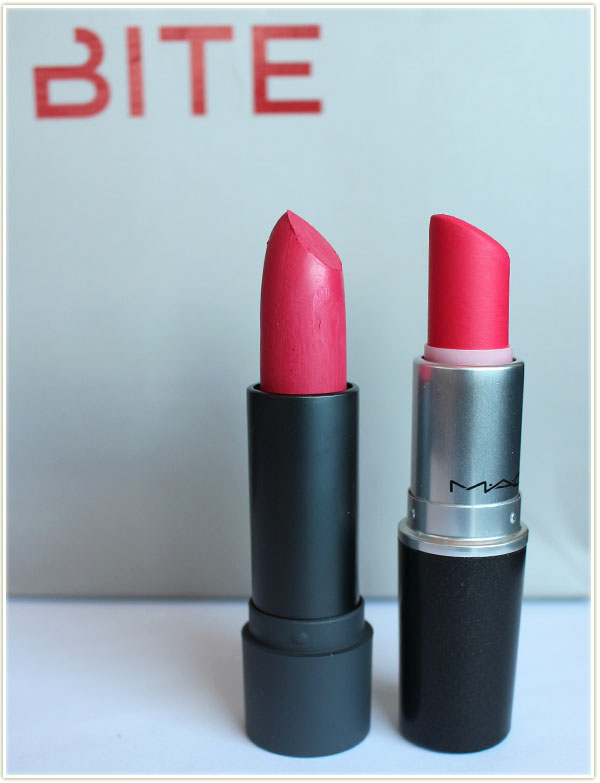
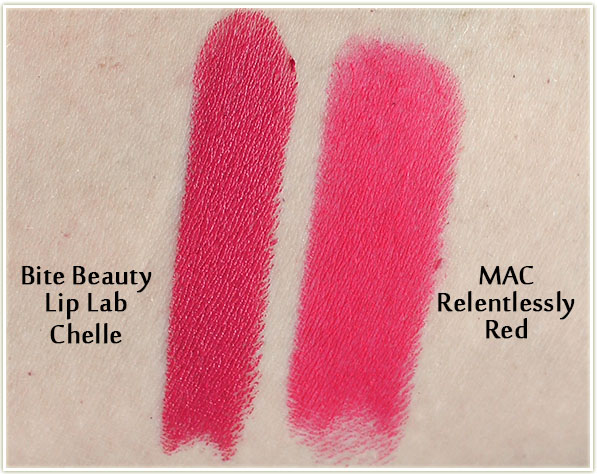
The Bite Beauty Lip Lab colour compared to MAC’s Relentlessly Red
When compared to Relentlessly Red, you can see that it’s definitely not the same colour, but that’s because I had the technician tweak it (she really did get the swatch colour bang on the first time though).
The Bite Beauty Lip Lab colour compared to MAC’s Relentlessly Red – swatches
And while it’s not as neon or even exactly the same shade, I do love it. It’s a comfortable matte finish and it’s a hell of a lot of fun to wear. I like that Relentlessly Red can still be my favourite shade of lipstick and the Lip Lab mix of it can be my interpretation of Relentlessly Red.
The Lip Lab experience was fantastic. It may have only taken about 15- 30 minutes, but getting to create your very own shade of lipstick is a fairly awesome experience. I now feel like getting a lipstick made at the Bite Beauty Lip Lab is going to become a ritual whenever I visit New York!
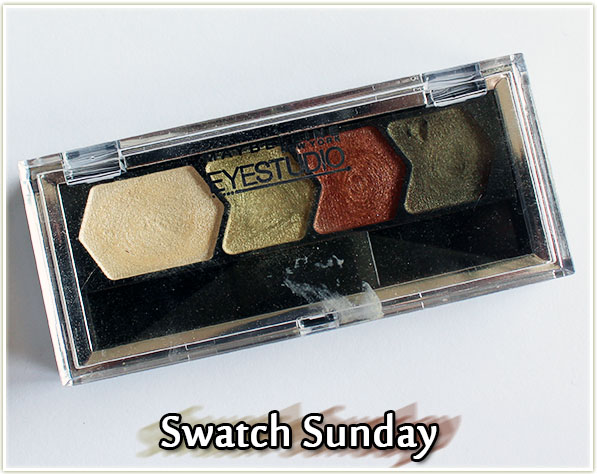
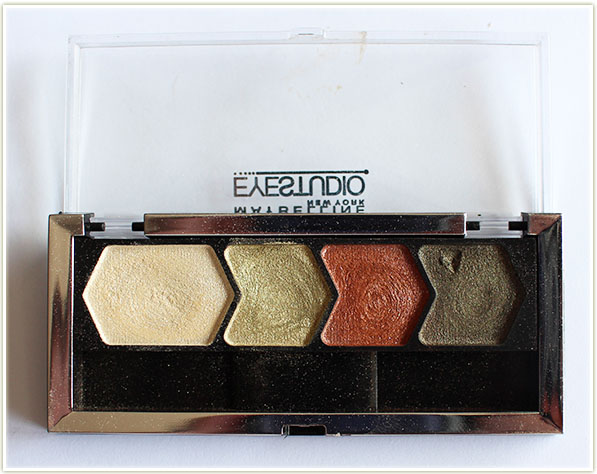
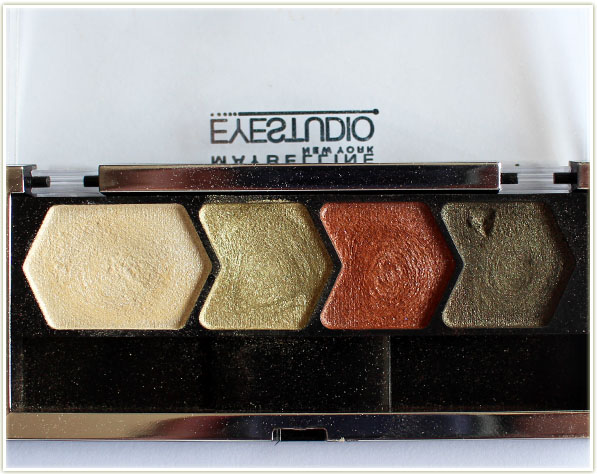
Limited edition for fall a few years back, this is Maybelline‘s Smokey Cinnamon quad. I remember this collection of quads being in short supply in Canada and having to hunt them down amongst the drugstores accessible to me. The formula in the Smokey Cinnamon quad is just as good as the first one I bought and the colours are gorgeous!
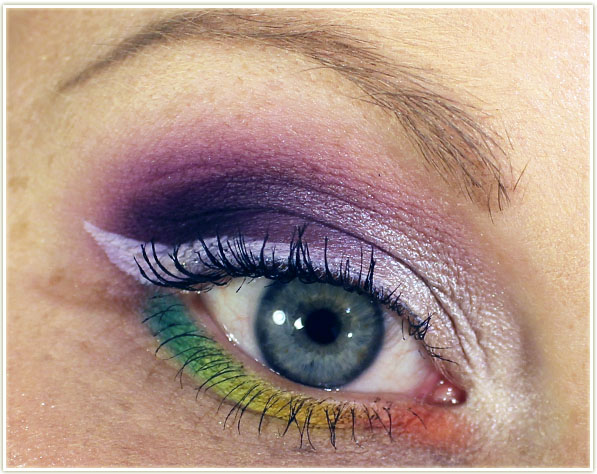
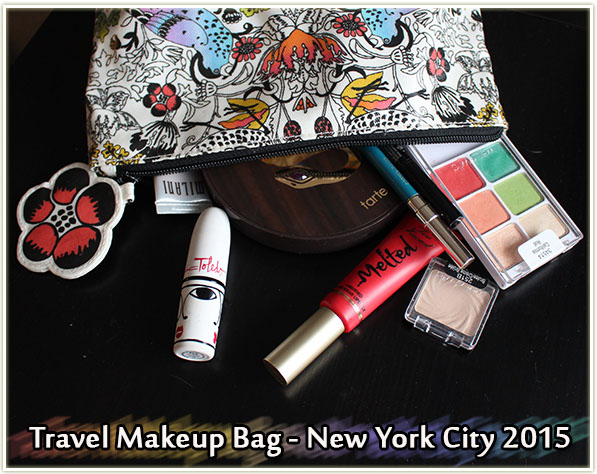
I’m heading to New York City tomorrow to visit some friends and while I’m not bringing too much makeup (in my book anyway), I love planning out what to pack and doing so in advance even lets me post about it! (Bonus that I then figure out what the heck I’m missing from makeup bag while writing up the post too…)
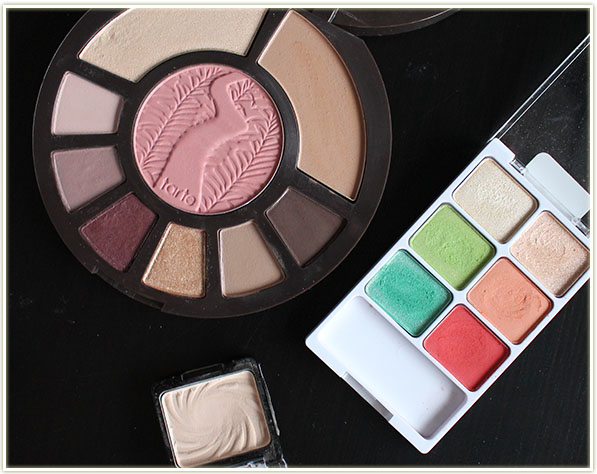
Tarte Rainforest After Dark, Wet n Wild California Roll, Wet n Wild Brulee
Alright, we’ve got some new travellers on the block here! The TarteRainforest After Dark palette does NOT get enough love in my collection so I’m packing it so I’ll be forced to use it. It also saves me on bringing a bronzer and a highlighter, plus it comes with a blush. Perfect every day essentials in that compact disk right there.
But… of course I need some colour in my life. Wet n Wild’s California Roll has colours that I would reach for most (red) so I’m chucking that one in my bag.
And since neither of two palettes actually comes with a matte cream brow bone shade (the one in the Tarte palette veers far too pink for my tastes), I’ve got my ever so perfect Wet n Wild single shadow in Brulee thrown in for good measure. I can’t tell you how handy it is having a single shadow that’s perfect for highlighting your brows. I don’t care what brand it is, so handy!
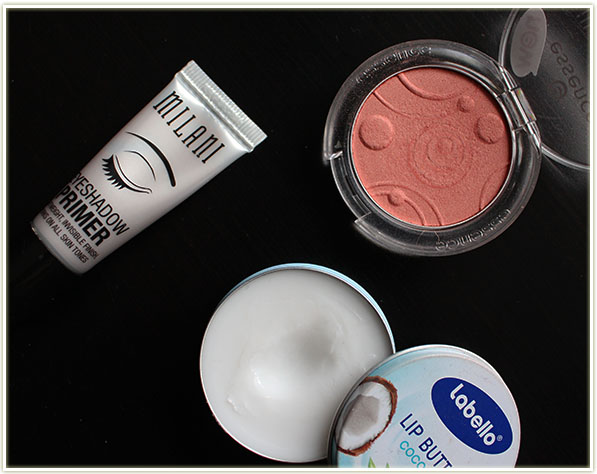
Milani Eyeshadow Primer, essence blush in Autumn Peach, Labello Lip Butter in Coconut
Various necessities here. My Milani eyeshadow primer is the only thing keeping my eyeshadows from overly creasing lately. (It does conk out around the 12 hour mark OR slightly before that if it’s hot as hell outside.)
And, of course, I couldn’t just travel with ONE blush, so I grabbed for essence‘s Autumn Peach because it’s more orange toned than the pink shade in the Tarte palette. Stunning, STUNNING shade too.
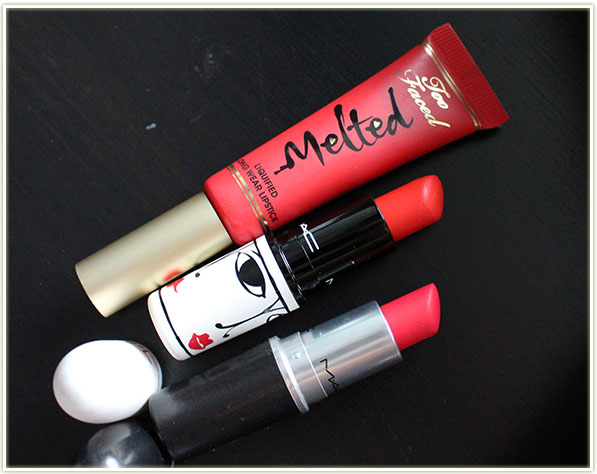
Too Faced Melted Strawberry, MAC Barbecue and MAC Relentlessly Red
Both of those MAC lipsticks are becoming frequent travellers. Relentlessly Red is what I consider “my shade” (that’s the pinkier one) and Barbecue is that perfect orangey-red (but more orange than red) that seems to suit a lot of occasions. I brought both of these lipsticks with me to Florida back in April too.
Too FacedMelted Strawberry is in there because not only do I love the formula, but it’s also a fun red to wear. I may need, I may not – but I sure do love having options.
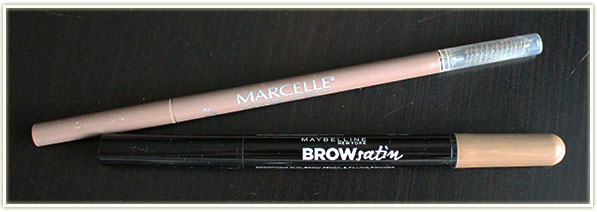
Marcelle Nano in Fair Ash Blonde and Maybelline Define + Fill Duo (BROWsatin) in Blonde
My NYXMicro Brow Pencil is far too close to being finished so I didn’t trust it to last the length of my five day trip. Instead, I opted for the MarcelleNano and the MaybellineDefine + Fill Duo pencils. Not super exciting I suppose, but I didn’t want to be fussing around with my potted eyebrow products while on vacation so pencils were a definite must have for me.
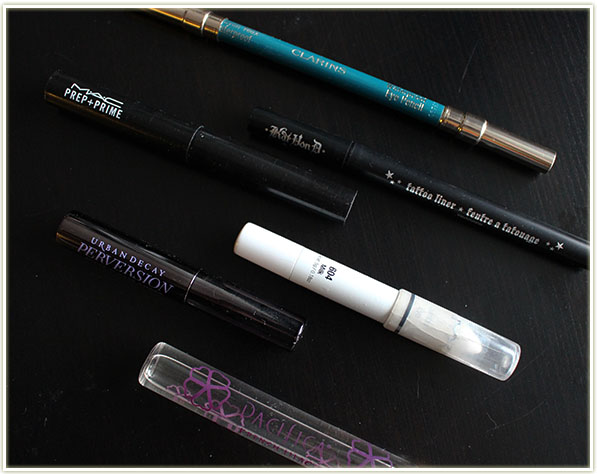
Clarins Aquatic Green eyeliner, Kat Von D Tattoo Liner in Trooper, MAC Prep + Prime for lips, NYX Jumbo Eyeshadow Pencil in Milk, Urban Decay Perversion mascara and Pacifica Lilac Blossom perfume
More necessities here.
The ClarinsAquatic Green waterproof eyeliner is if I want to play around with some colour amongst that neutral Tarte palette. This liner is no joke either – it stays put like nobody’s business.
The Kat Von DTattoo Liner is there because I’m pretty sure I can’t go five days straight without doing winged liner (plus this is the absolute BEST pen for doing quick lines without fussing around).
I also can’t wear lipstick without MAC‘s Prep + Prime for lips (I get bleed out no matter what I do, but this stuff saves me!).
NYX‘s Milk because those Wet n Wild shadows need a solid base to make them pop.
Urban Decay‘s Perversion mascara because not only is it amazing, but I also have an itty bitty sample size perfect for travel!
And lastly, my rollerball perfume – Pacifica‘s Lilac Blossom. We’re at the tail end of summer so I doubt I’ll be wearing this perfume much longer, but it’s my only rollerball and fit perfectly in my makeup bag.
And that’s it! I leave Thursday and I come back midday Monday. I don’t tend to do the touristy things in New York anymore because I’ve been visiting one friend there for… well probably a decade now, but I’m excited to just hang out, eat, drink and be merry. Plus you know… visit the Bite Beauty Lip Lab! 😉