As a blogger, I crop and edit my photos so I can show you exactly what *I* see, or what I want *you* to see when I look into a camera lens or take a picture of a product. Often that means zooming in on an object to show you the detail… but what does the rest of the shot look like? Or the surrounding area? Here’s a behind the scenes look of what ELSE is going on in the shots I post on my blog!
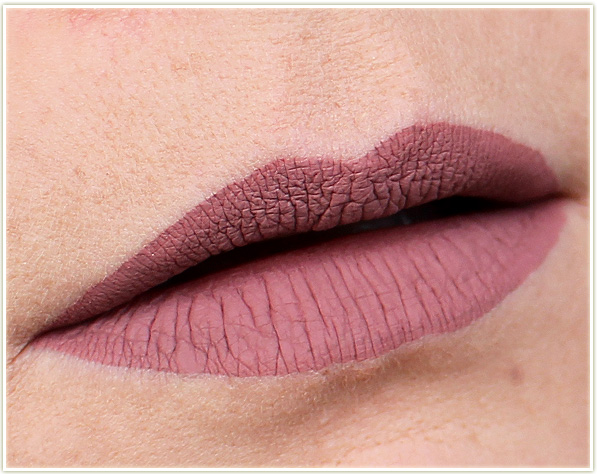
Damn. That’s a nice in focus, clean lip shot. This shot was for a post on the ColourPop Ultra Matte liquid lipsticks.
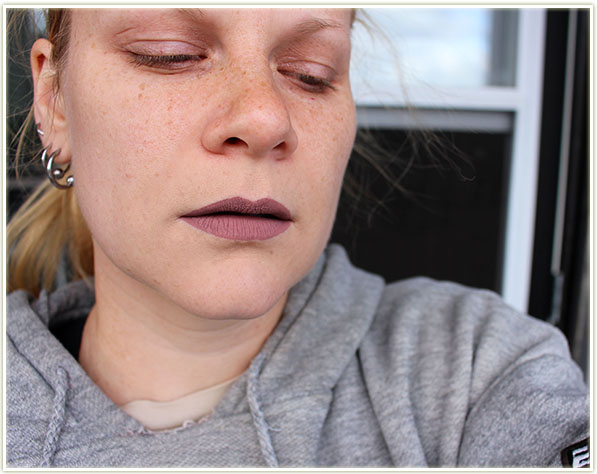
And here I am wearing a big ole sweat shirt and no other makeup applied to my face. If I’m only taking product shots on my lips, I definitely don’t do the rest of my makeup. On this day it was a bit chilly outside so I pulled on old sweatshirt from high school before heading out onto my balcony to take shots during the day. For the final photo, I tilted the photo so my lips are displayed diagonally as opposed to straight.
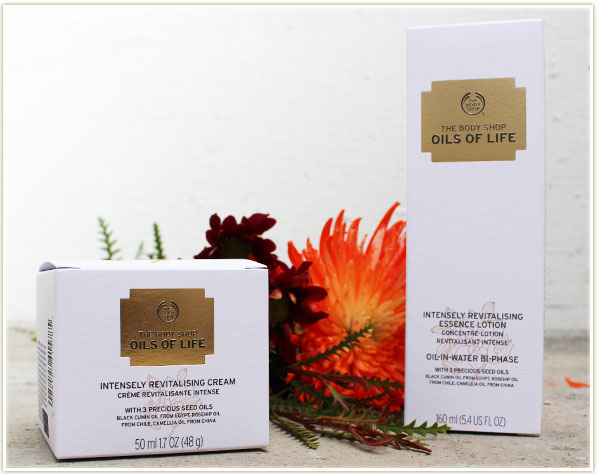
So lovely! So pristine! This was from my The Body Shop Oils of Life review.
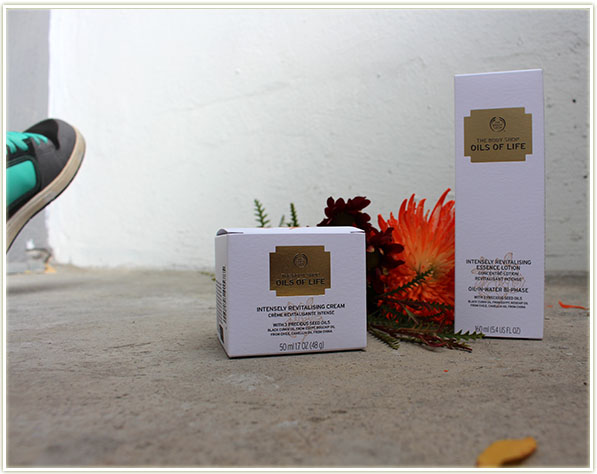
And here’s the wider shot. I’m sitting down on the floor of my concrete balcony with the products out in front of me. And my foot is sticking into the shot. Oops. I’ve also lightened up the shot considerably in Photoshop because the shadows were way too dark.
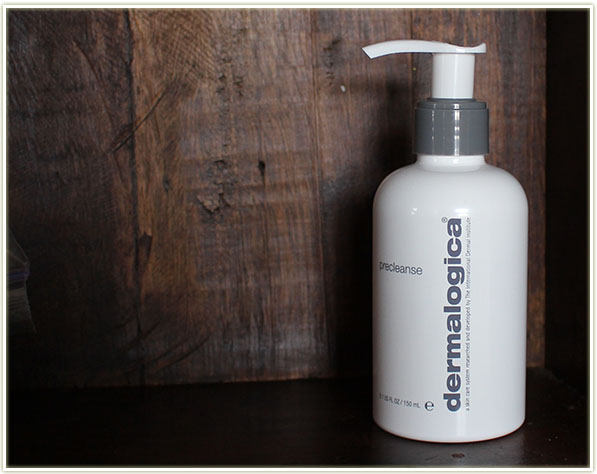
Another product shot from my Dermalogica Precleanse review. I really like the contrast between the white bottle and the dark wood.
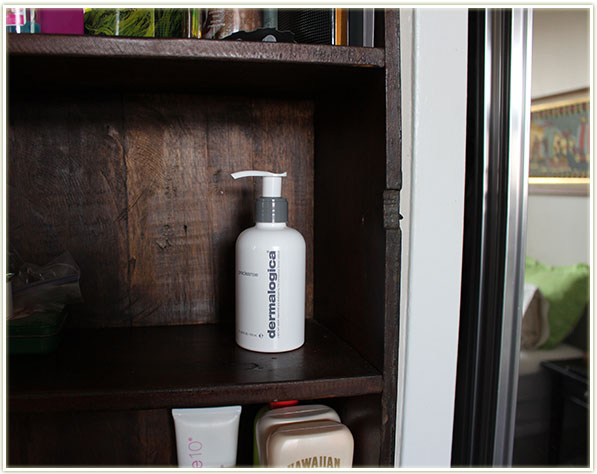
But this is what’s actually going on. I’m in my bedroom and the product is sitting inside a cabinet that we’ve hung on the wall. The whole shelf has been cleared so that there’s no other clutter in the shot. As you can see, I keep my sunscreens on the shelf below, and my perfumes are on the shelf above.
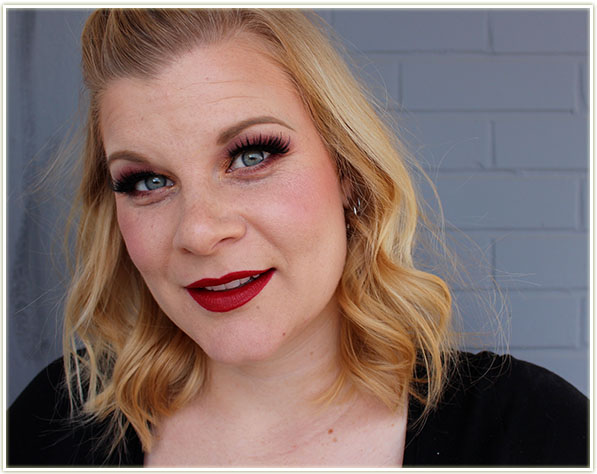
Here’s a post from my most recent guest post on Up The Rollercoaster. It’s a holiday look that focuses on red lips and big eyelashes.
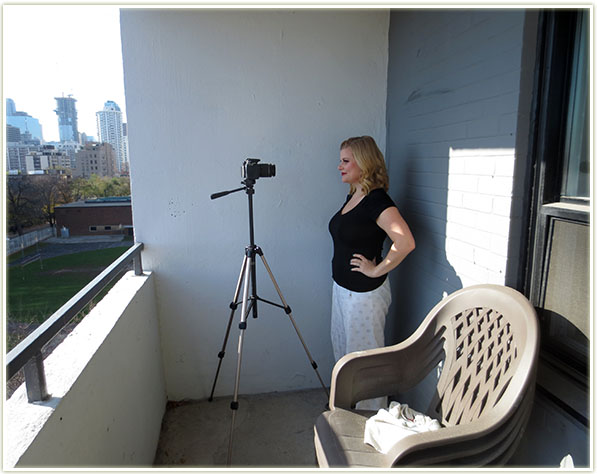
But here’s what it actually looks like when I’m taking these “glamorous” shots. I throw on a black top because it matches everything in regards to makeup, but I’m still wearing pyjama bottoms. I’m standing out on our balcony trying to hide from the sun lest the glare ruin the shots. We’ve got some plastic chairs stacked up (that we never use) and there’s a dirty towel sitting on top of them. Super glamorous eh? Haha!
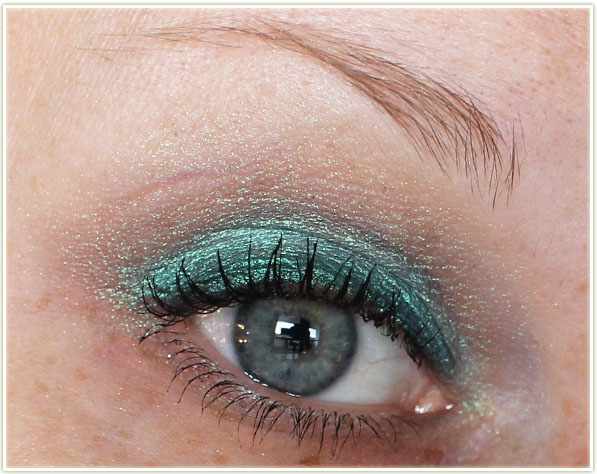
For my recent “How To” post, I focused on demonstrating how to use duochrome pigments. Most of the post involved close up eye shots.
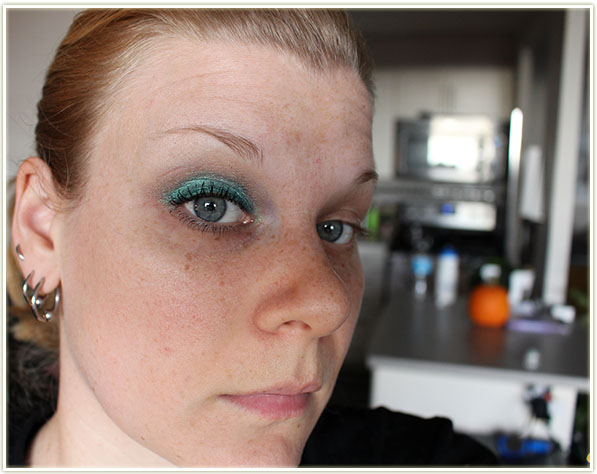
However, when I post eye shots, this is how close I can actually get to my camera without it losing focus. Pretty far away, aren’t I? Every time I post an eye shot, I choose whichever shot is most in focus and then crop everything else out. In this one, I’m only wearing eye makeup (no brows though) and you can see my kitchen in the background.

One of my favourite shots of myself this past year. Hooray for St. Patrick’s Day!
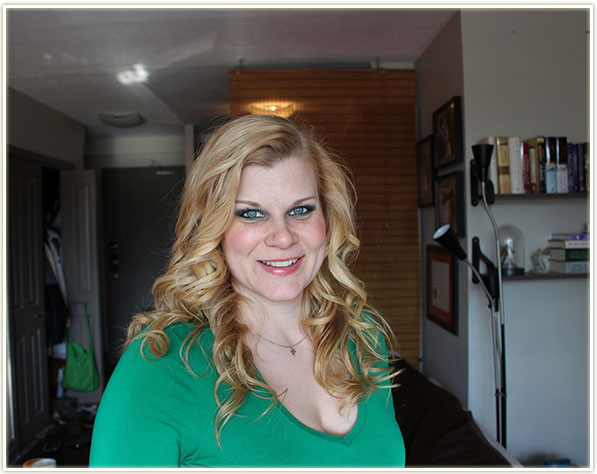
And here’s the full zoomed out shot. I have to stand in front of the huge windows to make sure I got the right amount of light on my face, but my kitchen is behind me and there’s a couple shelves with books on the right. (This was our old apartment, we moved within the same building in May and unfortunately the natural light is not nearly as nice here.) You can see a closet open on the left with a bag of my soccer stuff hanging from the handle.
There you have it. That’s my reality when I’m taking photos for the blog!
I love these behind the scenes shots!!
Jodi recently posted…Guest Post: Holiday Makeup Look with Chelle
I love seeing them on other blogs, so I thought I’d share mine!
ah so much fun to see behind the scenes! I don’t crop my full face photos very much so you can usually still see my kitchen…whoops! i’m surprised you have to stay so far away for your eye shots, I can’t get SUPER close but I do get closer than that.
Zoë recently posted…NIOXIN Hair System and 3D Styling Line Giveaway
What lens are you using for your close up shots? I’m using the kit lens and it even says for macro you need to 0.8 feet away from the lense. I can’t get any closer without the macro losing/refusing to focus. 🙁 I can’t manually focus either because I can’t even see my own eye in the viewfinder when I take these!
I’m using the 40 mm, so can’t get super close either, but I guess closer than this. I just found for nail shots for example I can get way closer with my kit lens than with the 40 (but I still prefer the 40).
Zoë recently posted…Rihanna RiRi Eau de Parfum
I’ll try getting closer and seeing what happens. It’s been a while since I’ve tried. I found the triggers went red to indicate it refused to focus. But again, it’s been a while.
well it works great cropped so I wouldn’t mess with your system too much haha you’re going to have awful photos for your next post and be like… ZOE….
Zoë recently posted…Rihanna RiRi Eau de Parfum
LMFAO! I will hold you personally accountable woman!!!
you are a cropping pro!
steph recently posted…#ManiMonday – Pantone Colour of the Year 2016 Nail Art (Rose Quartz and Serendipity)
Kind of have to be with all the junk in my backgrounds… lol
I loved this behind the scenes peek Chelle! I don’t blog or anything, in fact, I’m rather averse to pictures, so I have no idea about this stuff. It’s fun to see the real life behind your glamorous beauty!
Thanks, I’m glad you liked it! Blogging can be a lot of smoke and mirrors at times, so I like to ground everything in reality every now and again!
The PJs! Only doing up one eye to get the shot! I love this. More behind the scenes, please. 🙂
Glad you liked it! 😀 I’ll probably keep it as a reoccurring theme. I definitely have enough shots to create a new post every few months!
Love this post! I love seeing what really goes on behind the scenes with other bloggers 🙂
Kelly recently posted…“Deck the Halls” Holiday Inspired Makeup Tutorial
I hope more people do something similar! I’m always curious to see what’s going on in everyone else’s shots too!
I may have to contribute my portion to this series! 😉
Kelly recently posted…“Deck the Halls” Holiday Inspired Makeup Tutorial
Yes! Do it!
YES! I am always in PJs for photos.
Julie recently posted…Kat Von D Mi Vida Loca Remix eyeshadow palette review
Because there really isn’t anything more comfortable to be wearing. Elasticized waistband alllll the way!
OMG, Chelle, thank you for a much needed chuckle, we had such a rough night last night so you have no idea how much smile you brought me with this post. And yes, everyone only sees the cropped part of an image when reality is soooo far from all the glamour. LOL!
Shireen L. Platt recently posted…Put The Bloom Back Into Your Skin with Indeed Labs Fillume
Yay! Happy to give you a chuckle! Sometimes I find these kind of photos more insightful than the usual reviews with all put out!
Hope your day is better than your night. Many hugs!
Hahah, this is legit exactly what I do. There’s always a ton of crap just outside of the shot.
Hahaha yesssss! 😀
Haha I love this post! It sums up blogging perfectly!
Lindsey Elyse recently posted…DIY Salt Scrub
haha totally!
Not gonna lie, this makes me feel SO MUCH better about my photo taking situation.
Trysh recently posted…HOLIDAY 2015: Live Clean Holiday Hand Soaps*
Lol! I don’t think anyone’s situation is perfect, we just try to make it look like it is! 😉
I love this! Thank goodness for photo editing, right?!?
I used to only wear BB Cream around my eyes when I tried/reviewed mascara. But now I tend to include more full-face pictures in my posts.
Chantal recently posted…Illamasqua ”Creator” Nail Polish
If I can get away with only showing part of my face, I’ll do it, but the only real thing that works for is eyes. Hard to show blush without putting your whole face in the shot!
But yes, thank heavens for photo editing. Otherwise everything would look really cluttered!
I love this post. What a fun idea! I love seeing behind the scenes… makes me feel that much more normal
Show me your behind the scenes! I think it all makes us feel a lot better to see that we’re not in perfect situations!
hahahah ALL SO TRUE!!! when i do a lipswatch i try and get away with as little make up as possible everywhere else. sometimes i’ll just put foundation around my mouth and call it a day. no ones needs to see anytihng else anyways!
jenn f recently posted…Leaning Cool – Dior Eternal Gold*
Oh I forgot about that, I totally do the foundation only around the mouth trick. Particularly if I’m taking multiple lip swatches… because otherwise my lip edges would like red as all hell!
Love this! Nice to know I’m not the only one who only puts foundation around my mouth for lip shots… and takes glamour shots in pajamas lol
Rebekah recently posted…saving my hands with germ bloc
lol all the tricks we learn to do to get the most impact out of our shots! 😀
This is so great (and true!). 90% of the time I do makeup photos I’m in some form of PJs – when you’re sitting on a cold floor to get that natural light you do what you gotta do! I also have placemats that look like wood that I use for product photos because I’m always travelling and wanted some consistency in my photos. Plus, that way I can take them with me to find the best light!
Nadia @ The View Is Beautiful recently posted…Under the Mistletoe | A Holiday Smokey Eye
Placemats that look like wood is genius! I love that! And so true… you can move them around to find the best lighting! I have a wooden table… but like hell I’m moving that thing!
This gave me so many more ideas for eyeshadow/lip swatch shots!!! So informative, and entertaining too I guess haha.
Hah! I hadn’t thought of it as being informative, but that’s really cool too! It helps to see how other people shoot things so I’m glad to help out!
I loved this post! Was interesting to see how and where you take such great pics. You look fab in the St. Patrick’s Day pic.
Thanks so much Clarissa! I always thinking it’s funny to see the behind the scenes photos. Everything is so much less classy/professional that way! 😉